
Subscribe to Our Youtube Channel
Related Manuals for Weidmüller IE-SW-SL28M


Summary of Contents for Weidmüller IE-SW-SL28M
- Page 1 Industrial Ethernet IEC-61850-3 Switches Manual IE-SW-SL28M and IE-SW-L3-SL28M SubstationLine Third Edition, October 2022...
- Page 2 Industrial Ethernet managed Switches Manual The software described in this manual is furnished under a license agreement and may be used only in accordance with the terms of that agreement. Copyright Notice Copyright ©2016 Weidmüller Interface GmbH & Co. KG All rights reserved.
-
Page 3: Table Of Contents
3.3 Basic Settings ........................10 3.3.1 Device Description ......................10 3.3.2 IP Configuration ......................11 3.3.2.1 IP Configuration for Layer 2 switch type IE-SW-SL28M ........12 3.3.2.2 IP Configuration for Layer 3 switch type IE-SW-L3-SL28M ........14 3.3.3 IP Status......................... 18 3.3.4 Access Management ..................... - Page 4 User Manual Managed Switches 3.4.2 Port Trunking ......................... 46 3.4.2.1 Aggregation Mode ....................46 3.4.2.2 LACP Port Settings ....................48 3.4.2.3 LACP System Status ..................... 49 3.4.2.4 LACP Port Status ....................50 3.4.2.5 LACP Statistics ...................... 51 3.4.2.6 Aggregation Status ....................51 3.4.3 Loop Protection ......................
- Page 5 User Manual Managed Switches 3.6.4.10 Port Statistics ....................... 89 3.6.5 Fast Recovery ........................ 90 3.7 Virtual LAN ..........................91 3.7.1 The Virtual LAN (VLAN) Concept .................. 91 3.7.2 Configuring Virtual LAN ....................93 3.7.2.1 VLAN Membership ....................93 3.7.2.2 VLAN Membership Status ..................98 3.7.2.3 VLAN Port Status ....................
- Page 6 User Manual Managed Switches 3.11 Multicast ..........................145 3.11.1 The Concept of Multicast Filtering ................145 3.11.2 IGMP Snooping Basic Configuration ................. 148 3.11.3 IGMP Snooping VLAN Configuration ................. 150 3.11.4 IGMP Snooping Status ....................152 3.11.5 IGMP Snooping Group Information ................153 3.11.6 IGMP SFM Information ....................
- Page 7 User Manual Managed Switches 3.14 Monitoring and Diag ......................208 3.14.1 MAC Address Table Configuration ................208 3.14.2 MAC Address Table Status..................210 3.14.3 Port Statistics Overview ..................... 211 3.14.4 Detailed Port Statistics ....................212 3.14.5 Port Monitoring ......................213 3.14.6 System Log Information .....................
-
Page 8: About This Manual
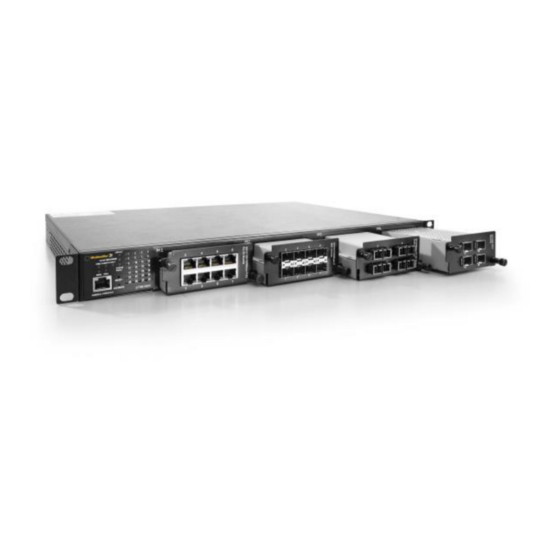
Switches) that is also available in our online catalogue. 2. Getting Started The IE-SW-SL28M/IE-SW-L3-SL28M Switch is specially designed to operate in harsh environments like Substations thanks to its IEC 61850-3 and IEEE 1613 compliance. The product comes with an IP30 rugged case, redundant power supply, alarm relay and wide operating temperature range from -40 to 85ºC. -
Page 9: Software Features
User Manual Managed Switches 2.2 Software features • Management Web-interface (HTTP / HTTPS) SNMP v1/v2c/v3 Telnet console Command Line Interface (CLI) Upload of a configuration file via web-interface • Network redundancy Spanning Tree Protocol (STP) Rapid Spanning Tree Protocol (RSTP) Multiple Spanning Tree Protocol (MSTP) Media Redundancy Protocol (MRP;... -
Page 10: Web Management
User Manual Managed Switches Access Control (port based via IEEE 802.1X) Access Control List (IP based / MAC based) Loop protection Management access security via privilege level configuration for different user roles 3. Web Management In this chapter, we explain how to access the Weidmüller Switch’s through the Web console as well as all the configuration, monitoring, and administration functions available when using this interface. - Page 11 User Manual Managed Switches The web login page will open. Enter the default user name “admin” and password “Detmold”, and then click OK to continue. After logging in, the main general information of the switch is shown including, among others, System Name, Software version, MAC address and Serial number.
-
Page 12: Accessing The Web Interface Via Https
User Manual Managed Switches 3.2 Accessing the Web interface via HTTPS To secure your HTTP access, the Weidmüller switch supports HTTPS to encrypt all HTTP traffic. Perform the following steps to access the Weidmüller switch web browser interface via HTTPS/SSL. Open Internet Explorer and enter https://<Switch´s IP address>... -
Page 13: Ip Configuration
This option is different depending on the model used (IE-SW-SL28M or IE-SW-L3-SL28M). For the model IE-SW-SL28M (Layer 2) the user can program the IP settings of the web server whilst in the IE-SW-L3-SL28M model (Layer 3), the user can also program the routing functions between VLANs... -
Page 14: Ip Configuration For Layer 2 Switch Type Ie-Sw-Sl28M
User Manual Managed Switches 3.3.2.1 IP Configuration for Layer 2 switch type IE-SW-SL28M The IP settings allow the user to set manually the IP parameters or by means of a DHCP server (for both IPv4 and IPv6). See a brief explanation of each configuration item below. - Page 15 User Manual Managed Switches Current Lease Factory Setting Description Default For DHCPv4 interface with an active lease, this column No setting shows the current interface address, as provided by None (display) the DHCPv4 server. IP Address Factory Setting Description Default Assigns the Weidmüller Switch´s IPv4 address on a IPv4 address for TCP/IP network.
-
Page 16: Ip Configuration For Layer 3 Switch Type Ie-Sw-L3-Sl28M
User Manual Managed Switches option is received. Current Lease Factory Setting Description Default For DHCPv6 interface with an active lease, this column No setting shows the current interface address, as provided by None (display) the DHCPv6 server. IP Address Factory Setting Description Default... - Page 17 User Manual Managed Switches See a brief explanation of each configuration parameter below. IP Configuration Mode Factory Setting Description Default Mode that enables the Layer 3 capabilities of the Router switch. With this mode the switch allows routing of IP traffic between interfaces to be carried out.
- Page 18 User Manual Managed Switches automatically by the network’s DHCPv4 server. Fallback Factory Setting Description Default The number of seconds for trying to obtain a DHCP lease. After this period expires, a configured IPv4 Number between address will be used as IPv4 interface address. A 0 and value of zero disables the fallback mechanism, such 4294967295 sec...
- Page 19 User Manual Managed Switches Rapid Commit Factory Setting Description Default Disabled DHCPv6 Rapid Commit option disabled. The DHCPv6 client terminates the waiting process as Disabled Enabled soon as a Reply message with Rapid Commitment option is received. Current Lease Factory Setting Description Default...
-
Page 20: Ip Status
User Manual Managed Switches IP Static Routes This section allows the user to configure static IP routes. Static routing forwards IP packets belonging to the specified network to the given gateway. The button Add Route is used to create a new static IP route. The user has to fill the parameters described below and can delete any existing route by enabling Delete and pressing the button Apply. - Page 21 User Manual Managed Switches The tables displays the following information: IP Interfaces Interface The name of the interface. Type The address type of the entry. This may be LINK, IPv4 or IPv6. Address The current address of the interface (of the given type). Status The status flags of the interface (and/or address).
-
Page 22: Access Management
User Manual Managed Switches 3.3.4 Access Management 3.3.4.1 Login Methods The Login Methods page allows the user to restrict the remote management of the switch. It is possible to block any specific kind of management (eg: web or telnet). Setting Description Factory Default... -
Page 23: Authentication Methods
User Manual Managed Switches passphrase. Generate Generate a new self-signed RSA certificate. The Certificate Status field displays the current status of certificate on the switch. The possible status are: • Switch secure HTTP certificate is presented. • Switch secure HTTP certificate is not presented. •... - Page 24 User Manual Managed Switches tacacs Use remote TACACS+ server for authentication. When a method involving a remote server is selected (“radius” or “tacacs”), an additional method can be programmed as backup. Up to three different authentication methods can be programmed and each one is tried from left to right until a user is either accepted or rejected.
-
Page 25: Access Security
User Manual Managed Switches Method Setting Description Factory Default Accounting is disabled. tacacs Use remote TACACS+ server(s) for accounting. Cmd Lvl Setting Description Factory Default 0 to 15 Enable accounting for all commands with a privilege level higher than or equal to this level. Exec Setting Description... -
Page 26: Access Statistics
User Manual Managed Switches Start IP address Setting Description Factory Default IP address The start IP address for the access management None entry. End IP address Setting Description Factory Default IP address The end IP address for the access management None entry. -
Page 27: Users
User Manual Managed Switches Interface The interface type through which the remote host can access the switch. Received Number of received packets from the interface. Packets Allowed Packets Number of allowed packets from the interface. Discarded Number of discarded packets from the interface. Packets 3.3.5 Users By default, the switch default’s user name is “admin”... -
Page 28: Privilege Levels
User Manual Managed Switches Password (again) Setting Description Factory Default Max. 31 Enter the new password of the new user again to None characters confirm. Privilege Level Setting Description Factory Default 0 to 15 The privilege level of the new user. The allowed range is 0 to 15. - Page 29 User Manual Managed Switches The page shows a table with the following fields: Group Name The name identifying the privilege group. In most cases, a privilege level group consists of a single module (e.g. LACP, RSTP or QoS), but a few of them contains more than one.
-
Page 30: Time Setting
User Manual Managed Switches Privilege Levels Every group has an authorization privilege level for the following subgroups: Configuration Read-only Configuration/Execute Read/write Status/Statistics Read-only Status/Statistics Read/write User Privilege should be same or greater than the authorization Privilege level to have the access to that group. 3.3.6 Time Setting The Time Setting configuration page lets users set the time, date, and other settings. - Page 31 User Manual Managed Switches Set System Date Time manually Factory Setting Description Default None Allows configuration of the local date in yyyy-mm-dd System Date format. Allows configuration of the local time in 24-hour System Time None format. SNTP mode Setting Description Factory Default...
-
Page 32: Rip
User Manual Managed Switches Daylight Saving Offset Setting Description Factory Default User-specified Specifies the number of minutes that the time should None minutes. be set forward during Daylight Saving Time. 3.3.7 RIP NOTE: RIP configuration page is only available in the IE-SW-L3-SL28M model. Dynamic routing protocol RIP (Routing Information Protocol) is available in the IE-SW-L3-SL28M model and can be enabled through this option. - Page 33 User Manual Managed Switches VRRP Global Configuration Mode Setting Description Factory Default Disabled / Enable or Disable the VRRP protocol in the Layer 3 Disabled Enabled switch. Use Physical SA (Source Address) Setting Description Factory Default Disabled / VRRP can be configured to map real or virtual MAC Disabled Enabled addresses to the virtual IP addresses of VRRP...
- Page 34 User Manual Managed Switches VRID Setting Description Factory Default 1 to 254 The ID number of the Virtual Router. It must be the None same number used in the other Layer 3 switches that will belong to the same group. VLAN ID Setting Description...
-
Page 35: Lldp Function
User Manual Managed Switches Accept Mode Setting Description Factory Default Enabled / If Disabled, ping messages to the virtual IP interface Enabled Disabled (Primary IP) are not responded. Auth Type Setting Description Factory Default NoAuth / If NoAuth, authentication of VRRP packets is NoAuth SimpleText disabled. -
Page 36: Configuration
User Manual Managed Switches From the switch's web interface, users have the option of either enabling or disabling the LLDP, as well as setting the LLDP transmit interval (as shown in the figure below). In addition, users are able to view each switch's neighbor-list, which is reported by its network neighbors. - Page 37 User Manual Managed Switches LLDP Parameters Tx Interval Setting Description Factory Default 5 to 32768 sec The switch periodically transmits LLDP frames to its 30 (sec) neighbors to update the network discovery information. The interval between each LLDP frame is determined by the Tx Interval value.
-
Page 38: Neighbors
User Manual Managed Switches Disabled The switch will not send out LLDP information, and will drop LLDP information received from neighbors Enabled The switch will send out LLDP information, and will analyze LLDP information received from neighbors Port Descr Setting Description Factory Default... -
Page 39: Port Statistics
User Manual Managed Switches Local Interface The interface/port on which the LLDP frame was received. The identification of the neighbor’s LLDP frames. Chassis ID Port ID The identification of the neighbor port. Port Description The port description advertised by the neighbor unit. System Name The name advertised by the neighbor unit. - Page 40 User Manual Managed Switches LLDP Global Counters Clear global If checked, the global counters are cleared when the button Clear is counters pressed. Neighbor entries Shows the time when the last entry was last deleted or added. It also were last changed shows the time elapsed since the last change was detected.
-
Page 41: Industrial Protocols
User Manual Managed Switches Rx Errors The number of received LLDP frames containing some kind of error. Frames Discarded If a port receives an LLDP frame, and the switch's internal table has run full, the LLDP frame is counted and discarded. This situation is known as "Too Many Neighbors"... -
Page 42: Ethernet/Ip
User Manual Managed Switches such as PLCs, sensors, and meters. In order to be fully integrated into industrial systems, Weidmüller’s switches support Modbus TCP/IP protocol for real-time monitoring in a SCADA system. Configuring MODBUS/TCP on Weidmüller Switches Modbus TCP is disabled by default. To enable Modbus TCP, select Enable in Mode and then click Apply. -
Page 43: Backup & Restore
User Manual Managed Switches 3.3.11 Backup & Restore Following saving and restoring functions are available in this web page. • Save the current configuration file in connected PC • Save the startup configuration file in connected PC • Loading a new configuration by importing a file already saved in connected PC •... -
Page 44: Ext. Backup/Restore Module
User Manual Managed Switches 3.3.12 Ext. Backup/Restore Module The Weidmüller’s external backup and restore module IE-EBR-MODULE-RS232-ALM (Part No. 2682610000) is a standalone electronic unit that can be used to backup and restore the configuration of managed Weidmüller switches. The device will be connected to the switch’s serial console port and is powered via the console port. -
Page 45: Port Settings
User Manual Managed Switches 3.4 Port Settings Port settings are included to give the user control over the different ports of the switch. Through this menu the user can also configure Port trunking and Loop protection. 3.4.1 Port Configuration This page displays current port configurations. Ports can also be configured here. Description Setting Description... - Page 46 User Manual Managed Switches Configured Link Speed Setting Description Factory Default Disabled Immediately shuts off port access. Auto Auto Allows the port to use the IEEE 802.3u protocol to negotiate with connected devices. The port and connected devices will determine the best speed for that connection.
- Page 47 User Manual Managed Switches Flow Control Setting Description Factory Default Enabled / Enables or Disables flow control for this port. This Disabled Disabled setting is related to the setting for Configured Link Speed. When Auto Speed is selected on a port, this section indicates the flow control capability that is advertised to the link partner.
-
Page 48: Port Trunking
User Manual Managed Switches 3.4.2 Port Trunking Link Aggregation allows one or more links to be aggregated together to form a Link Aggregation Group. A MAC client can treat Link Aggregation Groups as if they were a single link. The Weidmüller switch's Port Trunking feature allows devices to communicate by aggregating several trunk groups (half of total number of ports), with a maximum of 16 ports for each group. - Page 49 User Manual Managed Switches Hash Code Contributors Source MAC Address Setting Description Factory Default Check / Uncheck When enabled, the source MAC address is used to Checked calculate the destination port for the frame. Destination MAC Address Setting Description Factory Default Check / Uncheck When enabled, the destination MAC address is used...
-
Page 50: Lacp Port Settings
User Manual Managed Switches 3.4.2.2 LACP Port Settings LACP (Link Aggregation Control Protocol) trunks are similar to static port trunks but they are more flexible because LACP is compliant with the IEEE 802.3ad standard. Hence, it is interoperable with equipment from other vendors that also comply with the standard. This page allows the user to enable LACP functions to group ports together to form single virtual links and change associated settings, thereby increasing the bandwidth between the switch and other LACP-compatible devices. -
Page 51: Lacp System Status
User Manual Managed Switches Setting Description Factory Default Auto / Specific Ports with the same key value can join in the same Auto aggregation group, while ports with different keys cannot. Auto: The key will be set according to the physical link speed (10Mb = 1, 100Mb = 2, 1Gb = 3). -
Page 52: Lacp Port Status
User Manual Managed Switches Aggr ID The aggregation ID is associated with the aggregation instance. Partner System ID The system ID (MAC address) of the aggregation partner. Partner Key The Key that the partner has assigned to this aggregation ID. Partner Prio The priority of the aggregation partner. -
Page 53: Lacp Statistics
User Manual Managed Switches 3.4.2.5 LACP Statistics This page provides an overview of the LACP statistics for all ports. The displayed table shows the following information: Port The switch port number. LACP Received Shows how many LACP frames have been received at each port. LACP Transmitted Shows how many LACP frames have been sent from each port. -
Page 54: Loop Protection
User Manual Managed Switches Speed Speed pf the aggregation group. Configured Ports Configured member ports of the aggregation group. Aggregated Ports Aggregated member ports of the aggregation group. 3.4.3 Loop Protection Avoid maintenance/installation crews from mistakenly placing one cable on the same switch generating a loop problem. -
Page 55: Status
User Manual Managed Switches Transmission Time Setting Description Factory Default 1 to 10 (sec) The interval between each loop protection PDU sent 5 (sec) on each port. Shutdown Time Setting Description Factory Default 0 to 604800 (sec) The period (in seconds) for which a port will be kept 180 (sec) disabled when a loop is detected (shutting down the port). -
Page 56: Dhcp Server/Relay
User Manual Managed Switches The displayed table contains information about the loop protection status in each port: Port The switch port number. Action The currently configured port action. Transmit The currently configured port transmit mode. Loops The number of loops detected on this port. Status The current loop protection status of the switch. -
Page 57: Dhcp Server
User Manual Managed Switches 3.5.1 DHCP Server 3.5.1.1 DHCP Server Mode Configuration This page configures global mode and VLAN mode to enable/disable DHCP server per system and per VLAN. Global Mode Factory Setting Description Default Enabled / Enable / Disable DHCP server per system. Disabled Disabled VLAN Mode... -
Page 58: Dhcp Server Excluded Ip Configuration
User Manual Managed Switches Type Factory Setting Description Default Display the type of pool. Network: The pool defines a pool of IP addresses to service more than one DHCP client. ‘-‘ Network / Host Host: The pool services for a specific DHCP client identified by client identifier or hardware address. -
Page 59: Dhcp Server Statistics
User Manual Managed Switches 3.5.1.4 DHCP Server Statistics This page displays the database counters and the number of DHCP messages sent and received by DHCP server. There are several tables on the page showing the following information: Database Counters Pool Number of pools. -
Page 60: Dhcp Server Binding Ip
User Manual Managed Switches DHCP Message Sent Counters OFFER Number of DHCP OFFER messages sent. Number of DHCP ACK messages sent. Number of DHCP NAK messages sent. 3.5.1.5 DHCP Server Binding IP This page displays bindings generated for DHCP clients. The displayed table shows the following information: IP address allocated to DHCP client. -
Page 61: Dhcp Server Ip Port Binding
User Manual Managed Switches 3.5.1.7 DHCP Server IP Port Binding If is required to assign a fixed IP address to a client, this page allows to statically bind each port of the switch to an IP address in a DHCP address pool. DHCP Mode Factory Setting... -
Page 62: Dhcp Relay Agent (Option 82)
User Manual Managed Switches 3.5.2 DHCP Relay Agent (Option 82) The DHCP Relay Agent makes it possible for DHCP broadcast messages to be sent over routers. The DHCP Relay Agent enables DHCP clients to obtain IP addresses from a DHCP server on a remote subnet, or those that are not located on the local subnet. -
Page 63: Dhcp Relay Statistics
User Manual Managed Switches they are not in the same subnet domain. Relay Information Mode Setting Description Factory Default Enabled / Indicates the DHCP relay information mode option Disabled Disabled operation. Enabled: When DHCP relay information is enabled, the agent inserts specific information (option 82) into a DHCP message when forwarding to a DHCP server and removes it from a DHCP message when transferring to a DHCP client. -
Page 64: Dhcp Snooping
User Manual Managed Switches Server Statistics Transmit to Server The number of packets relayed from the client to the server. Transmit Error The number of packets that resulted in errors while being sent to clients. Receive from The number of packets received from the server. Server Receive Missing The number of packets received without agent information option. - Page 65 User Manual Managed Switches Snooping Mode Setting Description Factory Default Enabled / Indicates the DHCP snooping mode operation. Disabled Disabled Enabled: Activates DHCP snooping. When DHCP snooping is enabled, the DHCP request messages will be forwarded to trusted ports and only allow reply packets from trusted ports.
-
Page 66: Dhcp Snooping Table
User Manual Managed Switches 3.5.3.2 DHCP Snooping Table This page displays the dynamic IP assigned information after DHCP Snooping mode is disabled. All DHCP clients that obtained the dynamic IP address from the DHCP server will be listed in this table except for local VLAN interface IP addresses. -
Page 67: Redundancy
User Manual Managed Switches The displayed table shows the following information for each port of the switch: Rx and Tx The number of discover packets received and transmitted. Discover Rx and Tx Offer The number of offer packets received and transmitted. Rx and Tx Request The number of request packets received and transmitted. -
Page 68: The O-Ring Concept
User Manual Managed Switches When configuring a redundant ring, all switches on the same ring must be configured to use the same redundancy protocol. You cannot mix the O-Ring, MRP or STP/RSTP/MSTP protocols on the same ring. The following table lists the key differences between the features of each protocol. Use this information to evaluate the benefits of each, and then determine which features are most suitable for your network. -
Page 69: Ring Coupling Configuration
User Manual Managed Switches For copper-based Gigabit Ethernet connections the link loss detection is not used as trigger for ring topology change due to the physical design, as a link loss recognition takes a time of several hundred millisecond. Instead, for copper-based Gigabit Ethernet connections control packets are sent cyclic to achieve the fast recovery time of 30ms (Method 2). -
Page 70: Dual Homing Configuration
User Manual Managed Switches 3.6.2.3 Dual Homing Configuration Dual Homing provides a redundant connection between an O-Ring network and an RSTP network. For a Dual Homing connection on any two switches inside of the O-Ring network a Homing port needs to be selected and enabled. Each configured Homing port must be connected to a RSTP enabled port on any switch of the RSTP network. - Page 71 User Manual Managed Switches ring cabling. This happens because there is no instance which controls and blocks the backup line. In this case all ring switches show a broken ring status. • Select the ‘Redundant ports’ which shall be used 3.
-
Page 72: Media Redundancy Protocol (Mrp)
User Manual Managed Switches Discarding The port is connected to a backup path and the path is blocked. Enable Dual Homing Setting Description Factory Default Enable Enables the Dual Homing operation in the Switch. Enable Does not enable the Dual Homing operation in the Disable Switch. -
Page 73: The O-Chain Concept
User Manual Managed Switches If Industrial protocol PROFINET is not required for the switch application, it is recommended to disable PROFINET to allow a port-independent use of any of the Web-Interface controlled redundancy protocols. Configuring MRP via Web-Interface Use the MRP page of the Redundancy menu. MRP Redundancy Setting Description... - Page 74 User Manual Managed Switches Recovery time for O-Chain connected to Daisy Chain of Weidmüller’s Substation/Advanced Line switches OR to an O-Ring network of Substation/Advanced Line switches For both above illustrated scenarios the overall network healing time can be calculated roughly to around 40 ms based on a proprietary method to force a MAC address table update for all connected Weidmüller switches.
- Page 75 User Manual Managed Switches • If the chain is healthy the O-Chain Edge port of the switch with lowest MAC address always becomes the blocking (discarding) state and the other Edge port will be the forwarding one. • BPDU control packets which will be sent cyclic from RSTP network to the O-Chain Edge ports will be blocked by both Edge ports as long as the chain is healthy.
-
Page 76: Stp / Rstp / Mstp
User Manual Managed Switches Explanation of ‘Setting’ and ‘Status’ items Chain Redundancy Setting Description Factory Default Enable Enable the O-Chain operation. Disable Disable Disable the O-Chain operation. Status Description Factory Default O-Chain redundancy disabled. Healthy The Chain is operating normally. Broken Any of the two links of the Chain is not connected. - Page 77 User Manual Managed Switches • The topology of a bridged network will be determined much more quickly compared to STP. • RSTP is backward compatible with STP, making it relatively easy to deploy. For example: • Defaults to sending 802.1D style BPDUs if packets with this format are received. •...
-
Page 78: How Stp Works
User Manual Managed Switches Bridge B Bridge A Bridge C What happens if a link failure is detected? As shown in next figure, the STP process reconfigures the network so that traffic from LAN segment 2 flows through bridge B. Bridge B Bridge A Bridge C... - Page 79 User Manual Managed Switches MAC address of the bridge and a priority defined for the bridge. For example, the default priority setting of Weidmüller switches is 32768. • Each port has a cost that specifies the efficiency of each link. The efficiency cost is usually determined by the bandwidth of the link, with less efficient links assigned a higher cost.
- Page 80 User Manual Managed Switches • Bridge A has been selected as the Root Bridge, since it was determined to have the lowest Bridge Identifier on the network. • Since Bridge A is the Root Bridge, it is also the Designated Bridge for LAN segment 1. Port 1 on Bridge A is selected as the Designated Bridge Port for LAN Segment 1.
-
Page 81: Configuring Stp / Rstp / Mstp - Bridge Settings
User Manual Managed Switches STP/RSTP only depend on the physical connections, whilst MSTP configures separate Spanning Tree instances for different VLAN groups. The main concepts that are specific of MSTP when comparing with STP/RSTP are: • Multiple Spanning Tree Instances (MSTIs). An MST instance (MSTI) is a particular set of VLANs that are all using the same spanning tree. - Page 82 User Manual Managed Switches Basic Settings Protocol version Setting Description Factory Default The version of the STP protocol. Valid values are STP, STP / RSTP / MSTP MSTP RSTP and MSTP. Bridge Priority Setting Description Factory Default Controls the bridge priority. Lower numeric values have higher priority.
- Page 83 User Manual Managed Switches Forward Delay (sec) Setting Description Factory Default Numerical value The amount of time this device waits before checking to input by user (4 to see if it should change to a different state. Max. Age (sec) Setting Description Factory Default...
-
Page 84: Msti Mapping
User Manual Managed Switches Port Error Recovery Timeout (sec) Setting Description Factory Default Numerical value input This field is only enabled if Port Error Recovery is by user (30 to 86400) checked. It sets the time to pass before a port in the None error-disabled state can be enabled. -
Page 85: Msti Priorities
User Manual Managed Switches Configuration Revision Setting Description Factory Default Numerical value input by user (0 to The revision of the MSTI configuration named above. 65535) MSTI Mapping VLANs Mapped Setting Description Factory Default The list of VLANs mapped to the different MSTIs. The VLAN number by the VLANs must be separated with commas and/or space. -
Page 86: Cist Ports
User Manual Managed Switches 3.6.4.6 CIST Ports This page allows the user to inspect and change the current CIST port configurations. For each port of the switch, the user can program the following parameters: STP Enabled Setting Description Factory Default Checked / Controls whether STP/RSTP is enabled on this switch Unchecked... - Page 87 User Manual Managed Switches Priority Setting Description Factory Default Scroll list with Configures the priority for ports having identical path cost. acceptable values Admin Edge Setting Description Factory Default Configures the operEdge flag to start as set or cleared (the initial operEdge state when a port is initialized). The operEdge is a flag indicating whether the port is Edge / Non-Edge Non-Edge...
-
Page 88: Msti Ports
User Manual Managed Switches Point-to-Point Setting Description Factory Default Auto Automatic detection if the link port is point to point or not (connected to a point-to-point LAN or to a shared media). Forced True The port link is point to point and then is a candidate for Auto rapid transition to the forwarding state. -
Page 89: Bridge Status
User Manual Managed Switches Path Cost Setting Description Factory Default Configures the path cost incurred by the port. Auto will set the path cost according to the physical link speed by using the 802.1D-recommended values. Specific allows the user to enter a user-defined value (1 Auto / Specific to 200000000). -
Page 90: Port Status
User Manual Managed Switches Port The port of the switch. Port ID The port identifier used by the STP protocol, consisting of the priority and the logical port index of the bridge port. Role The role of a port is assigned based on whether it is part of the active topology connecting the bridge to the root bridge (i.e., root port), connecting a LAN through the bridge to the root bridge (i.e., designated port);... -
Page 91: Port Statistics
User Manual Managed Switches In the table shown on the page is displayed the following information for each port: CIST Role The current STP port role of the CIST port. The port role can be one of the following values: AlternatePort BackupPort RootPort... -
Page 92: Fast Recovery
User Manual Managed Switches Port The switch port number of the logical STP port. MSTP The number of MSTP BPDUs transmitted/received on the port. RSTP The number of RSTP BPDUs transmitted/received on the port. The number of legacy STP Configuration BPDUs transmitted/received on the port. -
Page 93: Virtual Lan
User Manual Managed Switches Mode Setting Description Factory Default Enabled/Disabled Select to enable the Fast Recovery function. Disabled Recovery Priority Setting Description Factory Default Select the priority (number from 1 to ‘Total number of ports’) of each port. The connected port with the highest Not included, 1 to Not included Total number of ports... - Page 94 User Manual Managed Switches Benefits of VLANs The main benefit of VLANs is that they provide a network segmentation system that is far more flexible than traditional networks. Using VLANs also provides you with three other benefits: • VLANs ease the relocation of devices on networks: With traditional networks, network administrators spend most of their time dealing with moves and changes.
-
Page 95: Configuring Virtual Lan
User Manual Managed Switches A typical host (e.g., clients) will be untagged members of one VLAN, defined as "Access Port" in the Weidmüller switch, while inter-switch connections will be tagged members of all VLANs, defined as "Trunk Port" in the Weidmüller switch. The IEEE Std 802.1Q-1998 defines how VLANs operate within an open packet-switched network. - Page 96 User Manual Managed Switches Global VLAN Configuration Allowed Access VLANs Setting Description Factory Default Numerical value This field shows the allowed Access VLANs, it only between 1 and affects ports configured as Access ports. Ports in 4095 other modes are members of the VLANs specified in the Allowed VLANs field (Port VLAN Configuration section).
- Page 97 User Manual Managed Switches • The VLANs that a trunk port is member of may be limited by the use of Allowed VLANs • Frames classified to a VLAN that the port is not a member of are discarded • By default, all frames but frames classified to the Port VLAN (Native VLAN) get tagged on egress.
- Page 98 User Manual Managed Switches Port type Ports in hybrid mode allow for changing the port type, that is, whether a frame's VLAN tag is used to classify the frame on ingress to a particular VLAN, and if so, which TPID it reacts on. Likewise, on egress, the Port Type determines the TPID of the tag, if a tag is required.
- Page 99 User Manual Managed Switches Ingress Acceptance Hybrid ports allow for changing the type of frames that are accepted on ingress. Factory Setting Description Default Both tagged and untagged frames are accepted. See Port Tagged and Type for a description of when a frame is considered Untagged tagged.
-
Page 100: Vlan Membership Status
User Manual Managed Switches VLANs. 3.7.2.2 VLAN Membership Status This page provides an overview of membership status of VLAN users. User Type Setting Description Factory Default Scroll list with Various internal software modules may Combined acceptable user use VLAN services to configure VLAN types memberships on the fly. - Page 101 User Manual Managed Switches The following information is shown on the table: User Type Various internal software modules may use VLAN services to configure VLAN port configuration on the fly. It is possible to show VLAN memberships as configured by an administrator (Admin) or as configured by one of these internal software modules.
-
Page 102: Private Vlan Membership
User Manual Managed Switches for the port. Untagged VLAN ID If Tx Tag is overridden in the port and is set to UVID (Untagged VLAN ID), then this field will show the VLAN ID the user wants to untag on egress. Conflicts Two users may have conflicting requirements to a port's configuration. -
Page 103: Private Vlan Port Isolation
User Manual Managed Switches Check the box to include a port in a private VLAN. To remove or exclude the port from the private VLAN, make sure the box is unchecked. 3.7.2.5 Private VLAN Port Isolation This page is used for enabling or disabling port isolation on ports in a Private VLAN. A port member of a VLAN can be isolated to other ports on the same VLAN and Private VLAN. -
Page 104: Gvrp Port Configuration
User Manual Managed Switches between 1 and 20 (hundreds of sec) Leave-time Setting Description Factory Default Numerical value GVRP protocol timer. between 60 and 300 (hundreds of sec) LeaveAll-time Setting Description Factory Default Numerical value GVRP protocol timer. 1000 between 1000 and 5000 (hundreds of sec) Max VLANs... -
Page 105: Snmp
User Manual Managed Switches For each port it has to be configured whether GVRP is enabled or not. Port Mode Setting Description Factory Default Disabled / GVRP Turns the GVRP feature off or on for the Disabled Enabled port in question. 3.8 SNMP Weidmüller managed Switches support SNMP V1, V2c, and V3. - Page 106 User Manual Managed Switches Mode Factory Setting Description Default Enabled/Disabled Enables or disables SNMP operation mode. Enabled Version Factory Setting Description Default Specifies the SNMP protocol version used to manage V1 / V2c / V3 the switch. Read Community (SNMPv1 and SNMP v2c only) Factory Setting Description...
-
Page 107: Snmp Trap
User Manual Managed Switches 3.8.2 SNMP Trap This page allows the user to configure the general SNMP traps. Mode Factory Setting Description Default Disabled/Enabled Enables or disables SNMP traps in the switch. Disabled Pressing the button Add New Entry the SNMP Trap configuration page appears. - Page 108 User Manual Managed Switches SNMP Trap Configuration Trap Config Name Factory Setting Description Default Max. 255 Indicates the trap Configuration’s name. None characters Trap Mode Factory Setting Description Default Disabled/Enabled Enables or disables SNMP traps in the switch. Disabled Trap Version Factory Setting Description...
- Page 109 User Manual Managed Switches 2147 (sec) Trap Inform Retry Times Factory Setting Description Default Numerical value between 0 and Configures the retry times for SNMP trap inform Trap Probe Security Engine ID Factory Setting Description Default This field can only be programmed if the selected trap version is SNMPv3.
-
Page 110: Snmp Community Configuration
User Manual Managed Switches Authentication Factory Setting Description Default Enable/Disable the traps related with the SNMP Check/Uncheck Unchecked authentication failure event. Switch Factory Setting Description Default Enable/Disable the traps related with the STP Check/Uncheck Unchecked redundancy. 3.8.3 SNMP Community Configuration This page allows the user to configure SNMP community table. - Page 111 User Manual Managed Switches This page allows the user to configure SNMPv3 user table. The entry index keys are Engine ID and User Name. A default user is already created but is possible to create additional ones with different security levels. Press the button Add New Entry to create a new User.
-
Page 112: Snmp Groups Configuration
User Manual Managed Switches Authentication Password Factory Setting Description Default String between 8 and 32 characters A string identifying the authentication pass phrase. None (MD5) or between 8 and 40 (SHA) Privacy Protocol Factory Setting Description Default Encryption will be based on DES protocol. Encryption will be based on AES protocol. -
Page 113: Snmp View Configuration
User Manual Managed Switches Security Name Factory Setting Description Default A string identifying the security name that this entry Max. 32 should belong to. This Security Name must be one of None characters the created users names in the SNMP Users Configuration option. -
Page 114: Snmp Access Configuration
User Manual Managed Switches View Type Factory Setting Description Default Indicates that the created view subtree should be Included included. Exact Indicates that the created view subtree should be Excluded excluded. OID Subtree Factory Setting Description Default The object identifier (OID) value for the created view table. -
Page 115: Rmon
User Manual Managed Switches Reserved for SNMPv2c. User-based Security Model (usm): SNMPv3. Accepted any Security model. Security Level This Security Level must be selected in accordance with the one defined for the User of the selected Group Name. Factory Setting Description Default NoAuth, NoPriv... -
Page 116: Rmon History Configuration
User Manual Managed Switches Press the button Add New Entry to create a new entry to get RMON statistics in any port of the switch. Setting Description Factory Default Numeric value Indicates the index of the entry. None between 1 and 65535 Data Source Setting... -
Page 117: Rmon Alarm Configuration
User Manual Managed Switches port 5, the value is 2000005. Interval Setting Description Factory Default Time between 1 Indicates the interval in seconds for sampling the 1800 and 3600 sec history statistics data. Buckets Setting Description Factory Default Numeric value Indicates the maximum data entries associated this between 1 and History control entry stored in RMON. - Page 118 User Manual Managed Switches protocol. InDiscards: The number of inbound packets that are discarded even the packets are normal. InErrors: The number of inbound packets that contained errors preventing them from being deliverable to a higher-layer protocol. InUnknownProtos: the number of the inbound packets that were discarded because of the unknown or un-support protocol.
-
Page 119: Rmon Event Configuration
User Manual Managed Switches Rising Threshold Setting Description Factory Default Numeric value Rising threshold value. between -2 and 2 Rising Index Setting Description Factory Default Numeric value Rising event index. between 1 and 65535 Falling Threshold Setting Description Factory Default Numeric value Falling threshold value. -
Page 120: Rmon Statistics Status
User Manual Managed Switches Desc Setting Description Factory Default Max. 127 Description of the event. None characters Type Setting Description Factory Default None The event is not notified. None SNMP log is created when the event is triggered. SNMPtrap SNMP trap is sent when the event is triggered. Logandtrap SNMP log is created and SNMP trap is sent when the event is triggered. -
Page 121: Rmon History Status
User Manual Managed Switches The total number of events in which packets were dropped by the probe Drop due to lack of resources. The total number of octets of data (including those in bad packets) Octets received on the network. The total number of packets (including bad packets, broadcast packets, Pkts and multicast packets) received. -
Page 122: Rmon Alarm Status
User Manual Managed Switches The page includes a table with the following information: History Index Indicates the index of History control entry. Sample Index Indicates the index of the data entry associated with the control entry. The value of sysUpTime at the start of the interval over which this sample Sample Start was measured. -
Page 123: Rmon Event Status
User Manual Managed Switches Index field allows the user to select the starting point in the Statistics table. Clicking the Refresh button will update the displayed table starting from that or the next closest Statistics table match. The page includes a table with the following information: Indicates the index of Alarm control entry. -
Page 124: Traffic Prioritization
User Manual Managed Switches Log Time Indicates Event log time LogDescripi Indicates the Event description. 3.10 Traffic Prioritization The Weidmüller switch’s traffic prioritization capability provides Quality of Service (QoS) to your network by making data delivery more reliable. You can prioritize traffic on your network to ensure that high priority data is transmitted with minimum delay. - Page 125 User Manual Managed Switches IEEE 802.1p IEEE 802.1D Traffic Type Priority Level Best Effort (default) Background Standard (spare) Excellent Effort (business critical) Controlled Load (streaming multimedia) Video (interactive media); less than 100 milliseconds of latency and jitter Voice (interactive voice); less than 10 milliseconds of latency and jitter Network Control Reserved traffic Even though the IEEE 802.1D standard is the most widely used prioritization scheme in the LAN environment, it still has some restrictions:...
-
Page 126: Storm Control
User Manual Managed Switches • As the 802.1p priority levels are fixed to the traffic queues, the packet will be placed in the appropriate priority queue, ready for transmission through the appropriate egress port. When the packet reaches the head of its queue and is about to be transmitted, the device determines whether or not the egress port is tagged for that VLAN. - Page 127 User Manual Managed Switches For each port of the switch and for each frame type (Unicast / Multicast / Broadcast) is possible: Enable Setting Description Factory Default Check / Enable or disable the storm control status for the Unchecked Uncheck given frame type.
-
Page 128: Port Classification
User Manual Managed Switches 3.10.2 Port Classification This page allows the user to configure the basic QoS Ingress Classification settings for all switch ports. The following settings can be applied to any port of the switch: Setting Description Factory Default 0 to 7 Controls the default class of service. - Page 129 User Manual Managed Switches Setting Description Factory Default 0 to 3 Controls the default drop precedence level. All frames are classified to a drop precedence level. If the port is VLAN aware, the frame is tagged and Tag Classification is enabled, then the frame is classified to a DPL that is mapped from the PCP and DEI value in the tag.
-
Page 130: Port Tag Remarking
User Manual Managed Switches DSCP Based Setting Description Factory Default Checked / Check to enable DSCP Based ToS Ingress Port Unchecked Unchecked Classification Address Mode Setting Description Factory Default Source / The IP/MAC address mode specifies whether Source Destination the QoS Control List (QCL) classification must be based on source (SMAC/SIP) or destination (DMAC/DIP) addresses on this port. -
Page 131: Port Dscp
User Manual Managed Switches Tag Class Setting Description Factory Default Classified / Shows the tag remarking mode for this port: Disabled Default / Classified: Use classified PCP/DEI values. Mapped Default: Use default PCP/DEI values. Mapped: Use mapped versions of CoS and DPL. 3.10.4 Port DSCP This page allows the user to configure the basic ToS DSCP Configuration settings for all switch ports. -
Page 132: Port Policing
User Manual Managed Switches Ingress Translate Setting Description Factory Default Check / Check to enable ingress translation. Unchecked Uncheck Ingress Classify Setting Description Factory Default Disable / The classification of a port has four different values: Disable DSCP=0 / Disable: No ingress DSCP classification. Selected / All DSCP=0: Classify if incoming (or translated if enabled) DSCP is 0. - Page 133 User Manual Managed Switches Enable Setting Description Factory Default Check / Check to enable the policer on the switch port. Unchecked Uncheck Rate Setting Description Factory Default Numerical value Configures the rate of each policer. This value is restricted to 1 to 13128072 when the Unit is kbps or fps, and is restricted to 1 to 13128 when the Unit is Mbps or kfps.
-
Page 134: Queue Policing
User Manual Managed Switches Unit Setting Description Factory Default kbps / Mbps / Configures the unit of measure for each policer rate. kbps fps / kfps Flow Control Setting Description Factory Default Check / If enabled and the port is in Flow Control mode, then Unchecked Uncheck pause frames are sent instead of being discarded. -
Page 135: Port Scheduler
User Manual Managed Switches Enable Setting Description Factory Default Check / Check to enable the queue policer on the switch port. Unchecked Uncheck Rate Setting Description Factory Default Numerical value Configures the rate for the queue policer. This value is restricted to 100-13128072 when "Unit" is kbps, and 1-13128 when "Unit"... - Page 136 User Manual Managed Switches When clicking on any port number, a new page is loaded to configure the Scheduler and Shapers for that specific port of the switch.
- Page 137 User Manual Managed Switches Scheduler Mode Setting Description Factory Default Strict Priority / Configures the scheduler mode on this switch port. Strict Priority 6 Queues Weighted Queue Shaper Enable Setting Description Factory Default Check / Controls whether the queue shaper is enabled for Unchecked Uncheck this queue on this switch port.
-
Page 138: Port Shaper
User Manual Managed Switches "6 Queues Weighted". Port Shaper Enable Setting Description Factory Default Check / Unchecked Controls whether the port shaper is enabled for this switch Uncheck port. Queue Shaper Rate Setting Description Factory Default Numerical value Controls the rate for the port shaper. This value is restricted to 100-13128072 when "Unit"... -
Page 139: Dscp-Based Qos
User Manual Managed Switches When clicking on any port number, a new page is loaded to configure the Scheduler and Shapers for that specific port of the switch. The page is the same one loaded from the Port Scheduler option and all its settings are already explained in the previous section of this manual. -
Page 140: Dscp Translation
User Manual Managed Switches Setting Description Factory Default 0 to 3 Drop precedence level (DP). The higher the drop precedence inside a class, the more likely the packed is to be dropped, relative to the other packets with lower precedence level when congestion occurs. -
Page 141: Dscp Classification
User Manual Managed Switches Ingress Classification Setting Description Factory Default Check / Check to enable classification at ingress side. Unchecked Uncheck Egress Remap Setting Description Factory Default 0 to 63 Controls the remapping. The user can select the 0 to 63 DSCP value from a selected menu to which is desired to remap. -
Page 142: Qos Control List
User Manual Managed Switches For the actual QoS (0 to 7) the user can set the classified DSCP value. DSCP Setting Description Factory Default 0 to 63 Select the classified DSCP value for frames. 3.10.12 QoS Control List This page shows the QoS Control List, which is made up of the QCEs (QoS Control Entry). Each row describes a QCE that is defined. - Page 143 User Manual Managed Switches Port Members Setting Description Factory Default Check/Uncheck A row of check boxes for each port. Checked Check the box to include the port in the QCL entry. Key Parameters - DMAC Setting Description Factory Default Any / Unicast / Indicates the destination MAC address Multicast / for incoming frames.
- Page 144 User Manual Managed Switches Key Parameters - DEI Setting Description Factory Default Any / 0 / 1 Valid value of Drop Eligible Indicator (DEI). Can be ‘Any’, 0 or 1. Key Parameters – Frame Type Setting Description Factory Default Any / Ethertype / Indicates the type of incoming frame LLC / SNAP / allowed among the several possibilities.
- Page 145 User Manual Managed Switches ‘No’ or ‘Any’. DSCP It can be a specific value, a range of values or 'Any'. DSCP values are in the range 0-63 including BE, CS1-CS7, EF or AF11-AF43. Key Parameters – Frame Type – IPv6 Setting Description Factory Default...
-
Page 146: Qos Statistics
User Manual Managed Switches 3.10.13 QoS Statistics This page provides statistics for the different queues for all switch ports. The following information of each port is displayed on the page: Q0 – Q7 There are 8 queues per port. Q0 is the lowest priority queue. Rx / Tx The number of received and transmitted packets per queue. -
Page 147: Multicast
User Manual Managed Switches The following information can be displayed on the page: User Indicates the QCL user. Indicates the index of QCE. Port Indicates the list of ports configured with the QCE. Indicates the type of frame to look for incoming frames. Possible frame types are: Any: The QCE will match all frame type. - Page 148 User Manual Managed Switches reaches group members diverges. To make more efficient use of network bandwidth, it is only at these points that multicast packets are duplicated and forwarded. A multicast packet has a multicast group address in the destination address field of the packet's IP header. Benefits of Multicast The benefits of using IP multicast are: •...
- Page 149 User Manual Managed Switches Network with multicast filtering Hosts only receive dedicated traffic from other hosts belonging to the same group. The Weidmüller switch supports both automatic multicast filtering with IGMP (Internet Group Management Protocol) Snooping and manual multicast filtering by adding static multicast IP addresses.
-
Page 150: Igmp Snooping Basic Configuration
User Manual Managed Switches • When an IP host receives a query packet, it sends a report packet back that identifies the multicast group that the end-station would like to join. • When the report packet arrives at a port on a switch with IGMP Snooping enabled, the switch knows that the port should forward traffic for the multicast group, and then proceeds to forward the packet to the router. - Page 151 User Manual Managed Switches Global Configuration Snooping Enabled Setting Description Factory Default Check/Uncheck Enable the IGMP Snooping function globally. Unchecked Unregister IPMCv4 Flooding Enabled Setting Description Factory Default Check/Uncheck Enable unregistered IPMCv4 traffic flooding. Checked The flooding control takes effect only when IGMP Snooping is enabled.
-
Page 152: Igmp Snooping Vlan Configuration
User Manual Managed Switches Fast Leave Setting Description Factory Default Check/Uncheck Enable the fast leave on the port. Unchecked System will remove group record and stop forwarding data upon receiving the leave message without sending last member query messages. It is recommended to enable this feature only when a single IGMPv2 host is connected to the specific port. - Page 153 User Manual Managed Switches Querier Address Setting Description Factory Default IP address Define the IPv4 address as source address used in IP None header for IGMP Querier election. When the Querier address is not set, system uses IPv4 management address of the IP interface associated with this VLAN.
-
Page 154: Igmp Snooping Status
User Manual Managed Switches LLQI Setting Description Factory Default 1 to 31774 (tenths Last Member Query Interval. It is the time value 10 (1 sec) of sec) represented by the Last Member Query Interval, multiplied by the Last Member Query Count. Setting Description Factory... -
Page 155: Igmp Snooping Group Information
User Manual Managed Switches Transmitted Querier Received The number of received queriers. V1 Reports The number of received V1 reports. Received V2 Reports The number of received V2 reports. Received V3 Reports The number of received V3 reports. Received V2 Leaves The number of received V2 leave packets. -
Page 156: Igmp Snooping Port Group Filtering
User Manual Managed Switches The following information can be displayed on the page: VLAN ID VLAN ID of the group. Groups Group address of the group displayed. Port Switch port number. Indicates the filtering mode maintained per basis (VLAN ID, port number, Mode Group Address). -
Page 157: Ipmc Profile Configurations
User Manual Managed Switches For each port of the switch, the user can select the Filtering profile: Filtering profile Setting Description Factory Default Select IPMC Select the IPMC Profile as the filtering condition for None profile entry from the specific port. Summary about the designated a list profile will be shown by clicking the view button. -
Page 158: Ipmc Profile Address Configuration
User Manual Managed Switches Rule Setting Description Factory Default Rule setting When the profile is created, click the edit button to None enter the rule setting page of the designated profile. Summary about the designated profile will be shown by clicking the view button. You can manage or inspect the rules of the designated profile by using the following buttons: : List the rules associated with the designated... -
Page 159: Security
User Manual Managed Switches 3.12 Security Security can be categorized in two levels: the user name/password level, and the port access level. For both levels Weidmüller switches provide a wide range of options that allow the user to meet the security requirements of different applications. - Page 160 User Manual Managed Switches an EAP Request/Identity frame to ask for the username of the supplicant. The following actions are described below: 1. When the supplicant receives an "EAP Request/Identity" frame, it sends an "EAP Response/Identity" frame with its username back to the authenticator. 2.
-
Page 161: Device Binding
User Manual Managed Switches 3.12.1 Device Binding This page provides Device Binding related configuration. Device Binding is a powerful monitor tool for devices and network security. Function State Setting Description Factory Default Enabled/Disabled Enable/Disable Device Binding. Disabled Mode Setting Description Factory Default --- / Scan /... -
Page 162: Alias Ip Address
User Manual Managed Switches Alive Check Active / Status Setting Description Factory Default Enable/Disable When enabled, the switch will ping the device Disabled continuously. The Status column indicates the alive check status: Got Reply: Receiving ping reply from device. Lost Reply: Not receiving ping reply from device. Stream Check Active / Status Setting Description... -
Page 163: Alive Check
User Manual Managed Switches Alias IP Address Setting Description Factory Default IP address Specify Alias IP address. Keep "0.0.0.0", if the device None doesn't have alias IP address. 3.12.1.2 Alive Check This page provides additional configuration options for the Alive Check function on each port. - Page 164 User Manual Managed Switches Mode Setting Description Factory Default Enable / Disable Enable or Disable (---) the Alive Check option on the --- (Disabled) port. Note: If the Binding function is not enabled on a port, it will not be possible to enable the Alive Check option. Binding function is enabled in the Device Binding page.
-
Page 165: Ddos Prevention
User Manual Managed Switches Status Setting Description Factory Default Information only Indicates the Alive Check status. --- (Disabled) ---: Disabled Got Reply: Receiving ping reply from device. Lost Reply: Not receiving ping reply from device. 3.12.1.3 DDOS Prevention This page provides DDOS (Distributed Denial of Service) Prevention related configuration options. The switch could monitor the ingress packets and do some actions when DDOS attack happened on any specific port. - Page 166 User Manual Managed Switches Sensibility Setting Description Factory Default Low / Normal / Indicates the level of DDOS detection. Possible levels Normal Medium / High are: Low: Low sensibility. Normal: Normal sensibility. Medium: Medium sensibility. High: High sensibility. Packet Type Setting Description Factory...
-
Page 167: Device Description
User Manual Managed Switches Status Setting Description Factory Default Information only Indicates the DDOS Prevention status. --- (Disabled) ---: Disabled Analyzing: Analyze the packet throughput for initialization. Running: Function ready. Attacked: DDOS attack happened. 3.12.1.4 Device Description From this option it can be specified a description and a location for each port to help administrators differentiate between different ports. -
Page 168: Stream Check
User Manual Managed Switches Location Address Setting Description Factory Default Max. of 128 Description of the location of the device connected to None characters the port. Description Setting Description Factory Default Max. of 128 Description of the device connected to the port. None characters 3.12.1.5 Stream Check... -
Page 169: Ip Source Guard
User Manual Managed Switches Action Setting Description Factory Default --- / Log it Indicates the action when stream getting low. The --- (Disabled) possible actions to be configured are: ---: No action Log it: Log the event. Status Setting Description Factory Default Information only... -
Page 170: Static Ip Source Guard Table
User Manual Managed Switches IP Source Guard Configuration Mode Setting Description Factory Default Enabled/Disabled Enable or Disable the IP Source Guard function Disabled globally in the switch. All configured ACEs (Access Control Entries) will be lost when the mode is enabled. The button Translate dynamic to static translates all dynamic entries to static entries (see following sections Static and Dynamic IP Source Guard Tables). -
Page 171: Dynamic Ip Source Guard Table
User Manual Managed Switches VLAN ID Setting Description Factory Default 1 to 4095 The VLAN ID for the entry. None IP Address Setting Description Factory Default IP address Allowed source IP address for the entry. None IP Mask Setting Description Factory Default IP mask... -
Page 172: Acl Ports Configuration
User Manual Managed Switches 3.12.3.1 ACL Ports Configuration This option allows the user to configure the ACL parameters of each switch port. These parameters will affect frames received on a port unless the frame matches a specific ACE. The parameters that can be configured for each port of the switch are: Policy ID Setting Description... -
Page 173: Acl Rate Limiter Configuration
User Manual Managed Switches Port Redirect Setting Description Factory Default Disabled / Port Select which port frames are redirected on. It can't be Disabled number set when action is permitted. Mirror Setting Description Factory Default Enabled/Disabled Specifies the mirror operation of this port. Disabled Enabled: Frames received on the port are mirrored. -
Page 174: Acl Configuration
User Manual Managed Switches For each Rate Limited ID (1 to 16) it has be configured the maximum data rate. Rate Setting Description Factory Default Maximum rate in The valid rate is 0-131071 in pps. 3.12.3.3 ACL Configuration This page shows the Access Control List (ACL), made up of the Access Control Entries (ACEs) defined on this switch. - Page 175 User Manual Managed Switches IPv4/ICMP: The ACE will match all IPv4 frames with ICMP protocol. IPv4/UDP: The ACE will match all IPv4 frames with UDP protocol. IPv4/TCP: The ACE will match all IPv4 frames with TCP protocol. IPv4/Other: The ACE will match all IPv4 frames not being ICMP /UDP / TCP protocol.
- Page 176 User Manual Managed Switches Ingress Port Setting Description Factory Default Any / Port n Select the ingress port for which this ACE applies: All: The ACE applies to any port. Port n: The ACE applies to this port number, where n is the number of the switch port. Policy Filter Setting Description...
- Page 177 User Manual Managed Switches VLAN ID Filter Setting Description Factory Default Any / Specific Specify the VLAN ID filter for this ACE. Any: No VLAN ID filter is specified. Specific: A field for entering the VLAN ID appears. Tag Priority Setting Description Factory...
- Page 178 User Manual Managed Switches Counter Setting Description Factory Default Information only Counts the number of times the ACE was hit by a None frame. Ethernet type parameters If the type of frame selected is Ethernet type, additional parameters can be programmed: SMAC Filter Setting Description...
- Page 179 User Manual Managed Switches ARP. RARP: Frame must have ARP/RARP opcode set to RARP. Other: Frame has unknown ARP/RARP Opcode flag. Request/Reply Setting Description Factory Default Any / Request / Specify the available Request/Reply opcode (OP) flag Reply for this ACE. Any: No Request/Reply OP flag is specified.
- Page 180 User Manual Managed Switches RARP Target MAC Match Setting Description Factory Default Any / 0 / 1 Specify whether frames can hit the action according to their target hardware address field (THA) settings. Any: Any value is allowed. 0: RARP frames where THA is not equal to the target MAC address.
- Page 181 User Manual Managed Switches IP Protocol Filter Setting Description Factory Default Any / ICMP / UDP Specify the IPv4 protocol filter for this specific ACE. / TCP Any: No IPv4 protocol is specified. ICMP: IPv4 ICMP protocol frames. UDP: IPv4 UDP protocol frames. TCP: IPv4 TCP protocol frames.
- Page 182 User Manual Managed Switches Network Any: No source IP filter is specified. Host: Source IP filter is set to Host. Specify the source IP address in the SIP Address field that appears. Network: Source IP filter is set to Network. Specify the source IP address and source IP mask in the SIP Address and SIP Mask fields that appear.
- Page 183 User Manual Managed Switches must not be able to match this entry. 1: IPv6 frames with a hop limit field greater than zero must be able to match this entry. ICMP parameters If the type of frame selected is IPv4/ICMP or IPv6/ICMP, several additional parameters can be programmed: ICMP Type Filter Setting...
- Page 184 User Manual Managed Switches TCP FIN Setting Description Factory Default Any / 0 / 1 Specify the TCP "No more data from sender" (FIN) value for this ACE. Any: Any value is allowed ("don't-care"). 0: TCP frames where the FIN field is set must not be able to match this entry.
-
Page 185: Acl Status
User Manual Managed Switches TCP ACK Setting Description Factory Default Any / 0 / 1 Specify the TCP "Acknowledgment field significant" (ACK) value for this ACE. Any: Any value is allowed ("don't-care"). 0: TCP frames where the ACK field is set must not be able to match this entry. -
Page 186: Authentication, Authorization And Accounting (Aaa)
User Manual Managed Switches Filter: Frames matching the ACE are filtered. Rate Limiter Indicates the rate limiter number of the ACE. The allowed range is 1 o 16. When Disabled is displayed, the rate limiter operation is disabled. Forward packet that matched the specific ACE to CPU. Counter The counter indicates the number of times the ACE was hit by a frame. - Page 187 User Manual Managed Switches Retransmit Setting Description Factory Default 1 to 1000 Number of times, in the range 1 to 1000, a RADIUS request is retransmitted to a server that is not responding. If the server has not responded after the last retransmit it is considered to be dead.
- Page 188 User Manual Managed Switches Server Configuration Press the button Add New Server to add and configure a RADIUS server. Up to 5 servers are supported. The parameters that have to be configured for each server are: Hostname Setting Description Factory Default IP address The IP address of the RADIUS server.
-
Page 189: Tacacs+ Server Configuration
User Manual Managed Switches 3.12.4.2 TACACS+ Server Configuration This page allows the user to configure the TACACS+ servers. Global Configuration Timeout Setting Description Factory Default 1 to 1000 (sec) Number of seconds to wait for a reply from a TACACS+ server before retransmitting the request. Deadtime Setting Description... -
Page 190: Radius Overview
User Manual Managed Switches Hostname Setting Description Factory Default IP address The IP address of the TACACS+ server. None Port Setting Description Factory Default Port The TCP port to use on the TACACS+ server for authentication. Timeout Setting Description Factory Default 1 to 1000 (sec) This optional setting overrides the global timeout... -
Page 191: Radius Details
User Manual Managed Switches Dead (X seconds left): Access attempts were made to this server but it did not reply within the configured timeout. The server has temporarily been disabled but will get re-enabled when the dead-time expires. The number of seconds left before this occurs is displayed in parentheses. This state is only reachable when more than one server is enabled. -
Page 192: Network Access Server (802.1X)
User Manual Managed Switches 3.12.5 Network Access Server (802.1X) The IEEE 802.1X standard defines a port-based access control procedure that prevents unauthorized access to a network by requiring users to first submit credentials for authentication. One or more central servers (the backend servers determine whether the user is allowed access to the network. - Page 193 User Manual Managed Switches Reauthentication Enabled Setting Description Factory Default Check / Uncheck Determines if connected clients must be Unchecked reauthenticated (checked) or not (unchecked). Reauthentication Period Setting Description Factory Default 1 to 3600 (sec) Period, in seconds, after which a connected client 3600 must be reauthenticated.
- Page 194 User Manual Managed Switches Hold Time Setting Description Factory Default 10 to 1000000 This setting applies to the following modes Modes (sec) defined in Port Configuration (described below global settings): • Single 802.1X • Multi 802.1X • MAC-Based Auth. If a client is denied access, either because the RADIUS server denies the client access or because the RADIUS server request times out (according to the timeout specified on the RADIUS configuration page),...
- Page 195 User Manual Managed Switches Guest VLAN Enabled Setting Description Factory Default Check / Uncheck The "Guest VLAN Enabled" checkbox provides a Unchecked quick way to globally enable/disable Guest VLAN functionality. When checked, the individual ports setting determines whether the port can be moved into Guest VLAN.
- Page 196 User Manual Managed Switches Port Configuration Admin State Setting Description Factory Default Force Authorized If NAS is globally enabled, this selection controls the Force / Force port's authentication mode. The following modes are Authorized Unauthorized / available: • Force Authorized: In this mode, the switch will send Port-based 802.1X / Single one EAPOL Success frame when the port link comes...
- Page 197 User Manual Managed Switches requests sent from the switch. The maximum number of supplicants that can be attached to a port can be limited using the Port Security Limit Control functionality. • MAC-based Auth: Unlike port-based 802.1X, MAC-based authentication is not a standard, but merely a best-practices method adopted by the industry.
- Page 198 User Manual Managed Switches RADIUS-Assigned VLAN Enabled Setting Description Factory Default Check / Uncheck When RADIUS-Assigned VLAN is both globally Unchecked enabled and enabled (checked) for a given port, the switch reacts to VLAN ID information carried in the RADIUS Access-Accept packet transmitted by the RADIUS server when a supplicant is successfully authenticated.
-
Page 199: Network Access Server (Nas) Switch Status
User Manual Managed Switches Port state Setting Description Factory Default Information only The current state of the port. It can undertake one of Globally the following values: Disabled • Globally Disabled: NAS is globally disabled. • Link Down: NAS is globally enabled, but there is no link on the port. -
Page 200: Network Access Server (Nas) Statistics
User Manual Managed Switches The table displayed on the page shows the following information: Port The switch port number. Click to navigate to detailed NAS statistics for this port. Admin State The port's current administrative state. Possible values already explained in previous section (Admin State). - Page 201 User Manual Managed Switches System Configuration Mode Setting Description Factory Default Enabled / Enable or Disable the Global limit control on the Disabled Disabled switch. Aging Enabled Setting Description Factory Default Check / Uncheck If checked, secured MAC addresses are subject to Unchecked aging according to the ‘Aging Period’...
- Page 202 User Manual Managed Switches Aging Period Setting Description Factory Default 10 to 10000000 If Aging is enabled (checked) the user can specify the 3600 (sec) aging period of the MAC addresses in seconds. Port Configuration Mode Setting Description Factory Default Enabled / Controls whether Limit Control is enabled on this port.
-
Page 203: Port Security Status
User Manual Managed Switches State Setting Description Factory Default Information only This column shows the current state of the port as Disabled seen from the Limit Control's point of view. The state takes one of the following four values: Disabled: Limit Control is either globally disabled or disabled on the port. - Page 204 User Manual Managed Switches User Module Legend The table displayed shows the following information: User Module Name The full name of a user module that may request Port Security services. Abbr A one-letter abbreviation of the user module. This is used in the Users column in the Port Status table.
-
Page 205: Port Status
User Manual Managed Switches Control user module and that module has indicated that the limit is exceeded. No MAC addresses can be learned on the port until it is administratively re-opened. MAC Count The two columns indicate the number of currently learned MAC addresses (forwarding as well as blocked) and the maximum number of MAC addresses that can be learned on the port, respectively. -
Page 206: Configuring Relay Warnings
User Manual Managed Switches 3.13.1 Configuring Relay Warnings The Fault Relay Alarm function uses relay output to alert the user when certain user-configured events take place. Configuring Relay Warning Events Settings Alarm event types can be divided into two basic groups: Power Failure and Port Link Down/Broken. -
Page 207: Configuring Email Warning
User Manual Managed Switches Warning Relay output is triggered when… Power Failure PWR 1 No power input in the first power supply module of the switch. PWR 2 No power input in the second power supply module of the switch. Warning e-mail is sent when…... -
Page 208: Email Settings
User Manual Managed Switches Event Types can be divided into two basic groups: System Events and Port Events. System Events are related to the overall function of the switch, whereas Port Events are related to the activity of a specific port. NOTE: For each event the user can decide if a log is registered (SYSLOG) and/or if a warning Email is sent (SMTP). -
Page 209: Syslog Setting
User Manual Managed Switches E-mail Alert Setting Description Factory Default Enabled or Enable or disable the Email warning function. Disabled Disabled SMTP Server Address Setting Description Factory Default IP address The IP Address of your email server. 0.0.0.0 Sender E-mail Address Setting Description Factory... -
Page 210: Monitoring And Diag
User Manual Managed Switches Server Mode Setting Description Factory Default Client(Local) Events are logged only in the switch. Client(Local) Client(Local) and Events are logged in the switch and in a remote Server(Remote) SYSLOG server. Server Address Setting Description Factory Default IP address The IP address of Syslog Server used by your None... - Page 211 User Manual Managed Switches Aging Configuration Disable Automatic Aging Setting Description Factory Default Check / Uncheck By default, dynamic entries are removed from the Unchecked MAC table after 300 seconds. This removal is called aging. It is possible to de-activate the automatic aging of dynamic entries by checking Disable Automatic Aging.
-
Page 212: Mac Address Table Status
User Manual Managed Switches NOTE: If the setting of the port for the MAC Table Learning is Secure, make sure the link used for managing the switch is added to the static MAC table before saving. Otherwise the management link will be lost and can only be restored by using another non-secure port, by connecting to the switch via the serial interface or by restoring the default values. -
Page 213: Port Statistics Overview
User Manual Managed Switches The page includes a table with the following information: Type Indicates whether the entry is static or dynamic. VLAN The VLAN ID of the entry. MAC Address The MAC address of the entry. Port Members The ports that are members of the entry. 3.14.3 Port Statistics Overview This page provides an overview of general traffic statistics for all switch ports. -
Page 214: Detailed Port Statistics
User Manual Managed Switches transmissions per port. Drops The number of frames discarded due to ingress or egress congestion. Filtered The number of received frames filtered by the forwarding process. The Clear button allows the user to reset all the port counters. 3.14.4 Detailed Port Statistics This page provides detailed traffic statistics for any specific switch port. -
Page 215: Port Monitoring
User Manual Managed Switches Receive and Transmit Queue Counters The number of received and transmitted packets per input and output queue. Receive Error Counters Rx Drops The number of frames dropped due to lack of receive buffers or egress congestion. Rx CRC/Alignment The number of frames received with CRC or alignment errors. - Page 216 User Manual Managed Switches Mode Setting Description Factory Default Enabled or Enable or disable the Mirroring or Remote mirroring Disabled Disabled function. Type Setting Description Factory Default Mirror The source port(s) and destination port are located on Mirror this switch. Source (RMirror) The source port(s) and intermediate port(s) are located on this switch.
- Page 217 User Manual Managed Switches Intermediate The intermediate ports are located on this switch. (RMirror) Destination The destination port(s) and intermediate port(s) are (RMirror) located on this switch. VLAN ID Setting Description Factory Default 1 to 4095 When Remote Mirroring is activated, the VLAN ID points out where the monitor packet will copy to.
-
Page 218: System Log Information
User Manual Managed Switches Mode Setting Description Factory Default Check / Uncheck Select destination port. The destination port is a port Unchecked of the switch where is received a copy of traffic from the source port. 3.14.6 System Log Information This page shows the Event Log Table stored in the switch. -
Page 219: Veriphy Cable Diagnostics
User Manual Managed Switches 3.14.7 VeriPHY Cable Diagnostics This page allows the user to perform Cable Diagnostics tests on copper wires. Press the Start button to run the diagnostics. When completed, the page refreshes automatically and the cable diagnostics results are shown in the cable status table. NOTE: The VeriPHY diagnostics tool is only accurate for cables 7 - 140 meters long. -
Page 220: Sfp Type
User Manual Managed Switches Parameter Description Port No. Switch port number with SFP plugged in Temperature (°C) SFP casing temperature Vcc (V) Voltage supply to the SFP Tx Bias (mA) The bias current of the optical transmitter Tx power (mW) The amount of light being transmitted into the fiber optic cable in (dBm) The amount of light being transmitted into the fiber optic cable in... -
Page 221: Ping And Ping6
User Manual Managed Switches Parameter Description Port Switch port number with SFP plugged in Vendor Provider of the SFP transceiver Product Identification of the SFP transceiver Version Version of the SFP transceiver Type General information about the SFP transceiver (Interface / Fiber optic type / Distance) 3.14.10 Ping and Ping6 The Ping function uses the ping command to give users a simple but powerful tool for... -
Page 222: Ptp Clock Configuration
User Manual Managed Switches modes. Transparent clock operation may be configured as peer to peer or end to end. Peer to peer provides better accuracy but then is required that all the network devices are PTP complaint. 3.15.1 PTP Clock Configuration This page allows the user to configure and inspect the current PTP clock settings. - Page 223 User Manual Managed Switches Clock Type and Profile The clock instance, device type and selected profile is shown. If the clock has been configured to use a profile (eg: 1588), clicking the Apply button will reset configured values to profile defaults. Port Enable and Configuration Select (check) the ports configured for this Clock Instance and click on Ports Configuration to edit all the data settings.
- Page 224 User Manual Managed Switches Clock Parent DataSet Shows dynamic information about the Grandmaster clock defined in the IEEE 1588 Standard. The Help button of the web page provides a description of all the displayed parameters. Clock Default DataSet The clock default data set is defined in the IEEE 1588 Standard. It holds three groups of data: the static members defined at clock creation time, the Dynamic members defined by the system, and the configurable members which can be set here.
-
Page 225: Ptp Clock Status
User Manual Managed Switches SELL : The assigned master is selected as current master. SYNC : The master is sending Sync messages. 3.15.2 PTP Clock Status This page shows an overview of the PTP clocks configured in the switch. The table on the page shows the following information: Inst The particular clock instance. -
Page 226: Factory Default
User Manual Managed Switches In this web page is also possible to activate the factory default configuration or startup configuration (last saved configuration) to the switch. Select the corresponding configuration file and click the Activate Configuration button. Additionally, it is also possible to delete the startup configuration file by selecting the file and clicking the button Delete Configuration File. -
Page 227: System Reboot
User Manual Managed Switches 3.18 System Reboot This function is used to restart the Ethernet Switch. 3.19 License Information This page shows Weidmüller’s declaration for used Open Source Software (GNU General Public License). -
Page 228: Downloads (Software And Documentation)
User Manual Managed Switches A. Downloads (Software and Documentation) Using below described link you can download following items: • Firmware Upgrades • Private MIB files • EDS file • GSDML file • Documentation (User Manual and Hardware Installation Guide) Download via Product Catalogue (Online Catalogue) •... -
Page 229: Modbus Register Table
User Manual Managed Switches B. Modbus Register Table Registers can be read via ID = 1 and function code 4 (Input register). Register Register Max Data Tag name address address Data Type Length Setting (Description) (HEX) (DEC) (Words) System Information Vendor 0x0000 Word... - Page 230 User Manual Managed Switches Packets Information Port Tx Packets 0x2000~ 8192 Word Eg. 0x44332211: Packet amount = 44332211 Word 0 = 4433 Word 1 = 2211 Port Rx Packets 0x2100~ 8448 Word Eg. 0x44332211: Packet amount = 44332211 Word 0 = 4433 Word 1 = 2211 Port Tx Error 0x2200~...
- Page 231 User Manual Managed Switches 0xFFFF: Not Enabled O-Chain 2 0x3702 14082 Word 0x0002: Link Down Port Status 0x0003: Blocked 0x0005: Forwarding 0xFFFF: Not Enabled...
Need help?
Do you have a question about the IE-SW-SL28M and is the answer not in the manual?
Questions and answers