Leica TCS SP8 Safety Manual
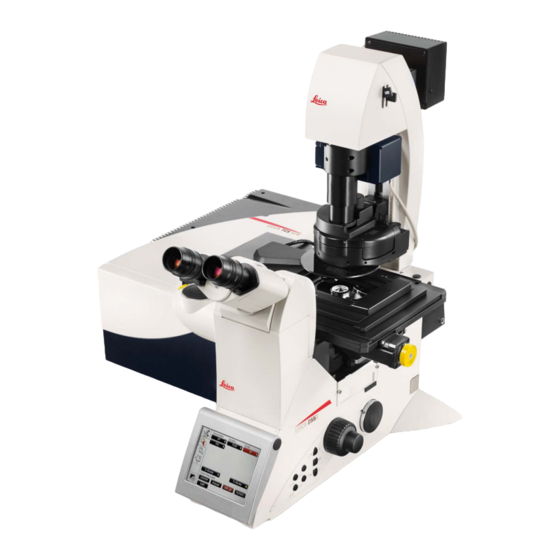
Confocal system
Hide thumbs
Also See for TCS SP8:
- User manual (118 pages) ,
- Quick start manual (31 pages) ,
- User manual (13 pages)
Table of Contents
Advertisement
Quick Links
BEGINNERS SAFETY MANUAL FOR LEICA TCS SP8
Produced by Graham Wright, Fiona Chia, Cris Barzaghi, Wang Jing Fang, Shaalini, Melvin
1. Safety Guidelines ........................................................................................................................ 2
1.1 Lasers .................................................................................................................................... 3
1.2 Immersion Oil ........................................................................................................................ 3
1.3 Metal Halide Lamps (MHL) ................................................................................................... 4
2. Training ....................................................................................................................................... 4
2.1 To arrange a training session: ............................................................................................... 4
3. Online Booking and System Access............................................................................................. 5
3.1 Acknowledgements ............................................................................................................... 6
4. Operation Procedures ................................................................................................................. 6
4.1 Switching ON Protocol .......................................................................................................... 7
4.2 Objective Lens ....................................................................................................................... 7
4.3 Software initiation ................................................................................................................ 8
4.4 Turning on the lasers ............................................................................................................ 8
4.5 Using Dye Assistant tab ......................................................................................................... 8
4.6 Setting Laser & Detector configuration .............................................................................. 10
4.7 Using the Acquisition tab .................................................................................................... 11
4.8 Image Adjustments - Setting the Gain and Offset properly............................................... 12
4.9 How to do a Z stack for a 3D Image .................................................................................... 13
4.10 Saving images and reusing settings .................................................................................. 14
4.11 Switching OFF Protocol ..................................................................................................... 15
5. Troubleshooting ........................................................................................................................ 16
5.1 Troubleshooting Appendix .................................................................................................. 18
CONFOCAL SYSTEM
Last Updated on Sep 2021
Advertisement
Table of Contents

Related Manuals for Leica TCS SP8


Summary of Contents for Leica TCS SP8
-
Page 1: Table Of Contents
BEGINNERS SAFETY MANUAL FOR LEICA TCS SP8 CONFOCAL SYSTEM Produced by Graham Wright, Fiona Chia, Cris Barzaghi, Wang Jing Fang, Shaalini, Melvin 1. Safety Guidelines ........................2 1.1 Lasers ............................ 3 1.2 Immersion Oil ........................3 1.3 Metal Halide Lamps (MHL) ....................4 2. - Page 2 THIS PAGE IS INTENTIONALLY LEFT BLANK Last Updated on Sep 2021...
-
Page 3: Safety Guidelines
1. Safety Guidelines Please adhere to the safety guidelines for your own safety and health. When in doubt, always approach the bioimaging facility for assistance. 1.1 Lasers Lasers in the confocal facility are class 3B lasers. This means that the lasers are strong enough to cause serious damage to your eyes, including temporary to permanent blindness. -
Page 4: Metal Halide Lamps (Mhl)
1.3 Metal Halide Lamps (MHL) Metal halide lamps are fluorescence lamps that gives a visible light range of 300 – 650nm, enabling us to observe fluorescence signals such as GFP, DAPI and RFP. Metal halide lamps contain mercury vapours that are extremely toxic to the human body. Therefore, please take note of the following safety guidelines when working with the metal halide lamp: •... -
Page 5: Online Booking And System Access
allowed to conduct the training. None of your lab members are allowed to conduct the training for you. If you need a refresher or some specific advice on anything microscopy related, please approach any member of the Bioimaging Facility for assistance/help. We also offer training on the various types of image analysis and image processing software available here at TLL, including ImageJ/Fiji, Huygens and Imaris. -
Page 6: Acknowledgements
• Under any circumstances, users are not allowed to make bookings on behalf of other people. Users who have received training but are yet to gain access to microscopy resource booking may approach TLL Bioimaging department for booking assistance if they need to use it urgently. -
Page 7: Switching On Protocol
4.1 Switching ON Protocol (a) SIGN IN the Logbook and record your START-TIMING. (b) Switch on Laser Key (1), Laser Power (2), Scanner power (3) and PC Microscope (4). (c) Switch on the Metal Halide lamp (5), if you need it. (d) Switch on STED laser module (6), if you need it. -
Page 8: Software Initiation
4.3 Software initiation Turn on the machine following the instructions pasted on the wall and inserted in the log book. Wait for complete initialization of microscope and Windows after logging in with your TLL username and password. Double click on: (A) The LAS X configuration screen will appear: Configuration: Machine.xlhw must be selected. - Page 9 • Then select, Dye assistant to set up your laser pathway. 1. Click to add the number of channels you would like to image. 2. Click to select the dyes you are using for each channel. 3. Then select the type of detector (HyD or PMT) you would like to image with your dyes.
-
Page 10: Setting Laser & Detector Configuration
4.6 Setting Laser & Detector configuration • Based on the no. of dyes, you have selected, it will give you the total no. of seq. (E.g., if you have selected 3 dyes in sequential mode, you will have 3 seqs corresponding to each dye.) •... -
Page 11: Using The Acquisition Tab
• If you want to also acquire a brightfield image activate the Transmission channel. Ensure that there is at least one active laser emission line when you are using this channel 4.7 Using the Acquisition tab Select the Acquisition tab, in which you can set the parameters for your imaging: •... -
Page 12: Image Adjustments - Setting The Gain And Offset Properly
Click on Live to view a live image. You can now adjust parameters while checking the result directly on the monitor. Be careful though, if you spend too long doing this you will photobleach your sample. Start focusing your sample and then center it moving the stage. Now, based on the image, you can adjust the brightness in the Acquire and Acquisition tabs: •... -
Page 13: How To Do A Z Stack For A 3D Image
power, until blue pixels just disappear. Decrease Offset until you have a dusting of green pixels in the background where there are no cells. When using the HyD detectors, gain is set at default 100 reduce it or the laser power to prevent oversaturation. -
Page 14: Saving Images And Reusing Settings
4.10 Saving images and reusing settings Taking snapshots: • Right click on the image you would like to take a snapshot of. • Click on Snapshot to get an RGB image of the desired image. To store an image: • Select the Projects tab and it will list the images you have acquired (either with the Capture Image or Start buttons. -
Page 15: Switching Off Protocol
4.11 Switching OFF Protocol Check through TLL microscopy resource booking if there is a user immediately after you. If there is a user immediately after you, leave the system on and log off the PC. Otherwise switch off the system. (a) Save your images through TLL common drive folder. -
Page 16: Troubleshooting
5. Troubleshooting Issue Explanation & Remedial steps White Light Laser Error occurred with the wavelength setting system (AOBS). The does not emit laser AOBS is part of the laser scanning module (LSM). radiation. Confirm that: • White Light Laser module interlock is set to ON. •... - Page 17 • Switch on the argon laser • Open LAS X program • Confirm laser emission • Gating function for removing autofluorescence photons only works for pulsed lasers (WLL). It will not work for continuous mode argon lasers. No signal viewed from Check that your sample does actually have the signal using the the sample Wide Field eyepiece.
-
Page 18: Troubleshooting Appendix
5.1 Troubleshooting Appendix Switches (under computer terminal) Power schematic diagram of the SP8 Last Updated on Sep 2021...
Need help?
Do you have a question about the TCS SP8 and is the answer not in the manual?
Questions and answers