
Related Manuals for POLMAR DB-2


Summary of Contents for POLMAR DB-2
- Page 1 DUaL BaND DUaL BaND traNsceiVer manuale d’uso User’s manual importato e distribuito da Polmar srl...
- Page 2 Attuale nella progettazione e pratico nell’uso, ha una funzionalità stabile. Il progetto è stato sviluppato per soddisfare le esigenze utente sulla qualità e fa- cilità d’uso. Siamo certi che vi soddisferà strutturalmente e nelle prestazioni. Questo manuale è relativo al modello DB-2.
- Page 3 FUNzioNaLità PriNciPaLi • Due bande, doppio schermo, doppio “standby”. • Compatto, assicura operatività facilitata. • Annunciatore vocale in lingua inglese. • Etichetta canale editabile. • Funzionalità “Dual Watch”, doppio ascolto. • Funzionalità VOX. • Scansione CTCSS / DCS. • Selezione larghezza banda larga / stretta. • Tono 1750 Hz.
-
Page 4: Table Of Contents
sommario Suggerimenti d’uso Disimballo e verifica contenuto Precauzioni durante la carica Carica batteria Installazione accessori Descrizione comandi Schermo LCD Modalità operativa Guida base operativa Scorciatoie operative Operatività tasti numerati Modo impostazione Menù Descrizione ed impostazione passi menù Specifiche... -
Page 5: Suggerimenti D'uso
sUggerimeNti D’Uso Raccomandiamo di leggere interamente questo manuale d’uso a prevenire l’insor- gere di possibili problemi. • Rispettare i regolamenti locali sulle radiocomunicazione, ad evitare d’essere per- seguiti a termine di legge. • Prima di entrare in ambienti contenenti esplosivi o infiammabili, spegnere la radio. • Non sostituire o caricare la batteria in ambienti contenenti esplosivi o infiammabili. • Prima di entrare in zona con detonatori o mine, spegnere la radio. • Non usare la radio se l’antenna è... -
Page 6: Disimballo E Verifica Contenuto
DisimBaLLo e VeriFica coNteNUto Prima di iniziare ad usare il ricetrasmettitore DB-2 verificare che la confezione con- tenga le parti di seguito elencate. Qualora mancasse qualcosa, rivolgersi al Rivenditore. Parti in dotazione • Apparato DB-2 • Antenna • Pacco batteria Li-ion • Caricabatteria • Cinghiello • clip da cintura • Manuale utente... -
Page 7: Precauzioni Durante La Carica
PrecaUzioNi DUraNte La carica Il compatto pacco batteria in dotazione al DB-2 è agli ioni di litio, “Li-ion” ad alta efficienza: 3.7 V capacità 1300 mAh. La vita utile, con normale uso, supera i 500 cicli di carica, dopodiché le prestazioni tenderanno a diminuire. Un pacco batteria molto usato, che presenta una autonomia di carica ridotta, deve essere sostituito con identico tipo e modello, l’uso di altre batterie può... -
Page 8: Carica Batteria
1) carica con il solo caricabatteria Si può eseguire il ciclo di ricarica collegando il caricabatteria direttamente al DB-2, tramite la presa EXT DC, vedi figura. 2) carica tramite il cavo di programmazione (opzionale) Se si dispone di un PC si può caricare la batteria del ricetrasmettitore con il cavo di collegamento/programmazione opzionale. - Page 9 suggerimenti • La batteria non viene resa carica dalla fabbrica, prima di poterla utilizzare deve essere caricata. • Eseguendo due o tre cicli di carica / scarica, si porta la batteria nelle migliori condizioni di resa. Se la carica residua batteria è ridotta, caricarla, o sostituirla con un’altra.
-
Page 10: Installazione Accessori
iNstaLLazioNe accessori installazione del pacco batteria 1. Far scivolare il blocco copertura batteria in posizione di libero, poi far scorrere la copertura in direzione fig. 1, a rimuoverla. 2. Inserire la batteria in dotazione nel vano, prestando attenzione al verso, fig. 2. Fig. 1 Fig. 2 Bloccato Sbloccato... - Page 11 3. Applicare il coperchio batteria, poi porre il suo blocco in posizione di bloccato. Fig. 3 Si dovrebbe prestare attenzione alle conseguenze ambientali derivanti dalla eli- minazione delle batterie; seguire le norme vigenti in materia di smaltimento ATTENZIONE - Pericolo di esplosione se la batteria è sostituita in modo non cor- retto.
- Page 12 4. installazione antenna L’antenna in dotazione presenta un’ottima resa in banda VHF o UHF. Per installare l’antenna bisogna avvitarla sul connettore del ricetrasmettitore, te- nendola per la base, fino al serraggio. Non applicare una coppia eccessiva. Per togliere l’antenna, tenerla per la base e svitarla (verso antiorario). Note • Mai passare in trasmissione in assenza d’antenna. •...
- Page 13 installazione fermaglio cintura Allineare le due prese del fermaglio cintura nelle sedi previste sulla radio. Fissarle tramite le due viti M 2.5 x 5 in dotazione. Per rimuoverlo, svitarle. Fig. 6 installazione microfono / altoparlante esterno Rimuovere la copertura della presa microfono / alto- parlante sulla radio ed inserire la spina jack, come rap- presentato in fig. 7.
- Page 14 applicare il cinghietto da polso Inserire il laccio nel foro dedicato, presente sul dorso della radio. Fig. 8...
-
Page 15: Descrizione Comandi
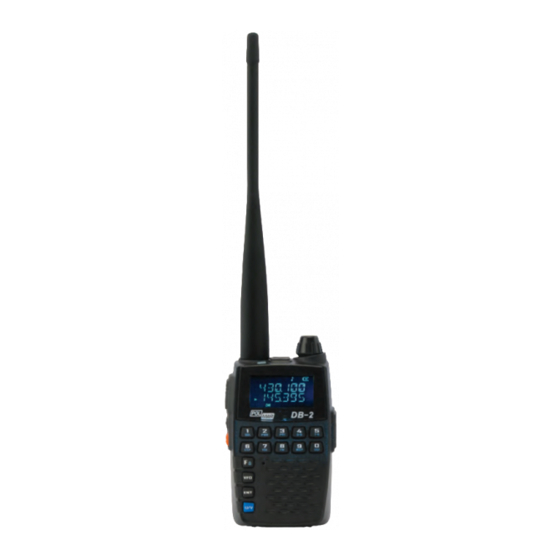
DescrizioNe comaNDi MIC/SP INTERRUTTORE/SINTONIA Questa presa è per Per accendere / spegnere il ri- collegare un microfono/ cetrasmettitore tenere premuto auricolare esterno. per 3” questo comando. Si usa anche per variare la frequenza sintonizzata, selezione passi menù e regolazione volume. ANTENNA Collegare a questa presa l’antenna in dotazione. - Page 16 TASTO PTT Premere questo tasto per passare in trasmissione, terminata, rilasciarlo per tornare in ricezione. ALIMENTAZIONE ESTERNA TASTI MULTIFUNZIONALE Su questa presa inserire Impostazione iniziale: spina alimentazione tasto nero: Monitor, esterna (in CC) e cavo 1) Premerlo per forzare l’apertura programmazione. dello squelch. 2) Per regolare il volume, tenerlo premuto poi ruotare il comando di sintonia...
-
Page 17: Schermo Lcd
schermo LcD All’accensione, sullo schermo LCD, appaiono diverse icone. Nella tabella seguente si riporta il significato. Riporta la frequenza di lavoro corrente, il numero canale o il passo menù. Riporta il numero canale corrente o il passo menù, se la radio opera in modo MR (memoria). - Page 18 Icona Descrizione Blocco tastiera Numero canale corrente, in modo MR Spegnimento automatico Tono cicalino Spostamento negativo Spostamento positivo CTCSS Selezione menù Monitoraggio contemporaneo segnale, sia in modo VFO, sia MR Potenza ridotta Funzionalità VOX Indicazione carica residua batteria Attivazione / disattivazione radio FM Ricezione canale prioritario mentre si riceve un segnale o in scansione...
-
Page 19: Modalità Operativa
Se è attivata l’opzione etichetta, appare il nome assegnato al canale. Consultare il paragrafo dedicato nella sezione menù modo Fm Il DB-2 copre in ricezione anche la banda riservata alla radio diffusione FM: 88.00 – 108.00 MHz. Per impostare la gamma in scansione e memorizzare le stazioni preferite, consultare il paragrafo “scorciatoie operative”, passo 8. -
Page 20: Guida Base Operativa
1. Verificare che il pacco batteria sia inserito così come l’antenna. 2. Premere il comando ACCENSIONE / SINTONIA per 3”. 3. Per spegnere il DB-2 premere il comando ACCENSIONE / SINTONIA per 3” Nota Se all’accensione non viene riprodotto l’annuncio “POWER ON”, la funzionalità ci- calino potrebbe essere stata disattivata, vedere punto 9 “scorciatoie operative”. - Page 21 Blocco tastiera A prevenire variazioni accidentali di frequenza, è prevista la funzionalità di blocco tasti, che si può attivare manualmente o automaticamente. Consultare il passo 22 del menù. 1. Passare in modo menù premendo [ ] e [ 2. Selezionare il asso 22: KEY LK, ruotando la manopola di sintonia. 3.
- Page 22 (via software) Il DB-2 dispone di due tasti multifunzionali, entrambi prevedono le stesse opzioni operative. Tramite il programma d’impostazione si può impostare la funzionalità assegnata a questi, tra quelle previste. A Nessuna. B R egolazione monitor e volume (Default: tasto multifunzionale nero). Quando di assegna questa funzionalità ad un tasto laterale, tenendolo premuto si passa in monitoraggio, il volume audio è...
-
Page 23: Scorciatoie Operative
scorciatoie oPeratiVe Per velocizzare alcuni comandi si può usare il tasto [ ] in combinazione con un altro. 1. Regolazione soglia squelch Premendo il tasto [ ] ed il tasto numerico [ ] si accede alla regolazione livello soglia squelch, da 0 a 9, ruotando la manopola di sintonia. 2. - Page 24 [ ] e [ In modo radio FMW il DB-2 può monitore la ricezione in banda amatoriale. Se si riceve una chiamata mentre si è in modalità FMW, il ricetrasmettitore commuta temporaneamente nel modo FM. Al termine della chiamata, trascor- si 5”, automaticamente l’apparecchio torna in modo ricezione FMW.
-
Page 25: Operatività Tasti Numerati
10. Scansione Premendo il tasto [ ] ed il tasto [ ] si avvia la scansione. Per invertire la direzione ruotare la sintoni. La scansione si può avviare in modo VFO, MR e CH. 11. Memorizzazione canale Premendo il tasto [ ] ed il tasto numerico [ ] per memorizzare su un canale della memoria, richiamabile direttamente dalla tastiera o ruotando la... -
Page 26: Modo Impostazione
moDo imPostazioNe Passo Etichetta e funzionalità Valori disponibili TX_SEL (trasmissione priorità) BUSY / EDIT APRO (modo voce) OFF / COMP / SCRM BCLO (blocco canale occupato) OFF / ON W/N (banda larga / stretta) WIDE / NARROW TAIL (eliminazione tono fine TX) OFF / ON SCAN (lista scansione) ADD / DEL OFFSET (spaziatura frequenza) - Page 27 Passo Etichetta e funzionalità Valori disponibili SCANS_S (selezione modo scansione) CO / TO / SE SCAN_V (impostazione velocità scansione) 100, 150, 500 mS APO_SW (spegnimento automatico) OFF / 30 - 180 S RX_ALT (ricezione avviso emergenza) OFF / ON KEY_LK (modalità blocco) AUTO / MANUAL VOX_LV (regolazione livello VOX) 1 - 9...
-
Page 28: Menù
meNù Premendo [ ] nella parte inferiore sinistra dell’LCD appare l’indicazione “F”, a questo punto per entrare nel sistema menù, premere [ ], a schermo appare l’in- dicazione “MENU”. Selezionare il passo d’interesse ruotando la manopola di sintonia, poi premere ] per accedere nella impostazione di questo. -
Page 29: Descrizione Ed Impostazione Passi Menù
DescrizioNe eD imPostazioNe Passi meNù 1. Trasmissione priorità (TX_SEL) Funzione: con il DB-2 è possibile trasmettere in banda secondaria anche se si sta lavorando in banda operativa. Impostazione iniziale EDIT. EDIT: trasmissione in banda operativa. BUSY: trasmissione sull’ultima banda utilizzata per comunicazioni. 2. Modo voce (APRO) OFF: manipolazione voce esclusa. COMP: compressione / espansione voce. Blocco canale occupato (BCLO) ON: blocco su canale occupato attivo. OFF: funzionalità disattivata. 3. Blocco canale occupato (BCLO) ON: Blocco su canale occupato attivo OFF: Funzionalità disattivata 4. Selezione larghezza banda larga / stretta (W/N) - Page 30 6. Lista scansione (SCAN) Questa funzione è disponibile solo in modo memoria, serve ad aggiungere o togliere dalla lista scansione il canale memoria corrente. Entrati in questo passo, tramite la sintonia selezionare tra aggiungere “ADD” o togliere “DEL”, poi confermare la selezione premendo il PTT o [ ], uscire premendo [ 7.
- Page 31 9. Schermata iniziale all’accensione (OPENS) Si imposta il tipo di schermata iniziale all’accensione. OFF: normale avvio, appare subito la frequenza o il numero canale corrente. MSG: appare il messaggio che è stato impostato per l’accensione. DC: a schermo viene riportata la tensione alimentazione. 10. Impostazione messaggio accensione (MSG) Si può immettere un messaggio lungo fino a 6 caratteri personalizzato. Tramite la sintonia selezionare il primo carattere tra “0” – “9”, “A” – “Z”, “ ”, “+”, “-“, “/” e “_”. Per passare al campo carattere successivo premere [ ], per tornare indietro premere [...
- Page 32 14. Impostazione nota di chiamata (1750 Hz) abbinata al tasto PTT. Per inviare o meno la nota di apertura ripetitori a 1750 Hz quando si preme il PTT. OFF: non si trasmette il tono chiamata. ON: s i invia il tono di chiamata per un tempo impostabile da 1 a 15”. 15. Limitazione massima durata passaggio in trasmissione (TOT) Per evitare che la radio rimanga in trasmissione per un intervallo eccessivo si può...
- Page 33 18. Impostazione velocità scansione Si regola la velocità avanzamento scansione, valori disponibili da 100 a 500 mS con passo 50 mS. 19. Spegnimento automatico (APO_SW) Entrati in questo passo, tramite la sintonia impostare il temporizzatore “APO”, poi confermare la selezione premendo il PTT o [ ], uscire premendo [ In assenza di operatività, trascorso il tempo impostato, la radio si spegnerà...
- Page 34 24. Passo ricevitore radiodiffusione FM (FM_STP) Si può selezionare tra 25, 50, 100 o 200 KHz. 25. Scansione CTCSS (SK_CTS) Entrati in questo passo, premere [] per avviare la scansione subtoni, poi confermare premendo il PTT o [ ], uscire premendo [ Quando la radio riceve un segnale contente lo stesso subtono CTCSS imposta- to, la scansione entra in sosta, l’indicazione CTCSS lampeggia.
- Page 35 memorizzazioNe e caNceLLazioNe memoria registrazione in memoria In modo VFO ci si porta su una frequenza d’interesse immettendola direttamente tramite la tastiera o con la manopola di sintonia. Premere [ ] e [ ], a sinistra della indicazione di frequenza lampeggia la locazione memoria corrente (su cui verrà...
- Page 36 memorizzazioNe e caNceLLazioNe stazioNi raDioDiFFUsioNe Fm memorizzazione radiodiffusione FmW In modo FMW, premere [ ] e [ ], a sinistra della indicazione di frequenza lam- peggia la locazione memoria corrente (su cui verrà memorizzata la frequenza sin- tonizzata). Selezionare quella che si vuole impegnare immettendone direttamente il numero mediante la tastiera o ruotando la sintonia.
-
Page 37: Specifiche
sPeciFiche generali Gamma frequenza VHF: 144 - 146 MHz UHF: 430 - 434 MHz / 435 - 438 MHz FMW: 88 – 108 MHz (solo RX) Memoria 128 canali Antenna ad elevato guadagno Impedenza antenna 50 W Tensione operativa 3.7 Vcc Modalità operativa simplex Dimensioni 84 x 48 x 26 mm trasmissione Potenza uscita alta ≤2 W, ridotta ≤0.8 W Modulazione 16K0F3E banda larga, 11K0F3E banda stretta Deviazione max. banda larga < 5 KHz, stretta < 2,5 KHz Pre-enfasi 6 dB Assorbimento ≤1.5 A Deviazione QT/DST banda larga 0.5 KHz ±0.1 KHz, banda stretta 0.7 KHz ±0.1 KHz Sensibilità... - Page 40 Main Functions • Dual band, dual display and dual standby • Compact and easy to operate • Channel name editing • Dual watching function VOX function CTCSS/DCS scanning • Wide/narrow bandwidth selectable • Wide frequency coverage • 1750Hz tone • Battery capacity management • Power protection function • Programmable multifunction key • FM radio and 25 radio stations memory • PC programming and battery charging are compatible...
- Page 41 contEnts Unpacking and Checking Equipment Charging Precaution Charging Operation Installation of Accessories Radio Illustration LCD Display Working Mode Basic Operation Shortcut Operation Number Key Operation Set Menu Mode Menu Operaton Description and setting of Function Menu Specification...
- Page 42 using tips Please read the following brief instructions, non-compliance with these rules may cause danger or violate the law. • Obey the local government regulation before using this radio, improper use may violate the law and be punished. • Turn off the radio before entering flammable or explosive areas. • Do not charge or change the battery in flammable or explosive areas. • Turn off the radio before getting close to the blasting zone or detonator areas. • Do not use radio whose antenna is damaged, touching of damaged antenna will cause heat injury. • Do not attempt to open the radio; the maintenance work should be done by tech- nical expert only. • To avoid troubles caused by electromagnetic interference or electromagnetic compatibility, • please turn off the radio in places where have the banner “Do not use wireless equipment”, such as hospital and other healthcare places. • In the car with an airbag, do not put the radio within the scope of the airbag deployment.
-
Page 43: Unpacking And Checking Equipment
EquipMEnt Welcome to use DB-2 two-way radio. Carefully unpack the radio. We recommend you check the items listed in the following table before discar ding the package. If any item is missing,please contact localdealer immediately. supplied accessories: • DB-2 transceiver • Antenna • Li-ion battery pack • Battery-charger • Handstrap • Belt Clip • User’s Manual Note: The antenna frequency range please refers to the annular label at the bot- tom of antenna. -
Page 44: Charging Precaution
The supplied battery pack of DB-2 is a high-perfonnanceli-ion battery with 3.7V standard voltage, 1300mAh high capacity in a very compact package. Under non- nal use,the battery pack may be used for approximately 500 charge cycles and more, after which operating time maybe expected to decrease. If you have an old battery pack which is displaying capacity which has become diminished, you should replace the pack with a new one. Please use Polmar designated battery; other batteries can cause explosion and harm people. -
Page 45: Charging Operation
After installing the battery pack, if the battery icon shows C J, it means that the battery pack is out of power,Please charge it 1) using power adapter If you forget the charger and only have Power Adapter, you can use Power Adapter to charge the DB-2 directly, as shown in the illustration to EXT DC jack. 2) using program cable (optional) With the optional program cable it is possible to charge the battery radio through a PC. The charging situation is displayed on battery capacity indicator icon on the radio. Indicator light of charger will show charging condition. Icona State Charging blinking Completed full... - Page 46 Battery tips • The battery is not fully charged in factory, please charge before using it. • Charge and discharge the battery for two or three times, the battery capacity will reach the best condition. When the battery capacity is low, please charge or change the battery. • The battery lasts shortly even if it is fuly charged, the battery is depleted, please contact your local dealer to buy a new authentic Polmar battery.
-
Page 47: Installation Of Accessories
instaLLation oF accEssoriEs installation of Battery pack 1. Slide the battery cover latch to unlock position in direction of the arrowhead (pict. 1), then slide the battery cover toward the bottom to remove it out in direction of arrowhead (pict. 2). 2. Install the supplied battery pack into battery compartment correctly (pict.2). Picture 1 Picture 2 Locked Unlocked... - Page 48 3. Return battery cover back and slide the battery cover latch to the lock position (pict.3). Picture 3...
- Page 49 4. antenna installation The supplied antenna provides good results over VHF or UHF range of the trans- ceiver you need. To install the antenna, hold the bottom end of the antenna, then screw it onto the connector on the transceiver until it is snug. Do not over-tighten by use of extreme force.To uninstall the antenna, hold the bottom end of it and turn it counterclock- wise to remove it. Notes: • Never transmit without having an antenna connected. • When installing the supplied antenna, never hold the upper part of the antenna while screwing it onto the connector on the transceiver or you may snap the antenna. Fig. 4 Fig. 5...
- Page 50 instaLLing BELt cLip Align the two holds of belt clip and the two holes of the radios, fix them with the supplied M2.5x5 screws. Loosen the screw set to remove belt clip. Fig. 6 installing external microphone/speaker Open the cover of the mic/speaker jack and insert the mic/speaker plug. (pict. 7). Note • Using external headset of mic/speaker will affect the water tightness performance of the radio. • If the external headset is not workable, please use common headset. Presa microfono altoparlante esterno E X T Fig. 7...
- Page 51 Wrist strap installation Wear strap through the hole on the back of the radio. Pict. 8...
-
Page 52: Radio Illustration
radio iLLustration MIC/SP POWER/DIAL This jack provides connection Press and hold for 3 seconds to points for microphone,earphone. turn on and off the transceiver, also used for setting frequency, menu selections and volume adjustment. ANTENNA Connect the supplied antenna here. BUSY/TX The internal turns green during receive and turns red during transmit. SPEAKER Il microfono The internal speaker is located incorporato è here. posto in questa area. - Page 53 Press it to transmit and release it to receive after your transmission is completed. MULTIFUNCTION KEY Monitor, Tone call (1750Hz), EXT DC voltage display,emergency alert. This jack allows Default: Monitor. connection to an external 1. Press it and disable the noise DC power source and squelching. program cable 2. Press and hold it, rotate DIAL key to adjust the volume.
-
Page 54: Lcd Display
Lcd dispLay You will see various icons shown on the screen when power on. The following table can help you identify icons’ meaning which display on LCD. Displaying working frequency, channel number or function menu Displaying the selected channel number or function menu when the radio is on MR mode. - Page 55 Icons Description of functions Keypadlock Current working channel number in MR mode Auto power off Beep tone Minus shift Plus shift CTCSS Function menu for selecting Monitor the signal under both VFO and MR mode at the same time Low power VOX function Battery capacity indicator FM radio ON/OFF Priority receiving channel when signal receiving or signal scanning...
-
Page 56: Working Mode
When you have stored a memory channel at least and under VFO mode, press ] key to enter MR mode. The frequency will be indicated on the display and the channel No.will be indicated at the left top. If the transceiver display name option is “ON”, it will show the name of the channel. Please see Menu operation. channel Mode(ch) When you have stored a memory channel at least,press [ ] key and switch power on the radio, enter CH mode.Channel No.will be indicated on the display and if the transceiver display name option is wON”, it willshow the name of the channel. Please see Menu Operation. FM radio Mode DB-2 provides frequency 88.00-108.00MHz FM radio Scan frequency range and store your favorite channels, please see Shortcut Opera- tion. Menu Mode Press [ ] key + [ ] key to enter MENU mode, there are 27 items in total. Please see Menu Operation. -
Page 57: Basic Operation
Basic opEration switching power on and off 5. Be sure the battery pack is installed and connect the antenna correctly. 6. Press and hold POWER/DIAL knob for 3 seconds, a “POWER ON” voice will be heard , the current voltage will indicated on the display, then the display will resume its normal indication of the operating frequency. 7. To turn off the DB-2, press and hold POWER/DIAL again for 3 seconds. Note: If you dont hear the “POWER ON” voice when the radio power on, the Beep function may have been disabled via Shortcut Operation. Frequency adjustment The DB-2 will be operating in the VFO mode, a channelized system which allows free tuning throughout the operating band. Rotation of the POWER/DIAL knob allows turning in the pre-programmed steps established for the operating band. Clockwise rotation of the DIAL causes it toward a higher frequency, while counter-clockwise rotation will toward lower frequency. transmission 1. Press PTT switch, and speak into the front panel microphone in a normal voice level. The BUSYI TX indicator will turn red during transmission. Release PTT switch to return to the receive mode. 2. During transmission, the relative power level will be indicated at the left upper... - Page 58 Lock In order to prevent accidental frequency change, the DB-2 provides KEYPAD LOCK function, you can activate it by Manual or Auto activates it. See Menu Operation. 3. Press [ ] + [ ] keys to enter MENU mode. 4. Rotate the POWER/DIAL knob to select ITEM22: KEY LK 5. Press [ ] key to enable adjustment of this function. 6. Rotate the POWER/DIAL knob to choose between Manual and Auto. 7. When you have made your selection, press [ ] key to save the new setting and return to MENU mode. Note: • And in this mode, if you rotate POWER/DIAL knob, you will adjust the volume. • When you choose Manual Keypad Lock, press [ ] key to lock the keypad. • When the keypad is locked, the [ ] icon will be indicated on the top of LCD. • Press [ ] key again for 3 seconds to unlock it.
- Page 59 Multifunction side key operation (via software) The DB-2 provides two multifunction side keys for you. Both of them have the same options. And you can set their function via program software according to your requirement. There are six different options as below: A. None B. Monitor and volume adjustment (default: multifunctional black key) When you set this function to the side key, press and hold it, the transceiver will be into Monitor state and talking volume will be indicated on the LCD. Ro- tate the POWER/DIAL knob to adjust it as your need. C. Tone Calling (1750Hz - default: multifunctional orange key) If the repeaters in your country require a 1750Hz burst tone for access, you can set the side key to serve as a T-Call key. To access a repeater, press and hold in T-Call key for the amount of time specified by the repeater. The transmitter will automatically be activated,and a 1750Hz audio tone will be superimposed on the carrier. Once access to the repeater has been gained, you may release T-Call key and use PTT for activating the transmission. D. Emergency Alarm When set this as emergency alarm function, short press to start emergency alarm, press PTT to transmit alarm signal, then press any key to exit. Long press to start emergency alarm and transmit alarm signal, it will exit when...
-
Page 60: Shortcut Operation
shortcut opEration The users can operate the TH -UV3R rapidly via [ ] + other keys. Details are as below. 1. Squelch grade setting Press [ ] key + number key [ ] key to enter squelch grade setting :0-9 grades. Rotate the DIAL knob to adjust it. 2. High/Low power setting Press [ ] key + number key [ ] key to enter High/Low power setting. Rotate the DIAL knob to adjust and when you select Low power, a “LOW’ icon will appear at the bottom of the LCD. 3. Priority scan setting Press [ ] key+ number key [ ] key to enter priority scan setting. Note that this function Is only available under MR and CH mode. 4. Shift offset direction setting Press [ ] key + number key [ ] key to enter Shift offset direction setting... - Page 61 ] key + number key [ ] to enter frequency step setting. Rotate the DIAL knob to select 5/6.25/10/12.5/25.0/37,5/50.0/100.0KHz. 7. VOX switch on/off setting(F+7) Press [ ] key + number key [ ] to enter VOX switch on/off setting. Rotate the DIAL knob to select ON/OFF. Regarding VOX level setting please see MENU OPERATION ITEM 23. Page 36. 8. FM radio mode Press [ ] key + number key [ ] to enter FM rad io mode. A FM icon will ap- pear on the bottom of the LCD. Rotate the DIAL knob to select FM frequency or direcUy input the frequency by keypad. FM radio frequency range is 76.00-1 08.00MHz. Press [ ] key + number key ] again to exit. Under FM Radio mode, DB-2 can monitor the receiver signals. When there is a call, DB-2will exit FM radio mode temporarily and receive the call. After finish- ing the call for 5 seconds, retum back FM radio mode automatically. 9. Keypad beeper setting Press [ ] key+ number key [ ] to enter keypad beeper setting. Rotate the DIAL knob to select OFF/TONE/VOICE. 10. CTCSS/DCS setting Press [ ] key + number key [ ] to enter CTCSS/DCS setting. 1. Switch between RX and TX via [ ] key. 2. Switch between CTCSS and DCS via [ ] key. OFF->CTCSS->DCS N->DCS 1->0FF 3. Rotate the DIAL knob to select CTCSS/DCS.
-
Page 62: Number Key Operation
4. Press [ ] key to confirm and [ ] to exit. 11. Scanning function Press [ ] key+ [ ] key to start scanning function. Rotate the DIAL knob to change scanning direction. You can scan under VFO, MR and CH mode as your requirement. 12. Channel Storage Press [ ] key + [ ] key to store the channels you desired, and you can input the channel number via keypad directly. Rotate the DIAL knob to select channel number and press [ ] key to store. 13. Menu mode (F+ENT) Press [ ] key+ [ ] key to enter menu mode. See Menu Operation. nuMBEr kEy opEration Under VFO mode, you can select the frequency by number key directly. If the input number is out of band, it will prompt “ERROR”. If you input frequency is available, the transceiver will enter your desired frequency. Under channel mode, press number key to change the current channel. -
Page 63: Set Menu Mode
sEt MEnu ModE Passo Icon and Function Available Values TX_SEL (Priority Transmit) BUSY / EDIT APRO (Voice Mode) OFF / COMP / SCRM BCLO (Busy Channel Lock) OFF / ON W/N (Wide/Narrow Band) WIDE / NARROW TAIL (End-tone Elimination) OFF / ON SCAN (Scan Added) ADD / DEL OFFSET (Shift Frequency Setting) 0.000 - 99.950 MHz CH_NAM (Channel Name Setting) 0 - 9, A - Z, +, -, /, _ NAM_SW (Channel Name Displaying) OFF / ON OPENS (Power-on Display) OFF / DC / MSG MSG (Power-on Message) 0 - 9, A - Z, +, -, /, _ D_WAIT (Dual Watching) OFF / ON LAMP (Back Light Setting) OFF / ON / AUTO DC (Battery Voltage Display) CURRENT VOLTAGE 1750_S (1750 TX) OFF / 1 - 15 S TOT (Time-out-timer) OFF / 30 - 360 S RX_SAV (Battery Saving Mode) OFF / 1-1 / 1-2 / 1-3 / 1-4... - Page 64 Passo Icon and Function Available Values SCANS_S (Scan Mode setting) CO / TO / SE SCAN_V (Scan velocity setting) 100, 150, 500 mS APO_SW (Auto Power-off setting) OFF / 30 - 180 S RX_ALT (RX Alarm Setting) OFF / ON KEY_LK ((Key Lock Setting) AUTO / MANUAL VOX_LV (VOX Level Setting) (1-9) 1 - 9 VOX_DV (VOX ending delay time) 0.5, 1.0, 2.0, 3.0 S FM_STP ((FM radio Frequency Step setting) 5/6,25/10/12,5/25/37,5 50/100kHz SK_CTS (CTCSS Scan) 67.0 - 2541.0 Hz SK_DCS (DCS Scan) D023N - D754N, D023I - D0754I...
-
Page 65: Menu Operaton
MEnu opEration Press [ ], “F “will be indicated at the left bottom of the LCD. and then press [ key, LCD displays “MENU” to enter menu mode. Rotate encoder key to select the menu items, then press [ ] key to enter the desired menu. Rotate encoder key to select the desired one, then press [ ] key to confirm. During operation, press [ ] key to exit and back to the last menu, press [ ] key to exit menu mode. -
Page 66: Description And Setting Of Function Menu
Function MEnu 1. Priority Transmit (TX.SEL-MENU 2) Functions: DB-2 allows you to transmit on the sub band even if you are work- ing on the operating band. Enter Menu 2nd to select priority transmit band. Default: EDIT. EDIT: lt will transmit on the operating band. BUSY: lt will transmit on the band last talking used. 2. Voice mode (APRO) Set it through menu 2, two modes are available 1) 0FF 2) COMP: voice compander 3. Busy channel lock (BCLO) ON: busy channel lock function is on OFF: busy channel lock function is off 4. Wide/narrow bandwidth selectable (W-N) Press [ ], and then press [ ] key, rotate the POWER/DIAL knob key to select Menu 3, LCD displays “W-N”. WIDE: wide bandwidth is selected, NARROW: narrow bandwidth is selected. 5. End tone elimination (TAIL) lt can eliminate nasty sound when transmission is finished. The benefit of this function is particularly evident for those using earphone. Note: This function will only activate when other radios also turn on TAIL function. - Page 67 6. Scan added (SCAN) Press [ ], and then press [ ] key, rotate the POWER/DIAL knob key to select Menu 6, LCD displays “SACN”, press [ ] to enter and rotate the POWER/DIAL knob key to select “ADD” or “DEL”. Press PTT or [ ] key to confirm then press [ ] key to exit. This function is only available under channel mode in order to add scan function into the current channel. ADD: scan added DEL: scan deleted 7. Offset frequency (DIFFER) Press [ ], and then press [ ] key, rotate the POWER/DIAL knob key to select Menu 5, LCD displays “DIFFER”, press [ ] to enter and rotate the POWER/DIAL knob key to select the differ frequency from 00.000 MHz - 70.000MHz. Press PTT or [ ] key to confirm then press [ ] key to exit. 8. Channel name setting (CH_NAM) Channel name can be edited by users, 6 digits or letters in maximum, this function is only available under channel mode. Under CH and MR mode, press ], and then press [ ] key, rotate the POWER/DIAL knob key to select Menu 8, LCD displays “NAME”, press [ ] to enter, the first digit blinks on the screen, rotate the POWER/DIAL knob key to choose from “0”- “9” and “A”, press[ ] key to switch to next character, press [ ] key to back to last character, then press [ ] key to confirm the setting. 9. Channel name displaying (NAM_SW) Under CH and MR mode, rotate DIALNOLUME knob to swift “ON” and “OFF”...
- Page 68 10. Power on message displaying (OPEN_S) The desired power on message will be displayed when you turn on the radio 1) OFF: normal power on, displaying frequency or channel number directly 2) MSG: displaying your edited power-on message 3) DC: displaying current battery voltage 11. Power on message setting (MSG) Power on message can be edited, 6 digits or letters in maximum a. when the first digit blinks on the screen, rotate DIAUPOWER knob to choose from “0”-”9”, “A”-”Z”, “+”,”-”,”*”,”/” and “_”. Press number key 2 to switch to nest character, press number key 1 to back to last character, and press number key 0 to delete current edited one Press [ ] to confirm 12. Dual monitor (D_WAIT) OFF: dual monitor is on, radio works uncer both channels ON: dual monitor is off, radio works under only current channel 13. Backlight setting (LAMP) Press [ ], and then press [ ] key, rotate the POWER/DIAL knob key to select Menu 10, LCD displays “LAMP”, press [ ] to enter and rotate the POWER/DIAL knob key to select the mode, press PTT or [ ] key to confirm then press [ ] key to exit. ON: LCD backlight will be turned on constantly OFF: LCD backlight will be turned off constantly AUTO: Keypad and LCD backlight will be turned on upon any operation, and stay for 5 seconds. lt will be automatically turned off when there is not any operation. 14. Battery Voltage (DC) Display battery current voltage.
- Page 69 15. 1750Hz tone transmit settting (1750_S) To press [PTT] to transmit 1750Hz tone or mot OFF: not to transmit 1750Hz tone ON: to transmit 1750Hz tone and transmitting time can be adjusted and is 1-15 seconds 16. Time out timer (TOT) To prevent radio from being damaged due to continue transmission for a long time, the radio will alert you when transmission time limit is up. A transmitting time can be set between 30” to 360” or OFF . Press [ ], and then press [ ] key, rotate the POWER/DIAL knob key to select Menu 121 LCD displays “TOT”, press [ ] to enter and rotate the POWER/DIAL key to select the time, press PIT or [ ] key to confirm then press [ ] key to exit. 17. Rx power saving (RX_SAV) Press [ ], and then press [ ] key, rotate the POWER/DIAL knob key to select Menu 13, LCD displays “SAVE” , press [ ] to enter and rotate the POW- ER/DIAL knob key to select the time, press PTT or [ ] key to confirm then press [ ] key to exit. OFF: RX power saving function is off Level: 1 :1, 1 :2, 1 :3, 1 :4, the higher the level, the better the performance of RX power saving. 18. Scan mode selecting (SCAN_S) Press [ ] and then press [ ] key and rotate the POWER/DIAL knob key to select Menu 11, LCD displays “SCANS”, press [ ] to enter and rotate the POWER/DIAL knob key to select scan mode, press PTT or [ ] key to confirm then press [ ] key to exit.
- Page 70 continue scanning even the signals still exists. b. Carrier-operated scan (CO) The radio will stop scanning if there is signal and stay in the same frequency till the signal disappears. Before the radio begins scan again, there will be 15S for the radio to transmit and receive. c. Search scan (SE) The radio will stop scanning if there is signal and stay in the same frequency, and then exits. 19. Scan velocity setting (SACN_V) lt can adjust the time for scanning, the available values are 100ms, 150ms, 200ms, 250ms, 300ms, 350ms, 400ms, 450ms, 500ms. 20. Auto power off (APO_SW) Press [ ], and then press [ ] key, rotate the POWER/DIAL knob key to select Menu 14, LCD displays “AP”, press [ ] to enter and rotate the POWER/ DIAL knob key to select the tome, press PTT or [ ] key to confirm then press ] key to exit. If APO is on, the radio will be turned off when there is no operation within the pre-determined time. OFF: APO is off. 30 min, 60 min, 90 min, 120 min, 150 min, 180 min mean that the radio will turn off when there is no operation after these pre-determined time. 21. Emergency alert receiving (RX_AL T) OFF: won’t receive the emergency alert ON: receive the emergency alert 22. Lock mode (KEY _LK) AUTO: radio will be locked automatically if there is not any operation within BS MANUTO: long press [ ] for 2S to lock the keypad 23. VOX level setting (VOX_LV)
- Page 71 VOX sensibility can be adjusted by setting VOX level, Level1 is the lowest, so it needs the strongest voice. 24. VOX ending delay time (VOX_DV) The radio resumes to receiving mode soon after transmitting, your TX voice may sometimes not be sent out successfully. To avoid this problem, you can adjust VOX delay time after transmission. The available values are 1.5 sec., 1.0 sec., 2.0 sec., 3.0 sec. 25. FM radio frequency step (FM_STP) To select frequency step for FM radio, the available values are 25K, 50K, 100K, 200K. 26. CTCSS scanning (SK_CTS) Press [ ], and then press [ ] key, rotate the POWER/DIAL knob key to select Menu 19, LCD displays “SK CTS”, press [ ] to begin scanning, press PTT or [ ] key to confirm then press [ ] key to exit. The radio will stop scanning when a same CTCSS code of other radios is received, and CTCSS code blinks. Rotate the POWER/DIAL knob key to changescanning direction. 27. DCS scanning (SK_DCS) Press [ ], and then press [ ] key, rotate the POWER/DIAL knob key to select Menu 20, LCD displays “SK DCS” , press [ Cl I to begin scanning, press PTT or [ ] key to confirm then press [ ] key to exit. The radio will stop scanning when a same CTCSS code of other radios is received and DCS code blinks. Rotate the POWER/DIAL knob key to change scanning direction.
- Page 72 reset lt is used to clear all the settings. Press and hold [ ] key to turn on radio, LCD displays “RESET YES ?”, then press [ ] to enter it, you will hear first sound, which means RESET begins and it finished when you hear second sound then ra- dios enter VFO mode automatically channEL storagE and dELEtE channel storage Under VFO mode, input desired frequency by keypad directly or select one by ro- tating the knob, and then press [ ] + [ ] the digits blinks at the left top of fre- quency, press number to input desired channel directly or rotate the knob to choose desired one, then press [ ] for storage. channel delete 1. Under MR or CH mode, press [ ] to turn on the radio, LCD dis- plays “DEL?’” and channel number blinks at the right top of LCD. 2. Rotate the knob or input channel number you want to delete, then press [ to confirm 3. After delete, it will skip into next channel, if you want to delete it, repeat above operation.
- Page 73 FM radio storagE and dELEtE FM radio storage Under FMW frequency mode, press [ ] + [ ], the channel number for storage blinks at the left top of frequency. Rotate the knob or use number key to select the desired channel number, press [ to confirm. Mode selection Under FMW radio mode, press [ ] to switch between FMW memory mode and FMW frequency mode (this function is unavailable when there is not FMW memory channel) FM radio channel delete Under FMW memory mode, turn off the radio, press [ ] to turn on the radio, you will see “DEL ?” in the screen and the channel num- ber blinks. Rotate the knob to choose the channel number you want to delete, press [ ] to confirm. Repeat this operation, you can delete all...
-
Page 74: Specification
spEciFication general Frequency Range VHF: 144 - 146 MHz UHF: 430 - 434 MHz / 435 - 438 MHz FMW: 88 – 108 MHz (RX only) Channel Capacity Antenna High gain antenna Antenna impendance 50 W Working Voltage 3.7 Vcc Working Mode simplex Dimension 84 x 48 x 26 mm transmission Output Power high ≤2 W, low ≤0.8 W Modulation (W/N) 16K0F3E wide band, 11K0F3E narrow band Max. Deviation (W/N) wide < 5 KHz, narrow < 2,5 KHz Pre-emphasis Character 6 dB Emission Current ≤1.5 A QT/DQT Deviation (WIN) wide band 0.5 KHz ±0.1 KHz, narrow band 0.7 KHz ±0.1 KHz Modulation Sensitivity 8 – 12 mV Modulation Distortion <5% reception Sensitivity -122 dBM @ 12 dB SINAD Audio Power ≥0.5 W Audio Distortion <5%... - Page 75 Questo simbolo, aggiunto al numero di serie, indica che l’apparato risponde pienamente ai requisiti della Direttiva Europea delle Radio e Telecomunicazioni 1999/05/EC, per quanto concerne i terminali radio. This symbol, on the serial number seal, means that the equipment complies with the essential requirements on the European Radio and Telecommunication Terminal Directive 1999/05/EC. Questo simbolo avverte l’operatore che l’apparato opera in una banda di frequenze che, in base al paese di destinazione e di utilizzo, può essere soggetta a restrizioni oppure al rilascio di una licenza d’esercizio. Assicurarsi che pertanto la versione di apparato acquistata operi in una banda di frequenze autorizzata e regolamentata dalle vigenti normative locali.
- Page 76 Elenco dei paesi dove l’apparato può essere utilizzato...
- Page 77 Con la presente, la Polmar srl dichiara che questo ricetrasmettitore di marca Polmar mod. DB-2, è conforme ai requisiti essenziali ed alle altre disposizioni pertinenti stabilite dalla Direttiva 1999/5/CE. Hiermit erklärt Polmar srl daß sich das Gerät Polmar DB-2 in Übereinstimmung mit den grundlegenden Anforderungen und den übrigen einschlägigen Bestimmungen der Richtlinie 1999/5EG befindet. Hereby Polmar srl, declares that this apparatus brand Polmar, mod. DB-2 is in compliance with the essential requirements and other relevant provisions of Directive 1999/5/CE. Por medio de la presente Polmar srl declara que el Polmar DB-2 cumple con los requisitos y cualesquiera otras disposiciones aplicables o exigibles de la Directiva 1999/5/CE. Hierbij verklaart Polmar srl dat het toestel Polmar DB-2 in overeenstemming is met de essentiële eisen de andere relevante bepalingen van richtlijn 1999/5/EG. Hawnhekk, Polmar srl, jiddikjara li dan Polmar DB-2 jikkonforma mal-h - ti˙ g ijiet essenzjali u ma provvedimenti oh - rajn relevanti li hemm fid-Dirrettiva 1999/5/EC. Niniejszym Polmar srl os ´ wiadcza, z ˙ e Polmar DB-2 jest zgodny z zasadniczymi wymogami oraz pozostalymi...
- Page 78 inForMaZionE agLi utEnti Ai sensi dell’art. 13 del decreto legislativo 25 luglio 2005, n. 15” Attuazione delle Direttive 2002/95/CE, 2002/96/CE e 2003/108/CE, relative alla riduzione dell’uso di sostanze pericolose nelle apparecchiature elettriche ed elettroniche, nonché allo smaltimento dei rifiuti” Il simbolo del cassonetto barrato riportato sull’apparecchiatura indica che il prodotto alla fine della propria vita utile deve essere raccolto separatamente dagli altri rifiuti. L’utente dovrà, pertanto, conferire l’apparecchiatura giunta a fine vita agli idonei centri di raccolta differenziata dei rifiuti elettronici ed elettrotecnici, oppure riconsegnarla al rivenditore al momento dell’acquisto di una nuova apparecchiatura di tipo equivalente, in ragione di uno a uno. L’adeguata raccolta differenziata per l’avvio successivo dell’apparecchiatura dismessa al riciclag- gio, al trattamento e allo smaltimento ambientalmente compatibile contribuisce ad evitare possi- bili effetti negativi sull’ambiente e sulla salute e favorisce il riciclo dei materiali di cui è composta l’apparecchiatura.
- Page 79 Modello Model tecniche della stessa senza determinare dei danni. Il rivenditore e la Polmar srl si riservano di verificare le condizioni di appli- Data di acquisto (allegare copia dello scontrino o fattura)/ Purchase Date (enclose copy of receipt or invoce) cabilità...
- Page 80 Importato e distribuito da Polmar srl info@polmar.biz • www.polmar.biz...
Need help?
Do you have a question about the DB-2 and is the answer not in the manual?
Questions and answers