
Related Manuals for Viking VCSF136D


Summary of Contents for Viking VCSF136D
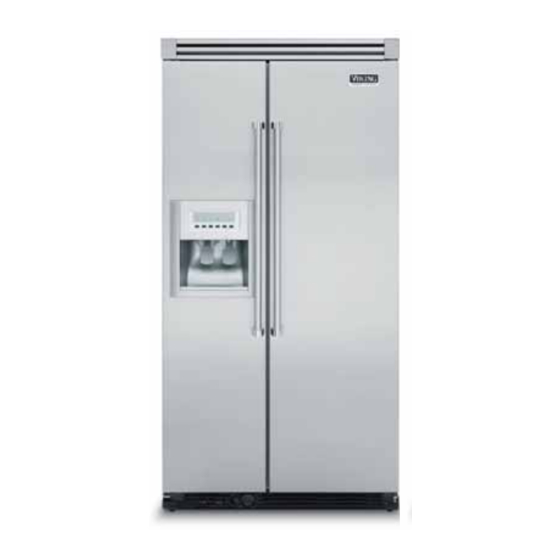
- Page 1 Service Preferred Service Manual Freestanding Side-by-Side This Base Manual covers general and Refrigerator/ limited to the following models: VCSF136D Freezer with DDSF136D Dispenser SMR-0008 December, 2010...
-
Page 2: Table Of Contents
Step 13–Dispensing Housing Heater Status....20 WIRING DIAGRAMS Step 16–Refrigerator Compartment Full Schematic ..............61 Door Switch Input ............20 Wiring Diagram ............... 62 Step 17–Freezer Compartment Door Switch Input ..20 Step 20–Water Filter Usage Rating ....... 20 © 2010 Viking Preferred Service... -
Page 3: Important Information
“DANGER”, “WARNING” or “CAUTION”. These words mean: CAUTION DANGER VIKING will not be responsible for any injury Immediate hazards which WILL result in severe or property damage from improper service personal injury or death. procedures. If performing service on your... -
Page 4: Warranty Information
(2) years from the date of original retail purchase. Viking Range Corporation, warrantor, agrees to repair or replace, at its option, any part which fails or is found to be defective during the warranty period. * Painted, decorative items and water filters are warranted to be free from defective materials or workmanship for a period of ninety (90) days... -
Page 5: Warranty Service Information
The return of the Owner Registration Card is not a condition of warranty coverage. You should, however, return the Owner Registration Card so that Viking Range Corporation can contact you should any question of safety arise which could affect you. -
Page 6: General Information
” 8 ” 8 ” ( 6 1 ( 6 1 2 ” 2 ” - 1 / - 1 / ( 6 9 ( 6 9 ” ” ( 7 6 ( 7 6 © 2010 Viking Preferred Service... -
Page 7: Warnings
When you are finished, reconnect the refrigerator to the electrical source and reset the control (Thermostat, Refrigerator or Freezer Control depending on the model) to the desired setting. © 2010 Viking Preferred Service... -
Page 8: Model - Serial Number Matrix
V C S F 1 3 6 D S S V = Professional SS=Stainless D = Designer D = Dispenser C = Commercial Door D = Desinger Door 35” Wide 1 = Series S = Side-By-Side F = Freestanding Serial Numbers S04124180 Serial Number © 2010 Viking Preferred Service... -
Page 9: Operation
33°F to 45°F (0°C to 7°C). compartments any faster. refrigerator or freezer, first check the air vents to be sure they are not blocked before adjusting the controls. © 2010 Viking Preferred Service... -
Page 10: Freezer Controls
The Max Cool setting will press both buttons at exactly the same time. remain on for 24 hours unless manually turned off. the same time for 3 seconds again to turn the feature off. © 2010 Viking Preferred Service... -
Page 11: Door Ajar Alarm
first press of a control button will only reactivate the backlight, without changing any settings. Within 30 seconds after the backlight has been reactivated, additional presses of control buttons will change the applicable settings. © 2010 Viking Preferred Service... -
Page 12: The Water Dispenser
IMPORTANT: You do not need to apply a lot of pressure to the lever in order to activate the ice dispenser. Pressing hard will not make the ice dispense faster or in greater quantities. © 2010 Viking Preferred Service... -
Page 13: Turning The Ice Maker On/Off
filter is fully engaged. Replace the storage bin on the door and push 7. Flush the water system. See “Water and Ice down to make sure it is securely in place. Dispensers.” © 2010 Viking Preferred Service... -
Page 14: Cleaning
If the environment is particularly greasy or dusty, or there is significant pet traffic in the home, the condenser should be cleaned every 2 to 3 months to ensure maximum efficiency. © 2010 Viking Preferred Service... -
Page 15: Diagnostics
It is then cycled off for 60 seconds and on for 120 seconds. This on/off cycle is repeated until the bi-metal open or the maximum defrost time (21 minutes) is reported. Note: The dispensing portion of the electronic control controls the dispenser user interface and functions related to dispensing ice and water © 2010 Viking Preferred Service... -
Page 16: Service Diagnostics Mode
To exit service diagnostics mode perform one of the following: 1. Press the “SET” or “RETURN” button for three seconds. 2. Disconnect power to the unit. 3. Unit will automatically exit diagnostic mode after 20 minutes. © 2010 Viking Preferred Service... -
Page 17: Cooling Diagnostic Service Tests
Set the compressor speed using the RC temp increase to ramp-up, and RC temp decreases to ramp-down. Press Both to activate Max Speed Min Speed Ramping up from Ramping down Min to Max from Max to Min © 2010 Viking Preferred Service... -
Page 18: Step 6-Defrost Heater/Bi-Metal
Door Open Freezer Refrigerator Press & Good Press Press Both Press Both Hold Order to activate & to activate Holiday Mode to Reset Replace Hold – – –+ ˚F / ˚C CANCEL All Indicators On © 2010 Viking Preferred Service... -
Page 19: Step 9-User Interface Pad And Button Test
Ice and water pad pressed Step 11–Dispensing Light Verify when press “RC Temp Up” or “RC Temp Down” buttons the dispenser lighting cycles between maximum to minimum output levels. Not Available Press Both to activate © 2010 Viking Preferred Service... -
Page 20: Step 13-Dispensing Housing Heater Status
Step 20–Water Filter Usage Rating Displays in two sequential flashes filter water usage rating in gallons for the water filter on digits 3 and 4 of the uI display. Press Both to activate 00/0 99/9- © 2010 Viking Preferred Service... -
Page 21: Step 21-Water Filter Time Rating
Displays water valve status on digit 4. Initiate water dispenses and verify digit 4 changes to “1”. Press Both to activate 00/0 99/9- Step 25–Water Dispensing Displays water valve status on digit 4. Initiate water dispenses and verify digit 4 changes to “1”. Press Both to activate Dispenser Valve Dispenser Valve © 2010 Viking Preferred Service... -
Page 22: Step 26-Main Control Software Version
1. Press the “SET” or “RETURN” button for three seconds. 2. Disconnect power to the unit. 3. Unit will automatically exit diagnostic mode after 20 minutes. Note: The controls will resume normal operation to indicate successful exit from service diagnostics mode. © 2010 Viking Preferred Service... -
Page 23: Service Diagnostics And Procedures
Service Diagnostics and Procedures Parts Location–LED, Receiver, and Emitter Boards LED Board Connector Receiver Board Connector Emitter Board © 2010 Viking Preferred Service... -
Page 24: Parts Location-Power Supply And Main Control Boards
Service Diagnostics and Procedures Parts Location–Power Supply and Main Control Boards (P1) Connector (P2) Connector (P7) (P8) (P10) Connector Connector Connector (P11) Connector (P5) (P3) (P4) (P1) (P13) Connector Connector Connector Connector Connector © 2010 Viking Preferred Service... -
Page 25: Component Testing
P7 (Tan/Red) to P7 (White/Black) Ice Dispenser Motor Gemini Flash P13 (Bray/Orange) to P13 (Blue) 104.9 Light Switch Gemini Flash P3 (Blue/Yellow) to P5 (Yellow/Blue) door open door closed Defrost Heater Gemini Flash P5 (Brown) to P2 (White) 22.6 © 2010 Viking Preferred Service... -
Page 26: Main Control Board Wiring Connections
Purple P7-12 Inverter Red/White P4-1 Line Black P11-7 Freezer Thermistor Orange P4-5 Neutral White P11-8 Freezer Thermistor Tan/White P4-6 Refrigerator light White/Tan P11-9 Refrigerator Thermistor Orange P4-7 Upper freezer light White/Tan P11-10 Refrigerator Thermistor Blue/White © 2010 Viking Preferred Service... - Page 27 P10-1 Power Supply Orange/Black P10-2 Power Supply Black/White P1-1 Condenser fan motor White/Red P1-2 Neutral White P1-3 Line in Black P13-1 Ice dispenser motor Blue/Black P13-2 Ice dispenser motor Gray/Orange P13-3 Light interlock switch Blue © 2010 Viking Preferred Service...
-
Page 28: Power, Emitter And Receiver Board Wiring Connections
Connection to gemini Orange/Black board P2-2 Connection to gemini BlackWhite board Receiver Board Number Description Wire Color Neutral White Light Interlock Switch Yellow Ice Maker Black/White Light Interlock Switch Blue/Yellow Emitter Board Brown/White Emitter Board Orange/Black © 2010 Viking Preferred Service... -
Page 29: Ice Maker Diagnostics
The table below shows the module voltage checks (power to ice maker). Test Points Component Line Voltage 0 Volts L – N Module Power Ok No Power T – H Bi-metal Ope3n Closed L – H Heater L – M Motor N – V Water Valve © 2010 Viking Preferred Service... - Page 30 12. Wait five seconds and open the freezer door and watch optics are good, and the receiver senses the the status LED. ice maker. No Light, unplug the refrigerator for five seconds and repeat test. © 2010 Viking Preferred Service...
-
Page 31: Parts Location-Refrigerator Compartment
Service Diagnostics and Procedures Parts Location–Refrigerator Compartment Upper Light Assembly Damper Door Switch Temperature Sensor Lower Lights Water Tank Meat/Vegetable Temperature Control Water Filter © 2010 Viking Preferred Service... -
Page 32: Water Filter
2. Slide cover to rear wall to remove cover. 2. Turn water filter cap clockwise to remove from water filter. Water Filter Cap 4. Remove/replace light bulb. 5. Reverse procedure to reinstall. 3. Reverse procedure to reinstall. © 2010 Viking Preferred Service... -
Page 33: Upper Refrigerator Light Assembly
2. Remove lower light bulb cover by pressing in tabs. Screw Tabs 3. Lower light assembly and disconnect wiring. 4. Remove/replace light bulb. 5. Reverse procedure to reinstall. 4. Replace or repair as necessary. 5. Reverse procedure to reinstall. © 2010 Viking Preferred Service... -
Page 34: Refrigerator Damper
Damper 1. Open refrigerator door and remove shelves as necessary. 2. Remove 1/4” screw securing cover. Housing Screw 4. Repair or replace damper. 5. Reverse procedure to reinstall. 3. Remove cover and disconnect wiring Connector © 2010 Viking Preferred Service... -
Page 35: Refrigerator Temperature Sensor
3. Disconnect wiring and remove sensor. 3. Disconnect tank and water lines Water Line Connector Sensor 4. Remove water tank. 4. Repair or replace sensor. 5. Reverse procedure to reinstall. 5. Reverse procedure to reinstall. © 2010 Viking Preferred Service... -
Page 36: Vegetable/Meat Temperature Control
Blade Door Switch 3. Pull switch into refrigerator compartment and 3. Remove cover. disconnect wiring. Connections 4. Repair or replace. 4. Repair or replace switch. 5. Reverse procedure to reinstall. 5. Reverse procedure to reinstall. © 2010 Viking Preferred Service... -
Page 37: Parts Location-Freezer Compartment
Service Diagnostics and Procedures Parts Location–Freezer Compartment Ice Maker Emitter Board Receiver Board Upper Light Air Channel to Refrigerator Freezer Panel Thermistor Lower Light Defrost Thermostat Upper Freezer Rails Defrost Heater Lower Freezer Rails © 2010 Viking Preferred Service... -
Page 38: Ice Maker
0VAC between test points its use if necessary. T and H (this verifies the thermostat has closed). Verify heater resistance is approximately 264 . With motor running, verify heater is heating. © 2010 Viking Preferred Service... - Page 39 fill valve or particles of sand can keep valve from slide ice maker tray out seating properly. To access the ice maker: 1. Open door 2. Open ice maker door and remove 1/4” securing screws. Screw © 2010 Viking Preferred Service...
-
Page 40: Thermal Cut Out (Tco)
(ejector blades horizontal pointing toward back of ice maker). Tabs © 2010 Viking Preferred Service... -
Page 41: Receiver Board
(see ice maker section, page 39). 2. Remove 1/4” securing screws and pull out to remove. 3. Lower control into freezer compartment and disconnect wiring. Screw Wiring Harness Air Channel 3. Reverse procedure to reinstall. © 2010 Viking Preferred Service... -
Page 42: Emitter Board
3. Lower door into freezer compartment 1. Remove Ice maker, (see ice maker section, and disconnect wiring. page 39). 2. Press tabs and remove bulb cover. Tabs Wiring 4. Remove/replace light bulb. 5. Reverse procedure to reinstall. © 2010 Viking Preferred Service... -
Page 43: Lower Freezer Light Bulb
2. Remove securing screw and remove bulb cover. Screw Screw 3. Disconnect wiring and remove sensor. 4. Remove/replace light bulb. 5. Reverse procedure to reinstall. Wiring 4. Repair or replace sensor. 5. Reverse procedure to reinstall. © 2010 Viking Preferred Service... -
Page 44: Freezer Drawer
Screw Side Frame 3. Rotate slightly and lift rail assembly to disengage from front screw. Rail Channel 2. Slide drawer out and remove. 3. Reverse procedure to reinstall. Front Screw 4. Reverse procedure to reinstall. © 2010 Viking Preferred Service... -
Page 45: Lower Freezer Rails
2. Remove upper back panel by pulling out at the 2. Remove securing screws and lower rails. bottom and then down. Upper Back Panel Screws 3. Reverse procedure to reinstall 3. Reverse procedure to reinstall © 2010 Viking Preferred Service... -
Page 46: Freezer Panel
Remove securing screws and disconnect wiring. Screw Screw Wiring 5. Reverse procedure to reinstall Note: With the freezer panel removed, the 4. Repair or replace fan. evaporator fan, defrost heater, and defrost thermostat are accessible. 5. Reverse procedure to reinstall. © 2010 Viking Preferred Service... -
Page 47: Defrost Heater
4. Remove freezer panel (see freezer panel section, page 46). Remove evaporator fan (see evaporator section, page 46). 6. Disconnect heater wiring. Defrost Heater Wiring Wiring Clips Clips 8. Repair or replace heater. 9. Reverse procedure to reinstall. © 2010 Viking Preferred Service... -
Page 48: Defrost Thermostat
3. Remove upper back panel (see upper back panel section, page 45). 4. Remove freezer panel (see freezer panel, page 46). Remove evaporator fan (see evaporator section, page 46). Disconnect wiring and un-clip thermostat. Wiring Defrost Thermostat © 2010 Viking Preferred Service... -
Page 49: Parts Location-Dispenser
Service Diagnostics and Procedures Parts Location–Dispenser User Interface Board LED Assembly Ice Guide Ice Paddle Water Fitting Water Paddle Assembly Assembly © 2010 Viking Preferred Service... -
Page 50: Dispenser Bezel
Wiring Tabs 4. From inside of bezel, remove two screws to 2. Lift bezel assembly up and out. release user interface board. Screw 5. Repair or replace user interface board. 6. Reverse procedure to reinstall. © 2010 Viking Preferred Service... -
Page 51: Dispenser Led Board
Grounding Screw Tabs 3. Disconnect wiring connector and wiring to switches. Remove securing screws to remove control bracket. Wiring 3. Repair or replace user LED board. Connector 4. Reverse procedure to reinstall. Screw Control Bracket © 2010 Viking Preferred Service... - Page 52 Screw Retainer Clip Screw Water Fitting Water Tube 7. Repair or replace. 5. Disconnect delay and remove ice guide by pulling outward. 8. Reverse procedure to reinstall. Ice Guide Delay © 2010 Viking Preferred Service...
-
Page 53: Parts Location-Rear
Service Diagnostics and Procedures–Disassembly Parts Location–Rear Power Board Control Board Condenser Water Valve Inverter © 2010 Viking Preferred Service... -
Page 54: Inverter
Remove condenser fan securing screws and disconnect wiring. Screw Condenser Fan 2. Remove Inverter securing screws and disconnect wiring. Inverter Repair or replace condenser fan. Reverse procedure to reinstall. 3. Repair or replace inverter. 4. Reverse procedure to reinstall. © 2010 Viking Preferred Service... -
Page 55: Main Control Board
1, page 54). 2. Remove screws and control box housing. Control Box Housing Screw 5. Repair or replace main control board. 6. Reverse procedure to reinstall. 3. Lift off the housing cover. Housing Cover © 2010 Viking Preferred Service... -
Page 56: Water Valve
If no voltage is present, verify harness. If good, replace module. To access: Slide unit out of service. Remove securing screws and lower rear cover (see inverter section step 1, page 54). © 2010 Viking Preferred Service... -
Page 57: Troubleshooting Guide
Door seal Verify closure, replace if needed Dirty condenser Clean condenser coil Control board Verify operation Freezer too cold Temperature setting Move to medium setting Defrost thermostat Verify thermostat is closing Control board Verify operation © 2010 Viking Preferred Service... - Page 58 Clean condenser coil Condenser/evaporator fan Verify movement/operation of fan Control board Verify operation Frost on evaporator Defrost thermostat Verify thermostat is closing Evaporator fan Check connection and possible short/open condition Defrost heater Verify heater is not open © 2010 Viking Preferred Service...
- Page 59 Adjust water fill screw, level ice maker or refrigerator, reduce water pressure, or replace water valve or ice maker Leaky water valve Tighten connections or replace water valve Temperature Problems Action Freezer too warm Adjust freezer setting or repair refrigerator © 2010 Viking Preferred Service...
- Page 60 Closed thermostat (won’t open above 32˚F) Replace thermostat Thermostat out of calibration Replace thermostat Heater not staked in mold Replace ice maker Won’t cycle test with power available Replace ice maker Won’t eject ice with power available Replace ice maker © 2010 Viking Preferred Service...
-
Page 61: Full Schematic
Wiring and Schematics Full Schematic © 2010 Viking Preferred Service... -
Page 62: Wiring Diagram
Wiring and Schematics Wiring Diagram © 2010 Viking Preferred Service...
Need help?
Do you have a question about the VCSF136D and is the answer not in the manual?
Questions and answers