Table of Contents
Advertisement
Advertisement
Table of Contents

Related Manuals for Durafly Das Ugly Stik


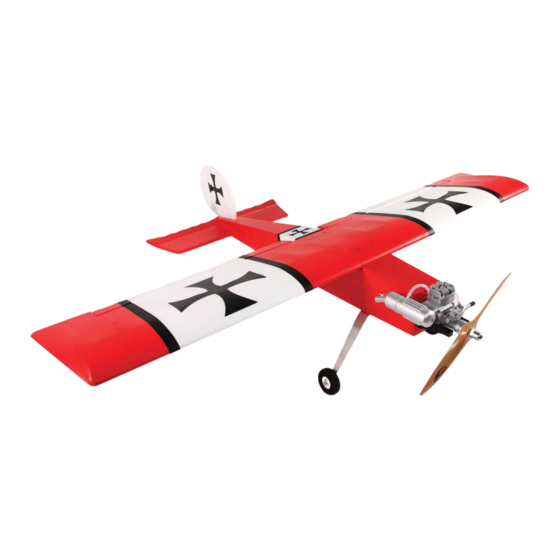
Summary of Contents for Durafly Das Ugly Stik
- Page 2 Read this instruction manual fully so as to become completely familiar with the features of this product before operating. Failure to operate this product correctly could result in damage to the product, personal property and cause serious injury. This is a sophisticated hobby product and is NOT a toy.
-
Page 3: Table Of Contents
Contents Introduction Specifications Contents of box Required to complete Assembly Setting up your model Model flying precautions Pre-flight checks Flying the Ugly Stik UglyStik tips Spare parts listing Trouble shooting Contact information... -
Page 4: Introduction
INTRODUCTION: Thank you for purchasing the Durafly Retro Series ‘Das Ugly Stik’. The Ugly Stik design has been a popular nitro sports model for almost half a century and this iconic airframe is known throughout the RC world for its exceptional flight characteristics and charming yet simple lines. -
Page 5: Contents Of Box
8. Main Wing REQUIRED TO COMPLETE MODEL: In its ‘Plug n Fly’ format Das Ugly Stik requires some additional electronic components to get it flight ready. Durafly recommends the products below for optimum performance and great value. Available at hobbyking.com... -
Page 6: Assembly
ASSEMBLY: 1. Locate the bag marked ‘Aileron’ and install aileron control horns and rods for each side of the wing as shown. Ensure the servo horn is at 90 degrees to the wing when installing the control rod. 2. Now connect the supplied Y-lead to the aileron servos and set the wing aside for later. - Page 7 3. Following the illustration below, screw the remaining control horns to both the elevator and rudder control surfaces until firmly installed. PB1.7 x 10mm PB1.7 x 10mm 4. Turn the fuselage over and with the supplied bolts, secure the horizontal and vertical tail plane to the rear of the fuselage as shown, connecting the pre-installed control rods to the control horns.
-
Page 8: Landing Gear
5. With the supplied 2.6x10mm screws, attach the landing gear to the plastic plate on the underside of the fuselage. Screw down firmly to avoid any play at the mounting point. 6. Install the tail wheel up through the elevator and tighten into the metal collet with the supplied hex tool as shown. -
Page 9: Propeller
8. The final stage of assembly is to mount the propeller. Slide the prop onto the motor shaft and tighten firmly in place. Note: The Durafly logo on the prop faces outwards. -
Page 10: Setting Up Your Model
Assembly of your Durafly Ugly Stik is now complete. Before you move onto the final set-up of the model, we suggest you perform a final check on all screws, bolts and components to ensure all are secture and firmly in place. - Page 11 2. Check all control surfaces are moving in the correct direction with the applicable stick input (see below) 3. Das UglyStik handles very well in flight but requires setting up beforehand. Please follow the recommended settings below for good all round flight performance 10-18mm 10-20mm 10-20mm...
- Page 12 4. Suggested center of gravity (CG) for Das Ugly Stik is approximately 65mm from the leading edge of wing (on the aileron servo wire). With a 2200mah 3S lipo installed via the underside battery hatch and pushed as far forward as possible the model should balance at this point.
-
Page 13: Model Flying Precautions
MODEL FLYING PRECAUTIONS: crowded areas Remember to keep clear of the propeller at all times when your flight battery is connected. flight... -
Page 14: Pre-Flight Checks
PRE-FLIGHT CHECKS: 1. Always range check your model before any flight (especially when flying a new model for the first time). Follow your radio manufacturers guidelines for performing this check. 2. Check all screw/bolts and mounting points are firmly secured, including control horns and clevises. -
Page 15: Flying The Ugly Stik
FLYING THE UGLY STIK: The Durafly Retro Series Ugly Stik not only looks as good as the original, but flies just as well, capturing perfectly those excellent flight qualities that established the Ugly Stik as such a popular RC sports flyer all those years ago. -
Page 16: Uglystik Tips
If the prop is in any way damaged it must be replaced and any loose fixings must be tightened. Thank you again for purchasing the Durafly Retro Series Ugly Stik. We hope you’ll have many happy days of flying and look forward to bringing you more Durafly models in the future. -
Page 17: Spare Parts Listing
SPARE PARTS LISTING: Main wing Fuselage Horizontal stabiliser 9306000098-0 9306000099-0 9306000100-0 Vertical stabiliser Battery hatch Dummy engine 9306000101-0 9306000102-0 9306000103-0 Propeller Landing gear Accessories set 9306000104-0 9306000106-0 9306000105-0 Motor Prop nut set Sticker sheet 9306000107-0 9306000108-0 9306000109-0... -
Page 18: Trouble Shooting
TROUBLE SHOOTING: Problem Cause Solution 1. Battery is not fully charged. 1.Charge the batteries. 2. Transmitter battery low. 2. Install a full charged battery. 3. Motors not connected. 3. Check for connection between the ESC and motor. Motor does 4. The motor is damaged. 4.
Need help?
Do you have a question about the Das Ugly Stik and is the answer not in the manual?
Questions and answers