Table of Contents
Advertisement
USER'S GUIDE
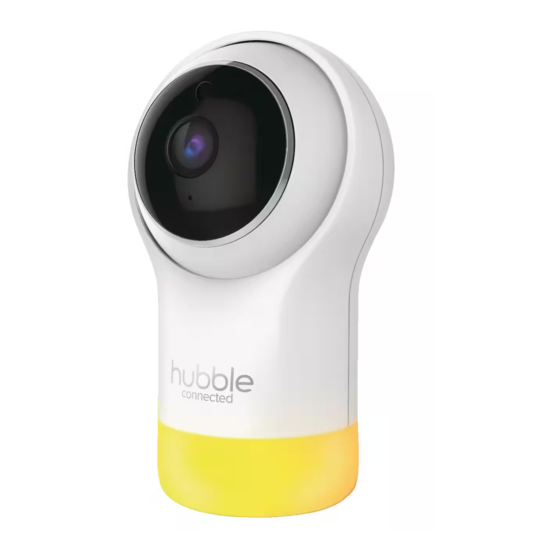
Smart HD Baby Monitor with Night Light
Nursery Pal Glow, Nursery Pal Glow-2, Nursery Pal Glow-3,
Nursery Pal Glow-4, Nursery Pal Glow-W, Nursery Pal Glow-W2,
Nursery Pal Glow-W3, Nursery Pal Glow-W4, Nursery Pal Glow-Twin,
Nursery Pal Glow-Triple, Nursery Pal Glow-Quad
The features described in this user's guide are subject to modifications without prior notice.
Advertisement
Table of Contents

Related Manuals for Hubble Nursery Pal Glow


Summary of Contents for Hubble Nursery Pal Glow
- Page 1 USER’S GUIDE Smart HD Baby Monitor with Night Light Nursery Pal Glow, Nursery Pal Glow-2, Nursery Pal Glow-3, Nursery Pal Glow-4, Nursery Pal Glow-W, Nursery Pal Glow-W2, Nursery Pal Glow-W3, Nursery Pal Glow-W4, Nursery Pal Glow-Twin, Nursery Pal Glow-Triple, Nursery Pal Glow-Quad...
- Page 2 Please retain your original dated sales receipt for your records. For warranty service of your Hubble product, you will need to provide a copy of your dated sales receipt to confirm warranty status. Registration is not required for warranty coverage.
- Page 3 Microphone 11. 7 Colors Night Light Important guidelines for installing your Nursery Pal Glow • The signal strength may also be reduced by other solid structures, like walls, or by radio or electrical equipment, such as TVs, computers, cordless or mobile phones, fluorescent lights or dimmer switches.
-
Page 4: Table Of Contents
3.4.1 Power ON and Connect the Camera ........10 3.4.2 Download HubbleClub by Hubble Connected App ..... 11 3.4.3 Sign up with Hubble on your smart device ......11 3.4.4 Add the Camera to your account ........12 4. Camera Functions ................15 4.1 Connecting the Camera Unit to power ...........15... -
Page 5: Safety Instructions
1. Safety Instructions WARNING: Strangulation Hazard: Children have STRANGLED in cords. Keep this cord out of the reach of children (more than 3ft (1m) away). Never use extension cords with AC Adapters. Only use the AC Adapters provided. Safety Instructions... - Page 6 Smart HD Baby Monitor SET UP & USE: • Choose a location for the Smart HD Baby Monitor that will provide the best view of your baby in their crib. • Place the Smart HD Baby Monitor on a flat surface, such as a dresser, desk, or shelf or mount the Unit securely using the Flexible Grip or Tripod mount screw hole on the underside of the stand.
- Page 7 • Do not use the Baby Monitor near water or allow water or other foreign substances to enter the power port or adapter. • Do not place the Baby Monitor near a heat source. • Only use the chargers and power adapters provided. Do not use other chargers or power adapters as this may damage the device and battery packs.
-
Page 8: Getting Started
2. Getting Started 2.1 Connecting the Power Supply of the Smart HD Baby Monitor • Connect the mains power to the Smart HD Baby Monitor and the other end to a suitable electrical outlet. • Only use the enclosed adapter (DC 5.0 V, 1.0 A, 5.0 W). -
Page 9: Wi-Fi® Internet Viewing
Wi-Fi Router Access your View your Camera from any Camera locally Camera compatible device remotely Hubble Service When a user tries to access the Camera, our Hubble server authenticates the user’s identity and permits access to the Camera. Wi-Fi® Internet Viewing... -
Page 10: Setup
3.3 Setup Connect the Wi-Fi® Camera to the Power Adapter, then plug into mains power. The Camera must be within range of the Wi-Fi® router with which you want to connect. Make sure the password of the router is available for entering during the in-app setup process. -
Page 11: Download Hubbleclub By Hubble Connected App
Done (fig. 2), enter your account information to sign up with Hubble. Note: If you already have a Hubble App account, please tap Log in with Hubble to go to the next steps. fig. 1 fig. -
Page 12: Add The Camera To Your Account
Camera (fig. 4) fig. 3 fig. 4 • To select your device for setting up by tapping Baby Monitoring (fig. 5). • Tap Nursery Pal Glow to add the new camera (fig. 6) . fig. 5 fig. 6 Wi-Fi® Internet Viewing... - Page 13 • The following setup instructions will appear on the screen, select your Wi-Fi network and enter “Password” (fig. 7). • Power on your camera and wait for the Red LED flashing on the camera. (fig. 8) fig. 7 fig. 8 •...
- Page 14 • It will take a few minutes for the Camera to connect to the Wi-Fi® network before showing the connection status (fig. 11). • The Camera has been successfully connected, name your Camera (fig. 12). fig. 11 fig. 12 • If connection fails, please tap Retry and repeat the steps starting from 3.4.4.
-
Page 15: Camera Functions
The Red LED will flash if the camera is not set up. (Note: To switch off the device, unplug the power supply.) • Run the Hubble App on your smart device. 4.2 Overview of the Features on Hubble App Event History •... - Page 16 Lullabies Tap to access the Melody menu and select one of the 5 pre-set melodies you wish to play on your Camera Unit. Two-way Tap to activate the function. Press the round communication button once to speak through the Camera Unit.
-
Page 17: Procedure For Resetting The Camera
5. Procedure for Resetting the Camera If your Camera is moved from one router (e.g. home) to another (e.g. Note: office) or you have Camera setup issues, then the Camera must be reset. Please reset the Camera with the following procedures: •... -
Page 18: Disposal Of The Device (Environment)
6. Disposal of the Device (environment) At the end of the product life cycle, you should not dispose of this product with normal household waste. Take this product to a collection point for the recycling of electrical and electronic equipment. The symbol on the product, user’s guide and/or box indicates this. -
Page 19: Cleaning
7. Cleaning Clean the Baby Monitor with a slightly damp cloth or with an anti-static cloth. Never use cleaning agents or abrasive solvents. Cleaning and care • Do not clean any part of the product with thinners or other solvents and chemicals –... -
Page 20: Help
8. Help Noise interference on your device • To avoid background noise or echoes, ensure that there is enough distance between your device and the Wi-Fi® Camera Unit. • Use of other 2.4 GHz products, such as Bluetooth™ systems or microwave ovens, may cause interference with this product. -
Page 21: General Information
• Damage caused by or resulting from contact with foreign substances, including, but not limited, to liquid, water, rain, humidity, perspiration, sand, dirt, and/or food; • Damage caused by or resulting from the use of Non-Hubble Smart Nursery branded or certified Products or Accessories or other peripheral equipment;... - Page 22 IS LIMITED TO THE DURATION OF THIS LIMITED WARRANTY. REPAIR OR REPLACEMENT IS YOUR SOLE AND EXCLUSIVE REMEDY AGAINST BINATONE AND Hubble Smart Nursery. IN NO EVENT SHALL BINATONE OR Hubble Smart Nursery’s LIABILITY TO REPAIR OR REPLACE YOUR PRODUCT OR ACCESSORY EXCEED THE ORIGINAL PURCHASE PRICE OF THE PRODUCT AND ACCESSORY AND BINATONE AND Hubble Smart Nursery’s TOTAL LIABILITY FOR DAMAGES ARISING FROM THIS...
- Page 23 ALL DISCLAIMERS, LIMITATIONS OF LIABILITY AND MODIFICAITONS OF WARRANTIES STILL APPLY EVEN IF THE LIMITED REMEDY OF REPAIR AND REPLACEMENT FAILS OF ITS ESSENTIAL PURPOSE. Some jurisdictions do not allow the limitation or exclusion of incidental or consequential damages, so the above limitations or exclusions may not apply to you.
- Page 24 These terms and conditions constitute the complete warranty agreement between you and BINATONE regarding the Products or Accessories purchased by you, and supersede any prior agreement or representations, including representations made in any literature publications or promotional materials issued by BINATONE or representations made by any agent, employee or staff of BINATONE, that may have been made in connection with your purchase of any Product and/or Accessory.
- Page 25 RF Exposure Compliance This equipment complies with FCC radiation exposure limits set forth for an uncontrolled environment. This equipment should be installed and operated with minimum distance 20cm between the radiator and your body. This transmitter must not be co-located or operating in conjunction with any other antenna or transmitter.
-
Page 26: Technical Specifications
10. Technical Specifications Smart HD Baby Monitor Frequency 2400 MHz to 2483.5 MHz color CMOS 2M Pixels Image sensor Operating F - 104 Temperature Power Adapter: Input 100-240Vac, 50/60Hz, 0.2A; Output: 5.0Vdc, 1.0A Specifications are subject to change without prior notice. Technical Specifications... - Page 27 Manufactured, distributed and sold by Binatone Electronics International LTD. Hubble Connected and the logo are trademarks or registered trademarks of Binatone Electronics International LTD. All rights reserved. US_EN Version 1.0 Printed in China...
Need help?
Do you have a question about the Nursery Pal Glow and is the answer not in the manual?
Questions and answers