
Related Manuals for Hubble Nursery View Deluxe


Summary of Contents for Hubble Nursery View Deluxe
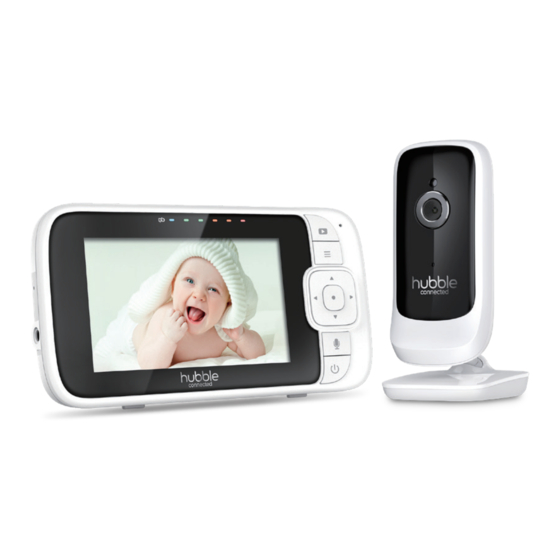
- Page 1 USER’S GUIDE 4.3" Video Baby Monitor Nursery View Deluxe, Nursery View Deluxe Twin The features described in this user’s guide are subject to modifications without prior notice.
- Page 2 Please retain your original dated sales receipt for your records. For warranty service of your Hubble product, you will need to provide a copy of your dated sales receipt to confirm warranty status. Registration is not required for warranty coverage.
- Page 3 Overview of the Parent Unit 1. Display (LCD screen) 8. Microphone Charging LED 9. MENU button RED when mains power Press to open / close the Menu connected. options. 3. Parent Unit ON/OFF LED 10. Navigation button + - < > (Green) Move Up/Down/Right/Left menu 4.
- Page 4 Parent Unit menu icons Signal Level (4 Levels) Night Vision Mode (Video also changes to Black/White) Talk Mode On Indicates the screen off timer is set Volume Level Control (8 Levels) No Baby Unit detected Battery Level Indication (4 Levels) Zoom Level Control (1X, 2X) LCD Brightness Level Control (8 Levels) Lullaby Control (5 Song Selections)
- Page 5 Overview of Your Baby Unit 1. Light Sensor 6. Speaker 7. PAIR button 2. Camera Lens 8. Power Socket 3. Infrared LEDs (x8, for night 9. Temperature Sensor vision) 4. Power/Link indicator 5. High Sensitivity Microphone Important guidelines for installing your Digital Video Baby Monitor •...
-
Page 6: Table Of Contents
Table of contents 1. Safety Instructions ................8 2. Getting Started ................... 11 2.1 Connecting the Power Supply for the Baby Unit ......11 2.2 Connecting the Power Supply of the Parent Unit ......11 2.3 Desktop Stand of the Parent Unit ...........12 2.4 Registration (Pairing) ................13 3. - Page 7 4.7 Power Saving mode .................18 4.8 View multiple cameras on screen ............18 5. Disposal of the Device (environment) ..........19 6. Cleaning ....................19 7. Help ......................20 8. General Information ................22 9. Technical Specifications ..............26 Table of contents...
-
Page 8: Safety Instructions
1. Safety Instructions WARNING: Strangulation Hazard: Children have STRANGLED on cords. Keep this cord out of the reach of children (more than 3ft (1m) away). Never use extension cords with AC Adapters. Only use the AC Adapters provided. Safety Instructions... - Page 9 • Place the Baby Unit on a flat surface, such as a dresser, bureau or shelf, or mount the Baby Unit with Hubble Grip (Not Included). • NEVER place the Baby Unit or cords within the crib.
- Page 10 Caution: There is a risk of explosion if the battery is replaced by an incorrect type. Dispose of used batteries according to their instructions. Use only the rechargeable battery pack with rating: 3.7V 1200mAh. Safety Instructions...
-
Page 11: Getting Started
2. Getting Started 2.1 Connecting the Power Supply for the Baby Unit • Insert the DC plug of the power adapter into the DC socket on the back of the Baby Unit. • Connect the other end of the power adapter to a suitable electrical outlet. -
Page 12: Desktop Stand Of The Parent Unit
2.3 Desktop Stand of the Parent Unit • The parent unit comes with a desktop stand attached to the back of the parent unit. • To place the parent unit on a desk, simply pull out the stand, as shown. Note: Place the parent unit on a flat, even surface. -
Page 13: Registration (Pairing)
2.4 Registration (Pairing) The Baby Unit is pre-registered to your Parent Unit. You do not need to register it again unless the Baby Unit loses its link with the Parent Unit. To re-register your Baby Unit, or register a new Baby Unit, follow the procedures below: Press the button and the menu bar will pop up. -
Page 14: Using The Baby Monitor
3. Using the Baby Monitor 3.1 Setting Up Place the Baby Unit in a convenient location (e.g. on a table) and point the camera lens towards the area you want to monitor. Adjust the angle of the Baby Unit's camera until you are satisfied with the image shown on the Parent Unit. Note: Do not place the Baby Unit within the baby’s reach! If there is interference with the picture or sound, try moving the units to different locations, and... -
Page 15: Parent Unit Menu Options
4. Parent Unit Menu Options 4.1 Volume Press the + or - button to adjust the volume level. icon will pop up and you can select the desired volume from level 0~8. (The default volume level setting is level 4, and level 0 is OFF.) 4.2 Brightness Press the button and the menu bar will pop up. -
Page 16: Camera Control
4.6 Camera Control 4.6.1 Add (pair) a camera Press the button and the menu bar will pop up. Press the < LEFT button or > RIGHT button until is highlighted, and the - (delete) / + (add) / (view) / (scan) menu will pop up. -
Page 17: Delete A Camera
4.6.3 Delete a camera Press the button and the menu bar will pop up. Press the < LEFT button or > RIGHT button until is highlighted, and the - (delete) / + (add) / (view) / (scan) menu will pop up. Press the + UP button or - DOWN button to select - (delete), and press the button to confirm. -
Page 18: Power Saving Mode
4.7 Power Saving mode Press the button and the menu bar will pop up. Press the < LEFT button or > RIGHT button until V is highlighted. Press the + UP button or - DOWN button to select auto video off after 5 mins, 15 mins or 30 mins (if operating on batteries only). -
Page 19: Disposal Of The Device (Environment)
5. Disposal of the Device (environment) At the end of the product life cycle, you should not dispose of this product with normal household waste. Take this product to a collection point for the recycling of electrical and electronic equipment. The symbol on the product, user’s guide and/or box indicates this. -
Page 20: Help
7. Help Display No display • Try recharging the battery pack. • Reset the Units. Reset of the PU using the Reset Pin Hole and reset of the BU by powering off and holding the pair button while powering back on. Note: There is no power switch on this unit. - Page 21 • Make sure that the Baby and Parent Units are not near other electrical equipment, such as a television, computer or cordless/mobile telephone. Move the Baby Unit or Parent Unit 5 feet away from other electrical equipment. • Use of other 2.4 GHz products, such as wireless networks (Wi-Fi® routers), Bluetooth™...
-
Page 22: General Information
• Damage caused by or resulting from contact with foreign substances, including, but not limited, to liquid, water, rain, humidity, perspiration, sand, dirt, and/or food; • Damage caused by or resulting from the use of Non-Hubble Smart Nursery branded or certified Products or Accessories or other peripheral equipment;... - Page 23 DURATION OF THIS LIMITED WARRANTY. REPAIR OR REPLACEMENT IS YOUR SOLE AND EXCLUSIVE REMEDY AGAINST HUBBLE AND Hubble Smart Nursery. IN NO EVENT SHALL HUBBLE OR Hubble Smart Nursery’s LIABILITY TO REPAIR OR REPLACE YOUR PRODUCT OR ACCESSORY EXCEED THE ORIGINAL PURCHASE PRICE OF THE PRODUCT AND ACCESSORY AND HUBBLE AND Hubble Smart Nursery’s TOTAL LIABILITY...
- Page 24 What will HUBBLE do? HUBBLE or its authorized distributor at its sole discretion will, at no charge, repair or replace any Products or Accessories that do not conform to this Warranty. In the event that replacement is necessary to remedy a defect...
- Page 25 HUBBLE or representations made by any agent, employee or staff of HUBBLE, that may have been made in connection with your purchase of any Product and/or Accessory. FCC and IC regulations (FCC Part 15)
-
Page 26: Technical Specifications
9. Technical Specifications BABY UNIT Frequency 2400 MHz to 2483.5 MHz Image sensor Color CMOS 0.3M Pixels IR LED 8 pcs Operating F - 104 Temperature Power Adapter Input 100-240V AC, 50/60Hz, 300mA; Output 5.0V DC, 1000mA WARNING Use only with provided power supply. Technical Specifications... - Page 27 PARENT UNIT Frequency 2400 MHz to 2483.5 MHz Display 4.3” diagonal LCD Brightness 8 steps Control Volume Control 8 steps Operating F - 104 Temperature Power Adapter: Input 100-240V AC, 50/60Hz, 300mA; Output 5.0V DC, 1000mA WARNING Use only with provided power supply. Battery (built-in) TMB 5C 3.7V, 1200mAh Lithium-Ion, re-chargeable...
- Page 28 Manufactured, distributed and sold by Hubble Baby(HK) Limited. All rights reserved. US_EN Version 3.0 Printed in China...
Need help?
Do you have a question about the Nursery View Deluxe and is the answer not in the manual?
Questions and answers