Advertisement
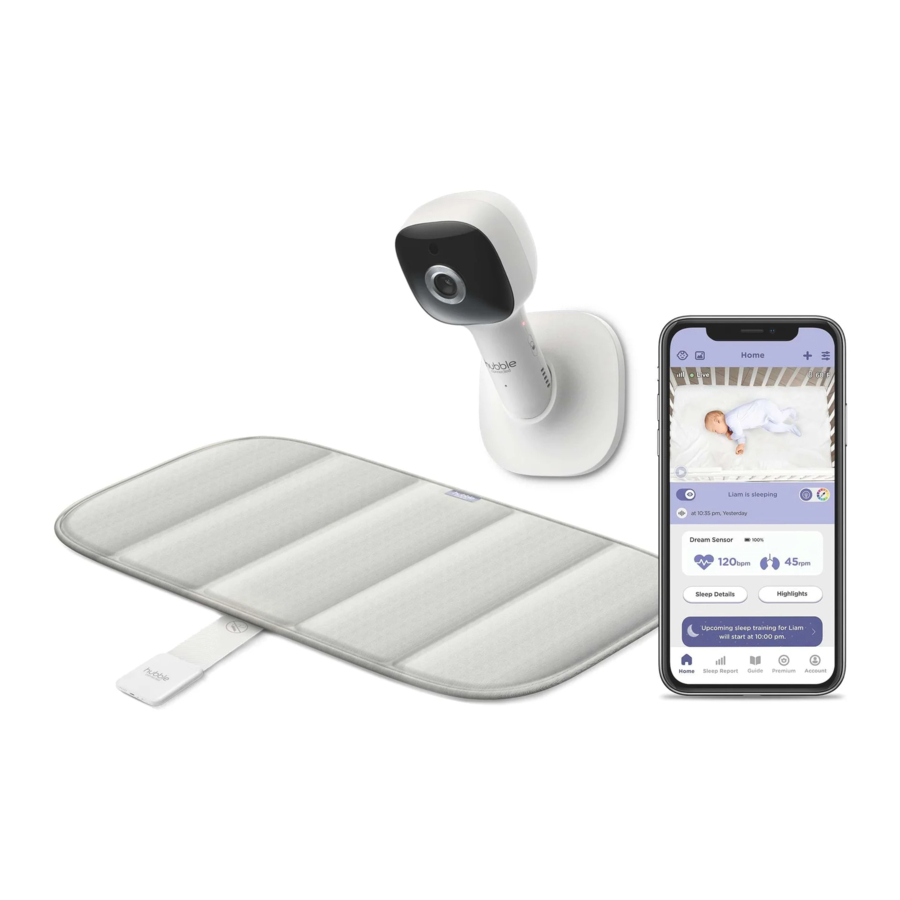
Contents Inside Bag


The product is intended for your general knowledge only and is not a substitute for professional medical advice or treatment for specific medical conditions. You should not use this product to diagnose or treat a health problem or disease without consulting with a qualified healthcare provider. Please consult your healthcare provider with any questions or concerns you may have regarding your condition.
Do not allow your infant to lay face down on this product. Do not allow any part of this product (or any fabric) to cover your infant's nose or mouth. Use with proper adult supervision only. To prevent strangulation or entanglement, the mat must be placed between the bedsheet and the mattress.
Overview of Sensor

- Buzzer
- Charging Socket
- LED indicator
- Power Button
- Sensor Body
- Sensor Belt
Setting up your Hubble Dream+
- Сharging the Sensor


- Charge the sensor for at least one hour before initial use.
- When the battery power is low, the LED will flash in red slowly; the sensor will also beep every 15 seconds until the device is being charged.
- Power On your Sensor
Power On - Press and hold the power button at the side of Sensor to turn it on, the LED indicator lights in green colour and breathing.
Power Off - Press and hold the power button at the side of Sensor, LED indicator flashes Red for 3 seconds and goes off.
![]()
- Installation of Sensor
![]()
Note: The Sensor is built in with high sensitivity force sensor, please insert it to the side pocket of mat gently. Folding of the sensor belt is not permitted. Do not put the Sensor into water.
Completely install Sensor into the mat side pocket.


Placement of the mat
To avoid serious injury or death including possible suffocation, strangulation and falls, read, understand and follow all instructions and warnings including:
Placement
Mat Must be placed in between the bedsheet and mattress

Setting up your Digital Video Baby Camera
- Connecting the Power Supply for the Camera Unit
![]()
- Insert the DC plug of the power adapter into the DC socket on the back of the Camera Unit.
- Connect the other end of the power adapter to mains power.
- The Camera Unit turns on and the power indicator lights in Blue colour.
Note
Only use the supplied power adapter (DC5V/1000mA).
- Fixing magnetic mount on the wall


- Mark the position of the screw holes on the wall.
- Install wall anchors (Not provided) suitable for the wall type and mounting screws if needed.
- Fasten the mounting screws (Not provided) on the wall.
- Position the cable behind the base as shown in the picture before attaching the base on the wall.
Connect Hubble Dream+ to your Android™ Devices / iPhone®
- Scan the QR code with your smart device and download HubbleClub by Hubble Connected App from the App Store for iOS devices or from the Google Play™ Store for Android™ devices.
![]()
![www.apple.com]()
![play.google.com]()
- Install HubbleClub by Hubble Connected App on your device.


- Open the HubbleClub by Hubble Connected App on your compatible smartphone or tablet.
- Follow the in-app instructions to create your Hubble account and connect to your device.
Please take note of the following minimum system requirements:
- Smartphones: iOS® 12.0, Android™ 8.0
Note:
You can't register on Hubble Club with an email address you've previously used on other Hubble Connected apps, please use a different email address.

Documents / Resources
References
Download manual
Here you can download full pdf version of manual, it may contain additional safety instructions, warranty information, FCC rules, etc.
Advertisement


Need help?
Do you have a question about the Dream+ and is the answer not in the manual?
Questions and answers