Table of Contents
Advertisement
Available languages
Available languages
Quick Links
FQ
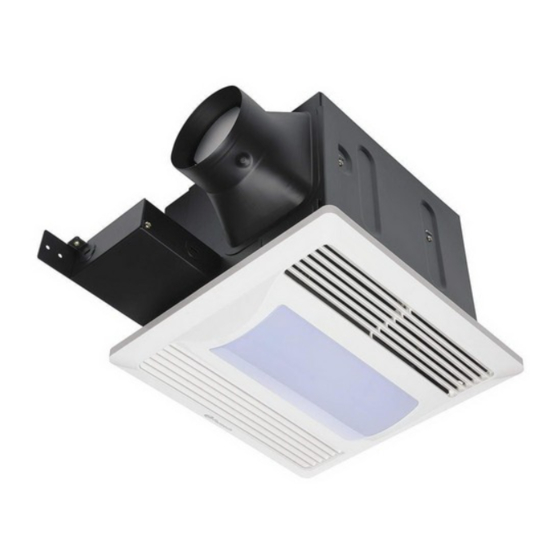
Quiet Exhaust Fans and Fan-Light
Ventilateurs extracteurs et ventilateurs éclairage silencieux
Extractores de aire silenciosos y extractores con luces
Package includes:
Fantech Exhaust Fan or Fan-Light, 1 pc
Fan Mounting Brackets, 5 pcs
Mounting screws, 8 pcs
26W CFL Type T4 (Fan-Light models only), 1 pc
4W night light (Fan-Light models only, 1 pc
L'ensemble comprend:
Ventilateur extracteur ou ventilateur à éclairage
Fantech, 1 pc
Supports de fixation, 5 pcs
Vis de fixation, 8 pcs
Lampe fluorocompacte de 26W de type T4
(modèles de ventilateurs à éclairage
seulement), 1 pc
Veilleuse de 4 W (modèles de ventilateurs à
éclairage seulement), 1 pc
El paquete incluye:
Extractor de aire o un extractor con luces
Fantech, 1 pc
Ménsulas de montaje, 5 pc
Tornillos de montaje, 8 pc
Lámpara CFL de 26 W tipo T4 (sólo con los
modelos de extractor con luces), 1 pc
Lámpara de noche de 4 W (sólo con los
modelos de extractor con luces), 1 pc
Techical / Customer Support:
United States Tel.: 800.747.1762
Installation Manual
Manuel d'opération
Manual de Instalación
To ensure quiet operation of ENERGY
STAR® qualified inline and remote fans,
each fans shall be installed using sounds
attenuation techniques appropriate for
the installation. For bathroom and general
ventilation applications, at least 8 feet of
insulated duct shall be installed between
the exhaust or supply grilles(s) and the fan.
For kitchen range hood remote ventilation
applications, where metal duct is generally
required by code, a metal sound attenuator
shall be installed between the range hood
and the fan.
Canada Tel.: 800.565.3548
Rev Date: 2016-07-27
Pour assurer un fonctionnement silencieux
Para asegurar una operación silenciosa
des ventilateurs et des ventilateurs
de los ventiladores en línea certificados
à distance qualifiés ENERGY STAR®,
ENERGY STAR®, cada ventilador debe
chaque ventilateurs doit être installé en
instalarse utilizando técnicas de atenuación
utilisant des techniques d'atténuation du
de sonido apropiadas para cada caso.
son appropriées pour l'installation. Pour
Para baños y aplicaciones comunes de
les applications de salles de bain et les
ventilación se recomienda instalar por lo
applications de ventilation générales, au
menos 8' de ducto flexible con aislamiento
moins 8 pieds de conduits flexible isolé
entre la rejilla de expulsión y/o inyección
doivent être installées entre les grilles
y el ventilador. Para campanas de cocina
d'évacuation et d'approvisionnement du
con un ventilador de extracción remoto,
ventilateur. Pour les applications de hotte
done se usa por código ducto rígido, se
de cuisinière à distance, où un conduit en
recomienda instalar un atenuador de
métal est généralement requis par le code
sonido entre la campana y el ventilador.
du bâtiment, un atténuateur acoustique en
métal doit être installé entre la hotte et
le ventilateur.
Item #: 483431
Advertisement
Table of Contents

Related Manuals for SystemAir Fantech FQ 80


Summary of Contents for SystemAir Fantech FQ 80
- Page 1 Installation Manual Item #: 483431 Rev Date: 2016-07-27 Manuel d'opération Manual de Instalación Quiet Exhaust Fans and Fan-Light Ventilateurs extracteurs et ventilateurs éclairage silencieux Extractores de aire silenciosos y extractores con luces Package includes: Fantech Exhaust Fan or Fan-Light, 1 pc Fan Mounting Brackets, 5 pcs Mounting screws, 8 pcs 26W CFL Type T4 (Fan-Light models only), 1 pc...
- Page 2 Note Warning / Information Technical Practical tip Important information note Read and Save these instructions for future reference. Before installation, to reduce the risk of fire, electric shock, or injury to persons, observe the following: Caution: 1. Use this unit in the manner intended by the 9.
- Page 3 Note Avertissement/ Information Information Conseil Note technique pratique importante Lire et conserver ces instructions. Observer les consignes suivante avant l'installation, pour réduire le danger d'incendie, de choc électrique ou de blessures: 1. N’utiliser cet appareil que de la manière correctement, couper immédiatement un circuit protégé, muni d’un interrupteur prévue par le fabricant.
- Page 4 Nota Advertencia / Información Información Consejo nota técnica práctico importante Lea y guarde estas instrucciones. Para reducir el riesgo de incendio, choque eléctrico o lesiones a las personas, tenga en cuenta lo siguiente antes de la instalación: 1. Use esta unidad solamente en la manera 8.
-
Page 5: Dimensions • Dimensiones
Dimensions • Dimensiones Dimensional information is in inches Dimensions sont exprimées en pouces Las dimensiones están en pulgadas Specifications Fan Specifications Model Power Consumption (W) Airflow (CFM) Power Motor Light (CFL) Night Light FQ 80 120V/60 Hz FQ110 120V/60 Hz FQ80FL 120V/60 Hz FQ110FL... -
Page 6: Installation
Figure 2 The ducting from this fan to the outside of the building has a strong effect on the air flow, noise and energy use of the fan. Power supply Use the shortest, straightest duct routing possible for best Housing Fan outlet protective tube performance, and avoid installing the fan with smaller ducts than... -
Page 7: Wiring Diagram
Step 3. Figure 6 To install the housing in the ceiling, position it between the joists and extend the brackets to the adjacent joists.. Mark the screw locations (at the top of the keyhole on each bracket) on the joists. The bottom edge of the housing should be flush with the bot- tom of the joist. - Page 8 Le conduit de raccordement de ce ventilateur avec l’extérieur de Canalisation Figure 2 l’immeuble a un effet important sur le débit d’air, le bruit et la de protection d'alimentation consommation d’énergie du ventilateur. Veuillez utiliser le conduit Boîtier Sortie du ventilateur électrique le plus court et le plus droit possible pour obtenir un rendement optimal, et évitez d’installer des conduits plus petits que...
-
Page 9: Schéma De Câblage
Étape 3. Figure 6 Pour installer le boîtier dans le plafond, le placer entre les solives et allonger les supports vers les solives adjacentes. Marquer l’emplacement des vis (au haut du trou sur chaque support) sur les solives. Le bord inférieur du boîtier doit affleurer le bord inférieur de la solive. -
Page 10: Instalación
El conducto que va de este ventilador al exterior del edificio Figura 2 tiene un fuerte impacto en el flujo del aire, el ruido y la energía Tubo protector del ventilador. Utilice el enrutamiento del conducto más corto y Mangueras Salida del ventilador de alimentación recto posible para obtener un mejor rendimiento, y evite instalar... -
Page 11: Diagrama De Conexiones
Paso 3. Figura 6 Para instalar la carcasa en el cielo raso, posiciónela entre las viguetas y extienda las ménsulas a las viguetas adyacentes. Marque las ubicaciones de los tornillos (en la parte superior del orificio de alineación de cada ménsula) en las viguetas. -
Page 12: Warranty
WARRANTY Five (5) Year Warranty This warranty supersedes all prior warranties URING ENTIRE WARRANTY PERIOD: END USER, AS CREDIT TO DISTRIBUTOR’S ACCOUNT WILL BE Fantech will repair or replace any part which has a factory defect in PENDING INSPECTION AND VERIFICATION OF ACTUAL DEFECT BY workmanship or material. -
Page 13: Garantie
GARANTIE Garantie de 5 ans Cette garantie remplace toutes les garanties précédentes. DURANT TOUTE LA PÉRIODE DE GARANTIE: L'UTILISATEUR FINAL L'ÉQUIPEMENT DÉFECTUEUX RETOURNÉ PAR Fantech s'engage à réparer ou à remplacer toute pièce présentant un L'UTILISATEUR FINAL, CAR LE COMPTE DU DISTRIBUTEUR NE SERA défaut d'usine en matière de qualité... - Page 14 GARANTIA Garantia de Cinco (5) Años Esta garantia de sin efecto cualquier otra garantia anterior DURANTE EL PERÍODO INTEGRO DE LA GARANTÍA: DEBERÁ SER REEMPLAZADO POR EL DISTRIBUIDOR SIN CARGO PARA Fantech reparará o reemplazará toda parte que presente un defecto en EL USUARIO FINAL, YA QUE EL CRÉDITO DE LA CUENTA DEL el material o en la mano de obra.
-
Page 15: Notes • Notas
Notes • Notas fantech... - Page 16 Fantech reserves the right to make technical changes. Fantech se réserve le droit de faire des changements Fantech se reserva el derecho de hacer modificaciones For updated documentation please refer to www.fantech.net techniques. Pour de la documentation à jour, s'il vous plaît se técnicas en cualquier momento.
Need help?
Do you have a question about the Fantech FQ 80 and is the answer not in the manual?
Questions and answers