Advertisement
Quick Links
Advertisement

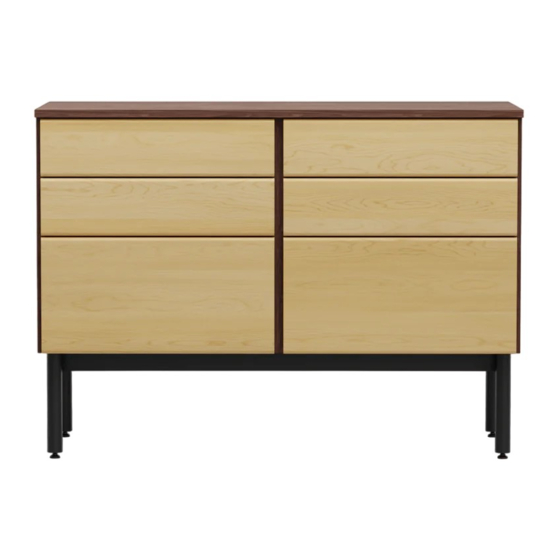
Summary of Contents for Floyd Dresser System
- Page 1 How to Assemble: The Dresser System (Two Unit)
- Page 2 Components Units Base Apron Base Leg Set 14x Bolts 4x Base Wing Nuts Pro Tip: If you’re considering a return, save your packaging! Assembly Instructions The Dresser System...
- Page 3 Components U-Brackets Hex Tool 1x Anti-Tip Kit (Not Pictured) Pro Tip: If you’re considering a return, save your packaging! Assembly Instructions The Dresser System...
-
Page 4: Assembling The Base
Step: 1 Assembling the Base... - Page 5 Leg Sets on a soft surface. Guide the threaded studs on the Base Aprons through the holes in the end of each Leg Set. Use the 4 provided Base Wing Nuts to secure the Base Aprons to the Leg Sets. Assembly Instructions The Dresser System...
- Page 6 Step: 1B Once assembled, place the Base on a level surface near its final location. Assembly Instructions The Dresser System...
- Page 7 Step: 2 Adding the Units...
- Page 8 Step: 2A With a partner, begin by placing the first Module onto the side of your choice. Both blocks on the underside of the Module should fit within the frame of the Base. Assembly Instructions The Dresser System...
- Page 9 Step: 2B Ensure that the blocks located on the underside of the Module are aligned squarely between the Aprons. Slide the Module back until it stops. Assembly Instructions The Dresser System...
- Page 10 Step: 2C With the Module now in place, insert 4 Bolts through the openings in the Base Aprons as shown. Loosely tighten each by hand. Underside Detail Assembly Instructions The Dresser System...
- Page 11 Step: 2D Repeat with Steps 2A-C to install the second Unit. Using the Hex Tool, tighten all Bolts. Assembly Instructions The Dresser System...
- Page 12 Step: 2E Once Units are in place and aligned, slide the 2 U-Brackets into the slots at top of Units. Push both brackets down firmly to install. Assembly Instructions The Dresser System...
- Page 13 Step: 2F Place the Top onto the The Dresser. Ensure the angled metal cleat on its underside fits between the opening at top of the Units. Assembly Instructions The Dresser System...
- Page 14 Step: 2G With the angled metal cleat between the opening in the Unit— push the Top back. The cleat should lock into place with corresponding cleat on top of the Unit. Assembly Instructions The Dresser System...
- Page 15 Ensure components are square and aligned. Then, insert Bolts through the marked holes in the Units and into the Top and tighten with the Hex Tool. NOTE: For Units with drawers, open top drawer to insert Bolts Assembly Instructions The Dresser System...
- Page 16 Follow the instructions included with the Anti-Tip Kit to install. Always install and use the Anti-Tip Kit. Once Unit is in place and secured to wall follow next steps to attach drawer faces or doors. Assembly Instructions The Dresser System...
- Page 17 Step: 3 Finishing the Units...
- Page 18 2 Large Drawer Drawer Faces Drawer Units Components 3 Medium Drawer Drawer Faces 3 Mixed Drawer Drawer Faces Assembly Instructions The Dresser System...
- Page 19 Screws to attach it to the Module from the inside of the Drawer. After all 4 screws are in place, tighten with a #2 screwdriver. One at a time, repeat these steps with the lower Drawers. Assembly Instructions The Dresser System...
- Page 20 Open Shelf Unit Shelf Shelf Pins Shelf Units Components 2 Door Unit Shelf Shelf Pins Doors Hinges Assembly Instructions The Dresser System...
- Page 21 Open Shelf Unit Locate and remove the Shelf and the 4 Shelf Pins. Move the Shelf Pins to your desired position, and place the Shelf atop the Pins. Assembly Instructions The Dresser System...
- Page 22 Door is aligned with the bottom of the Unit. Screw the hinge plate to side of case with 4 provided Screws and tighten using a #2 screwdriver. Repeat with reverse door to finish Unit. Assembly Instructions The Dresser System...
- Page 23 Double check that product is assembled correctly and all components Usage: are properly tightened before use. Periodically Remove all packaging before first use. re-tighten hardware. Only meant for indoor use. Assembly Instructions The Dresser System...
- Page 24 Assembly Instructions The Dresser System...


Need help?
Do you have a question about the Dresser System and is the answer not in the manual?
Questions and answers