Table of Contents
Advertisement
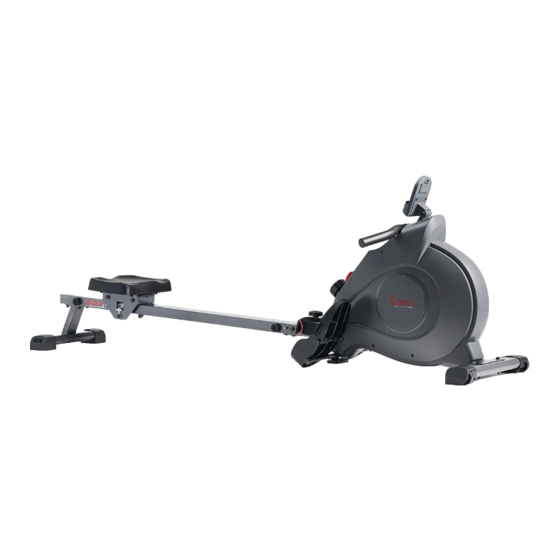
MAGNETIC ROWING MACHINE SMART
ROWER WITH BLUETOOTH
SF-RW522016
USER MANUAL
IMPORTANT! Please retain owner's manual for maintenance and adjustment instructions. Your satisfaction is
very
important
to
us,
PLEASE
DO
NOT
RETURN
UNTIL
YOU
HAVE
CONTACTED
US:
support@sunnyhealthfitness.com
or 1- 877 - 90SUNNY (877-907-8669).
Advertisement
Table of Contents

Summary of Contents for Sunny Health & Fitness SF-RW522016
- Page 1 MAGNETIC ROWING MACHINE SMART ROWER WITH BLUETOOTH SF-RW522016 USER MANUAL IMPORTANT! Please retain owner’s manual for maintenance and adjustment instructions. Your satisfaction is very important PLEASE RETURN UNTIL HAVE CONTACTED support@sunnyhealthfitness.com or 1- 877 - 90SUNNY (877-907-8669).
-
Page 2: Important Safety Information
IMPORTANT SAFETY INFORMATION We thank you for choosing our product. To ensure your safety and health, please use this equipment correctly. It is important to read this entire manual before assembling and using the equipment. Safe and effective use can only be achieved if the equipment is assembled, maintained, and used properly. -
Page 3: Pre-Assembly Check List
PRE-ASSEMBLY CHECK LIST Before you start to assemble, please make sure all parts are included. Description Spec. Qty. Description Spec. Qty. Main Frame Computer Sliding Rail Hardware Package Front Stabilizer Hardware Package Rear Stabilizer Thank You Card Seat Manual Computer Support AAA Battery 49L/R Pedal L/R... -
Page 4: Hardware Package
HARDWARE PACKAGE... - Page 5 HARDWARE PACKAGE Ordering Replacement Parts (U.S. and Canadian Customers only) Please provide the following information in order for us to accurately identify the part(s) needed: The model number (found on cover of manual) The product name (found on cover of manual) ...
- Page 6 ASSEMBLY INSTRUCTIONS We value your experience using Sunny Health and Fitness products. For assistance with parts or troubleshooting, please contact us at support@sunnyhealthfitness.com or 1-877-90SUNNY (877-907- 8669). STEP 1: Attach Front Stabilizer (No. 1) to Main Frame (No. 44) using 2 Bolts (No. 3) and 2 Washers (No.
- Page 7 We value your experience using Sunny Health and Fitness products. For assistance with parts or troubleshooting, please contact us at support@sunnyhealthfitness.com or 1-877-90SUNNY (877-907- 8669). STEP 3: Insert the Seat (No. 71) onto Sliding Rail (No. 62). Insert the Limit Axle (No. 66) into the hole on the back of the Sliding Rail (No.
- Page 8 We value your experience using Sunny Health and Fitness products. For assistance with parts or troubleshooting, please contact us at support@sunnyhealthfitness.com or 1-877-90SUNNY (877-907- 8669). STEP 6: Remove 4 Screws (No. 37) from the back of the Computer (No. 13) with the Spanner (No. 81). First insert Couputer Wire A/B (No.13A/B) though Computer Support (No.
- Page 9 ADJUSTMENTS &USAGE GUIDE CAUTION! Moving parts, such as the seat, can cut and crush. Keep hands clear of the sliding rail during use! PEDAL STRAP ADJUSTMENT The pedal straps is adjustable and can be personalized to fit the user’s foot size. NOTE: To avoid injury, please adjust the pedal straps to user’s foot before exercise.
- Page 10 FOLDING GUIDE Figure A When not in use, you can save space by folding the Sliding Rail (No. 62). Disassemble Knob (No. 47) and Washer (No. 46) and pull out the Pull Pin (No. 60). Fold the Sliding CAUTION! Rail (No. 62) to vertical angle (Figure A).
- Page 11 UNFOLDING GUIDE Figure A When in use, you can put the Sliding Rail (No. 62) down. Pull out Pull Pin (No. 60) from the hole on the Main Frame (No. 44), then remove Knob (No. 47) and Washer (No. 46) from Sliding Rail (No. 62). (Figure Slightly lay down the Sliding Rail (No.
-
Page 12: Battery Installation And Replacement
BATTERY INSTALLATION & REPLACEMENT BATTERY INSTALLATION: 1. Take out 2 AAA batteries from meter box. 2. Press the buckle of battery cover on the back of the Computer (No. 13), then remove battery cover. 3. Install 2 AAA batteries into the battery case on the back of the Computer (No. 13). Pay attention to the battery + and –... -
Page 13: Exercise Computer
EXERCISE COMPUTER KEY FUNCTIONS: ■ Pressing the MODE key to select and lock on a function for following sequence: SCANTIME COUNT DIST CAL TOTAL COUNT (TOT) SPMT/500M SCAN Pressing and hold the MODE key with 3 seconds to reset the value to zero (without TOT). MODE: ■SLEEP ... - Page 14 APP CONNECTION: 1. Scan the QR code below to download the SunnyFit app onto your mobile device. 2. If this is your first time using the SunnyFit app, follow the in-app instructions to register for your free SunnyFit account and log in. 3.
-
Page 15: Exploded Diagram
EXPLODED DIAGRAM... -
Page 16: Parts List
PARTS LIST Description Spec. Qty. Description Spec. Qty. Front Stabilizer Main Frame Φ8*Φ16*1.5 Washer Sensor Wire Bolt M8*55 Sensor Wire A 4L/R End Cap (Left / Right) Sensor Wire B Φ24*Φ12*2 Washer ST4.2*25*Φ10.5 Screw Knob Handlebar Bolt M12*160 Φ26*3*215 Foam Grip 49L/R Pedal L/R Φ28*15...


Need help?
Do you have a question about the SF-RW522016 and is the answer not in the manual?
Questions and answers