Table of Contents
Advertisement
Advertisement
Table of Contents

Summary of Contents for Sunny Health & Fitness SF-RW5612
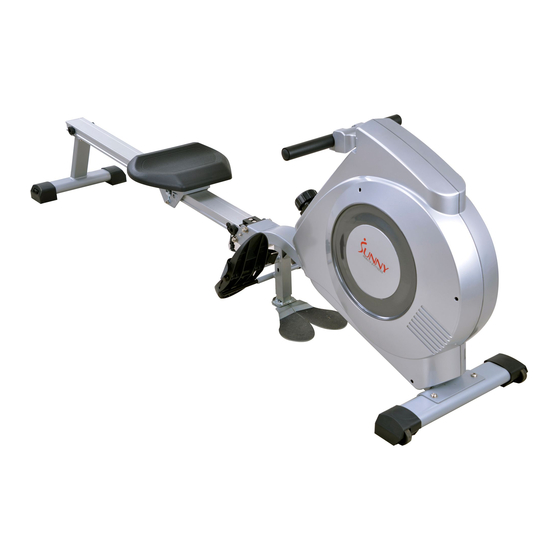
- Page 1 DUAL FUNCTION ROWING MACHINE SF-RW5612 USER MANUAL IMPORTANT! Please retain owner’s manual for maintenance and adjustment instructions. Your satisfaction is very important to us, PLEASE DO NOT RETURN UNTIL YOU HAVE CONTACTED US: support@sunnyhealthfitness.com or 1- 877 - 90SUNNY (877-907-8669).
-
Page 2: Important Safety Information
IMPORTANT SAFETY INFORMATION We thank you for choosing our product. To ensure your safety and health, please use this equipment correctly. It is important to read this entire manual before assembling and using the equipment. Safe and effective use can only be achieved if the equipment is assembled, maintained and used properly. -
Page 3: Exploded Drawing
EXPLODED DRAWING... -
Page 4: Parts List
PARTS LIST Description Spec. Description Spec. Left Chain Cover 673.7*671.2*84.6 Bearing 6300-2RS Φ4.5*26 Pull Pin C-Clip ST4.2*16*Φ8 Screw Bearing 16003-2RS PT80*40*71.5*90*6 Φ112*67.5 Adjustable End Cap Belt Wheel ST4.2*19*Φ8 ф35*d17*16 Screw Bearing Belt Wheel with Inertial Wheel One Way Bearing Φ28*1.5*440 Handlebar Bearing 6000-2RS... - Page 5 Description Spec. Description Spec. Φ38*10*M8*30 Front Stabilizer Foot Pad End Cap with PT80*40*71.5*90*6 Φ16 Protective Ring Wheel (L) 5 (L) M6*40*Φ10*2.5 Adjusting Screw Bottom Fixed Piece 41.8*15*94 Cover of Fixed Adjusting U Seat 30*10*1.5 89.4*80*26.1 Piece M6*16*Φ12 M10*1*H7*S14 Screw d6*Φ12*1.2 Bolt M6*55*S10 Washer...
-
Page 6: Hardware Package
HARDWARE PACKAGE Ordering Replacement Parts (U.S. and Canadian Customers only) Please provide the following information in order for us to accurately identify the part(s) needed: ✓ The model number (found on cover of manual) ✓ The product name (found on cover of manual) ✓... -
Page 7: Assembly Instructions
ASSEMBLY INSTRUCTIONS STEP 1: Attach the Front Stabilizer (No. 53) to the Main Frame (No. 42) using 2 Bolts (No. 51) and 2 Washers (No. 52). Tighten and secure with Allen Wrench (No. 105). STEP 2: Fix the 2 Bolts (No. 44) into the bottom hole in position A of Main Frame (No. - Page 8 ASSEMBLY INSTRUCTIONS STEP 3: Insert the Seat (No. 95) into the Sliding Rail (No. 99). Insert the Limit Axle (No. 91) into the hole on the back of the Sliding Rail (No. 99). Attach the Limit Mat (No. 86) onto the Limit Axle (No.
- Page 9 ASSEMBLY INSTRUCTIONS STEP 5: Attach the Sliding Rail (No. 99) to the bolt of the Main Frame (No. 42), then insert the Pull Pin (No. 46). Connect Trunk Wire 1 (No. 41) with the Sensor Wire (No. 90). Your rowing machine is now assembled.
- Page 10 ASSEMBLY INSTRUCTIONS This rowing machine has dual functions. You can row while seated or you can stand on the Foot Plates (No. 72 & 78) and pull the handlebar up vertically, giving you more options to exercise your arms and upper body. To use for standing exercises, turn Right Foot Plate (No.
-
Page 11: Adjustment Guide
ADJUSTMENT GUIDE CAUTION! Moving parts, such as the seat, can crush and cut. Keep hands clear of the sliding rail during use! PEDAL STRAP ADJUSTMENT The pedal strap is adjustable and can be personalized to fit the user’s foot size. MOVING THE MACHINE To move the machine, lift the rear stabilizer until the transportation wheels on the front stabilizer touch the... - Page 12 EXERCISE METER Our computer on the Dual Function Rowing Machine allows the user to tailor a personalized workout by monitoring their progress. During a workout, the computer will alternately and repeatedly display your Time, Count, Calories Burned, Total Count, and Scan (all of the above). With our easy-to-use computer, the user can efficiently track their fitness improvements from one workout to the next.


Need help?
Do you have a question about the SF-RW5612 and is the answer not in the manual?
Questions and answers