Advertisement
Quick Links
Advertisement

Related Manuals for Kuat NV 2.0


Summary of Contents for Kuat NV 2.0
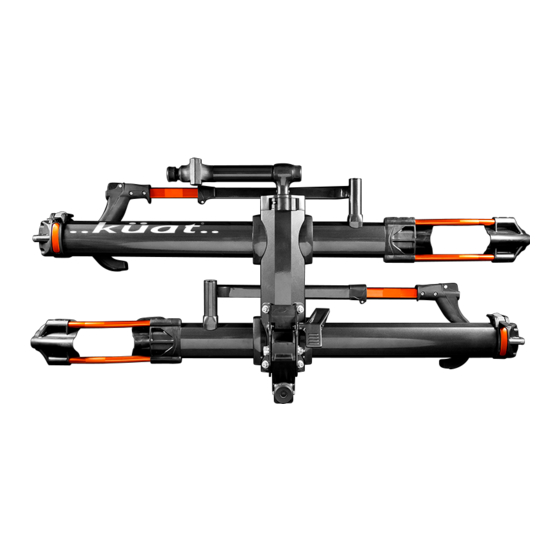
- Page 1 ™ USER GUIDE...
- Page 2 Parts: Outer Front Tire Tray Inner Front Tire Tray Outer Rear Tire Tray Inner Rear Tire Tray Trail Doc Clamp ™ Pivot Assembly Trail Doc Post ™ Included in the parts box: 6mm Allen Wrench M6 Lock Washer M8x45 Bolts 8mm Allen Wrench 4x M8 Nuts 2x Keys...
- Page 3 STEP 1. STEP 1. Open the end cap lever to release the Trail Throw the end cap lever open to release Post and pull the Trail Doc Post completely out the Trail Doc Post and pull the Trail Doc Post ™...
-
Page 4: Parts Needed
STEP 3. Align the trays with the holes on the center beam by matching the coordinating labels. Then al- ternate between bolts to tighten. Parts Needed 4x M8 Nuts 3x M8x160 Bolts NOTE: The trays with the “..Küat..” logo will be farthest from the hitch. - Page 5 STEP 4. Press the pivot lever onto the corre- sponding keyed shaft. Then tighten the bolt with the lock washer to secure the pivot lever. Parts Needed M8x45 Bolt Pivot Lever M6 Lock Washer NOTE: When positioning the pivot lever there should be about 1in (25.4mm) of space between the lever and the tray.
- Page 6 STEP 5. Thread the Trail Doc clamp onto the ™ Trail Doc post. ™ Parts Needed Trail Doc Clamp Trail Doc Post ™ ™ STEP 6. Open the lever on the end cap and insert the Trail Doc ™. NOTE: Use the end cap plug to keep debris out when the Trail Doc is not installed.
- Page 7 Using the NV Hitch Lock If your NV 2.0 uses the side-entry hitch lock system, follow all instructions labeled Section 1 to ensure proper lock usage. Side Entry If your NV 2.0 uses the rear-entry hitch lock system,follow all instructions labeled Section 2 to ensure proper lock usage.
- Page 8 Section 1 Using the Side-Entry Hitch Lock Insert the rack into the hitch receiver and align the hitch pin holes, then insert the hitch pin and lock. Push or pull the rack in the hitch receiver to remove rattle caused by the hitch pin and turn the knob until tight.
- Page 9 Section 2 Using the Rear-Entry NV Hitch Lock Insert NV 2.0 into hitch aligning hitch pin holes. Slide hitch pin through hitch, NV 2.0, and into new hitch lock. Remove dust cover access lock key core and lock hitch pin.
- Page 10 Loading bicycles: STEP 1. Rotate the tire hook outward. Press the button and extend the hook. NOTE: When not in use keep the tire hook rotated inward to avoid damage. STEP 2. Set the bicycle on the rack and place the hook as close to the bicycle’s front fork as possible, then ratchet the hook down onto the tire.
- Page 11 terrain a NOTE: PA RT NOTE: front cradle bolt with an 8mm Allen wrench (Do not front cradle bolt with an 8mm Allen wrench (Do not fully remove the bolt). Once loose, move the cradle to fully remove the bolt). Once loose, move the cradle to one of three positions;...
- Page 12 denté ou avec des bicyclettes 15,9 kg ou plus lou ds . NEEDED : NOTE: Front Tire Safety Strap must be used when driving NOTE: Fr ont Tire Safety Strap must be used when driving over rough terrain or with bicycles 35 lbs or heavier. over rough terrain or with bicycles 35lbs or heavier.
- Page 13 Using the NV Bike Lock If your NV 2.0 uses the side-entry cable lock system, follow Section 1 to ensure proper lock mechanism usage. Side Entry If your NV 2.0 uses the rear-entry cable lock system, follow Section 2 to ensure proper lock mechanism usage.
- Page 14 Section 1 Using the Side-Entry Lock System Pull the lock and cable out from the rear tire tray. NOTE: When re-inserting the lock cable into the rack there should be a positive engage between the cable and the magnet in the back of the tray. Loop the cable through the rear triangle and insert the lock tip into the lock found on the cable.
- Page 15 Section 2 Using the Rear-Entry NV Lock Slide lock assembly out of tray until cable is fully extended. When near full extension cable will catch. Pull again to fully seat cable into lock. Slide forward to dust cover access lock key core.
- Page 16 When adjusting the pivot position, always support the end of the rack before engaging the pivot lever. This will assist with the release of the pivot lever and prevent the rack from falling. NOTE: The rack can tilt down for access to the rear hatch of the vehicle.
- Page 17 Operating the Trail Doc ™ STEP 1. Open the Trail Doc clamp by rotating the ™ knob counterclockwise until the clamp springs open. STEP 2. While holding the bicycle in place rotate the knob 1/4 of a turn clockwise, to engage the ratcheting mechanism, and close the clamp.
-
Page 18: Additional Notes
Additional Notes: NOTE: When loading bicycles with 20”-24” front tires an adapter must be used. Please contact Küat Racks directly by calling toll free 1(877)822-5828, or by emailing us at info@kuatracks.com and a 20”-24” adapter kit will be provided. 20”-24” Adapter Kit Tips and Tricks •... - Page 19 • Do not take through automatic car wash. • Drive responsibly. If you have questions or problems, please contact Küat Racks directly by calling toll free 1(877)822-KUAT, or by email: info@kuatracks.com ADVERTENCIAS • Siga las instrucciones para un montaje, instalación y uso adecuados.
- Page 20 Küat Racks Limited Lifetime Warranty Küat honors the warranty on all Küat brand products for original owners of the product. Warranty is not transferable. If a Küat rack that is covered by the terms of this warranty and is determined by Küat, to be defective, Küat to the original purchase price of the product in lieu of repairing or replacing the product.
- Page 21 Küat RV Compatibility Warning Küat’s receiver hitch-mounted bicycle racks may be used with some recreational vehicles (RVs) as described below. Many types of RVs subject the rack and bicycles on it to high forces and extreme movements. As a result, Küat does not recommend using our receiver hitch-mounted products on RVs that will likely expose the rack to unacceptable conditions.
- Page 22 1.877.822.5828 info@kuat.com kuat.com v.05 kuatracks.com info@kuatracks.com 1.877.822.5828...
Need help?
Do you have a question about the NV 2.0 and is the answer not in the manual?
Questions and answers