Subscribe to Our Youtube Channel
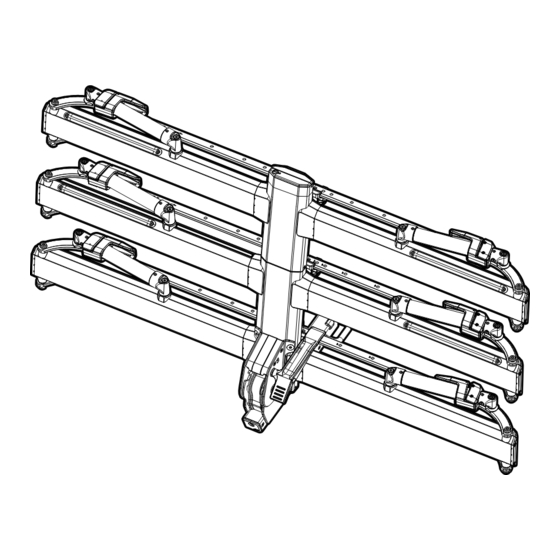
Summary of Contents for Kuat PISTON PRO X ADD-ON
- Page 1 PISTON PRO X ADD-ON ONE BIKE ASSEMBLY ASSEMBLY VIDEO HOW TO USE VIDEO http://kuat.com/pa2/as http://kuat.com/pa2/htu...
- Page 2 Parts (2) Tray (1) M10 x 165 Bolt (2) Key (1) M10 Nut (1) Cable Lock (1) Centerbeam Add-On Tools 8mm Hex Key Keep your struts clean! Just like your shifters and derailleurs, dirt, dust, and grime can work themselves into the mechanism resulting in sub-par peformance.
- Page 3 Deploying Piston Pro X Add-On arms provides easier access to tray bolt and tray nut locations. Your Piston Pro X Add-On arrived with security tabs beneath each OneTap lever to ensure safe shipping. Pull each tab upward to remove them and operate the levers.
- Page 4 Tray Assembly - Part 1 Each Piston Pro X Add-On tire tray features an EasyClip tab that will hook into a slot on the centerbeam, allowing the tire tray to hang in place during assembly. EasyClip tab Tray Angle tire tray to help guide tab as it clips into slot.
- Page 5 Hook labeled A tray to A position on centerbeam. Hook labeled B tray to B position on centerbeam.
- Page 6 Tray Assembly - Part 2 Opening Piston Pro X arms provides easier access to tray bolt and tray nut locations. With trays secured, insert M10 nut into B tray. With M10 nut in place, insert M10x165 into A tray, through centerbeam, and into M10 nut.
-
Page 7: Installation
Installation Unlock built-in 8mm security hex key and use to remove center bolt on endcap. Once bolt is removed, pull endcap from the end of main Piston Pro X centerbeam. - Page 8 Insert Add-On into Piston Pro X. For a much easier installation, we recommend inserting the Add-On with Piston Pro X already installed into your vehicle hitch.
- Page 9 Using the built-in 8mm security hex key, alternate tightening each bolt fully to 20-30Nm. (Do not exceed 30Nm)
- Page 10 Reinstall Piston Pro X Add-On endcap and tighten endcap bolt to 20-30Nm. Install and secure security hex key into the new Add-On endcap. Store original Piston Pro X Endcap and bolt in a safe place should you choose to revert the Piston Pro X back to original capacity.
- Page 11 Using Pivot System Raise and lower the rack using the lever with your foot or hand to release the pivoting hub.
- Page 12 Disassembly To revert your Piston Pro X to the 2 bike configuration, disassemble and remove Piston Pro X endcap assembly. Using the built-in 8mm security hex key, completely loosen both M10 bolts located beneath endcap assembly. Lift Add-On up and out of Piston Pro X base unit.
- Page 13 Disassembly - Continued Reinstall Piston Pro X endcap and tighten endcap bolt to 20-30Nm. Install and secure security hex key into Piston Pro X endcap.
- Page 14 OneTap Operation Open each arm by tapping the OneTap levers. Stand back and watch! Each arm will fully open automatically. Stand clear of automatic arms to avoid impact.
- Page 15 To close, simply push arms back down into stowed position. There is no need to re-engage the OneTap lever. Refer to Piston Pro X Two-Bike instructions for lock and over-center arm function.
- Page 16 Warnings PISTON PRO X ADD-ON ONE BIKE Max Weight Per Tray Max Wheelbase Max Tire Width Number Of Bikes On All 3 Trays 53 in 5 in 50 lb 22.6kg 127 mm 1346 mm WARNINGS • Follow instructions for proper assembly, installation and use.
-
Page 17: Limited Lifetime Warranty
Küat Limited Lifetime Warranty Innovations LLC. Küat honors the warranty on all Küat brand products for original owners of the product. Warranty is not transferable. If a Küat rack that is covered by the terms of this warranty and is determined by Küat to be defective, Küat will repair or replace the defective parts. - Page 18 1.877.822.5828 info@kuat.com kuat.com v.02...
- Page 19 Notes:...


Need help?
Do you have a question about the PISTON PRO X ADD-ON and is the answer not in the manual?
Questions and answers