Yealink MeetingBoard 65 Quick Start Manual
Hide thumbs
Also See for MeetingBoard 65:
- Installation manual (13 pages) ,
- Quick start manual (7 pages)
Advertisement
Available languages
Available languages
Advertisement
Table of Contents

Related Manuals for Yealink MeetingBoard 65


Summary of Contents for Yealink MeetingBoard 65
- Page 1 For more information For more information please scan please scan 65/86 MeetingBoard Guide& Video Guide& Video Floor-Mounted Quick Start Guide ( ) V1.1 Please read this guide before installation to avoid unnecessary personal injury and damage to the endpoint.
- Page 2 Table of Contents English..............1 Deutsch.............7 Français............13 Español............19...
-
Page 3: Package Contents
Rubber cap X 6 Quick Start Guide (Floor-Mounted) Endpoint Installation Take and place all components gently to avoid damage. MeetingBoard 65 MeetingBoard 86 We recommend 2 people working together to mount MeetingBoard 65, 4 people working together to mount MeetingBoard 86. - Page 4 Lock the scroll wheels Install the floor stand beam on the back of the floor stand (M6×12mm) Rubber cap BA CK B ACK BA CK BAC K B ACK BA CK B AC K BA CK * Pay attention to the size of the positioning column, do not insert it ×...
- Page 5 Install Windows OPS (Optional) The endpoint has a built-in Android OS and supports installing OPS modules to use both Windows and Android OS. Windows OPS is optional. If you have not purchased, skip this step. When installing or uninstalling OPS, make sure that the end- point is powered off.
- Page 6 Raise the endpoint, mount the endpoint into the floor stand, and tighten the screws on both sides of the legs of the floor stand * We recommend 2 people working together to mount MeetingBoard Install 65, 4 people working together to mount MeetingBoard 86 ( MeetingBoard 86 can be carried by the handles on both sides).
-
Page 7: Hardware Component Instructions
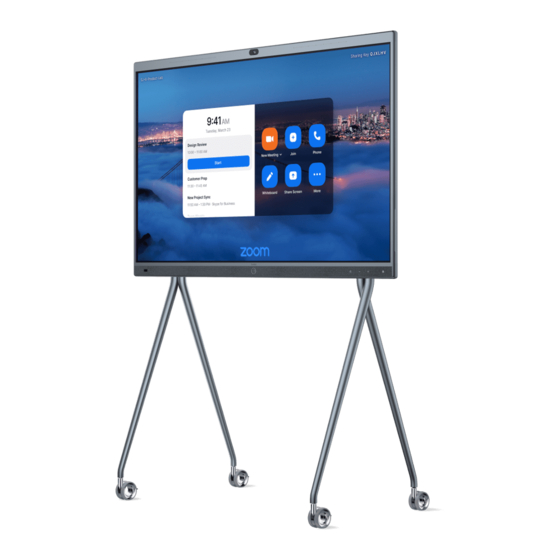
Hardware Component Instructions Microphone/LED Indicator strip Camera Lens Microphone/LED Indicator strip USB cable HDMI (USB Type cable B to Type A *Need (Bottom) Connect Yealink cable) to bring Accessories *Need to bring your Return to Home Switch Sig- Speaker NFC* (UVC、VCM、VCH,... -
Page 8: Led Status
Power on 1. Insert the end of the power cable into the power port of the endpoint. 2. Insert the power cord plug into the outlet. 3. Turn the rocker switch button on the right rear of the endpoint to "I" to turn on the endpoint. - Page 9 5 mm Inbusschlüssel Gummi Kappe X 6 Kurzanleitung (Bodenmontage) Endpunkt-Installation Behandeln Sie die Komponenten vorsichtig, um Schäden zu vermeiden. MeetingBoard 65 MeetingBoard 86 Wir empfehlen für die Montage des MeetingBoard 65 zwei und für das MeetingBoard 86 vier Personen.
- Page 10 Stellen Sie die Räder fest Installieren Sie den Stativträger auf der Rückseite des Stativs (M6×12mm) Gummi Kappe BA CK B ACK BA CK BAC K B ACK BA CK B AC K BA CK * Größe der Positioniersäule beacht- en, nicht verkehrt herum einführen ×...
- Page 11 Installieren Sie Windows OPS (optional) Das Gerät verfügt über ein integriertes Android-Betriebssystem und unterstützt die Installation von OPS-Modulen für die Verwendung von Windows als auch dem Android-Betriebssystem. Windows OPS ist optional Haben Sie diesen nicht erworben, können Sie diesen Schritt überspringen. Stellen Sie sicher, dass das Gerät bei der (De-)installation des OPS ausgeschaltet ist.
- Page 12 Sie links und ziehen Sie die Schrauben auf beiden Seit- en der Beine des Bodenständers fest Wir empfehlen für die Montage des MeetingBoard 65 zwei und für das MeetingBoard 86 vier Personen (das MeetingBoard 86 kann mit Handgriffen auf beiden Seiten getragen werden).
- Page 13 Mikrofon/LED-Anzeigestreifen Kameralinse Mikrofon/LED-Anzeigestreifen Stift HDMI- USB-Kabel Kabel (USB-Typ-B- *Muss zu-Typ-A-Ka- (Unterseite) Anschlüsse für das selbst bel) Yealink-Zubehör mitge- *Muss selbst Zurück zum Start- Signalquel- Lautsprecher (UVC, VCM, VCH bracht mitgebracht usw.) werden bildschirm / Aktivie- le ändern werden Lautstärke erhöhen rungsbildschirm Lautstärke verringern...
- Page 14 Stromversorgung an 1. Stecken Sie das Stromkabel in den entspre- chenden Anschluss des Geräts ein. 2. Stecken Sie den Stecker des Stromkabels in die Steckdose. 3. Stellen Sie den Kippschalter rechts auf der Rückseite des Geräts auf „I“, um es einzu- schalten.
-
Page 15: Contenu De L'emballage
Installation du point de terminaison Manipulez et placez tous les composants délicatement pour éviter tout dommage. MeetingBoard 65 MeetingBoard 86 Nous recommandons d’effectuer le montage du MeetingBoard 65 à 2 personnes, et le montage du MeetingBoard 86 à 4 personnes. - Page 16 Verrouiller les roues de défilement Installer la poutre du pied de sol à l’arrière du support au sol (M6×12mm) Bouchon en caoutchouc BA CK B ACK BA CK BAC K B ACK BA CK B AC K BA CK * Faites attention à la taille de la col- onne de positionnement, ne l’insérez ×...
- Page 17 Installer Windows OPS (facultatif) Le point de terminaison dispose d’un système d’exploitation Android in- tégré et prend en charge l’installation de modules OPS pour utiliser les systèmes d’exploitation Windows et Android. Windows OPS est facultatif. Si vous ne l’avez pas acheté, passez cette étape.
- Page 18 Soulevez le point de terminaison, montez le point de terminaison dans le support au sol, et serrez les vis des deux côtés des pieds du support de sol * Nous recommandons d’effectuer le montage du MeetingBoard Installer 65 à 2 personnes, et le montage du MeetingBoard 86 à 4 per- sonnes(vous pouvez transporter le MeetingBoard 86 par les poignées des deux côtés).
- Page 19 Objectif de la caméra Microphone/Bande indicatrice LED Plume Câble USB Câble (câble USB HDMI Type B vers *Be- (Bas) Connecter les acces- Type A) soin soires Yealink *Besoin d'ap- Retourner à l’écran Commuter Haut-parleur NFC* (UVC、VCM、VCH, d'apporter le porter etc.) d’accueil/écran de la source vôtre...
-
Page 20: Panne D'alimentation
Allumer 1. Insérez l’extrémité du câble d’alimentation dans le connecteur d’alimentation du point de terminaison. 2. Insérez la prise du cordon d’alimentation dans la prise murale. 3. Tournez le bouton de l’interrupteur situé à l’ar- rière droit du point de terminaison sur « I » pour mettre le point de terminaison sous tension. -
Page 21: Contenido De La Caja
(montado en el piso) Instalación de punto final Tome y coloque todos los componentes con cuidado para evitar daños. MeetingBoard 65 MeetingBoard 86 Recomendamos al menos 2 personas para montar el sistema MeetingBoard 65, 4 personas para montar el sistema MeetingBoard 86. - Page 22 Bloquear las ruedas de desplazamiento Instale la viga del soporte de suelo en la parte posterior del soporte de suelo (M6×12mm) Tapa de goma BA CK B ACK BA CK BAC K B ACK BA CK B AC K BA CK * Preste atención al tamaño de la co- lumna de posicionamiento, no la inserte ×...
- Page 23 Instalar Windows OPS (Opcional) El terminal tiene un sistema operativo Android incorporado y soporta la instalación de módulos OPS para usar ambos sistemas operativos; Windows y Android. Windows OPS es opcional. Si no lo ha comprado, omita este paso. Al instalar o desinstalar OPS, asegúrese de que el terminal esté...
- Page 24 Eleve el terminal, móntelo en el soporte de suelo y apriete los tornillos a ambos lados de las patas del soporte de suelo * Recomendamos al menos 2 personas para montar el sistema MeetingBoard Instalación 65, 4 personas para montar el sistema MeetingBoard 86 (MeetingBoard 86 se puede transportar por las asas de ambos lados).
- Page 25 Bolígrafo Cable USB Cable (cable USB HDMI tipo B a tipo A) *Necesitas (Abajo) Conecte los * Necesitas traer el accesorios de Yealink tuyo traer el tuyo Altavoz Regresar a la Cambiar NFC* (UVC、VCM、VCH, etc.) pantalla de inicio/ fuente de...
-
Page 26: Corte De Energía
Potencia 1. Inserte el extremo del cable de alimentación en el orificio de alimentación del terminal. 2. Inserte el enchufe del cable de alimentación en la toma de corriente. 3. Coloque el botón del interruptor de la parte posterior derecha del terminal en posición "I"para encenderlo. - Page 27 We recommended placement of the OPS antenna is as follows, with the highest signal strength: HDMI,the HDMI logo,and High-Definition Multimedia Interfoce are trademarks or registered trodemarks of HDMI Licensing LLC.
- Page 28 Contact the specified maintenance center for repair. problems with Yealink device arising from the use of this product; we are not liable for financial • Do not insert any object into equipment slots that is not part of the product or damages, lost profits, claims from third parties, etc., arising from the use of this product.
- Page 29 Schäden oder Verluste haftbar, die aus der Verwendung dieses Produkts entstehen, noch für zurVermeidung eines Blitzschlags. Ansprüche eines Dritten. Wir sind nicht haftbar für Probleme mit dem Yealink Gerät, die aus • Wenn das Gerät längere Zeit ungenutzt bleibt, trennen Sie es von der der Verwendung dieses Produkts entstehen.
- Page 30 Débranchez la prise d’alimentation et l’Asymmetric Digital Subscriber Line (ADSL) à tiers. Nous ne sommes pas responsables des problèmes avec les appareils Yealink découlant paire torsadée (le câble de fréquence radio) pour éviter la foudre.
- Page 31 Non ci assumiamo responsabilità di problemi relativi ai dispositivi Yealink con • Se non si usa il dispositivo per un periodo di tempo prolungato, scollegarlo dalla seguenti all’uso di questo prodotto;...
- Page 32 As one of the best providers in more than 140 countries and regions, Yealink ranks No.1 in the global market share of SIP phone shipments (Global IP Desktop Phone Growth Excellence Leadership Award Report, Frost &...
Need help?
Do you have a question about the MeetingBoard 65 and is the answer not in the manual?
Questions and answers
How to configure whiteboard OPS module windows
To configure the OPS module on the Yealink MeetingBoard 65:
1. Remove the OPS cover from the device.
2. Insert the OPS module into the designated slot.
3. Tighten the screws to secure the OPS module in place.
If the OPS module is abnormal, you may need to reinsert it and ensure it is properly secured.
This answer is automatically generated