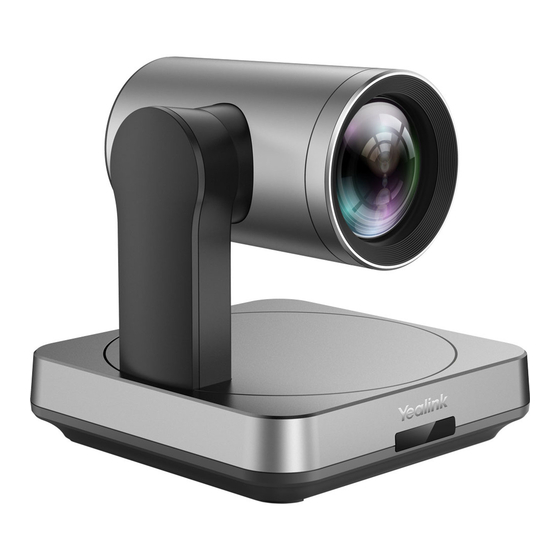
Yealink MVC Series Deployment Manual

Yealink MVC Series Deployment Manual

For microsoft teams rooms system
Hide thumbs Also See for MVC Series:
Table of Contents

Advertisement

Yealink MVC/MVC Ⅱ Series for Microsoft
Teams Rooms System Deployment Guide V2.4

Advertisement

Table of Contents
loading

Summary of Contents for Yealink MVC Series

  • Page 1 Yealink MVC/MVC Ⅱ Series for Microsoft Teams Rooms System Deployment Guide V2.4...
  • Page 2: Table Of Contents

    | Contents | ii Contents About This Guide..................5 Related Documents..........................5 Summary of Changes......................... 5 Changes for Guide Version 2.4....................5 Changes for Guide Version 2.3....................6 Changes for Guide Version 2.2....................6 Changes for Guide Version 2.1....................7 Introduction....................
  • Page 3 Enabling Tracking Mode......................53 Controlling Camera......................... 54 Resetting the Camera to Home Position................54 Creating the Preset Position on the Yealink RoomConnect Plug-in........54 Setting Camera to the Preset Position...................55 Setting UVC30 Camera as the Content Camera................55 Setting the Content Camera Mode on Yealink RoomConnect Plug-in........56 Setting the Content Camera....................56...
  • Page 4 Troubleshooting..................66 Upgrading System Software......................66 Enabling Automatic Windows Update..................67 Firmware for Each Device.........................67 Manually Windows Update........................67 General Issues..........................68 The System Camera of MVC300/MVC300 Ⅱ is Not Available..........68 Cannot Control the Camera....................69 Does the MVC/MVC Ⅱ System Come with All the Necessary Software Pre-installed?..69 The Room Is Not Enabled for Teams Meetings..............
  • Page 5: About This Guide

    | About This Guide | 5 About This Guide This guide is intended for the administrators who need to configure and manage MVC series for Microsoft Teams Rooms System. This guide is applicable to the following devices: • MVC940/MVC840/MVC640/MVC320 •...
  • Page 6: Changes For Guide Version 2.3

    Camera-Hub • UVC80 • UVC50 MSpeaker Ⅱ • • Technical Specifications • Deployment Solutions of MVC Series • Introduction Deployment Solutions of MVC Ⅱ Series • • Checking the Device Status • Enabling Tracking Mode • Adjusting the Camera Layout MVC900 Ⅱ...
  • Page 7: Changes For Guide Version 2.1

    12x optical zoom, covering up an extra-large meeting room. • The Yealink MVC840 includes 2 or 3 VCM34 (support cascading up to 6 units) and a UVC84 USB PTZ camera with 4K video resolution and 12x optical zoom, covering up a large meeting room.
  • Page 8: Hardware Overview

    | Introduction | 8 • Hardware Overview • Technical Specifications • Microsoft Teams Rooms Hardware Overview This chapter provides hardware overview. • MCore • Mini-PC • Camera-Hub • UVC84 • UVC80 • UVC50 • UVC40 • UVC30 Room • MTouch MTouch Ⅱ...
  • Page 9: Mini-Pc

    | Introduction | 9 Port Name Description ④ USB 3.0 port • Connects to UVC84/UVC80/UVC50/UVC40/UVC30 Room camera. • Connects to a wireless USB dongle to use the wireless keyboard or the mouse. • Connects to other USB devices. ⑤ Connects to MTouch Ⅱ. VCH port ⑥...
  • Page 10: Camera-Hub

    | Introduction | 10 Camera-Hub Port Name Description LED Indicator Indicates different status of the system. Reset Key Resets to factory defaults. USB port Camera Port RCA In Connects to an audio input device via a RCA cable. RCA Out Connects to an audio output device via a RCA cable.
  • Page 11: Uvc84

    | Introduction | 11 UVC84 Port Name Description ① VCH port Connects to audio devices, for example, VCM34. ② DC48V port Connects to the power source via a power adapter. ③ Video Out port Connects to a PC as a video output. ④...
  • Page 12: Uvc50

    | Introduction | 12 Port Name Description ② Line In port Connects to an audio input device using a 3.5 mm audio cable. ③ USB port Inserts the DD10 to connect to the CPW90. ④ Video Out port Connects to a PC as a video output. ⑤...
  • Page 13: Uvc40

    | Introduction | 13 Port Name Description ⑧ Security Slot Creates a secure connection to the camera with a universal security cable to lock the camera down. UVC40 Port Name Description ① Reset Key Resets to factory defaults. ② DC48V port Connects to the power source via a power adapter.
  • Page 14: Mtouch

    | Introduction | 14 MTouch Port Name Description ① Human Motion The motion detection sensor can automatically wake up the Sensor system and light up the touch screen when people approaches the touch screen. ② USB port Connects to Mini-PC and MTouch is powered by Mini-PC. ③...
  • Page 15: Mtouch Ⅱ

    | Introduction | 15 MTouch Ⅱ Port Name Description ① Human Motion The motion detection sensor can automatically wake up the Sensor system and light up the touch screen when people approaches the touch screen. ② 3.5mm headset Connects to a headset. jack ③...
  • Page 16: (Optional) Mshare

    | Introduction | 16 (Optional) MShare Port Name/Indicator Name Description ① LED Indicator Indicates the working status of MShare. ② Mini DP port Connects to PC via Mini-DP cable for content sharing. ③ HDMI port Connects to PC via HDMI cable for content sharing. ④...
  • Page 17: Mspeaker Ⅱ

    VCM38 is a newly designed ceiling microphone with 8 built-in microphones, which can realize 360° voice pickup range. VCM38 delivers excellent voice quality with high-quality echo cancellation and Yealink noise proof technology. With Beamforming technology, VCM38 can automatically locate and optimize voice pick up for the person speaking.
  • Page 18: Vcm34

    | Introduction | 18 Name Description Cascades multiple VCM38 units via PoE switch. • Connects to UVC84/UVC80/UVC50/Camera-Hub. • Cascades multiple VCM38 units via PoE switch. VCM34 Port Name Description ① RJ45 port Connects to the PoE port of another VCM34 to cascade more VCM34 units.
  • Page 19: Cp900

    | Introduction | 19 The following buttons are available during Skype for Business and Teams meetings: Button Name Description ① Volume Up/Down Key Adjusts the volume of the MSpeech. ② Mute Key During a call, tap the mute button to mute or unmute. CP900 The CP900 is directly connected to the MCore/MTouch Ⅱ...
  • Page 20: Vcr20 Remote Control

    | Introduction | 20 VCR20 Remote Control The VCR20 remote control enables you to operate the system, including receiving meeting calls, controlling the camera, adjusting the volume and so on. The following table introduces the keys on the remote control.
  • Page 21: Technical Specifications

    1 x Power port MCore ports • 2 x HDMI video output • Bluetooth and Wi-Fi • 1 x Yealink VCH port for connecting MTouch II • 4 x USB3.0 Type-A • 1 x 10/100/1000M Ethernet port • 1 x Power port •...
  • Page 22 • Human Motion Sensor • Angle adjustable bracket (28° ~ 50°) • 1080P/30FPS FHD • Built-in Wi-Fi AP for Yealink wireless presentation device • Support wired and wireless content sharing • HDMI/USB-C HD video input Camera-Hub • Support up to 9 cameras •...
  • Page 23: Microsoft Teams Rooms

    Acoustic echo cancellation (AEC) MSpeaker Ⅱ • RMS: 10W • Frequent response: 100Hz-20KHz • S/N:≥70dB • 1x Yealink VCH port • 1 x Line-in (3.5mm) VCM34 • Built-in 3-microphone array • 20ft (6m) and 360° voice pickup range • Yealink Noise Proof Technology •...
  • Page 24: License Requirements For Using Microsoft Teams Rooms Features

    | Deployment and Connection | 24 For more information, please visit the Microsoft Teams Rooms. • License Requirements for Using Microsoft Teams Rooms Features License Requirements for Using Microsoft Teams Rooms Features The following table lists the licensing-dependent features that are available in Microsoft Teams Rooms and what licenses you need to buy to get them.
  • Page 25: Deployment And Connection Of Mvc940

    | Deployment and Connection | 25 MVC800 Ⅱ • • MVC800 MVC500 Ⅱ • • MVC500 • MVC400 MVC300 Ⅱ • • MVC300 • Recommended Deployment Solution • Installing the Content Camera Deployment and Connection of MVC940 Note: For more information about how to install and deploy accessories (for example, MCore or Camera-Hub), refer to the Quick Start Guide of the corresponding accessory.
  • Page 26: Deployment And Connection Of Mvc840

    | Deployment and Connection | 26 Deployment and Connection of MVC840 Optional audio device connection:...
  • Page 27 | Deployment and Connection | 27 Note: For more information about how to install and deploy accessories (for example, MCore or UVC84), refer to the Quick Start Guide of the corresponding accessory.
  • Page 28: Deployment And Connection Of Mvc640

    | Deployment and Connection | 28 Deployment and Connection of MVC640 Note: For more information about how to install and deploy accessories (for example, MCore or UVC84), refer to the Quick Start Guide of the corresponding accessory. Deployment and Connection of MVC320...
  • Page 29: Mvc900 Ⅱ

    | Deployment and Connection | 29 Note: For more information about how to install and deploy accessories (for example, MCore or UVC30 Room camera), refer to the Quick Start Guide of the corresponding accessory. MVC900 Ⅱ Note: For more information about how to install and deploy accessories (for example, MCore or Camera-Hub), refer to the Quick Start Guide of the corresponding accessory.
  • Page 30: Mvc900

    | Deployment and Connection | 30 MVC900 Note: For more information about how to install and deploy accessories (for example, Mini-PC or Camera-Hub), refer to the Quick Start Guide of the corresponding accessory.
  • Page 31: Mvc800 Ⅱ

    | Deployment and Connection | 31 MVC800 Ⅱ Note: For more information about how to install and deploy accessories (for example, MCore or UVC80 camera), refer to the Quick Start Guide of the corresponding accessory.
  • Page 32: Mvc800

    | Deployment and Connection | 32 MVC800 Note: For more information about how to install and deploy accessories (for example, Mini-PC or UVC80 camera), refer to the Quick Start Guide of the corresponding accessory.
  • Page 33: Mvc500 Ⅱ

    | Deployment and Connection | 33 MVC500 Ⅱ Note: For more information about how to install and deploy accessories (for example, MCore or UVC50 camera), refer to the Quick Start Guide of the corresponding accessory.
  • Page 34: Mvc500

    | Deployment and Connection | 34 MVC500 Note: For more information about how to install and deploy accessories (for example, Mini-PC or UVC50 camera), refer to the Quick Start Guide of the corresponding accessory. MVC400 Note: For more information about how to install and deploy accessories (for example, MCore or UVC40 camera), refer to the Quick Start Guide of the corresponding accessory.
  • Page 35: Mvc300 Ⅱ

    | Deployment and Connection | 35 MVC300 Ⅱ Note: For more information about how to install and deploy accessories (for example, MCore or UVC30 Room camera), refer to the Quick Start Guide of the corresponding accessory. MVC300 Note: For more information about how to install and deploy accessories (for example, Mini-PC or UVC30 Room camera), refer to the Quick Start Guide of the corresponding accessory.
  • Page 36: Recommended Deployment Solution

    • Conference Room Wiring Deployment Solutions of MVC Ⅱ Series Yealink MVC900 Ⅱ/MVC800 Ⅱ/MVC500 Ⅱ/MVC400/MVC300 Ⅱ supports different camera devices (Camera-Hub/ UVC84/UVC80/UVC50/UVC40/UVC30 Room) and audio devices (VCM38/VCM34/ MSpeaker Ⅱ/CP900/) according to the conference requirements. Deployment solutions for different camera devices and audio input devices are as follows: Note: You can purchase VCM38 separately.
  • Page 37 | Deployment and Connection | 37 MVC Ⅱ System Meeting Room Type Device Included Small-to-medium meeting room MVC500 Ⅱ (4-12 people) Small-to-medium meeting room MVC400 (5-15 people) Focus and small meeting room MVC320 (2-7 People) Focus and small meeting room MVC300 Ⅱ...
  • Page 38 | Deployment and Connection | 38 MVC500 Ⅱ: MVC400:...
  • Page 39 | Deployment and Connection | 39 • CPW90 wireless microphones support 360-degree audio pickup at a radius of up to 20ft/6 meters. For medium-to-large meeting room (13-20 people) MVC840:...
  • Page 40 | Deployment and Connection | 40 MVC800 Ⅱ:...
  • Page 41 | Deployment and Connection | 41 • The distance between the two VCM34s is 3 meters. • VCM34 supports 360-degree audio pickup at a radius of up to 6 meters and you can cascade up to 4 VCM34 units. For extra-large meeting room (18-30 people)
  • Page 42: Deployment Solutions Of Mvc Series

    Note: The MTouch Ⅱ needs to be placed in a position facing the door. Deployment Solutions of MVC Series Yealink MVC900/MVC800/MVC500/MVC300 system supports different camera devices (Camera-Hub/ UVC80/UVC50/UVC30 Room) and audio devices (VCM34/VCM38/MSpeaker/CP900) according to the conference requirements. Deployment solutions for different camera devices and audio input devices are as follows: Note: You can purchase VCM38 separately.
  • Page 43 | Deployment and Connection | 43 Meeting Room Type MVC System Device Included Extra-large meeting room MVC900 (18-30 People) Medium-to-large meeting room MVC800 (13-20 People) Small-to-medium meeting room MVC500 (4-12 People) Focus and small meeting room MVC300 (2-7 People) For focus and small meeting room (2-7 People) For small-to-medium meeting room(4-12 People)
  • Page 44 | Deployment and Connection | 44 • VCM34 support 360-degree audio pickup at a radius of up to 20ft/6m. For medium-to-large meeting room (13-20 people) • The distance between the two VCM34s is 3 meters.
  • Page 45: Camera Installation

    | Deployment and Connection | 45 • VCM34 supports 360-degree audio pickup at a radius of up to 20ft/6m and you can cascade up to 4 VCM34 units. For extra-large meeting room (18-30 people) • The distance between the two VCM34s on both sides is 10ft/3m. •...
  • Page 46 | Deployment and Connection | 46 UVC84: UVC80: UVC50: UVC40:...
  • Page 47: Installing Mspeaker Ⅱ

    | Deployment and Connection | 47 UVC30: • Recommended Camera Installation Recommended Camera Installation The recommended camera installation is as below: • Install the LCD TV and video camera relative to the center of the participants. Ensure that the participants face the camera and LCD TV directly during calls. •...
  • Page 48: Installing Vcm38

    VCM38 can be installed on the ceiling/suspended ceiling using the ceiling or hanging installation. The recommended installation height of the microphone is 8ft/2.5m (adjustable according to the actual situation of the venue). Yealink MSpeaker Ⅱ Quick Start Guide (EN, For more information about installing VCM38, refer to CN).
  • Page 49: Conference Room Wiring

    | Deployment and Connection | 49 For more information on how to install the MCore, please refer to Yealink Mcore Quick Start Guide (EN, CN). Conference Room Wiring If the conference room has a dedicated routing channel, you can follow the way as it is. If not, follow the way below to route and fix the wire.
  • Page 50: Initial Setup

    | Initial Setup | 50 Initial Setup Once the MCore/Mini-PC is powered on, the MCore/Mini-PC will load the Microsoft Windows 10 IoT Enterprise operating system automatically. By default, there are two Windows accounts (Skype user account and administrator account) built into the MVC/MVC Ⅱ system. Note: Before setting up the MVC/MVC Ⅱ...
  • Page 51 | Setup Wizard | 51 2. Select the check box on the EULA page, and then tap Next. 3. Enter the skype account, the password and re-enter the password on the Account page, and then tap Next.
  • Page 52: Basic Settings Of Teams Room Systems

    In addition, you can use the preset position feature if you set up preset positions for the connected camera on the Yealink RoomConnect plug-in. If you enable the tracking mode feature, the camera will automatically zoom the participants in the meeting room in real-time according to the changes of participants.
  • Page 53: Enabling Manual Control Mode

    Enabling Tracking Mode • Controlling Camera • Resetting the Camera to Home Position • Creating the Preset Position on the Yealink RoomConnect Plug-in • Setting Camera to the Preset Position Enabling Manual Control Mode Procedure to go to the Camera Control page.
  • Page 54: Controlling Camera

    Related tasks Enabling Manual Control Mode Creating the Preset Position on the Yealink RoomConnect Plug-in Presets are the pre-saved settings of both the angle and the focal length for the camera. You can use it to quickly point a camera at a pre-defined location. Note that only the administrator has the permission to use Yealink RoomConnect.
  • Page 55: Setting Camera To The Preset Position

    7. Tap New Preset to create a new preset. Note: If you are using the Yealink Room Connect for the first time, tap Skip to manage the devices locally, or you can manage the devices on the Yealink Device Management Platform or Yealink Management Cloud Service.
  • Page 56: Setting The Content Camera Mode On Yealink Roomconnect Plug-In

    Setting the Content Camera Mode on Yealink RoomConnect Plug-in Procedure 1. On the home page of Yealink RoomConnect, select the desired UVC30 camera. 2. Go to Advanced > Others. 3. From the drop-down menu of Content Camera Mode, select ON or OFF.
  • Page 57: Sharing The Content On The Whiteboard With Remote Participants

    | Basic Settings of Teams Room Systems | 57 3. Under the tab of Peripherals, select Yealink UVC30 Camera from the drop-down menu of Yealink UVC30 Camera. Note: Tap Preview and pan or tilt the content camera according to the preview to make sure that the video image of the content camera is contained in the preview.
  • Page 58: Adjusting The Camera Layout

    | Basic Settings of Teams Room Systems | 58 • Adjusting the Camera Layout Adjusting the Camera Layout Procedure to go to the Camera Control page. If you are in a meeting, tap > to go to the Camera Control page. 2.
  • Page 59: Dual Screen Layouts

    | Basic Settings of Teams Room Systems | 59 The PC content is given prominence in the largest pane and other participants are displayed beside the PC content. Tip: Tap Layout to display the shared content in full screen. Dual Screen Layouts The following introduces the default layout when you connect two displays.
  • Page 60: Enabling Dual Monitor Mode

    | Basic Settings of Teams Room Systems | 60 Enabling Dual Monitor Mode Before using two external display devices, you need to enable the dual monitor mode first. Procedure 1. Tap More > Setting. 2. Enter the administrator password (default: sfb) to go to the Settings page. 3.
  • Page 61: Wired Content Sharing

    Wired Content Sharing For MVC series, you can use MShare for wired content sharing after it is connected to the PC via Mini-DP/ HDMI. For MVC Ⅱ series, you can use MTouch Ⅱ for wired content sharing after it is connected to the PC via USB-C/HDMI.
  • Page 62: Adjusting The Lightness Of Mtouch/Mtouch Ⅱ

    | Basic Settings of Teams Room Systems | 62 2. If the WPP20 is first connected to the computer, you need to manually start the Yealink Wireless Presentation Pod software from This PC in Windows 10 or from My Computer in Windows 7 and then upgrade the WPP20.
  • Page 63: Changing Sign-In Account

    | Basic Features for Microsoft Teams Rooms App | 63 Changing Sign-in Account Procedure 1. Tap More > Setting. 2. Enter the administrator password (default: sfb) to go to the Settings page. 3. In the Account page, enter the account information in the corresponding field. 4.
  • Page 64: Switching Between Skype User Account And Administrator Account

    | Switching Between Skype User Account And Administrator Account | 64 On the screen, you can do the following: • Join a scheduled meeting by selecting the meeting. Note: To display a meeting on the room console, organizers should set the room as the meeting location.
  • Page 65: Administrator Account Login

    The Yealink RoomConnect plugin running under Windows can automatically detect all the devices of the MVC/MVC Ⅱ system. After logging to the Yealink Management Cloud Service or Yealink Device Management Platform via Yealink RoomConnect, you can manage or diagnosis all the devices of the MVC/ MVC Ⅱ system and view the alarm.
  • Page 66: Troubleshooting

    Administrator Account Login Troubleshooting This section describes solutions to common issues that may occur while using the Yealink MVC/MVC Ⅱ system. Upon encountering a case not listed in this section, contact your Yealink reseller for further support. • Upgrading System Software •...
  • Page 67: Enabling Automatic Windows Update

    92.421.0.10 or later UVC40 128.410.0.10 or later UVC30/UVC30 Camera Content 105.421.0.5or later Yealink Plug-in Software (Yealink RoomConnect) 2.22.33.0 or later MTouch Ⅱ 126.410.0.5.rom or later The information mentioned in this document is applicable to Microsoft Teams APP in version 4.4.41.0 or later.
  • Page 68: General Issues

    1. Tap More > Setting. 2. Enter the administrator password (default: sfb) to go to the Settings page. 3. On the Peripherals page, do not select Yealink UVC30 Camera in the field of Content Camera (Preview). 4. Tap Save and exit.
  • Page 69: Cannot Control The Camera

    | Troubleshooting | 69 Cannot Control the Camera If you enable the tracking mode, you cannot control the camera. See Enabling Manual Control Mode enable the manual control mode. Does the MVC/MVC Ⅱ System Come with All the Necessary Software Pre-installed? The MVC/MVC Ⅱ...
  • Page 70: Checking The Device Status

    | Appendixes | 70 Checking the Device Status You can view the firmware and the hardware versions of the connected devices on your MVC/MVC Ⅱ system, including Camera-Hub, UVC84, UVC80, UVC50, UVC40, UVC30 Room, MSpeech, MTouch Ⅱ, cp900 VCM38, and VCM34. Procedure to go to the Status page.

Table of Contents