Yealink RoomCast Manual
- Quick start manual (25 pages) ,
- User manual (13 pages) ,
- Manual (9 pages)
Advertisement
RoomCast Wireless Casting Device
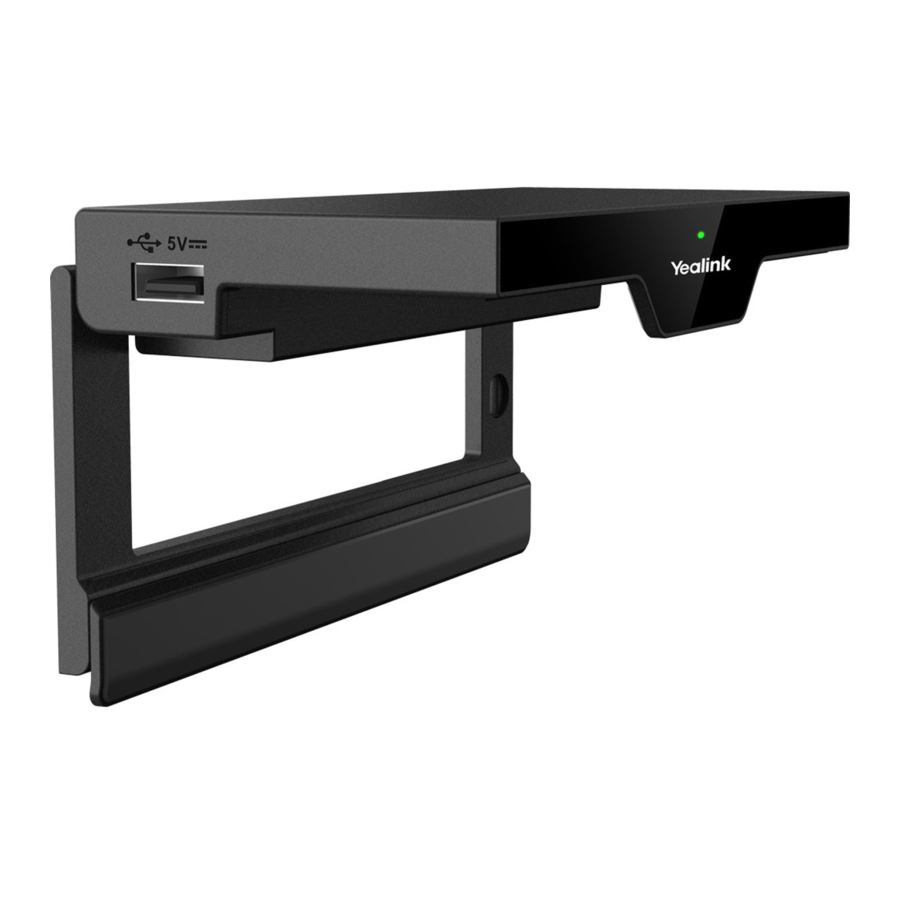
Hardware Overview

| No. | Port Name | Description |
| 1 | DC12V port | Connect to the power source via a power adapter. |
| 2 | Internet port | Connect to the network device. |
| 3 | HDMI port | Connect to a screen/projector for displaying video images. |
| 4 | USB port | Connect to touch device, Yealink Wireless Presentation Pod, keyboard, mouse, and so on. |
| 5 | Security Slot | Allow you to connect a universal security cable to the RoomCast, so you can lock it down. RoomCast cannot be removed when locked. |
| 6 | LED Indicator | Display the status of RoomCast. |
Related tasks
LED Indicator
Home Screen

| No. | Description |
| 1 | Display the time and date. |
| 2 | Display the available screen sharing types and methods. |
| 3 | Display the IP address of RoomCast. |
| 4 | Display the welcome message. |
| 5 | Display the brand logo. |
| 6 | Display the wireless AP name and password. |
| 7 | Display the meeting room name or device name. |
Related tasks
Setting the Screen Cast
Customizing the Home Screen
Getting Started
This guide intends to walk you through installing RoomCast and using RoomCast to share screens.
- Deployment and Connection
- Presentation Methods
Deployment and Connection

 Note: You can connect the RoomCast to a wired network or Wi-Fi.
Related tasks
Connecting to a Wireless Network
Presentation Methods
You can share your screen using Yealink Wireless Presentation Pod, Miracast, AirPlay, and Google Cast. The following section introduces how to use WPP20 to share screens.
Before you begin
Make sure you have paired WPP20 with RoomCast and connected WPP20 to the PC which is powered on.
Procedure
Do one of the following:
- On the WPP20, press the presentation button to share the full screen of the PC.
- On the Yealink Wireless Presentation Pod software, click Advanced Share. Select the window you want to share and then click Start Sharing.
Note: For more information about other methods, refer to RoomCast Screen Sharing Guide.
Configurations on the Web
This section introduces how to go to the web user interface of RoomCast and configure the basic, network, and system settings.
- Signing in to the Web User Interface
- Basic Settings
- Network Settings
- System Settings
Signing in to the Web User Interface
Procedure
- You can sign in to the web user interface of RoomCast by the following two methods:
- When RoomCast connects to a wired/wireless network:
- Make sure you connect the PC and RoomCast to the same LAN.
- Open a web browser and enter the IP address of RoomCast (displayed in the top-right corner of the home screen).
- Enter the username and password (the default administrator username is admin and password is 0000) and click Login.
- When RoomCast does not connect to a wired network:
- Connect PC to the wireless AP provided by RoomCast. (The AP name and password are displayed on the home screen, and the default name is Yealink-XXXXXX.)
- Open a web browser and enter the IP address of RoomCast (displayed in the top-right corner of the home screen).
- Enter the username and password (the default administrator username is admin and password is 0000) and click Login.
- When RoomCast connects to a wired/wireless network:
- After signing in, set the personalization, time, network, and password according to the quick setup.
Note: The quick setup will pop up automatically when you sign in to the web user interface for the first time. You can also click Quick Setup in the bottom-right corner to open it.
Basic Settings
This section introduces how to share screens, customize the home screen, and control the LED indicator.

- Setting the Screen Cast
- Customizing the Home Screen
- LED Indicator
Setting the Screen Cast
You can share your screen using Yealink Wireless Presentation Pod, Miracast, AirPlay, and Google Cast.
Procedure
- On the web user interface, go to Basic > Screen Cast.
- Configure and save the following settings:
| Parameter | Description |
| Miracast | Enable or disable the RoomCast to share screens via Miracast. Default: enabled. |
| AirPlay | Enable or disable the RoomCast to share screens via AirPlay. Default: enabled. |
| Google Cast | Enable or disable the RoomCast to share screens via Google Cast. Default: enabled. |
| Cast from WAN Port | Enable or disable RoomCast to share screens via the office wired network. Default: enabled. If disabled, users cannot share screens via the wireless network which the RoomCast connects to. |
| On-Screen Code | Enable or disable the on-screen PIN code when using Miracast or AirPlay to share screens. Default: disabled. |
Note: For more information about the screen sharing method of RoomCast, refer to the RoomCast Screen Sharing Guide.
Related tasks
Connecting to a Wireless Network
Customizing the Home Screen
You can customize the wallpaper, language, theme or others for the home screen of RoomCast.
Procedure
- On the web user interface, go to Basic > On-Screen.
- Configure and save the following settings:
| Parameter | Description |
| Theme | Set the RoomCast theme as detailed or simple version. Default: detailed. |
| Wallpaper | Set the RoomCast wallpaper.
|
| Wallpaper Carousel | Enable or disable the RoomCast wallpaper carousel. Default: disabled. |
| On-Screen Language | Set the RoomCast display language. |
| Meeting Room Name/Host Name | Set the device name of RoomCast or the name of the meeting room that the RoomCast locates in. |
| Welcome Message | Set the welcome message of RoomCast. |
| Display Resolution | Set the resolution of the RoomCast output image. Default: auto. The available resolution you can select varies from the screen you connect. RoomCast will automatically select a best resolution to fit the connected screen. |
| Display IP Address | Enable or disable the home screen to display the RoomCast IP address. Default: enabled. |
| Display Wi-Fi Name | Enable or disable the home screen to display the RoomCast Wi-Fi name. Default: enabled. |
| Display Wi-Fi Password | Enable or disable the home screen to display the RoomCast Wi-Fi password. Default: enabled. This parameter is available only when you enable the Display Wi-Fi Name. |
| Display Time | Enable or disable the home screen to display the time. Default: enabled. |
| Display Brand Logo | Enable or disable the home screen to display the brand logo. Default: enabled. You can upload your brand logo. Supported file format are png, jpg, or jpeg. The file size should be no more than 5MB. |
Related information
Home Screen
LED Indicator
You can enable or disable the LED indicator of RoomCast.
Procedure
- On the web user interface, go to Basic > LED Control.
- Enable or disable the LED Indicator.
| Status | Description |
| Red | In idle mode |
| Green | Working |
| Off | Power off |
Network Settings
This section introduces: how to connect the RoomCast to a wireless network and use RoomCast to provide a Wi-Fi Hotspot.

- Connecting to a Wireless Network
- Wi-Fi Hotspot
Connecting to a Wireless Network
Except for connecting the RoomCast to a wired network, you can also connect it to a wireless network.
Procedure
- On your web user interface, go to Network > Wireless Network > Connect to Exiting Network.
- Click Scan Wireless Network to search for the wireless network.
- Select the desired wireless network and connect the RoomCast to it. If the network is protected with password, enter its password.
- Click Confirm to connect.
The display device prompts that the RoomCast is connected to a wireless network.
Note: The feature of Connect to Exiting Network is enabled by default. If you disable this feature, the RoomCast cannot connected to a wireless network.
Related tasks
Signing in to the Web User Interface
Wi-Fi Hotspot
You can set the parameters of the Wi-Fi hotspot provided RoomCast.
Procedure
- On your web user interface, go to Network > Wireless Network > Wi-Fi Hotspot.
- Configure and save the following settings:
| Parameter | Description |
| Wi-Fi Hotspot | Enable or disable the Wi-Fi hotspot. Default: enabled. |
| Band | Configure the frequency of the Wi-Fi hotspot.
Default: 5G. |
| Network Name | Configure the name of the Wi-Fi hotspot.
|
| Password | Configure the password of the Wi-Fi hotspot.
|
| Channel | Configure the channel of the Wi-Fi hotspot.
Default: auto. |
| LAN IP Address | Configure the generation type of Wi-Fi hotspot address.
Default: auto. |
| IP Address | Configure the IP address of the Wi-Fi hotspot.
|
| Network Isolation | Enable or disable the network isolation. Default: disabled. Generally, the devices connected to the Wi-Fi Hotspot provided by the RoomCast can access the internet. However, if you enable this feature, those devices can only share screens but cannot access the internet. |
System Settings
This section introduces how to set the power and update schedule for the RoomCast.
- Power Schedule
- Power Saving
- Automatic Update
Power Schedule
If you enable this feature, the power saving mode automatically starts after the RoomCast is inactive for a specified amount of time outside the defined working hours. You can set working hours and add up to 5 working hours. If you disable this feature, the RoomCast is in working status all the time.
Procedure
- On the web user interface, go to System > Power Schedule > Power Schedule.
- Enable Power Saving
- Click Add, set the time, and click Save.
Note: If you add multiple working hours, they will take effect simultaneously.

Power Saving
During power saving mode, no HDMI signal is outputting, while the Wi-Fi is still working. You can start screen sharing to wake up the RoomCast.
Procedure
- On the web user interface, go to System > Power Schedule > Power Schedule.
- Enable Power Saving.
- In the Power Saving Timeout field, set the time and click Confirm.
Note: Activate the RoomCast with any of the following actions:
- Any device connects to the wireless AP provided by the RoomCast
- Any device starts screen casting
- Plug in or unplug the USB cable
- Plug in the HDMI cable
- Wake up the display device
Automatic Update
If you enable this feature, the RoomCast will check whether a new version is available at a specific time each day. If it is, the RoomCast will automatically upgrade to the new version.
Procedure
- On the web user interface, go to System > Update > Update Schedule.
- Enable Automatic Update.
- Set the Update Time and click Confirm.
Digital Signage
RoomCast can be used as digital signage for enterprise needs to welcome external visitors and display culture promotion or announcements.
Once the RoomCast is connected to the Yealink Device Management Platform, it can synchronize meeting room calendars and digital signage content after the device is bound to a meeting room.
- Connecting to Yealink Device Management Platform
- Synchronizing to Meeting Room Calendar
- Digital Signage Content
Connecting to Yealink Device Management Platform
RoomCast supports connecting to Yealink Management Cloud Service(YMCS) or Yealink Device Management Platform(YDMP) to manage, diagnose and alarm all devices in a unified manner.
About this task
Before powering the device for the first time or restoring to factory settings, you need to add the device to the YMCS or YDMP. After the device is powered on, it will automatically connect to the management platform without manually opening it on the web user interface.
For more information on how to use YMCS or YDMP, please refer to the Yealink Management Cloud Service Administrator Guide/Yealink Device Management Platform Administrator Guide.
Turning on via Web User Interface Manually
Procedure
- Go to the web user interface of RoomCast.
- Go to System > Auto Provision, enable DM Server Active.

- Adding devices in the YDMP.


Synchronizing to Meeting Room Calendar
After adding the RoomCast to the YDMP, you can bind it to the meeting room in the Yealink Workspace Management Platform(YWMP). The meeting room schedule will be automatically synced to RoomCast and displayed at the top (detailed mode)/bottom (minimalist mode) of the RoomCast home screen.

Digital Signage Content
Digital signage is used to display the information needs such as enterprise culture promotion, enterprise announcement information proclamation, and external visitor welcome.
You can configure and set the digital signage in the YWMP. Please refer to Yealink Workspace Management Platform Administrator Guide.

Documents / Resources
References
Download manual
Here you can download full pdf version of manual, it may contain additional safety instructions, warranty information, FCC rules, etc.
Advertisement


Need help?
Do you have a question about the RoomCast and is the answer not in the manual?
Questions and answers