Table of Contents
Advertisement
Quick Links
Advertisement
Table of Contents

Subscribe to Our Youtube Channel
Related Manuals for Autel EVO II Enterprise V3


Summary of Contents for Autel EVO II Enterprise V3
- Page 1 QUICK START GUIDE...
- Page 3 1. OVERVIEW The EVO II Enterprise V3 brings excellent flight performance, achieving a top speed of 20m/s (45mph), 42-minute flight time, and an operating distance at 15km (9.32miles, FCC). The aircraft comes with a 7.9 inch touch-screen controller, boasts a 2048x1536 pixel resolution.
- Page 4 Power Button Rear LED Indicators Rear Vision System Left Side Vision System SD Card Slot Right Side Vision System USB-C Port Aircraft Battery Pairing Button / Pairing Indicator Air Vent...
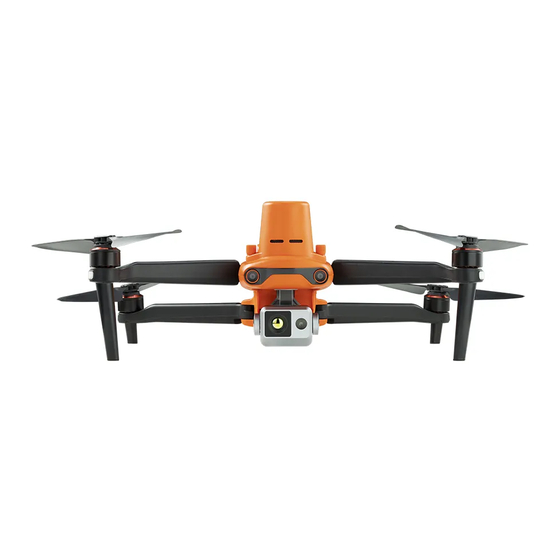
- Page 5 Upward Vision System Enterprise Accessory Interface Ultrasonic Sensor Downward Vision System Downward Vision Lighting LED...
- Page 6 3. FLIGHT LED INDICATIONS A LED indicator is located on the end of each aircraft arm. The front LEDs will light up solid red to help you identify the direction of the aircraft's nose. The rear LEDs will display the current flight status of the aircraft. The chart below shows the meaning of each status indicator.
-
Page 7: Remote Controller
4. REMOTE CONTROLLER Left Command Stick HDMI Port Customizable Button C2 Gimbal Pitch Angle Wheel USB TYPE-C Port Photo Shutter Button Video Recording Button USB TYPE-A Port *Zoom Control Wheel Customizable Button C1 Power Button Right Command Stick Air outlet *The function may alter, please take the practical effect as standard. - Page 8 Air Vent Speaker Hole Grips Tripod Mount Hole Bottom Hook 5. CHARGING Aircraft Battery: Plug the charging connector into the battery’s charge port, and connect the other end to power adapter. Plug the power adapter into a power outlet (100-240V). Controller: Connect the charging cable to the USB port at the top of the controller, and the other end to power adapter.
-
Page 9: Preparing The Aircraft
6. AUTEL EXPLORER APP Search for ‘Autel Explorer’ from Google Play and install the app on your controller. 7. PREPARING THE AIRCRAFT Before powering on the aircraft, please remove the gimbal guard. Unfold the arms and propellers. NOTE: Power off the aircraft before folding the arms. Fold in the rear... - Page 10 8. PROPELLERS Because the propellers come attached to the aircraft, the following instructions apply if you need to reinstall propellers. • Attaching the Propellers Power off the aircraft. Pair the propellers and corresponding motors according to the white mark . Press each propeller down firmly and rotate in the lock direction to securely attach the propeller.
- Page 11 9. ENTERPRISE ACCESSORIES Loudspeaker Spotlight Strobe RTK Module 1. Detach the accessory (1) Please ensure the aircraft is powered off. (2) Lose the screws on both sides, and remove the accessory. (3) Insert both ends of the protective cover into the corresponding slots. 2.
- Page 12 10.PREPARING THE CONTROLLER Unfold the antenna, detach the stick heads on the back of the controller handle, and screw them into the corresponding screw holes on both sides of the screen. Adjust the antenna angle, and when the antenna and the back of the controller are at the angle of 180 or 260, and the antenna surface is facing the aircraft, the signal quality of the aircraft and controller will reach the optimal condition.
- Page 13 Press and hold the power button 3 seconds to turn on the aircraft.The current battery level will be clearly displayed. 12. TAKE OFF Start the motors by holding both command sticks for two seconds as shown below. Push the left command stick slowly upward. NOTE: •...
-
Page 14: Command Stick Controls(Mode 2)
13. COMMAND STICK CONTROLS(MODE 2) Left Command Stick Left Side View Left Side View Ascend Descend Upward Downward Top View Top View Nose Rotates Left Nose Rotates Right Move Left Move Right Right Command Stick Left Side View Left Side View Forward Backward Upward... -
Page 15: Specifications
14. SPECIFICATIONS Aircraft 902~928MHz (FCC); 2.4~2.4835GHz; Operating Frequency 5.725~5.850GHz (Non-Japan); 5.650-5.755GHz (Japan) 900MHz: FCC/ISED<=31dBm 2.4GHz: FCC/ISED<=32dBm; Transmission Power (EIRP) CE/MIC/SRRC/RCM<=20dBm 5.8GHz/5.7GHz: FCC/ISED/SRRC/MIC<=33dBm; CE/RCM<=14dBm Remote Controller 902~928MHz (FCC); 2.4~2.4835GHz; Operating Frequency 5.725~5.850GHz (Non-Japan); 5.650-5.755GHz (Japan) FCC: ≤33dBm Transmission Power (EIRP) CE: ≤20dBm@2.4G, ≤14dBm@5.8G/5.7G SRRC: ≤20dBm@2.4G, ≤33dBm@5.8G/5.7G... - Page 16 FCC and ISED Canada Compliance This device complies with part 15 of the FCC Rules and ISED Canada licence-exempt RSS standards. Operation is subject to the following two conditions: (1) This device may not cause harmful interference, and (2) This device must accept any interference received, including interference that may cause undesired operation.
-
Page 17: Rf Exposure Information
Aircraft RF Exposure Information This equipment complies with RF radiation exposure limits set forth for an uncontrolled environment. This equipment should be operated with minimum distance 20cm between the radiator and your body. Remote Controller FCC Specific Absorption Rate (SAR) information SAR tests are conducted using standard operating positions accepted by the FCC with the device transmitting at its highest certified power level in all tested frequency bands, although the SAR is determined at the highest... - Page 18 18th Floor, Block C1, Nanshan iPark, No. 1001 Xueyuan Avenue, Nanshan District, Shenzhen, Guangdong, 518055, China 22522 29th Dr SE, Ste 101 Bothell, WA 98021 United States Toll-free: (844) MY AUTEL or (844) 692-8835 www.autelrobotics.com ©2022 Autel Robotics Co., Ltd. All Rights Reserved...
- Page 20 ©2022 Autel Robotics Co., Ltd. All Rights Reserved...
Need help?
Do you have a question about the EVO II Enterprise V3 and is the answer not in the manual?
Questions and answers