Table of Contents
Advertisement
Advertisement
Table of Contents

Related Manuals for Autel EVOII Dual 640TV3


Summary of Contents for Autel EVOII Dual 640TV3
- Page 1 EVO II Dual 640T V3 User Manual 2022.09...
- Page 2 The trademarks EVO Ⅱ Dual 640T™, Autel Explorer™, Starpoint™, and Autel Robotics® are the registered trademarks of Autel Robotics Co., Ltd. (hereinafter referred to as "Autel Robotics") in China and other countries/regions. All other products and company names mentioned in this User Manual are registered trademarks of their respective holders.
- Page 3 When the Autel Explorer App is connected to the aircraft and the backup option is turned on, flight logs and flight remote sensing data will be automatically uploaded and saved in the Autel Robotics data server.
- Page 4 Improper use of LiPo batteries may cause danger. Strictly observe the following safety guidelines when using, charging, or storing your batteries. Warning Use batteries and chargers provided only by Autel Robotics. Do not modify the battery pack and the recharger or replace them with third-party devices.
- Page 5 If the aircraft falls into water, remove the battery immediately after recovering it. Put the battery in an open place and keep a safe distance until it is completely dry. After that, stop using the battery. You can contact our Customer Service Team to replace it.
- Page 6 UAV flight areas. Use the Autel Explorer App to set the distance and height restrictions that meet the regulations. Do not fly in dangerous situations or severe weather conditions such as tornadoes, rain, hail, snow, etc. Do not fly the aircraft near electromagnetic interference sources such as power ...
- Page 7 Warning If any part of the aircraft or the remote controller fails to work properly or is visibly damaged, do not fly. Contact the Autel Robotics Customer Service Team: www.autelrobotics.cn/page/service Storage and Maintenance After any collision or squeeze, every part of the aircraft should be checked carefully.
-
Page 8: Table Of Contents
2.1.5 Flight Control System ....................23 2.1.6 Intelligent Flight Features ..................25 2.1.7 Omnidirectional Binocular Vision Sensing System ...........27 2.2 Remote Controller ....................31 2.2.1 Component Description ..................... 31 2.2.2 Use the Remote Controller ..................33 2.3 Autel Explorer App ..................... 37 2.3.1 Mission ..........................37... - Page 9 Chapter 3 Flight Preparations ................. 41 3.1 Prepare the Battery .................... 41 3.1.1 Install the Aircraft Battery ..................41 3.1.2 Remove the Aircraft Battery ..................41 3.1.3 Charge the Battery ....................... 41 3.2 Prepare the Remote Controller ................. 43 3.2.1 Unfold the Remote Controller ..................43 3.2.2 Turn On/Off the Remote Controller ...............
- Page 10 Chapter 5 Maintenance and Service ...............52 5.1 Firmware Updates ....................52 5.2 Troubleshooting ....................53 5.3 Storage and Maintenance ..................55 5.4 Warranty ......................55 5.5 Customer Service ....................56 5.5.1 Technical Support ......................56 5.5.2 Maintenance Service ....................56 Chapter 6 Appendix ....................57 6.1 Unlock No-Fly Zones ..................
-
Page 11: Chapter 1 About This Manual
640T V3 aircraft for the first time. 1. Product list: A list of all the items included in the packing box. If anything is missing, contact Autel Robotics customer support or local retailers. 2. User Manual: Teaches you how to operate the product skillfully. -
Page 12: Chapter 2 Product Profile
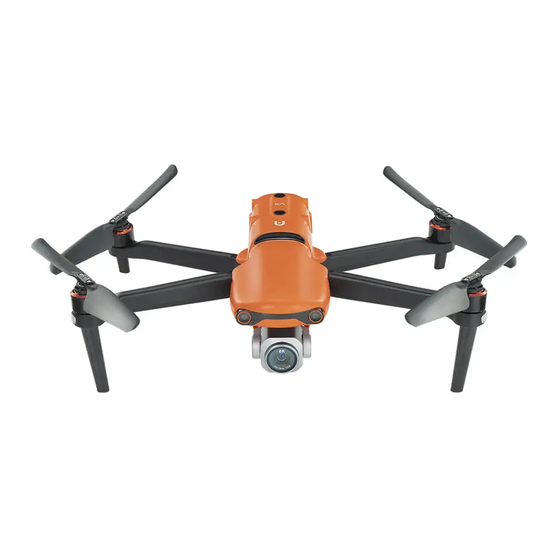
1080P video images. The body of the aircraft has 12 visual sensors, providing omnidirectional obstacle avoidance. The Autel Explorer App offers dozens of intelligent photography modes and mission flight modes such as rectangular, polygonal, waypoint, and oblique. - Page 13 ⑪ SD Card Slot ⑩ Left Vision System ⑫ Right Vision System ⑮ USB-C Port ⑬ Aircraft Battery ⑯ Linking button/indicator ⑭ Air Outlet ⑰ Upward Vision System...
-
Page 14: Flight Status Indicator
⑱ Ultrasonic Sensor ⑳ Downward Vision System ⑲ LED Fill Light Note The right side of the aircraft body has a protective cover that can protect USB-C ports and the linking button/indicator. Please ensure that the protective cover is closed during the flight. 2.1.2 Flight Status Indicator The aircraft has an LED indicator at the end of each arm. -
Page 15: Aircraft Battery
Status Definition of LED Indicators Normal RGY - Flash alternately System self-check YG - Flash alternately Warming up G - Flash slowly The aircraft is in GPS mode Warning Y - Flash slowly The aircraft is in ATTI mode There is no connection between the aircraft Y - Flash quickly and the remote controller R - Flash slowly... - Page 16 Turn off the battery Long press the power button for 3s to turn off the battery. If you have already installed the battery onto the aircraft, the two LED indicators on the nose and tail of the aircraft will flash 5 times, indicating that the aircraft is being shut down. Remove the battery from the aircraft when all power indicators are turned off.
- Page 17 2-3 days. Although there is no prompt message indicating that the battery is self-discharging, you may notice that the battery feels slightly hot. This is normal. You can customize the battery discharge threshold using the Autel Explorer App. Sleep Mode Protection ...
-
Page 18: Gimbal And Camera
To ensure that the gimbal can work properly, the gimbal temperature must keep between -10ºC and 50ºC. You can pitch or tilt the gimbal (-30º degrees to 90º degrees) using a dial on the remote controller or an Autel Explorer App. - Page 19 1. EVO Dual 640T V3 Gimbal ① MCU Mounting Plate ⑤ Pitch Motor ② Vibration Absorber ⑥ Roll Motor ③ Infrared camera ⑦ Yaw Motor ④ 4K camera Important A gimbal protective cover is used for stabilizing the gimbal and preventing the ...
- Page 20 2. Gimbal Operation Mode Stabilized mode The roll axis remains horizontal and the pitch axis is at a user-defined angle. This mode is suitable for capturing stable horizontal images and videos. FPV mode The roll axis is consistent with the rolling direction of the aircraft and the pitch axis is at a user-defined angle.
- Page 21 3. Gently pinch the tail of the vibration absorber with your thumb and index finger. Slide the gimbal backward and upward along the slot of the gimbal compartment in a straight line. 3. Mount the Gimbal 1. Pinch the tail of the vibration absorber with your thumb and index finger and lift the gimbal.
- Page 22 3. Insert a screw into a hole of the decorating part of the gimbal, and then screw it in with a T6 screwdriver until the screw is fixed but not tightened. For the other screw, repeat the same step. Fully tighten the two screws with a screwdriver. 4.
-
Page 23: Flight Control System
5. Use the Micro SD Card Before you turn on the aircraft, insert a micro SD card into a port, as shown below. EVO II Dual 640T V3 supports SD cards of up to 256 GB in size. If you plan to record high-definition videos, we recommend using a Class 10 or UHS-3 Micro SD card. - Page 24 the acceleration and angular velocity. Measure the geomagnetic field and provides reference Compass information on the aircraft heading. Receive signals from global navigation satellite systems and GNSS receiver determine the 3-D position (latitude, longitude and altitude) of the aircraft. Measure the atmospheric pressure and determine the altitude Barometer of the aircraft.
-
Page 25: Intelligent Flight Features
2.1.6 Intelligent Flight Features 1. Auto-return This feature is enabled only when the GPS signal is good. To manually activate the auto-return feature, long press the auto-return button ( ) on the remote controller for 3s. After receiving the command, the aircraft will automatically return and land at the preset home point. - Page 26 automatically return to the home point. Otherwise, the aircraft will land in the current place. After the communication is restored, you can press the Pause button ) to regain control over the aircraft. Low aircraft battery The failsafe is triggered whenever one of the following errors occurs: The aircraft continuously calculates the battery power required for returning to the home point.
-
Page 27: Omnidirectional Binocular Vision Sensing System
3. Landing Feature Landing Protection When the aircraft arrives above the home point, this feature will detect the ground environment below. If the ground is flat, the aircraft will land automatically. Otherwise, it will hover and wait for the next instruction. Accurate Landing ... - Page 28 Rear Tail of the aircraft 0.5 to 16 m Rear part on the left and right Left/Right 0.5 to 10 m sides of the aircraft Top of the aircraft 0.5 to 10 m Bottom Bottom of the aircraft 0.5 to 10 m The figure below shows the covering angle of each binocular vision sensing system:...
- Page 29 Note The omnidirectional vision sensing system can sense obstacles in directions such as front, rear, top, bottom, left, and right. However, blind areas exist in four diagonal directions. When you fly the aircraft manually, pay attention to the surrounding environment and prompt messages of the App to ensure safety. Do not operate the aircraft in a complex environment with insufficient light, or ...
- Page 30 2. Function Description Dynamic Tracking Using deep learning algorithms, dynamic tracking can detect six objects in real time: walking persons, persons who ride bicycles, moving cars, trucks, ships, and animals. Real-time tracking algorithms can automatically track selected objects and let the aircraft avoid obstacles in its flight path.
-
Page 31: Remote Controller
2.2 Remote Controller Portable and highly-reliable, Autel Smart Controller V3 has a 7.9-inch ultra-bright screen, which can clearly display real-time flight information under the strong sunlight. The excellent low-temperature and heat dissipation performance makes it perfectly adapt to harsh environments. The battery can last for 4.5 hours, satisfying the needs of long-time outdoor work. - Page 32 Indicates the current battery level of the remote Power indicator controller. Antenna Communicates with the aircraft. Displays the image transmission screen and Display supports tapping operations. Instructs the aircraft to stop flying and hover in the Pause button current place or resume flying. Auto-takeoff/return Instructs the aircraft to take off or return to the button...
-
Page 33: Use The Remote Controller
Horn hole Plays recordings or messages about aircraft statuses. Standard 1/4 Used for connecting to the tripod. interface Air inlet Used for heat dissipation for the remote controller. Lower hook Used for fixing the strap on the remote controller. Prevents external damage such as collision and wear of Protective cover the remote controller. - Page 34 Note During charging, the LED indicators flash in turn. All LED indicators are on when the battery is full. 4. Adjust the antennas Extend the antennas of the remote controller. The strength of the signal received by the antennas varies depending on their positions. The strongest signal can be achieved when the antennas and the back of the remote controller form an angle of 180°...
- Page 35 1. Press the linking button next to the USB port on the right of the aircraft body to let the aircraft enter the linking state. 2. Turn on the remote controller and launch the Autel Explorer App. Go to the mission flight page, and click the wheel icon on the upper right corner to go to the settings menu.
- Page 36 Three command stick modes are provided: mode 1, mode 2, and mode 3. You can set this in the Autel Explorer App based on your preferences. By default, "Mode 2" is used by the remote controller. In this mode, you can move the left command stick...
-
Page 37: Autel Explorer App
EVO Ⅱ Dual 640T V3 aircraft can be widely applied in security, inspection, and other industries. You can select multiple mission modes such as waypoint, rectangular, polygon, and oblique using the Autel Explorer App. 1. Waypoint mission You can add waypoints by yourself and set the parameters and actions for each waypoint. - Page 38 Yaw angle: the nose heading of the aircraft when it flies to this waypoint. Click Waypoint, select "Action", add camera actions, and select the yaw angle mode. A. Route: The aircraft will turn to the next waypoint along the designated route.
- Page 39 Rectangular Polygon Oblique Flight altitude √ √ √ Oblique √ √ √ altitude ▲ ▲ ▲ Oblique GSD × × ▲ Flight speed √ √ √ Oblique speed × × √ Front overlap √ √ √ Oblique front × × √...
- Page 40 Important If one of the following errors occurs, the mission automatically ends, and the aircraft will perform the corresponding operations: Low battery: A message is displayed on the app interface, informing you that the aircraft will automatically return to the home point. Critical low battery: The aircraft will end the mission and automatically land in ...
-
Page 41: Chapter 3 Flight Preparations
Chapter 3 Flight Preparations EVO Ⅱ Dual 640T V3 adopts a unique convenient design and has been all assembled in the factory. To ensure that you fly the aircraft safely, read the following instructions and warnings before your first flight. 3.1 Prepare the Battery 3.1.1 Install the Aircraft Battery 1. - Page 42 Battery level indicator: The LED indicators on the battery of the aircraft glow from left to right, indicating the current battery level during the charging. The indicators will turn off when the battery is full. Battery level indicator status (during charging) - The green LED is normally on - The green LED flashes 2.
-
Page 43: Prepare The Remote Controller
3.2 Prepare the Remote Controller 3.2.1 Unfold the Remote Controller The remote controller is folded in the packing box. Extend the antennas before you use the remote controller. For details, see Section 2.2.2 Adjust the antennas. 3.2.2 Turn On/Off the Remote Controller Turn on/off ... -
Page 44: Prepare The Aircraft
3.3 Prepare the Aircraft 3.3.1 Unfold the Aircraft 1. Remove/mount the gimbal protective cover Remove the gimbal support before you turn on the aircraft, as shown in the following figure. After you turn off the aircraft, you need to put the protective cover back on the gimbal to prevent damage. - Page 45 Warning Turn off the aircraft before you install or remove the propeller. Important Wear protective gloves for installing or removing the propeller. 1. Mount the propeller 1. Make sure that the aircraft has been turned off. 2. Select the propeller that is compatible with each motor. 3.
-
Page 46: Compass Calibration
Important Before the flight, check every propeller is firmly secured. Do not use a damaged propeller. Do not touch a rotating propeller or motor. Always remove the propeller before you test the motor. 3.3.3 Compass Calibration Generally, you do not need to calibrate the compass as it has already been calibrated before the delivery. - Page 47 1. Calibration procedure 1. Turn on the aircraft and remote controller, launch the Autel Explorer App, go to the camera page, and click the Settings button ( ). When the calibration starts, the LED indicator on the back of the aircraft flashes yellow.
-
Page 48: Chapter 4 Flight Operations
The aircraft provides three command stick modes: mode 1, mode 2, and mode 3. In each mode, you can control the aircraft differently. By default, mode 2 is used. You can switch the modes using the Autel Explorer App. We recommend that beginners use mode 2. -
Page 49: Control With Command Sticks (Mode 2)
Slowly push the left stick upwards: Warning The motor will generate heat during the operation. Operate it with care. When the battery level is 15% or even lower, the aircraft is unable to take off. 4.2.2 Control with Command Sticks (Mode 2) When you control the aircraft for the first time, move the stick gently until you ... - Page 50 Left command stick Left view Left view Descend Ascend Push downwards Push upwards Top view Top view Nose turning right Nose turning left Push to the right Push to the left 2. Right Command Stick Push the stick upwards and downwards to move the aircraft forwards and backwards.
-
Page 51: Landing And Turning Off The Motor
4.2.3 Landing and Turning Off the Motor EVO Ⅱ Dual 640T V3 aircraft can be manually or automatically landed. The procedure for landing an aircraft is as follows: 1. Manual landing 1. Find an appropriate landing position (flat and open area). 2. -
Page 52: Chapter 5 Maintenance And Service
Chapter 5 Maintenance and Service 5.1 Firmware Updates To achieve the optimal performance of EVO II Dual 640T V3 aircraft, Autel Robotics will update relevant firmware when necessary. You can download a unified firmware upgrade package from the official website. The package includes the latest versions of multiple firmware, such as the flight controller, gimbal, camera, intelligent battery, and remote controller. -
Page 53: Troubleshooting
5.2 Troubleshooting Question 1: An error is found when the aircraft performs the self-check (the LED indicator at the tail of the aircraft glows solid red). This is a hardware issue. Please contact Autel Robotics' customer support: www.autelrobotics.cn/page/service Question 2: If the motor cannot start, check the following: Check whether the remote controller is paired with the aircraft. - Page 54 Question 6: The video link fault occurs or is interrupted often. Check whether there is any magnetic or signal interference source near the aircraft and remote controller. Question 7: The camera automatically turns off during recording. Do not pull out the micro SD card from the camera. Restart the camera and ...
-
Page 55: Storage And Maintenance
5.4 Warranty For users who purchase the products from authorized retailers, Autel Robotics guarantees that in normal use, the Autel Robotics product you buy is free from defects in material or workmanship. The warranty period for this product starts on the day you receive the product. -
Page 56: Customer Service
Important For the detailed after-sales policy, visit the official website of Autel Robotics: http://www.autelrobotics.cn/page/policy.html 5.5 Customer Service This section includes information on technical support, maintenance service, and application for replacement and spare parts. 5.5.1 Technical Support If you have any problems or questions regarding our product, contact Autel... -
Page 57: Chapter 6 Appendix
Note You must ensure that you abide by all relevant flight rules and regulations. If you want to unlock a No-Fly Zone, visit the official website of Autel Robotics and follow the instructions on the page to apply:... -
Page 58: Specifications
6.2 Specifications Aircraft Takeoff weight 1150 g Dimensions (Length x Width x 230x130x108 mm (folded) Height) 260x355x108 mm (unfolded) Diagonal length 397 mm Maximum flight time (no wind) 38 minutes Maximum hovering time (no 33 minutes wind) Maximum flight speed 20 m/s (in ludicrous mode) Maximum ascent speed 8 m/s (in ludicrous mode) - Page 59 Gimbal Pitch: -135° to +45° Mechanical range Heading: -100° to +100° Pitch: -90° to +30° Controllable range Heading: -90° to +90° Stabilization 3-axis Maximum control speed 300°/s (tilt) Angular vibration range (°) ±0.005° Sensing system Accurate measurement range: 0.5 - 18 m Forward Effective sensing speed: <...
- Page 60 Forward, backward, left and right: Surface with clear patterns and adequate lighting (> 15 lux, indoor fluorescent lamp, environment with normal light exposure) Upward: surface built from special materials that can reflects light diffusely and diffuse reflection > 20% (such as walls, trees. and persons) Operating environment Downwards: the ground has a rich texture and sufficient light.
- Page 61 3840x2160P60/P50/P48/P30(default)/P25/P24 Video resolution 2720x1528P60/P50/P48/P30/P25/P24 1920x1080P60/P50/P48/P30/P25/P24 Max bit rate 120 Mbps Supported file systems FAT32/exFAT Autel Smart Controller V3 Maximum transmission distance (unobstructed, free 15 km(FCC),8 km(CE) of any interference) 902-928 MHz(FCC) 2.400-2.4835 GHz *Operating frequency 5.725-5.850 GHz (Countries except for Japan) 5.650-5.755 GHz (Japan)
- Page 62 Capacity: 5800 mAh Voltage: 11.55V Battery Type: LiPo Energy: 67 Wh Charging time: 120 minutes 3 hours (maximum brightness) Battery endurance 4.5 hours (50% brightness) Operating temperature -20ºC ~ 40ºC 303×190×87 mm (folded antennas) Dimensions 303×273×87 mm (extended antennas) 1150 g (without the protective cover) Weight 1250 g (with the protective cover) Satellite positioning...
- Page 63 Charger 13.2V ⎓ 5A Input 100-240V, 50/60 Hz, 1.5A 5V ⎓3A 9V ⎓2A Output 12V ⎓1.5A Voltage 13.2V Rated power Note: * The frequency band used varies in different countries and regions.
Need help?
Do you have a question about the EVOII Dual 640TV3 and is the answer not in the manual?
Questions and answers