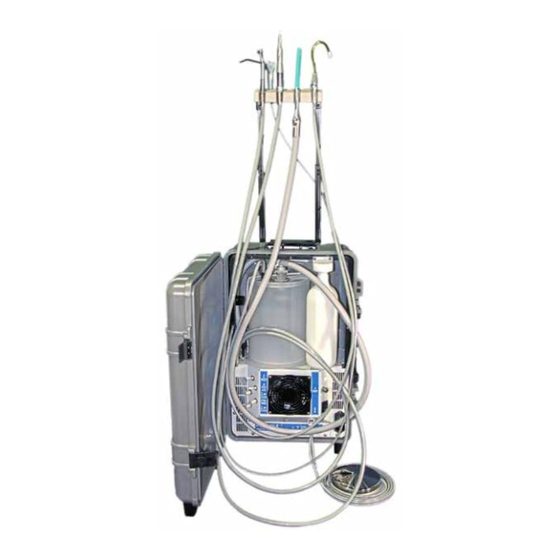
Summary of Contents for Aseptico ADU-17A2
- Page 1 OPERATION and MAINTENANCE INSTRUCTION MANUAL ADU-17A2 Express Air 2 Portable Dental System...
-
Page 2: Table Of Contents
Safety Precautions ............3 Setting Up the Unit ............4 P.O. Box 1548 • Woodinville, WA 98072 Figure 1 - ADU-17A2 System ........ 4 8333 216th Street S.E. • Woodinville, WA 98072 Figure 2a the 2e - Changing Voltage ....5 International (425) 487-3157 •... -
Page 3: Introduction
SAFETY PRECAUTIONS: Your new Aseptico Express Air 2 Portable Dental System is the finest portable electric dental system available. The Aseptico accepts no liability for direct or consequential ADU-17A2 features two handpiece controls, a 3-way air/ injury or damage resulting from improper use, arising in... -
Page 4: Setting Up The Unit
SETTING UP THE UNIT: FIG. 1 - ADU-17A2 Express Air 2 LOW VOLUME VACUUM (SALIVA EJECTOR) 3-WAY AIR/WATER SYRINGE CLIP-ON INSTRUMENT HANDPIECES HOLDER HIGH VOLUME VACUUM (HVE) CASE HANDLE WASTE TANK TIE-DOWN RESEVOIR CONNECTOR WATER SUPPLY BOTTLE HANDPIECE HIGH/LOW WASTE TANK... - Page 5 Fig. 2a Fig. 2b FUSES LOCATED IN VOLTAGE SELECTOR MODULE 120V Indicator Carefully reinstall fuses into Fuse Holder and slide Holder back into Selector Module (Figure 1e). Apply pressure until locking tab snaps back into position, producing a distinct clicking sound. 3.
-
Page 6: Operation Functions
OPERATION FUNCTIONS: Fig. 4 1. ON/OFF SWITCH: Vacuum Motor Turns the ADU-17A 2 system On or Off. Bungee Connector Cord 2. AIR FOOT CONTROL: The handpiece only operates when the foot pedal is depressed. When the foot pedal is not being used, the Water vacuum and syringe remain operational. -
Page 7: Operation
OPERATION: (Saliva Ejector) hose. Both High and Low Volume systems operate simultaneously from the same After the unit has been set up and you have made yourself vacuum source. To gain vacuum on the HVE, open the familiar with the system functions, there are two operating HVE Valve to full open and close the Saliva Ejector modes to select from: Valve. -
Page 8: Sterilization & Maintenance
SYRINGE TIPS activate. The Syringe, HVE, and Saliva Ejector will remain operational. The ADU-17A2 unit features a three-way air/water syringe with quick-change autoclavable tips. To remove a tip, press on the 3. Depress the foot pedal to operate the handpiece. Set locking collar surrounding the tip socket and pull the used tip the Handpiece High/Low switch to the desired position. -
Page 9: Troubleshooting
TROUBLESHOOTING: EXTENSION CORD RECOMMENDATIONS: Use only a 3-wire extension cord that has a 3-blade Unit will not start grounding plug. Connect extension cord plug to a matching Check system’s power connection. 3-slot receptacle. Ensure that the extension cord is in good condition and that its gage wire is the correct size wire Turn On/Off switch ON for operation. -
Page 10: Repacking Instructions
Note: For reliable grounding, connect to receptacle marked “Hospital Grade”. IMPORTANT NOTE: CAUTION: When running the ADU-17A2 unit at 230VAC 50Hz, expect approximately 17% less vacuum and WHEN TRANSPORTING UNIT, DO NOT PLACE pressure volume due to the slower turning of the OBJECTS ON TOP OF CASE. -
Page 11: Symbol Definitions
Handpiece - Air ninety (90) days from the date of return to Aseptico, whichever is later. This limited warranty applies only to the initial or first installation of the product or part. - Page 12 P.O. Box 1548 • Woodinville, WA 98072 8333 216th Street SE • Woodinville, WA 98072 (425) 487-3157 • (800) 426-5913 www.aseptico.com • info@aseptico.com P/N: 420967 Rev. G ECO 15498 PRINTED IN 04/2022 THE U.S.A.


Need help?
Do you have a question about the ADU-17A2 and is the answer not in the manual?
Questions and answers