Table of Contents
Advertisement
Quick Links
INSTRUCTION MANUAL
7B01006900A0
Preface
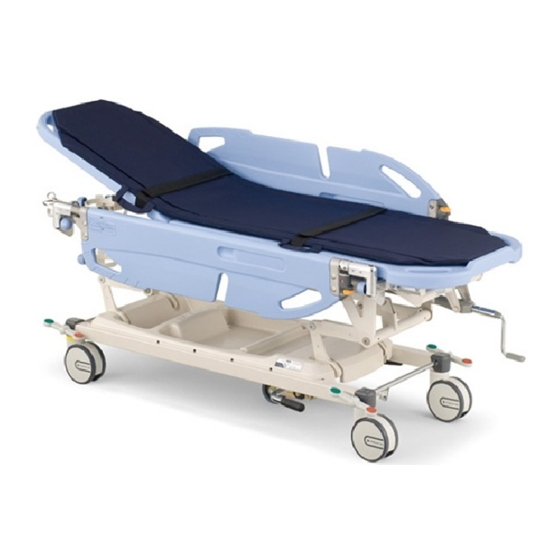
Thank you for purchasing the PK-728 Transfer Stretcher (hereafter
referred to as the "stretcher").
This instruction manual describes precautions and how to safely use and
operate the stretcher.
● Before using this stretcher, please read this instruction manual to
● After reading this instruction manual, store where it can be easily
● The actual stretcher purchased may differ from detailed descriptions
● Values described for the operation range, dimensions, angles, and mass
● For any queries, please feel free to directly contact Paramount Bed
PARAMOUNT BED CO., LTD
PK-728
Transfer Stretcher
fully understand the safe and proper operating procedures.
accessed for later reference.
given in this instruction manual due to product improvements.
may include some errors. Excluding special cases, in this instruction
manual, for display purposes words such as approximately, about, etc.
are omitted.
or your distributor.
Advertisement
Table of Contents

Subscribe to Our Youtube Channel
Related Manuals for PARAMOUNT BED PK-728


Summary of Contents for PARAMOUNT BED PK-728
- Page 1 Excluding special cases, in this instruction manual, for display purposes words such as approximately, about, etc. are omitted. ● For any queries, please feel free to directly contact Paramount Bed or your distributor. PARAMOUNT BED CO., LTD...
-
Page 2: Table Of Contents
CONTENTS Page PART NAMES INTENDED USE/SPECIFICATION SAFETY PRECAUTIONS PRECAUTIONS FOR USAGE OPERATION PROCEDURES 1. Caster (Central locking system) 2. Center wheel system 3. Height adjustment 4. Raising the backrest 5. Transfer board 6. Restraint belt 7. Oxygen cylinder holder 8. IV Pole (PC-5125) 9. -
Page 3: Part Names
PART NAMES The page number shown next to this PK-728 symbol indicates where the related explanation can be found p.21 p.13 Transfer mattress Backrest lever Gas spring is used for the Back section base backrest lever p.16 p.14-16 Restraint belt Transfer board p.19-20... -
Page 4: Intended Use/Specification
※For details of the patient target groups, the intended users and the clinical benefits, see “Specifications” below. 2. Specification Description Transfer Stretcher Model No. PK-728 Total length (cm) Total width (cm) 66.3 Mattress base height (cm) (*1) 51 to 85... -
Page 5: Safety Precautions
SAFETY PRECAUTIONS ■ Be sure to read these safety precautions beforehand to ensure proper usage. ● The safety precautions described here are intended to ensure safe use of the product and prevent personal injury. Precautions are classified as "WARNING", "CAUTION" to indicate the degree of hazard or injury that may result from improper use. - Page 6 SAFETY PRECAUTIONS ■ Place the patient on the stretcher with his/her head and feet oriented in the proper directions. ●Have the patient lie down on the stretcher with his/her head positioned at the head end of the stretcher and feet at the foot end.
- Page 7 ■ Do not attempt to repair or modify the stretcher yourself. ●This could cause abnormal operation, resulting in injury. ■ Do not attempt to transfer a patient on the stretcher with the transfer boards locked in the horizontal level position. ●The patient may fall off, the stretcher may tip over, or the patient’s hand may hit the wall, resulting in an injury.
- Page 8 ■ For accessories to be directly mounted on the stretcher, such as an IV Pole or mattress, use only accessories approved by Paramount Bed. ●The use of products other than the specified suitable products or products from other companies could create unintended gaps, cause interference between products, or lower stability, resulting in injury or failure of the stretcher.
- Page 9 ■ Do not climb on the back section base in the raised position. ●The back section base is subject to excessive weight, and could be damaged or deformed. ■ Do not move the stretcher by holding onto the transfer board only. ●Otherwise, this will apply a large force to the transfer board and there is a risk of damage or deformation.
-
Page 10: Precautions For Usage
PRECAUTIONS FOR USAGE ■To avoid possible malfunctions, do not install the bed in the following locations. ●Locations exposed to direct sunlight ●Locations with strong electromagnetic fields (near MRI machines, etc.) ●Locations near heat sources such as a stove or heater ●Location having a high oxygen concentration ●Locations exposed to excessive amounts of water vapor or oil vapor ●Locations that tend to be exposed to high temperatures or humidity, low temperatures or dry conditions... -
Page 11: Operation Procedures
OPERATION PROCEDURES 1. Caster (Central locking system) ●Lock the casters at all times except when moving the stretcher. Otherwise, the stretcher may move when transferring a patient to or from a bed, adjusting the height, or raising the backrest, causing an unexpected injury. -
Page 12: Center Wheel System
OPERATION PROCEDURES 2. Center wheel system ■Moving the center wheel located at the base center of the stretcher to be in contact with floor improves cornering, tracking, and allowing stable steering of the stretcher. When the center wheel is on The center wheel locking pedal ●Raising the center wheel locking pedal sets the center wheel to ON for better cornering, tracking, and steering. -
Page 13: Height Adjustment
3. Height adjustment ■The height of the stretcher can be adjusted with the height of a bed by operating the height adjusting handle. Height adjusment (Max. adjustable height: 34cm) ●Turn the height adjusting handle clockwise to raise the stretcher and turn counterclockwise to lower it. ●Lock the casters prior to height down adjustment. -
Page 14: Raising The Backrest
OPERATION PROCEDURES 4. Raising the backrest ■ The back section base angle can be adjusted at any degree from 0° to 70° using a lever. ●When raising the backrest, be sure to lock the casters. Otherwise, the stretcher may move during operation, resulting in an injury. ●When raising the backrest, unfasten the two pairs of restraint belts (see p. -
Page 15: Transfer Board
5. Transfer board ■ Transfer boards can be used to protect a patient on the stretcher from falling off and also as a bridge between the stretcher and a bed when transferring a patient to/from a bed. They can be used as an arm table by locking them in the horizontal level position. - Page 16 OPERATION PROCEDURES 5. Transfer board ■ To lock the transfer board in a horizontal level position (when using as an arm table) To lock the transfer board in a horizontal level position [Placing the transfer board in the horizontal level position from the up position and locking it in place] ①Release the safety lock and lower the transfer board in a horizontal level position while lifting the lug.
-
Page 17: Restraint Belt
●When operating the transfer board, prevent the tube (drain) from getting caught in part A in the figure to the left. If the tube (drain) gets caught, it may break. ●Do not operate the transfer board while placing fingers on part A in the figure to the left. -
Page 18: Oxygen Cylinder Holder
OPERATION PROCEDURES 7. Oxygen cylinder holder ■ The oxygen cylinder holder can contain a 500L (10cm to 11.5cm diameter) oxygen cylinder. ■ The oxygen cylinder holder can be set either vertically or horizontally. (Initial setting is vertical). Vertical setting ①Insert the oxygen cylinder holder into the attachment part for vertical setting as shown in the figure. - Page 19 Horizontal setting ①As shown in the figure, hold the rotation stopper fitting with your hand to keep it in a horizontal position, then insert the oxygen cylinder holder into the attachment part to set horizontally.Insert the oxygen cylinder holder deeply while adjusting its angle so that the boss of the holder reaches deeply into the stopper.
-
Page 20: Pole (Pc-5125)
8. IV Pole (PC-5125) ■ IV Pole attachment holes are located in two places each on the left and right sides of the stretcher, four places in total, to attach an IV Pole for intravenous drip. ■ When not using an IV Pole, you can store it either in the IV Pole storage holder or tray. To attach ①Insert an IV Pole firmly all the way into an IV Pole attachment hole. - Page 21 Hook ②Open the hooks at the tip when using the IV Pole. ● The load capacity of each hook is 1kg. ●When using the IV Pole, do not put a hand or arm between the base or transfer board and the IV Pole. The body part may get caught, resulting in injury.
-
Page 22: Accessory Rail
OPERATION PROCEDURES 9. Accessory rail ■ The stretcher is equipped with accessory rails under the transfer boards. Hooks (3K003355) can be attached to these rails and can be used to hang articles such as urine collection bags. ■ Hooks can be attached in some different positions. Attach them according to the position or length of the tube. -
Page 23: Patient Transfer
PATIENT TRANSFER * The illustration shows only one nurse in order to explain procedures simply. In actual procedures however, a patient should be transferred by at least two persons for safety. * Pay attention not to hit the oxygen cylinder holder when adjusting the height of stretcher for transfer. To transfer a patient from a bed to the stretcher Side rail of the bed ①Operate the center wheel locking pedal of the stretcher... - Page 24 PATIENT TRANSFER ①Roll the patient over to the opposite side of the stretcher. ● Fold the slide part on the down side ②Fold the side part of the transfer mattress on the down side. ③Insert the transfer mattress under the patient's back as deeply as possible.
- Page 25 Be sure to firmly secure the patient with the front and back belts. Pass the restraint belts through handles (all four) on the transfer mattress (see p.16). ● After placing a patient on the base (back section base and leg section base) of the stretcher, use the two pairs of restraint belts to secure the patient to the transfer mattress and...
- Page 26 PATIENT TRANSFER To transfer a patient from the stretcher to a bed Depress the center wheel locking pedal of the stretcher to Transfer board switch it OFF, place the stretcher by the bed, Restraint belt and lock the casters by pressing down the caster lock pedal (red) (see p.10 to 11).
-
Page 27: Product Symbol Definitions
PRODUCT SYMBOL DEFINITIONS ■The symbols below are used for the product. Symbol Description Symbol Description ●Warning and Caution ●Do not use the transfer board as a support to stand up. ●Safe working load ●Do not transport a patient with the transfer board locked in the horizontal level position. -
Page 28: Regular Inspection And Daily Maintenance
If you notice an irregularity or want a detailed inspection, contact Paramount Bed or your distributor (see “Contact Information” on p.30). If abnormal noise occurs during use, apply a lubricant (see the following illustration). - Page 29 REGULAR INSPECTION AND DAILY MAINTENANCE ○ Casters • There are not to be any abnormal sounds produced while the bed is being moved. • There is not to be any abnormal vibration occurring while the bed is being moved. • Operations are to run properly. •...
-
Page 30: Troubleshooting
Problems may not always indicate faults. Check the following once again before requesting repair. If the problem persists after checking these points and performing corrective actions, stop using the stretcher immediately and contact Paramount Bed or your distributor (see “Contact Information” on p.30). Reference... -
Page 31: After-Sales Service
1. When requesting repairs First check the items described in “9. TROUBLESHOOTING” on p.29 in the instruction manual. If the problem persists, contact Paramount Bed or your distributor (see “Contact Information” as shown below). ■ Details necessary when requesting repair ●... - Page 32 2021-12...
Need help?
Do you have a question about the PK-728 and is the answer not in the manual?
Questions and answers