Hytorc LITHIUM II Series Basic Operation Manual
Electric torque tool
Hide thumbs
Also See for LITHIUM II Series:
- Basic operation manual (36 pages) ,
- Manual (32 pages) ,
- Reference manual (25 pages)

Related Manuals for Hytorc LITHIUM II Series


Summary of Contents for Hytorc LITHIUM II Series
- Page 1 LITHIUM SERIES® II Electric Torque Tool Basic Operations Manual 333 Route 17 N. 800-FOR-HYTORC hytorc.com Mahwah, NJ 07430 (800-367-4986) 201-512-9500...
- Page 3 Modification of, or disclosure by any other agency or representative is strictly forbidden. Product Modifications. HYTORC DOES NOT ALLOW any of the products listed in this manual to be modified by any end user without exception. Should an application require a modification to the tool, or any of the standard accessories please consult with your local HYTORC representative and they will be able to obtain the assistance for any modification that may be required.
- Page 4 Warranty. The LITHIUM SERIES® Tool has a one-year limited warranty. Every tool is tested before leaving the factory and is warranted to be free from defects in workmanship and materials. HYTORC will repair or replace, without charge, any tool which, upon examination, proves to be defective in workmanship or materials for one (1) year after the date of purchase.
-
Page 5: Table Of Contents
10. ADJUST TORQUE 11. CHANGE DIRECTION 12. CHANGE SPEED 13. BOLTING WITH SOCKET AND REACTION ARM 14. BOLTING WITH THE HYTORC WASHER 15. BOLTING WITH THE HYTORC NUT 16. CHANGELOG APPENDIX A - CERTIFICATIONS LITHIUM SERIES® II Electric Torque Tool Basic Operations Manual... -
Page 6: General Safety Information
1 . G E NE R A L SA FE T Y INFOR M ATION WARNING! Read all safety warnings designated by the symbol and all instructions. Save all warnings and instructions for future reference. The term “power tool” in the warnings refers to your mains-operated (corded) power tool or battery-operated (cordless) power tool. - Page 7 (C O N T ’ D . ) D. POWER TOOL USE AND CARE • Do not force the power tool. Use the correct power tool for your application. The correct power tool will do the job better and safer at the rate for which it was designed. •...
- Page 8 Do not use a battery pack or charger that has received a sharp blow, has been dropped or has been run over or damaged in any way (i.e. pierced with a nail, hit with a hammer, stepped on). Damaged battery packs should be returned to an authorized HYTORC service center for recycling.
- Page 9 (C O N T ’ D . ) I. IMPORTANT BATTERY CHARGER SAFETY INSTRUCTIONS • Before using charger, read all instructions and cautionary markings on charger, battery pack and product using battery pack • DO NOT attempt to charge the battery pack with any chargers other than the one in this manual. The charger and battery pack are specifically designed to work together.
-
Page 10: Service
• All repairs are guaranteed for 6 months. • All repairs are subject to labor and part cost as outlined in the official HYTORC price list. • All repairs will be tested and calibrated to ensure the highest quality repairs. -
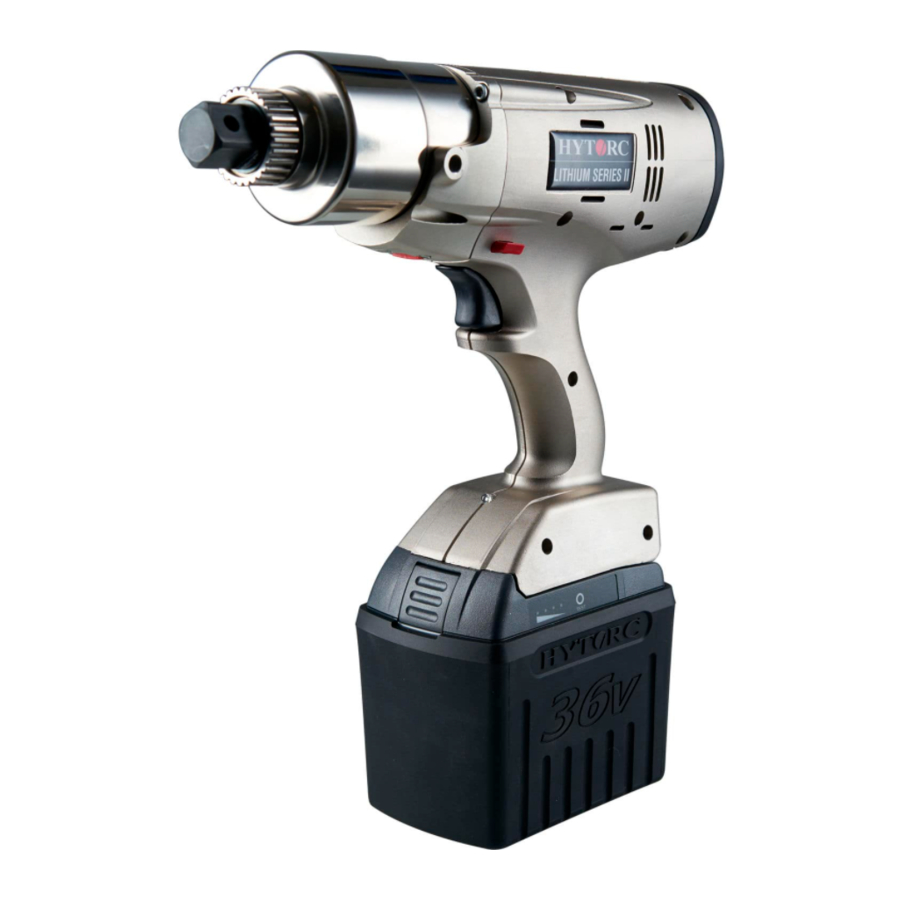
Page 11: Tool Description
36-volt battery system the tool provides sustained power through even the toughest jobs with capacity up to 5000 ft-lbs. This tool provides flexibility to support a variety of configurations including conventional sockets and reaction arms, the HYTORC Washer and precision mechanical tensioning with the HYTORC Nut. LITHIUM SERIES® II Electric Torque Tool Operations Manual... -
Page 12: Charge, Test And Install Battery
4 . CH A RGE , TE S T A ND INS TA L L BAT TE RY CHARGE THE BATTERY • The LITHIUM SERIES® II Tool is supplied with the HYTORC Battery Charger (Model: A000791) and two long-life HYTORC 36-volt batteries (Model: P002036-1) •... - Page 13 The RBRC (Rechargeable Battery Recycling Corporation) Seal on the Lithium-ion battery (or battery pack) indicates that the costs to recycle the battery (or battery pack) at the end of its useful life have already been paid by HYTORC The RBRC, in cooperation with HYTORC and other battery users, has established programs in the United States to facilitate the collection of spent Lithium-ion batteries.
-
Page 14: Care And Handling
• Maintenance must be performed by a qualified technician • Modifying any of the components invalidates the warranty • Check the calibration date on the tool. HYTORC recommends tool recalibration annually • If more than a year has passed since last calibration, contact HYTORC for recalibration •... -
Page 15: Secure From Dropping
6 . S ECU R E FROM DROPPIN G SECURING THE TOOL Follow local practices or standards for securing the tool from dropping. The eyelet provided fits most standard lanyards. LITHIUM SERIES® II Electric Torque Tool Operations Manual... -
Page 16: Install The Side Handle
7. IN S TA L L THE S IDE H A NDL E The side handle screws into the bearing housing on either the right or left - hand tighten only. -
Page 17: Worklight
8 . WOR K L IG HT A Work Light is available to enhance visibility, safety, and productivity. Work Light settings is available through the settings menu. LITHIUM SERIES® II Electric Torque Tool Operations Manual... -
Page 18: Turn Power On And Off
Push any button on the rear control Push and hold the center button for 3 The tool will automatically power off panel to turn the tool on. The HYTORC seconds to turn the power off. This can after 5 minutes of trigger inactivity to... -
Page 19: Adjust Torque
10. A DJ U S T TORQU E The torque value is displayed on the LCD screen along with Angle, Release, Fastener and Access Level. These paramaters may be adjusted through the menu system described in the Menu Guide. Only the torque value can be adjusted from the home screen. -
Page 20: Change Direction
The example shows the change in direction for right hand (RH) fasteners. The directional control switch automatically sets the appropriate direction for left hand fasteners, HYTORC Washers and for the HYTORC Nut as well. LOOSEN Changing direction sets the tool into the loosen mode with the torque value set to the maximum capability of the tool in order to quickly loosen or break out nuts. -
Page 21: Change Speed
12 . CH A N G E S PE E D The LITHIUM SERIES® II tool provides two speeds; torque and rundown. The rundown speed increases the speed to the maximum output of the tool allowing the user to quickly run down the nut to prepare for a torqueing operation. CHANGE TO RUNDOWN Push the speed switch toward the rear of the tool to switch to the rundown position. -
Page 22: Bolting With Socket And Reaction Arm
13 . BOLTIN G WITH SO CK E T A ND R E AC TION A R M WARNING Failure to make sure the reaction arm is in direct contact with an immovable object before fastening could result in serious injury. Make sure that no part of your body is in the path of the reaction arm when the nut is tightened to avoid injury. - Page 23 (C O N T ’ D . ) CONVENTIONAL TORQUE SETUP • Power on the tool • Select fastener type - for conventional torque applications the fastener will be right hand (RH) or left hand (LH) • If necessary set the speed switch to run down, place the socket on the nut and pull the trigger to quickly run down the nuts until they are flush against the flange.
- Page 24 (C O N T ’ D . ) CONVENTIONAL TORQUE LOOSENING • The Tool provides the maximum torque capacity in reverse providing a powerful breakout capability • Press the directional switch to toggle to the loosen mode • When using conventional torque install a back wrench to keep the back nut from turning •...
-
Page 25: Bolting With The Hytorc Washer
14 . BOLTIN G WITH THE H Y TORC WAS HE R INSTALL HYTORC WASHER DRIVER • The LITHIUM SERIES® II Tool is easily configured for tightening bolts where the HYTORC Washer is used • Identify the appropriate size HYTORC Washer Driver •... - Page 26 Set the speed switch back to torque after the run down is complete. • Position the tool over the nut and HYTORC Reaction Washer • Pull the trigger to apply torque until the tool reaches the desired torque and stops •...
- Page 27 • Press the directional switch to toggle to the loosen mode • Position the driver over the nut and HYTORC reaction washer and hold the trigger and begin applying torque • During the operation the status light will turn amber. If the operation is successful the status light will turn green, if unsuccessful the status light will turn red.
-
Page 28: Bolting With The Hytorc Nut
15 . BOLTIN G WITH THE H Y TORC N U T INSTALLING THE HYTORC NUT DRIVER • The LITHIUM SERIES® II Tool is easily configured for tightening the HYTORC Nut • Identify the appropriate size HYTORC Nut Driver • Slide the nut driver over the square drive and spline while aligning the set screw with the flat on the spline •... - Page 29 TIGHTENING THE HYTORC NUT NOTE: The HYTORC Nut inner sleeve is tightened in the counter clockwise direction (left hand threads). • Power on the tool, select the desired torque using the up and down arrow buttons and set the fastener type to HYTORC Nut •...
- Page 30 • Press the directional switch to toggle to the loosen mode • When loosening a HYTORC Nut, position the driver and hold the trigger until the HYTORC Nut is loose • The status light turn amber during operation. If the operation is successful, the status light will turn green, if unsuccessful the status light will turn red.
- Page 31 A PPE NDI X A - CE R TIFICATION S CERTIFICATE OF CONFORMANCE FOR JAPAN CERTIFICATE OF CONFORMANCE FOR SINGAPORE LITHIUM SERIES® II Electric Torque Tool Operations Manual...
-
Page 32: Changelog
16 . CH A N G E LO G 07/09/2019 - Back cover updated. For future-proofing all global locations have been removed from the back cover in favor of our HYTORC universe map. 07/31/2019 - French, Korean, and Spanish translations uploaded. - Page 34 OUR MISSION IS TO OPTIMIZE SAFETY, QUALITY AND SCHEDULE IN INDUSTRIAL BOLTING THROUGH INNOVATIVE SOLUTIONS AND AN UNYIELDING COMMITMENT TO WORLD CLASS CUSTOMER SERVICE. WITH OVER 50 YEARS OF EXPERIENCE FOCUSED ENTIRELY ON DEVELOPING THE HIGHEST QUALITY INDUSTRIAL BOLTING SYSTEMS, HYTORC IS THE MOST TRUSTED NAME IN THE INDUSTRY.
- Page 36 HYTORC WORLD HEADQUARTERS 333 Route 17 North, Mahwah, NJ 07430 • +201-512-9500 • 800-FOR-HYTORC THE HYTORC UNIVERSE IS MADE UP OF OVER 1,000 TRAINED BOLTING SPECIALISTS TO SUPPORT YOUR BOLTING NEEDS IN OVER 100 COUNTRIES. Locate your nearest HYTORC representative: H Y TO R C .CO M/ WO R LD...
Need help?
Do you have a question about the LITHIUM II Series and is the answer not in the manual?
Questions and answers