Page 3
Modification of, or disclosure by any other agency or representative is strictly forbidden. Product Modifications. HYTORC DOES NOT ALLOW any of the products listed in this manual to be modified by any end user without exception. Should an application require a modification to the tool, or any of the standard accessories please consult with your local HYTORC representative and they will be able to obtain the assistance for any modification that may be required.
CONVENTIONAL TORQUE SETUP CONVENTIONAL TORQUE TIGHTENING CONVENTIONAL TORQUE LOOSENING BOLTING WITH THE HYTORC WASHER INSTALL HYTORC WASHER DRIVER TIGHTENING WITH THE HYTORC WASHER DRIVER LOOSENING WITH THE HYTORC WASHER BOLTING WITH THE HYTORC NUT INSTALL HYTORC NUT DRIVER TIGHTENING THE HYTORC NUT...
1. IMPORTANT SAFETY INFORMATION Read and understand this material before operating or servicing the LITHIUM SERIES® Electronic Torque Tool. Failure to understand how to safely operate this tool could result in an accident causing serious injury or death. • Inspect all Tool components as they are removed from the shipping container. If damage is found to any component, contact the shipper immediately.
Page 7
PERSONAL SAFETY • Stay alert, watch what you are doing and use • Remove any adjusting key or wrench before turning common sense when operating the tool. Do not use the tool on. A wrench or a key left attached to a rotating the tool while you are tired or under the influence of part of the tool may result in personal injury.
Page 8
(i.e. pierced with a nail, hit with a hammer, stepped on). Damaged battery packs should be returned to an authorized HYTORC service center for recycling. US Department of Transportation Hazardous Materials Regulations The US Department of Transportation Hazardous Materials Regulations (HMR) actually prohibit transporting batteries in commerce or on airplanes, (i.e.
Page 9
IMPORTANT BATTERY CHARGER SAFETY INSTRUCTIONS • Before using charger, read all instructions and • Do not block any ventilation slots on charger power cautionary markings on charger, battery pack and supply. product using battery pack. • DO NOT attempt to charge the battery pack with •...
2. TOOL DESCRIPTION Cooling Vents Square Drive Compatible with Standard Sockets Brushed DC Motor and Cooling Fans Reaction Spline USB Micro Port Planetary Gear Box Eyelet Dual Speed Switch Trigger Pistol Grip Handle Battery Lock Button Batter Test Button and Charge Indicator 36V Rechargeable and PUSH-BUTTON CONTROL PANEL...
• All warranty repairs are free of all charges including return-freight. HELP If you require any further assistance, please call your local HYTORC Representative or 1-800-FOR-HYTORC (1-800-367-4986). Please visit us at HYTORC.com. FOLLOW US ONLINE 
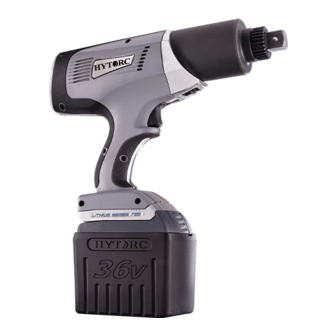
LITHIUM SERIES® Electric Torque Tool (BTM-DOC Models) Operations Manual...
• Maintenance must be performed by a qualified technician. • Modifying any of the components invalidates the warranty. • Check the calibration date on the tool. HYTORC recommends tool recalibration annually. • If more than a year has passed since last calibration, contact HYTORC for recalibration.
5. CHARGE, TEST & INSTALL BATTERY 1. Charging Cable 6. Power Indicator 2. Battery Pack 7. Legend 3. Charging Cradle 8. Charging Indicator 4. Power Supply 9. Fault Indicator 5. Power Supply Cord CHARGE THE BATTERY CHARGING INDICATOR • The LITHIUM SERIES Tool is supplied with two long life •...
The RBRC (Rechargeable Battery Recycling Corporation) Seal on the lithium ion battery (or battery pack) indicates that the costs to recycle the battery (or battery pack) at the end of its useful life have already been paid by HYTORC The RBRC, in cooperation with HYTORC and other battery users, has established programs in the United States to facilitate the collection of spent lithium ion batteries.
6. OPERATING THE CONTROL PANEL PRIMARY CONTROL FEATURES • Press Any Button to Power-On Tool (the tool automatically turns off after 5 min) • A new tool shows the factory default settings • A tool that has been used before displays the last settings used on the tool before it was powered off . •...
TOGGLE TORQUE, ANGLE & RELEASE The tool provides simple access to set Torque, Angle and Release by toggling the center button. The torque setup screen is the home screen for operating the tool. 1. TORQUE: Press and hold the center button for approximately 3-seconds and release it to access the Angle screen.
• While the tool has a capability to set the RELEASE between 0 and 359 degrees, the RELEASE is typically set on the lower end and less than 10 degrees (1-to-3 degrees for HYTORC Washer, or 3-to-7 degrees for reaction arms) so that nut is not loosened.
7. NAVIGATING THE MENUS MAIN MENU AND SUB-MENUS The Main Menu provides Operations, Job Data, System, Admin and the Exit and Power Off options. Press and hold the left and center buttons simultaneously for approximately three seconds, release buttons when the Main Menu is displayed. MAIN MENU •...
OPERATION MENU The Operation menu contains most functions for everyday operation. • The green bar highlights the current position • Press left button f to scroll down, right button to scroll up • Press the center button i to select and display a sub-menu (Continued on following page) In order to save or load a job profile the Allows the user to save tool parameters...
Page 20
Any selection returns users to OPERATION menu. NOTE: When using the HYTORC Washer or HYTORC Nut the safety feature requiring a push of the button before operation is disabled. Tool should never be used with a reaction arm in this setting.
JOB DATA MENU The Job Data menu contains settings needed to record and download data from the tool. • The green bar highlights the current position • Press left button f to scroll down, right button to scroll up •...
Page 22
(JOB DATA MENU continued from previous page) Provides a summary of jobs and events Press the buttons i to scroll through This screen prompts the user to currently being saved in memory. the job numbers to select the data connect a standard USB cable between set you want to download.
CONNECT USB CABLE SAMPLE EXCEL FILE EVENT TORQUE TORQUE TORQUE DATE TIME ANGLE RELEASE JOB DURATION TEMP VOLTAGE FASTENER COMPCODE CHECK UNITS PREMATURE LOOSEN FT. LBS. TRIGGER RELEASE PREMATURE TIGHTEN FT. LBS. TRIGGER RELEASE PREMATURE LOOSEN FT. LBS. TRIGGER RELEASE PREMATURE LOOSEN FT.
• Press the center button i to select and display a sub-menu NOTE: The SET UP DEVICE and DIAGNOSTIC Menu items are not intended for field use. These functions are password protected and only accessible by HYTORC in the factory. Displays Firmware (FW) and Hardware...
• Press the center button i to select and display a sub-menu NOTE: The CALIBRATE GUN and FORMAT NVRAM options are not intended for field use, these are only accessed by HYTORC authorized service personnel. (Continued on following page) The user is prompted...
Page 26
(ADMIN MENU continued from previous page) ENTER GENERAL ENTER GENERAL ENTER GENERAL PASSWORD PASSWORD PASSWORD The user may enable a Allows user to set time To adjust the minimum To adjust the maximum lockout mode that prevents and date by entering TORQUE limit press button TORQUE limit press button any user from changing...
8. DUAL SPEED OPERATION TWO-SPEED OPERATION Each LITHIUM SERIES Tool is equipped with a dual-speed gearbox. The gearbox has two modes: 1. RUNDOWN MODE: The gearbox is set to run at a higher speed and very low torque to run nuts down to seated position prior to tightening on an application.
9. BOLTING WITH CONVENTIONAL REACTION ARM WARNING! Failure to make sure the reaction arm is in direct contact with an immovable object before fastening could result in serious injury. Make sure that no part of your body is in the path of the reaction arm when the nut is tightened to avoid injury.
• The Torque rotational direction arrow and the rotating nut icon reflect the fastener clockwise or counter clockwise rotation associate with the specific fastener type. (The fastener type may be set under the Operation – Fastener Type menu: Right-Hand, Left-Hand, HYTORC NUT and HYTORC Washer). CONVENTIONAL TORQUE SETUP •...
CONVENTIONAL TORQUE TIGHTENING • To begin the TORQUE operation, pull and hold the trigger. • With Right or Left Fasteners, a message is displayed instructing the user press an additional button on the control panel to ensure the operator keeps both hands clear of the reaction arm. •...
CONVENTIONAL TORQUE LOOSENING • The Tool provides the maximum torque capacity in reverse providing a powerful breakout capability. • Press the center button to toggle to the loosen mode. • When using conventional torque install a back wrench to keep the back nut from turning. •...
INSTALL THE HYTORC WASHER DRIVER • The LITHIUM SERIES Tool is easily configured for tightening bolts where the HYTORC Washer is used. • Identify the appropriate size HYTORC Washer Driver. • Slide the washer driver over the square drive and spline while aligning the thumb screw with the flat on the spline.
Set the speed switch back to Torque after the run down is complete. • Position the tool over the nut and HYTORC Reaction Washer. • Pull the trigger to apply torque until the tool reaches the desired torque and stops.
• Press the center button to toggle to the loosen mode. • Position the driver over the nut and HYTORC reaction washer and hold the trigger and begin applying torque. • During the operation the status light turn amber during operation. If the operation is successful the status light will turn green, if unsuccessful the status light will turn red •...
11. BOLTING WITH THE HYTORC NUT INSTALL THE HYTORC NUT DRIVER • The LITHIUM SERIES Tool is easily configured for tightening HYTORC Nuts. • Identify the appropriate size HYTORC Nut Driver • Slide the nut driver over the square drive and spline while aligning the set screw with the flat on the spline.
TIGHTENING THE HYTORC NUT NOTE: The HYTORC Nut inner sleeve is tightened in the counter clockwise direction (left hand threads). • Power on the tool, adjust tool settings and set the fastener type to HYTORC Nut. • Position the tool over the nut.
• It may necessary to install a back wrench to keep the back nut from turning. • When loosening HYTORC Nuts position the driver and hold the trigger until the HYTORC Nut is loose. • The status light turn amber during operation. If the operation is successful, the status light will turn green, if unsuccessful the status light will turn red.
THIS ADDENDUM SUPERSEDES INFORMATION CONTAINED IN THE PRODUCT MANUAL WHAT HAS CHANGED? HOW HAS IT CHANGED? This product contains the new and faster HYTORC U85105 120W This new battery charger contains a single combined Charge Status/Fault LED Indicator, circled below in red.
Page 40
HYTORC OF KOREA Kyunggi-Do, +82-31-708-0850 HYTORC AUSTRALIA Adelaide, South Australia, +61-8-8293-8411 HYTORC SOUTH AFRICA Mount Edgecombe, DUR, +27-(0)315023119 HYTORC SINGAPORE Singapore, +65-689-789-95 HYTORC LATIN AMERICA Coatzaocoalcos, VER, +52-921-21-52760 Locate your nearest HYTORC representative or location: hytorc.com/world • info@hytorc.com • +1-201-512-9500 CAT-LITHIUM_SERIES-MAN-20180413...
Need help?
Do you have a question about the BTM-0250-DOC and is the answer not in the manual?
Questions and answers