Hytorc LITHIUM II Series Quick Start Manual
Electric torque tool
Hide thumbs
Also See for LITHIUM II Series:
- Basic operation manual (36 pages) ,
- Manual (32 pages) ,
- Reference manual (25 pages)
Table of Contents
Advertisement
Quick Links
L ITH I U M S E R IE S ® II EL EC T R I C TORQU E TO OL
QUICK START GUIDE
1. REVIEW SAFET Y INSTRUCTIONS
IMPORTANT!
•
Do not get wet.
•
Avoid exposure to condensing humidity.
•
Do not operate in temperatures above
140° F (60° C).
•
Keep vents clear of dust, dirt and debris.
•
Do not use in explosive environments.
•
Secure tool to prevent from dropping.
•
Keep hands clear of reaction pinch points.
•
Use handle supplied with tool.
•
Use only the battery and charger provided.
•
Follow Lithium-Ion Battery Safety
Instructions:
https://library.hytorc.com/posts/3103
3. CHARGE, TEST, AND INSTALL BATTERY
1.
Battery
Connect charger to power supply and
2.
Charging Cable
insert battery.
3.
Power Outlet
4.
Power Cord
1
5.
Power Supply
6.
Charger
7.
Charge Indicator
8.
Tool Base
9.
Test Button
10.
Release Button
4. POWER-ON TOOL
Power-On
Push any button to
power-on the tool.
Power-Off
Push and hold the
center button to
power-off the tool.
1-800-FOR-HYTORC
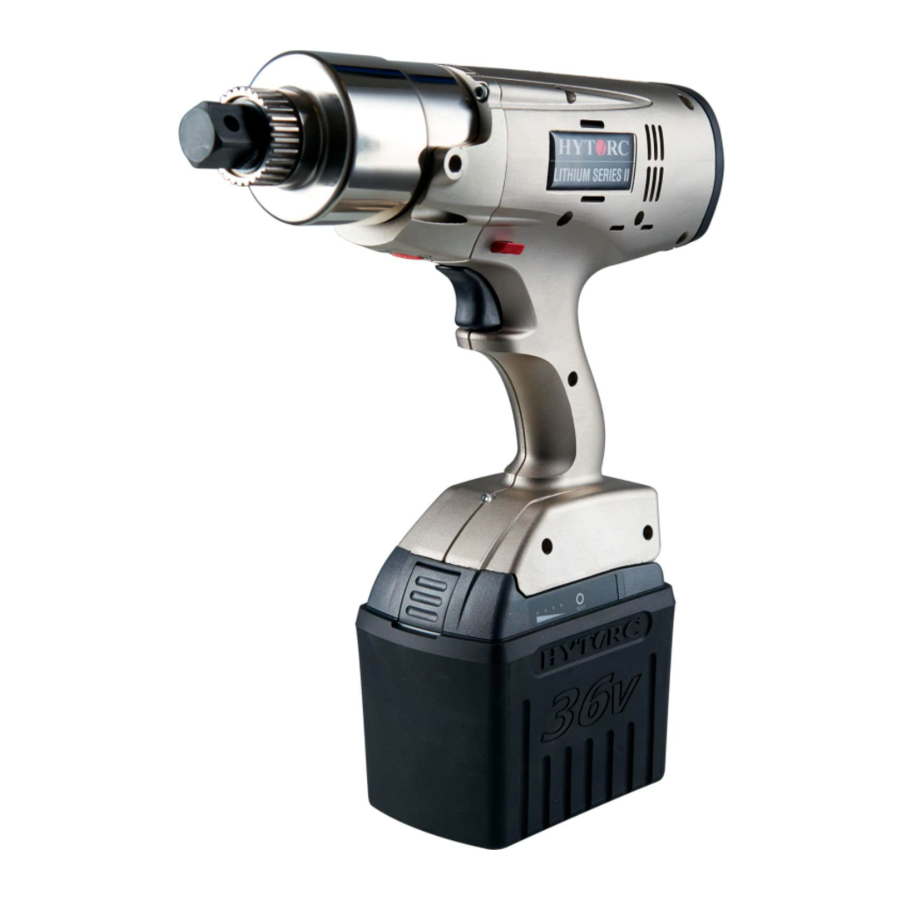
2. INSPECT TOOL COMPONENTS (CLOCKWISE FROM LEFT)
1
2
3
4
12
13
11
Charge indicator flashes while charging,
turns solid green when fully complete
(approximately 90 minutes).
2
3
4
10
6
5
5. REVIEW CONTROL PANEL AND HOME SCREEN
5
6
7
8
9
10
7
1
2
11
10
5
9
8
1.
Square Drive
2.
Reaction Spline
3.
Planetary Gearbox
4.
Handle Attachment
5.
Directional Control
6.
Cooling Vents
7.
Control Panel
8.
USB Micro Port
9.
Pistol Grip
10.
Eyelet
11.
Trigger
12.
Dual Speed Switch
13.
Battery
Press test button: a
fully charged battery
should display 4
green lights.
Slide battery onto
8
tool base until the
9
release button
snaps tight.
1.
Angle
2.
Release
3.
Status Indicator
4.
Fastener
3
5.
Direction
6.
Menu - Level
4
7.
Right Scroll Button
8.
Center Select Button
6
9.
Left Scroll Button
7
10.
Bluetooth
11.
Torque
HYTORC.COM
Advertisement
Table of Contents

Related Manuals for Hytorc LITHIUM II Series


Summary of Contents for Hytorc LITHIUM II Series
- Page 1 Use only the battery and charger provided. Dual Speed Switch • Follow Lithium-Ion Battery Safety Battery Instructions: https://library.hytorc.com/posts/3103 3. CHARGE, TEST, AND INSTALL BATTERY Battery Connect charger to power supply and Charge indicator flashes while charging, Press test button: a Charging Cable insert battery.
- Page 2 Calibration. completion. HYTORC owns all content, copyrights, trademarks and patents in this document. © 2020 HYTORC. Any unauthorized use or distribution of any material from this document is strictly prohibited. Headquarters: Email: 333 Route 17 N., Mahwah, NJ 07430 info@hytorc.com...
Need help?
Do you have a question about the LITHIUM II Series and is the answer not in the manual?
Questions and answers