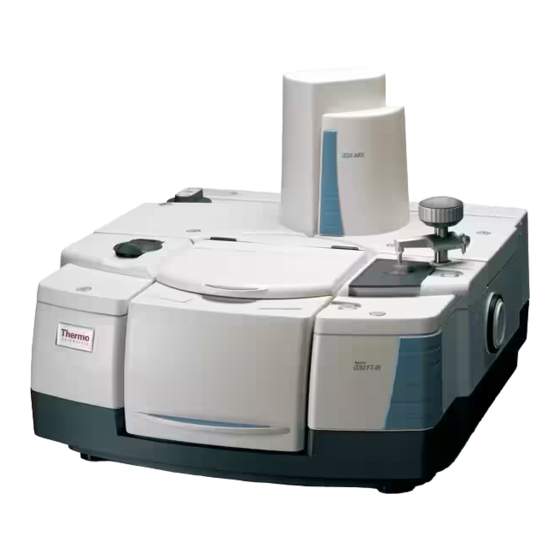
Thermo Scientific Nicolet iS50 User Manual
Ftir spectrometer
Hide thumbs
Also See for Nicolet iS50:
- User manual (56 pages) ,
- Getting started (28 pages) ,
- Manual (27 pages)

Related Manuals for Thermo Scientific Nicolet iS50


Summary of Contents for Thermo Scientific Nicolet iS50
- Page 1 Nicolet iS50 FTIR Spectrometer User Guide 269-3515 00 A Revision A February 2022 © 2022 Thermo Fisher Scientific Inc. All rights reserved.
- Page 2 For technical support, please contact: www.thermofisher.com Thermo Fisher Scientific Inc. provides this document to its customers with a product purchase to use in the product operation. This document is copyright protected and any reproduction of the whole or any part of this document is strictly prohibited, except with the written authorization of Thermo Fisher Scientific Inc.
-
Page 3: Table Of Contents
Contents Introduction Conventions Used Warranty Information Contacting Us Operation Operating Precautions Overview of the Nicolet iS50 Spectrometer Spectrometer Components Using Your Spectrometer Measuring a sample Accessories and Application Modules Smart Accessories Other Sampling Accessories Other Accessories System Accessories Installing Accessories... - Page 4 Checking Internal Humidity Replacing the Desiccant Checking and Changing the Purge Gas Filter Aligning the Spectrometer Service Installing or Removing Optional Hardware Replacing Components Troubleshooting Hardware Problems Applications Problems Research Module...
-
Page 5: Introduction
Refer to your ValPro documentation for more information. The Nicolet iS50 spectrometer performs chemical analyses of sample materials by collecting data in the mid-IR, far-IR and near-IR spectral ranges using a variety of accessories. The system integrates advanced instrument features, such as step-scan and dual-channel data collection, with a powerful software suite and many other features that make data collection easy. - Page 6 The spectrometer site and safety guide that came with your system contains important safety information. Before you use the system, read the entire guide. To prevent personal injury and damage to equipment, follow the safety precautions contained in the guide whenever you use the system. Nicolet iS50 Spectrometer User Guide Thermo Scientific...
-
Page 7: Conventions Used
Avoid hazard. Indicates a hazardous situation which, if not avoided, could result in minor or moderate injury. NOTICE Follow instructions with this label to avoid damaging the system hardware or losing data. Note Contains helpful supplementary information. Thermo Scientific Nicolet iS50 Spectrometer User Guide... -
Page 8: Warranty Information
We do not warrant uninterrupted or error-free operation of a product. We provide certain non-Thermo Fisher Scientific products on an “as is” basis. Non-Thermo Fisher Scientific manufacturers or suppliers may provide their own warranties. A separate software warranty is provided with the software user documentation. Nicolet iS50 Spectrometer User Guide Thermo Scientific... - Page 9 Missing or damaged parts if the shipping boxes are unpacked before our service engineer installs the system. Damage due to removing the sealed plastic bag before the instrument has come to room temperature. Thermo Scientific Nicolet iS50 Spectrometer User Guide...
-
Page 10: Contacting Us
Introduction Contacting Us For technical support, please contact: www.thermofisher.com Nicolet iS50 Spectrometer User Guide Thermo Scientific... -
Page 11: Operation
Chapter 2 Operation The Nicolet iS50 spectrometer provides powerful tools with easy operation. This operations help guide will take you through the basic steps in designing experiments and working with the instrument. With this information, you can collect and analyze data using a variety of tools, like spectral math, identification and quantification. -
Page 12: Operating Precautions
Contact us for information about the languages that are available. Before you use the system, read the entire manual. To prevent personal injury and damage to equipment, follow the safety precautions contained in the manual whenever you use the system. Nicolet iS50 Spectrometer User Guide Thermo Scientific... -
Page 13: Overview Of The Nicolet Is50 Spectrometer
Operation Overview of the Nicolet iS50 Spectrometer The Nicolet iS50 spectrometer is a multirange applied-research FT-IR spectrometer that automatically configures its optics and changes instrument components based on the requirements of the experiment. The main spectrometer is offered in two configurations: single range/manual multirange and advanced automated multi-range. - Page 14 Near-IR, GC-IR, Raman, and FT-IR microscopy applications. Each module has an associated blue button, called a Touch Point, to conduct experiments directly from the iS50 spectrometer. See"Accessories and Application Modules" for information about the available modules for the iS50 spectrometer. Nicolet iS50 Spectrometer User Guide Thermo Scientific...
-
Page 15: Spectrometer Components
Operation Spectrometer Components This section describes the components of the Nicolet iS50 spectrometer. See"Accessories and Application Modules" for information about Smart Accessories, other sampling accessories, optional accessories, and system accessories; and also the optional ATR, GC-IR, Raman, and NIR application modules. - Page 16 Operation Dimensions The following diagram shows the dimensions of the spectrometer as viewed from the top. The following diagram shows the dimensions of the spectrometer as viewed from the front. Nicolet iS50 Spectrometer User Guide Thermo Scientific...
- Page 17 The following diagram shows the dimensions of the spectrometer sample compartment. Power Switch The power switch is located near the back of the spectrometer on the left side. This switch is used to turn the spectrometer on and off. Thermo Scientific Nicolet iS50 Spectrometer User Guide...
- Page 18 Operation System LEDs The two LEDs on the spectrometer located next to the power switch indicate system status and system scan activity. Nicolet iS50 Spectrometer User Guide Thermo Scientific...
- Page 19 The sample compartment cover has two removable subpanels, about the size of a microscope slide, that can be removed to run additional cabling in and out of the sample compartment as needed. Thermo Scientific Nicolet iS50 Spectrometer User Guide...
- Page 20 This is an image of a cover lock in the unlocked position: To lock the cover, use a flathead screwdriver to turn the lock counterclockwise until the two dots line up. To unlock, turn the screwdriver clockwise. Nicolet iS50 Spectrometer User Guide Thermo Scientific...
- Page 21 Contact us if you desire keyed locks. Touch Points The sampling action of the Nicolet iS50 spectrometer is controlled mainly by the Touch Points on the spectrometer, which initiate the configuration of the spectrometer and run experiments.
- Page 22 The available external beam port windows are KBr, CsI, and (for the iS50 NIR). "Research Module" "Accessories and Application Modules" for information about how the external modules are connected to the external beam ports. Nicolet iS50 Spectrometer User Guide Thermo Scientific...
- Page 23 Note It is recommended that the desiccant be changed once per year, even ifthe humdity indicator in the cap is blue. "Spectrometer Components", "Checking Internal Humidity", and "Replacing the Desiccant" more information. Thermo Scientific Nicolet iS50 Spectrometer User Guide...
- Page 24 This section describes the spectrometer features and options inside the spectrometer. Some components shown in the image are not present in all spectrometers. Alternate Configurations This image shows an iS50 spectrometer with an ABX installed and no ATR installed. Nicolet iS50 Spectrometer User Guide Thermo Scientific...
- Page 25 SAMPLE COMPARTMENT WINDOWS When the sample compartment cover or hatch is open, sample compartment windows block the introduction of water vapor and carbon dioxide into the spectrometer and keep the purge intact. Thermo Scientific Nicolet iS50 Spectrometer User Guide...
- Page 26 Two types of internal sources are available: NIR (white light) This image shows the source mount with available sources in their respective positions and an optional Raman detector. An optional emission mirror is also shown. Nicolet iS50 Spectrometer User Guide Thermo Scientific...
- Page 27 The type of interferometer installed depends on your spectrometer configuration: The Nicolet iS50 uses a standard linear-scan Vectra™ interferometer. The Nicolet iS50R uses the step-scan and linear-scan capable Vectra interferometer and the optional Vectra Piezo™...
- Page 28 ROOM TEMPERATURE INTERCHANGEABLE DETECTORS DLaTGS detector with polyethylene window TE-cooled DLaTGS detector with KBr window PbSe detector with sapphire window Si detector with quartz window InGaAs detector for NIR TE-cooled InGaAs detector for NIR Nicolet iS50 Spectrometer User Guide Thermo Scientific...
- Page 29 The beamsplitters that are available for the iS50 spectrometer are: XT-KBr Quartz Solid Substrate CsI (Only available with the fixed CsI configuration; it cannot be used in the ABX.) Thermo Scientific Nicolet iS50 Spectrometer User Guide...
- Page 30 BEAMSPLITTER STORAGE AREA The beamsplitter storage area is provided in a sealed and desiccated area near the back of the spectrometer, to the left of the interferometer. This storage area can be accessed through the Nicolet iS50 Spectrometer User Guide Thermo Scientific...
- Page 31 The optional iS50 ABX provides multi-range spectrometry without having to manually swap optics or remove the exchanger. When you select a configuration in the software, the iS50 ABX loads the correct beamsplitter into the interferometer. See "Using Your Spectrometer" for more information. Thermo Scientific Nicolet iS50 Spectrometer User Guide...
- Page 32 Depending on your configuration, you will have either a fixed single position source mirror or a motorized quad-position source mirror. DETECTOR MIRROR Depending on your configuration, you will have either a single (top) detector mirror or a triple detector mirror. Nicolet iS50 Spectrometer User Guide Thermo Scientific...
- Page 33 On the electronics module are an auxiliary signals port, two accessory ports, a computer port, and a DC power port. On the base of the spectrometer are a microscope accessory port, purge input port, and sample compartment accessory port. Thermo Scientific Nicolet iS50 Spectrometer User Guide...
- Page 34 The power supply unit includes a power cable, a power supply, and a power cord. Connect the cable from the power supply into the DC Power port. Connect the power cord from the power supply into an electrical outlet or power strip. Nicolet iS50 Spectrometer User Guide Thermo Scientific...
- Page 35 USB port on the base of the spectrometer. A USB cable is connected from this external port to a USB 2.0 port on the computer. See Cabling An Accessory for more information. Thermo Scientific Nicolet iS50 Spectrometer User Guide...
-
Page 36: Using Your Spectrometer
If this does not resolve the problem, see Troubleshooting for possible causes and solutions. If you cannot resolve the problem, contact us. Turning the Spectrometer off Press the power switch (I/O) to O . Nicolet iS50 Spectrometer User Guide Thermo Scientific... - Page 37 To open the hatch, lift the cover up by the blue tab on the front of the hatch as shown: Closing the Sample Compartment Hatch Lower the hatch of the sample compartment down and towards you until it is closed. Thermo Scientific Nicolet iS50 Spectrometer User Guide...
- Page 38 2. Insert the tab on the curved back edge of the sample compartment cover into the notch in the spectrometer cover behind the locking mechanism. 3. Align the sample compartment cover so that the ball joint on the cover can be inserted into the locking mechanism. Nicolet iS50 Spectrometer User Guide Thermo Scientific...
- Page 39 Be sure that the curved back edge of the sample compartment cover is flat against the spectrometer back cover. 5. Secure the sample compartment cover by moving the locking mechanism lever to the right towards the “locked” symbol. 6. Close the sample compartment. Thermo Scientific Nicolet iS50 Spectrometer User Guide...
- Page 40 Use of controls or adjustments or performance of procedures other than those specified in your user information may result in hazardous radiation exposure. Time needed: Five minutes or less Tools needed: Flathead screwdriver Nicolet iS50 Spectrometer User Guide Thermo Scientific...
- Page 41 4. Replace the desiccant through the black desiccant cap. "Using Your Spectrometer" if you have an ABX. Opening the Beamsplitter Compartment Hatch The beamsplitter compartment hatch is located in the back cover of the spectrometer (non-ABX). Thermo Scientific Nicolet iS50 Spectrometer User Guide...
- Page 42 2. Lift the hatch to open. Closing the Beamsplitter Compartment Hatch 1. Lower the hatch by the front edge until it is closed. 2. Press on the front edge of the hatch to secure it. Nicolet iS50 Spectrometer User Guide Thermo Scientific...
- Page 43 1. Remove the sample compartment cover. 2. Open the 4 cover locks. 3. Lift the cover up and away from the instrument. Be sure to clear the beamsplitter tower. Replacing the ABX Cover Thermo Scientific Nicolet iS50 Spectrometer User Guide...
- Page 44 2. Carefully lower the cover over the ABX and lock it using a flathead screwdriver. 3. Replace the desiccant. 4. Replace the compartment cover. Installing the Standard Sample Holder 1. Attach the holder to a baseplate using a flat-head screwdriver and slotted screws. Nicolet iS50 Spectrometer User Guide Thermo Scientific...
- Page 45 The sample holder provided with your spectrometer is used for installing film samples, filters, and slide-mounted accessories in the beam path inside the sample compartment. 1. Open the sample compartment cover. 2. Slide the sample into one pair of slots in the sample holder. Thermo Scientific Nicolet iS50 Spectrometer User Guide...
- Page 46 The infrared beam is centered in the sample compartment, approximately 3.5 inches above the baseplate. To adjust the vertical height of the sample, turn the adjustment screw in the sample holder. Turn the screw counterclockwise to move the sample up; clockwise to move the sample down. Nicolet iS50 Spectrometer User Guide Thermo Scientific...
- Page 47 The sidewall adapters create a seal surface needed for some purged accessories. They provide a flat surface for the purge tube to sit tightly against. Cradles are located on the sidewalls of the sample compartment, next to the sample compartment window ports. Thermo Scientific Nicolet iS50 Spectrometer User Guide...
- Page 48 The fixed DTGS detector is a standard component and located in the middle position of the detector compartment. The fixed DTGS detector is not user-replaceable. Contact us if you suspect the fixed detector must be replaced. Nicolet iS50 Spectrometer User Guide Thermo Scientific...
- Page 49 Do not touch the window of the detector. Time: Five minutes or less Tools needed: Large flathead screwdriver, long Philips head screwdriver Thermo Scientific Nicolet iS50 Spectrometer User Guide...
- Page 50 4. Remove the detector. The detector is held in place by magnets on the bottom of its baseplate. Grasp the detector by its sides and carefully but firmly pull the detector straight up to remove it. Nicolet iS50 Spectrometer User Guide Thermo Scientific...
- Page 51 DLaTGS detectors with CsI windows must be stored in a very dry atmosphere. Installing a Detector WARNING Avoid shock hazard. Be sure to unplug the system from the power source before servicing any replacement parts. Thermo Scientific Nicolet iS50 Spectrometer User Guide...
- Page 52 This image shows the connections and baseplate of a cryo-cooled detector. The holes are in the detector baseplate and the pins are on the spectrometer baseplate. Nicolet iS50 Spectrometer User Guide Thermo Scientific...
- Page 53 5. Replace the detector compartment cover. Lock the cover by inserting a large flathead screwdriver into the lock and turning it clockwise. Turn the spectrometer 7. Configure the detector in OMNIC Paradigm software. Thermo Scientific Nicolet iS50 Spectrometer User Guide...
- Page 54 To install detector from a Nexus, 6700, or 8700 spectrometer, following the instructions on "Using Your Spectrometer". Then locate the bank of six switches labeled SW1 on the detector. Set them as shown: Switch Setting Nicolet iS50 Spectrometer User Guide Thermo Scientific...
- Page 55 Cool the funnel and funnel stem first: fill the funnel and let it drain completely into the detector two or three times. Always let the liquid nitrogen flow into the detector before adding more liquid nitrogen. Thermo Scientific Nicolet iS50 Spectrometer User Guide...
- Page 56 This does not necessarily mean a particular combination will provide the maximum sensitivity range of each component. Detector Specifications This table shows the beamsplitter-detector combinations that perform best, those that are compatible, and those that are not compatible. Nicolet iS50 Spectrometer User Guide Thermo Scientific...
- Page 57 DLaTGS (CsI Best window) DLaTGS Best window) DLaTGS Best Best Best (proprietary window) MCT-A Best Best MCT-B Best Best InSb Best PbSe Best Best Best InGaAs Best Best = Optimum beamsplitter-detector combination Thermo Scientific Nicolet iS50 Spectrometer User Guide...
- Page 58 Polaris, white 13,000 - 2,800* PbSe light TEC PbS (with Polaris, white 10,000 - 4,200* SabIR) light Polaris, white 12,000 - 3,800 InGaAs light Polaris, white CaF2 11,700 - 1,200* MCT-A‡ light Nicolet iS50 Spectrometer User Guide Thermo Scientific...
- Page 59 11,700 - 750 High D* MCT-A light Polaris, white 11,000 - 600* MCT-A‡ light Polaris, white 11,000 - 400* MCT-B‡ light Polaris, white 11,000 - 1,850* InSb‡,§ light Polaris, white 11,000 - 2,000* PbSe light Thermo Scientific Nicolet iS50 Spectrometer User Guide...
- Page 60 4,500 - 375 DLaTGS ATR Polaris CsI^ 6,400 - 200 DLaTGS-CsI Polaris 6,400 - 750 High D* MCT-A Polaris 6,400 - 600 MCT-A‡ Polaris 6,400 - 400 MCT-B‡ Polaris 6,400 - 200 DLaTGS ATR Polaris Nicolet iS50 Spectrometer User Guide Thermo Scientific...
- Page 61 These areas are under the same purge conditions as the main optics. As a result, you can use a stored or loaded beamsplitter immediately and immediately begin collecting data. Thermo Scientific Nicolet iS50 Spectrometer User Guide...
- Page 62 The CsI beamsplitter is very fragile and extremely hygroscopic. We strongly recommend minimizing the handling of this beamsplitter. 1. Open the beamsplitter compartment hatch. 2. Turn the latch counterclockwise to open the interferometer. 3. Hold the beamsplitter by the handle as shown. Nicolet iS50 Spectrometer User Guide Thermo Scientific...
- Page 63 5. Close the beamsplitter compartment hatch. If your Nicolet iS50 spectrometer does not have an ABX, the software automatically recognizes beamsplitters in the beamsplitter compartment. You do not need to configure them. Manually Removing a Beamsplitter 1.
- Page 64 KBr, XT-KBr, solid substrate, CaF2, and quartz. NOTICE The iS50 ABX is not recommended for use with the CsI beamsplitter due to the extreme fragility of CsI. Nicolet iS50 Spectrometer User Guide Thermo Scientific...
- Page 65 The iS50 ABX is located towards the back of the spectrometer and sits above the interferometer and is powered by the spectrometer. NOTICE For proper ABX operation, the laboratory bench top must be level from both front to back and left to right. ABX FEATURES Thermo Scientific Nicolet iS50 Spectrometer User Guide...
- Page 66 Use of controls or adjustments or performance of procedures other than those specified in your user information may result in hazardous radiation exposure Time Needed: Five minutes or less Tools needed: Large flathead screwdriver Nicolet iS50 Spectrometer User Guide Thermo Scientific...
- Page 67 2. Unscrew the two screws on the hanger using Philips-head screwdriver. Remove the short screw. Leave the long screw in far enough to open the hanger and attach it to the handle. 3. Place the hanger onto the beamsplitter handle as shown. Thermo Scientific Nicolet iS50 Spectrometer User Guide...
- Page 68 Exposure to laser light or high voltage may result. Use of controls or adjustments or performance of procedures other than those specified in your user information may result in hazardous radiation exposure Nicolet iS50 Spectrometer User Guide Thermo Scientific...
- Page 69 4. Put the ABX into the proper load position so that the post you want to hang the beamsplitter on is accessible in the front of the tower and is above the rounded notch in the tray. 5. In OMNIC Paradigm software, go to Configure > Instrument > ABX Settings. Thermo Scientific Nicolet iS50 Spectrometer User Guide...
- Page 70 Exposure to laser light or high voltage may result. Use of controls or adjustments or performance of procedures other than those specified in your user information may result in hazardous radiation exposure Nicolet iS50 Spectrometer User Guide Thermo Scientific...
- Page 71 4. Set the beamsplitter to Empty. The ABX rotates to that position so you can remove the beamsplitter. NOTICE Do not attempt to remove a beamsplitter from any location other than the load position. Thermo Scientific Nicolet iS50 Spectrometer User Guide...
- Page 72 . Using a Light Source The Nicolet iS50 spectrometer uses an IR source and a NIR (white light) source. Using the software, you can select a source by changing the Source setting in the advanced measurement settings area of the dashboard.
- Page 73 The filter wheel can hold up to five optical filters. (One position should be left empty.) Some filters are included with the filter wheel, depending on your configuration. The filter wheel accepts 1-inch Thermo Scientific Nicolet iS50 Spectrometer User Guide...
- Page 74 90 degrees. The polarizer is made of ZnSe, which limits the low-end spectral range to around 650 wavenumbers. There is no analyzer, but you can use manual optics in the sample compartment. Nicolet iS50 Spectrometer User Guide Thermo Scientific...
- Page 75 Typical aperture and gain settings for experiments in each range are also listed. The Aperture and Gain settings are located in the advanced measurement settings area of the dashboard. Thermo Scientific Nicolet iS50 Spectrometer User Guide...
- Page 76 To configure a focused external source, in the software, go to Configure > Instrument > Source Settings and select Focused external and save your changes. The external source is now available in the Sources list in the advanced measurement settings area of the dashboard. Nicolet iS50 Spectrometer User Guide Thermo Scientific...
-
Page 77: Measuring A Sample
Use only dried air or nitrogen to purge your instrument. We recommend that you leave the purge on at all times. This keeps the spectrometer free of undesirable gases, protects the optics, and improves the system’s thermal stability. Thermo Scientific Nicolet iS50 Spectrometer User Guide... - Page 78 For most applications, you don’t need to collect a new background spectrum for each sample spectrum if you haven't changed your measurement settings. The software comes with default measurment settings for instruments and accessories, and you can edit and save your own settings. Nicolet iS50 Spectrometer User Guide Thermo Scientific...
- Page 79 The measurement is saved to the database automatically. View your saved measurements in the Measurements pane of the dashboard. You can also export the measurement by selecting a spectrum in the results panel and going to File > Export Spectrum. Thermo Scientific Nicolet iS50 Spectrometer User Guide...
- Page 80 Performance verification workflows, qualification workflows and ValPro are tools that are available to provide confidence that your Nicolet iS50 spectrometer is performing at or better than regulatory requirements.
- Page 81 Detector Aperture Setting DLaTGS MCT-A, MCT-B, InSb, PbSe, Si, InGaAs Change the aperture setting in OMNIC Paradigm software in the advanced measurement settings area of the dashboard. Thermo Scientific Nicolet iS50 Spectrometer User Guide...
- Page 82 USING THE POLARIZER The IR-beam is randomly polarized; some polarization is caused by reflections, but generally the beam is unpolarized. The optional IR polarizer controls beam polarization and permits rotation of the Nicolet iS50 Spectrometer User Guide Thermo Scientific...
- Page 83 Your spectroscopy software will automatically change the aperture setting if a smaller beam size is required. Be aware that the smaller beam size will reduce the signal-to-noise ratio. Thermo Scientific Nicolet iS50 Spectrometer User Guide...
- Page 84 [This page intentionally left blank]...
-
Page 85: Accessories And Application Modules
Touch Point, to conduct experiments right from the spectrometer. The following modules are available: iS50 ATR Module iS50 NIR Module See the documentation that came with your system for user guides for these modules. Thermo Scientific Nicolet iS50 Spectrometer User Guide 85... -
Page 86: Smart Accessories
Accessories and Application Modules Smart Accessories A variety of Smart Accessories are available for the Nicolet iS50 spectrometer. Nicolet FT-IR spectrometers identify each Smart Accessory as it is installed and set the software parameters for data collection. A series of spectral quality checks are performed to ensure that the accessory is installed and operating correctly. - Page 87 Smart Golden Gate™ – This is a horizontal, single-reflection ATR accessory that features an extremely durable diamond crystal. It handles a wide range of sample types, including hard or brittle solids, corrosive liquids, and hard powders. Thermo Scientific Nicolet iS50 Spectrometer User Guide...
-
Page 88: Other Sampling Accessories
PAS is particularly applicable to powders (including dark, highly absorbent samples), polymer pellets, beads, and sheets and films. The PAC 300 Photoacoustic E.S.P. accessory is fully integrated with the spectrometer and computer. Nicolet iS50 Spectrometer User Guide Thermo Scientific... - Page 89 This accessory, or the Validation/Attenuation Wheel (described in the next section), is required for using an NPL or serialized polystyrene standard for validation with Thermo Scientific ValPro software. TRS Kit – The Time Resolved Spectroscopy (TRS) kit includes a fast transient data-acquisition card, a high-speed photovoltaic MCT detector, and the OMNIC SST software with TRS experiments software package to perform a variety of time-resolved experiments.
-
Page 90: Other Accessories
Optical Filter Wheel Filters – The following optical filters are available for use in the filter wheel: 1975 cm-1 low-pass optical filter for SSP=8, which are used for step-scan TRS and modulation experiments and polarization modulation experiments Nicolet iS50 Spectrometer User Guide Thermo Scientific... - Page 91 The shuttle automatically moves the sample out of the beam path before background collection begins. Since the sample compartment cover is not opened, the system purge is maintained. Thermo Scientific Nicolet iS50 Spectrometer User Guide...
-
Page 92: System Accessories
Purge Gas Generator – If you do not have in-house facilities to supply compressed air or nitrogen for system purge, we offer several purge gas generators. Uninterruptible Power Supply – An uninterruptible power supply reduces the chance of a system shutdown if power is lost. Nicolet iS50 Spectrometer User Guide Thermo Scientific... -
Page 93: Installing Accessories
Since optics are permanently aligned in the Smart Accessories and the Sync module loads your experiment parameters, you’re ready to collect data as soon as the accessory is installed. When you’re ready to remove the accessory, lift it up and out of the sample compartment. Thermo Scientific Nicolet iS50 Spectrometer User Guide... - Page 94 To install a baseplate-mounted accessory ❖ 1. Remove the Snap-In baseplate if installed. 2. Set the rear edge of the Accessory baseplate down at the back of the sample compartment and lower the front edge. Nicolet iS50 Spectrometer User Guide Thermo Scientific...
- Page 95 Snap-In baseplate. Installing Slide-mounted Accessories The standard sample holder is designed to accommodate slide-mounted accessories (such as a variable angle ATR) as well as thin film samples and optical filters. Thermo Scientific Nicolet iS50 Spectrometer User Guide...
- Page 96 Additional Snap-In baseplates are available for all accessories. You may wish to have extra baseplates that you keep attached to accessories that you use often, making switching accessories easier and faster. Nicolet iS50 Spectrometer User Guide Thermo Scientific...
- Page 97 Connectors Inside the Spectrometer Sample Compartment The following image shows the "Installing Accessories" "Installing Accessories" inside the spectrometer sample compartment. They are located at the bottom left corner of the back wall of the compartment. Thermo Scientific Nicolet iS50 Spectrometer User Guide...
- Page 98 This table contains pinout information for the Accessory connector: Pin Number Description + 5 VDC + 3.3 VDC 16, 21 +12 VDC (Unfiltered for Motors) 10, 22 Digital Ground (for +5, +3, and +12 Motor) +12 VDC (Filtered for Detectors) Nicolet iS50 Spectrometer User Guide Thermo Scientific...
- Page 99 PURGE CONNECTOR Use the purge connector for any accessories located in the spectrometer sample compartment that require purge. Connect the purge tubing from the accessory purge connector to the sample compartment purge connector. Thermo Scientific Nicolet iS50 Spectrometer User Guide...
- Page 100 [This page intentionally left blank]...
-
Page 101: Maintenance
This section describes the maintenance routines to perform on the spectrometer to keep it running efficiently. CAUTION Avoid personal injury. Perform only those procedures described in the documentation. If there are other problems, contact us. Any other service must be performed by trained personnel. Thermo Scientific Nicolet iS50 Spectrometer User Guide 101... -
Page 102: Static Electricity Precautions
Do not touch any printed circuit board in your instrument (such as the circuit board on the detector). Do not remove replacement components from their protective packaging until you are ready to install that component in your instrument. Nicolet iS50 Spectrometer User Guide Thermo Scientific... -
Page 103: Cleaning The Spectrometer
Never allow any liquid to come into contact with a window or optical component in the instrument. Cleaning the ABX Cover Clean the ABX cover just as you would clean the outside of the spectrometer. Be sure to turn the spectrometer off remove the power supply before cleaning. Thermo Scientific Nicolet iS50 Spectrometer User Guide... -
Page 104: Maintaining Detector Dewars
The vacuum must be pumped to approximately .000001 torr. A special evacuation valve for pumping out dewars is available; to order, contact us. Nicolet iS50 Spectrometer User Guide Thermo Scientific... -
Page 105: Checking Internal Humidity
To check the humidity indicator on the spectrometer, look at the indicator label on the desiccant compartment cap. If it is blue, the humidity level is OK. If it is pink or white, replace the desiccant. Thermo Scientific Nicolet iS50 Spectrometer User Guide... -
Page 106: Replacing The Desiccant
However, regenerating the desiccant will not restore it to its full, original capacity. Expect a shorter drying capacity time when using regenerated desiccant. We recommend using regenerated desiccant only once. The humidity indicator must be replaced when using regenerated desiccant. Time needed: 24 hours Nicolet iS50 Spectrometer User Guide Thermo Scientific... - Page 107 Otherwise, they will absorb moisture from the air in the room and quickly become saturated again. 4. Replace the humidity indicator in the desiccant access cap after installing the desiccant into the spectrometer. Thermo Scientific Nicolet iS50 Spectrometer User Guide...
-
Page 108: Checking And Changing The Purge Gas Filter
1. Turn off the purge gas at the main valve. Do not turn down the flowmeter or the pressure regulator. 2. Remove the plastic cover over the filter and then remove the filter. You can unscrew them both by hand. Nicolet iS50 Spectrometer User Guide Thermo Scientific... - Page 109 Note You may notice increased levels of water in spectra collected immediately after you have had the purge gas turned off. If this interferes with your data, wait 15 to 60 minutes until purge is completely re-established. Thermo Scientific Nicolet iS50 Spectrometer User Guide...
-
Page 110: Aligning The Spectrometer
2. Select Start to begin alignment. The screen says "Align complete" when alignment has finished successfully. The instrument takes up to 12 hours to come to thermal equilibrium. For best results, re-run alignment and calibration after the first 12 hours of operation. Nicolet iS50 Spectrometer User Guide Thermo Scientific... -
Page 111: Service
For information about running performance and diagnostic tests, see Diagnostics. CAUTION Avoid personal injury. Perform only those procedures described in the documentation. If there are other problems, contact us. Any other service must be performed by trained personnel. Thermo Scientific Nicolet iS50 Spectrometer User Guide 111... -
Page 112: Installing Or Removing Optional Hardware
Do not leave these solvents exposed around the spectrometer any longer than necessary. Purging the spectrometer can also ensure more accurate results. This is particularly true when measuring sample components that are also present in your laboratory environment. Nicolet iS50 Spectrometer User Guide Thermo Scientific... - Page 113 If your facility does not have an air compressor, a complete dry-air generating system is available. Contact our sales or service representative in your area for more information. Thermo Scientific Nicolet iS50 Spectrometer User Guide...
- Page 114 See the purge kit installation documentation that came with the module for specific instructions on how to set up the purge controls for that module. Time needed: 30 minutes or less Tools needed: Nicolet iS50 Spectrometer User Guide Thermo Scientific...
- Page 115 11/16 inch open-ended wrench to tighten the connection. Note When wrapping the connection with pipe tape, make sure the tape does not cover any of the opening as this may interfere with flow or create noise. Thermo Scientific Nicolet iS50 Spectrometer User Guide...
- Page 116 3. Wrap the reducing nipple or the 1/4 inch male fitting with pipe tape, and then install the pressure coupling. Use a 3/4 inch open-ended wrench to tighten the connection. 4. Install the purge filter, pressure regulator and flowmeter, and then snap the assembly into the pressure coupling. Nicolet iS50 Spectrometer User Guide Thermo Scientific...
- Page 117 Setting Purge Gas Controls 1. Reduce the pressure on the regulator by turning the knob counterclockwise until the gauge indicates that the pressure is 5 psig or below. Thermo Scientific Nicolet iS50 Spectrometer User Guide...
- Page 118 External beam ports are used to connect an external accessory to the spectrometer, such as an External Applications Module or a Research Module, for conducting emission experiments or experiments that include an external detector. Nicolet iS50 Spectrometer User Guide Thermo Scientific...
- Page 119 CAUTION Avoid shock hazard. Be sure to unplug the system from the power source before servicing any replacement parts. Time needed: Five minutes or less Tools needed: None Thermo Scientific Nicolet iS50 Spectrometer User Guide...
- Page 120 4. Store the port cover in a safe place. Keep the cover in the port when the port is not in use. To remove the port gasket ❖ If you need to remove the gasket, follow these instructions. Time needed: Five minutes or less Tools needed: Two screwdrivers - at least one flathead Nicolet iS50 Spectrometer User Guide Thermo Scientific...
- Page 121 To install the port gasket ❖ 1. Insert the rubber gasket at an angle into the beam port. Push along the gasket edges while pushing the gasket into the port. Thermo Scientific Nicolet iS50 Spectrometer User Guide...
- Page 122 Exposure to laser light or high voltage may result. Use of controls or adjustments or performance of procedures other than those specified in your user information may result in hazardous radiation exposure Nicolet iS50 Spectrometer User Guide Thermo Scientific...
- Page 123 Handle beam port windows by the edges only. 3. Hold the beam port window by the edges as shown. 4. Insert the optical beam port window into the port gasket, pushing the window assembly in only by Thermo Scientific Nicolet iS50 Spectrometer User Guide...
- Page 124 2. From the inside of the spectrometer, push the window assembly out of the port only by the edges, far enough so you can grasp it from outside of the spectrometer. 3. Carefully remove the window assembly from the port gasket. Nicolet iS50 Spectrometer User Guide Thermo Scientific...
- Page 125 The filter sits in a holder that installs over the opening of the spectrometer sample compartment window. Time needed: Five minutes or less Thermo Scientific Nicolet iS50 Spectrometer User Guide...
- Page 126 If you wish to remove dust from a filter, blow it off with a gentle stream of pure nitrogen. Do not use compressed air (from a can or an air compressor). Contaminants will damage the filters. Nicolet iS50 Spectrometer User Guide Thermo Scientific...
- Page 127 The wheel has six positions: five for optical filters that are 1 inch in diameter and from 1 mm to 4 mm thick, and an open position. Thermo Scientific Nicolet iS50 Spectrometer User Guide...
- Page 128 1. Turn off the spectrometer power, disconnect the power source, and remove the back cover. If you have an ABX, see "Using Your Spectrometer". 2. Put on gloves or finger cots and remove the optical filter from its protective packaging. Nicolet iS50 Spectrometer User Guide Thermo Scientific...
- Page 129 6. Using the filter ring wrench, screw the ring into the opening to hold the filter in place. The wrench has two tabs on one end that fit into two corresponding notches in the ring. Thermo Scientific Nicolet iS50 Spectrometer User Guide...
- Page 130 9. From the dashboard, click the More button in the New Measurement pane to open the advanced settings. 10. In the Filter wheel list, select the position that corresponds to the filter you want to use. Nicolet iS50 Spectrometer User Guide Thermo Scientific...
-
Page 131: Replacing Components
Time needed: 30 minutes or less Tools needed: None To remove a source ❖ 1. Turn the spectrometer off. 2. Disconnect the power supply. 3. Wait 10 minutes for the source to cool. Thermo Scientific Nicolet iS50 Spectrometer User Guide... - Page 132 Note You may notice increased levels of water and carbon dioxide in spectra collected immediately after you have had the cover open. If this interferes with your data, wait several minutes for equilibrium to be re-established. Nicolet iS50 Spectrometer User Guide Thermo Scientific...
- Page 133 Replacing the Power Supply CAUTION Avoid shock hazard. Be sure to unplug the system from the power source before servicing any replacement parts. Thermo Scientific Nicolet iS50 Spectrometer User Guide...
- Page 134 If the spectrometer does not function normally, turn the power off and check the cable connections between the power supply, the spectrometer, and the wall outlet or power strip, and then turn the power back on. If the spectrometer still does not function normally, contact us. Nicolet iS50 Spectrometer User Guide Thermo Scientific...
- Page 135 However, if the spectrometer is equipped with Automatic Purge Shutters, the sample compartment windows are not necessary. Also, the windows may need to be removed for certain experiments and spectral ranges or to allow purge to flow into an accessory. When the windows are Thermo Scientific Nicolet iS50 Spectrometer User Guide...
- Page 136 2. Open the sample compartment cover. Remove any sample compartment accessories before attempting to remove or install a sample compartment window. 3. Loosen the four bracket screws with the screwdriver to free the bracket from the sample compartment wall. Nicolet iS50 Spectrometer User Guide Thermo Scientific...
- Page 137 5. Lift the window out of the bracket. Hold it only by the edges. 6. Place it into its protective packaging Thermo Scientific Nicolet iS50 Spectrometer User Guide...
- Page 138 3. Place the bracket with the sample compartment window against the sample compartment wall opening, making sure the window fits tightly into the opening. 4. Insert a screw into each of the four holes of the bracket to attach it to the sample compartment wall. Nicolet iS50 Spectrometer User Guide Thermo Scientific...
- Page 139 Service 5. Wait for at least 15 minutes (one to six hours for best results) for the spectrometer to gain equilibrium. Thermo Scientific Nicolet iS50 Spectrometer User Guide...
- Page 140 [This page intentionally left blank]...
-
Page 141: Troubleshooting
Chapter 6 Troubleshooting This section describes common problems and their solutions. Thermo Scientific Nicolet iS50 Spectrometer User Guide 141... -
Page 142: Hardware Problems
Make sure the power cord is plugged into the Status indicator does spectrometer and a working wall outlet. not light when spectrometer is Replace the power supply. See "Replacing turned on. Power cord or Components" for instructions. power supply is defective. Nicolet iS50 Spectrometer User Guide Thermo Scientific... - Page 143 Replace the source. Source current or voltage out of specification (whatever source Cool MCT detector with about 1 L of LN2. is set to on). Currently selected Nitrogen-cooled detector is warm (including in GC). Thermo Scientific Nicolet iS50 Spectrometer User Guide...
- Page 144 Nitrogen- surrounding the cooled detector. dewar is leaking. The dewar or the detector may need to be replaced. Contact us to order a replacement. Nicolet iS50 Spectrometer User Guide Thermo Scientific...
- Page 145 Regenerate replace the desiccant. Desiccant is expired. Allow the spectrometer to stabilize for 3 to 5 minutes after the cover is closed. Spectrometer cover was recently opened. Thermo Scientific Nicolet iS50 Spectrometer User Guide...
- Page 146 Ensure nothing is blocking the beam path. Remove filters or screens from the beam. Make sure there is no purge shutter in beam. There is no interferogram. If using an ATR, make sure the crystal plate is installed. Nicolet iS50 Spectrometer User Guide Thermo Scientific...
- Page 147 Beamsplitter is not indicator), and the the beamsplitter if necessary. See "Using completely spectrometer Your Spectrometer", "Using Your inserted. alignment fails. Spectrometer", or "Using Your Spectrometer" if you have an iS50 ABX, for instructions. Thermo Scientific Nicolet iS50 Spectrometer User Guide...
- Page 148 Beamsplitter iS50 ABX, for instructions. compartment cover is open. Turn the spectrometer power off and then on. Unplug and plug the USB cable Contact us for service. Electronic error has occurred. Nicolet iS50 Spectrometer User Guide Thermo Scientific...
- Page 149 ABX. beamsplitter alignment issue. The hanger may be loose from the beamsplitter, or the beamsplitter may be stuck on or outside of the guide tray. Level the spectrometer. The spectrometer is not level. Thermo Scientific Nicolet iS50 Spectrometer User Guide...
- Page 150 ABX is otherwise to lift the beamsplitter out of the interferometer by the not functioning interferometer. ABX. correctly. Manually rotate the beamsplitter carousel to the load position and remove the beamsplitter. Nicolet iS50 Spectrometer User Guide Thermo Scientific...
-
Page 151: Applications Problems
Spectrum contains totally Sample in the transmission Decrease the pathlength by using a absorbing experiment is too thick. thinner sample. peaks. Thermo Scientific Nicolet iS50 Spectrometer User Guide... - Page 152 Desiccant is expired. Check the desiccant indicator; if the color has turned pale blue or pink, regenerate or replace the desiccant. Nicolet iS50 Spectrometer User Guide Thermo Scientific...
- Page 153 The infrared beam passes through the fringes are useful for determining sample at Brewster’s angle. (Do not the pathlength of the cell use this method if you are performing quantitative analysis.) Thermo Scientific Nicolet iS50 Spectrometer User Guide...
- Page 154 See "Installing or Removing Optional Hardware" "Installing or Removing Optional Spectrometer is not properly Hardware" for instructions. Allow the purged. system three to five minutes to re- establish purge before collecting the spectrum. Nicolet iS50 Spectrometer User Guide Thermo Scientific...
- Page 155 Increase number of scans noisy. Reduce resolution Resolution was too high. Open the aperture to increase the energy. Be sure the Interferogram height is less than 9 V peak-to-peak. Aperture is too small. Thermo Scientific Nicolet iS50 Spectrometer User Guide...
-
Page 156: Research Module
The center of the beam is 4 inches above the top surface of the sample compartment baseplate. See the diagram below for more dimensions from the both the top and side views of the research module. Nicolet iS50 Spectrometer User Guide Thermo Scientific... - Page 157 For accessories with detectors not automatically recognized by the iS50/iS50R spectrometer, an external detector interface kit is required and available from Thermo Scientific. This kit enables the spectrometer to recognize unknown external detectors. The kit communicates the detector type and detector address to the spectrometer after some minor configuring of the interface box.
- Page 158 Research Module VCD + PM-IRRAS You can also set up custom configurations to perform other types of experiments. See the OMNIC SST Online Help for more information. Nicolet iS50 Spectrometer User Guide Thermo Scientific...
Need help?
Do you have a question about the Nicolet iS50 and is the answer not in the manual?
Questions and answers