Thermo Scientific Nicolet iS50 FT-IR User Manual
Hide thumbs
Also See for Nicolet iS50 FT-IR:
- User manual (158 pages) ,
- Getting started (28 pages) ,
- Manual (27 pages)

Related Manuals for Thermo Scientific Nicolet iS50 FT-IR


Summary of Contents for Thermo Scientific Nicolet iS50 FT-IR
- Page 1 Nicolet iS50 FT-IR Spectrometers iS50 Raman Module User Guide 269-278000 Revision A July 2012...
- Page 2 © 2012 Thermo Fisher Scientific Inc. All rights reserved. Nicolet, OMNIC, and ValPro are registered trademarks of Thermo Fisher Scientific Inc. in the United States. Windows is a registered trademark of Microsoft Corporation in the United States and possibly other countries. All other trademarks are the property of Thermo Fisher Scientific Inc.
-
Page 3: Is50 Raman Module
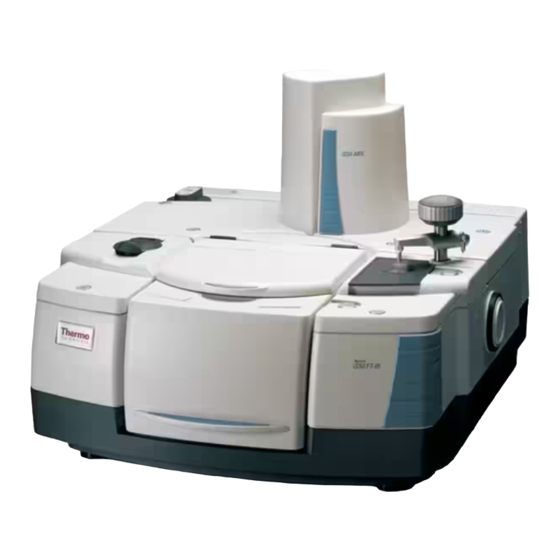
Raman Module This section describes the optional Thermo Scientific iS50 Raman module which allows you to collect FT-Raman spectra with your Nicolet™ iS™50 spectrometer. Figure 1. Nicolet iS50 spectrometer with iS50 Raman module installed iS50 Raman module The iS50 Raman module mounts in the spectrometer sample compartment. -
Page 4: Table Of Contents
Conventions Used in this Document This manual uses these conventions for providing safety and other special information: WARNING Indicates a hazardous situation which, if not avoided, could result in death or serious injury. iS50 Raman Module User Guide Thermo Scientific... -
Page 5: About The Is50 Raman Module
Please refer to your ValPro and OMNIC™ DS documentation for more information. For information about additional sampling modules for the Nicolet iS50 spectrometer, contact our sales representative in your area. Related Topics • Important Features Thermo Scientific iS50 Raman Module User Guide... -
Page 6: Important Features
Table 1. Sample compartment Touch Point indicator states LED status Meaning Raman module is not installed or connected properly Blinking Optics are configuring for Raman sampling Raman module is ready for use iS50 Raman Module User Guide Thermo Scientific... - Page 7 Module.” Figure 3. iS50 Raman module back panel Electrical connector Related Topics • About the iS50 Raman module • Installing the Raman Module • Turning on the Laser and Adjusting the Laser Power Thermo Scientific iS50 Raman Module User Guide...
-
Page 8: Specifications
Partial Least Squares and other advanced algorithms for quantitative analysis and material identification. For more information, open the Help menu in TQ Analyst software and select TQ Analyst Help Topics. iS50 Raman Module User Guide Thermo Scientific... -
Page 9: Safety Considerations
Raman module, and do not attempt to defeat the safety interlocks on the module housing and sample compartment cover—hazardous exposure to laser radiation could occur. Related Topics • Turning on the Laser and Adjusting the Laser Power • Your First Experiment Thermo Scientific iS50 Raman Module User Guide... -
Page 10: Operating Precautions
“source” of radiation. This radiation travels through the Raman module and spectrometer optics to a dedicated detector located in the spectrometer. The laser light, on the other hand, does not travel past the Raman sample compartment. iS50 Raman Module User Guide Thermo Scientific... -
Page 11: Compatible Samples
Place a few drops of liquid directly into one of the wells in the 9 or 48 well sample holder, or into a small cup or pan that fits the sample holder recesses, or into a vial that fits the Raman vial holder. Thermo Scientific iS50 Raman Module User Guide... -
Page 12: Configuring The Raman Module
Before you begin, check that the following software is installed on the computer connected to the Nicolet iS50 spectrometer: • Thermo Scientific OMNIC, version 9, SP1 or higher • Thermo Scientific View version 9, SP1 or higher, or Thermo Scientific Atls, version 9, SP1 or higher ... - Page 13 Interferometer” for instructions and information about how often to perform this step. Note To see the iS50 Raman module configuration settings at any time, open View software and choose Microscope > System Configuration. Related Topics • Installing the Raman Module Thermo Scientific iS50 Raman Module User Guide...
-
Page 14: Installing The Raman Module
4. Grasp the hand holds at the front and back edges of the Raman module and carefully place the module at the front of the sample compartment. Figure 5. Installing the iS50 Raman module iS50 Raman Module User Guide Thermo Scientific... - Page 15 “Controlling the Purge Shutters” in OMNIC Help Topics. (If Shutter Mode is set to Automatic on the Bench tab in Experiment Setup, the purge shutters will open automatically for Raman data collection.) Thermo Scientific iS50 Raman Module User Guide...
-
Page 16: Operation
NIR or ATR module, press the sample compartment Touch Point. Related Topics • Turning on the Laser and Adjusting the Laser Power • Adjusting the Sample Position • Setting a Timer to Turn Off the Laser iS50 Raman Module User Guide Thermo Scientific... - Page 17 Neutral density filters are used to control the power of the laser that reaches the sample compartment. Reducing the power at the sample can be useful when you have a heat-sensitive (usually dark) sample. Thermo Scientific iS50 Raman Module User Guide...
- Page 18 Note The laser must be on and the white light off while you adjust the sample position and focus. See “Turning on the Laser and Adjusting the Laser Power” and “Using the White Light Source” for details. iS50 Raman Module User Guide Thermo Scientific...
- Page 19 This will prevent the laser from being left on inadvertently and prolong its life. To set a timer for the laser 1. In OMNIC software, choose Collect > Experiment Setup. 2. Select the Advanced tab. Figure 8. Advanced tab parameters in Experiment Setup Thermo Scientific iS50 Raman Module User Guide...
-
Page 20: Preparing Samples
(metal, clear plastic or glass). • 48 well. Contains 48 7 mm wells. • Vial holder. One side has three recesses to hold glass or clear plastic vials; the other side has four. iS50 Raman Module User Guide Thermo Scientific... - Page 21 The sample stage moves down and forward. Wait until it stops moving before you proceed. 3. Install the sample holder on the stage. Position the sample holder so that the angled corners are on the right side. Thermo Scientific iS50 Raman Module User Guide...
- Page 22 Wait until the stage stops moving before you proceed. 2. Lift the sample holder off the stage. 3. Close the Raman sample compartment door. Related Topics • Raman Sample Holders • Installing a Sample Holder • Your First Experiment iS50 Raman Module User Guide Thermo Scientific...
-
Page 23: Sampling Options
50 micrometer diameter beam at the sample. The defocused setting creates an area with a diameter of approximately 1 mm at the sample by inserting a diffusing lens in the path of the laser beam. Thermo Scientific iS50 Raman Module User Guide... - Page 24 Make sure all instrument covers and beam ports are closed before you collect Raman data. Related Topics • Using the White Light Source • Using the Defocusing Lens to Adjust the Beam Size • Your First Experiment iS50 Raman Module User Guide Thermo Scientific...
-
Page 25: Your First Experiment
Raman sampling. Figure 11. Touch Point buttons in OMNIC software Main (sample compartment) Touch Point button Touch Point Setup button 4. Choose the Touch Point Setup button in the software. Thermo Scientific iS50 Raman Module User Guide... - Page 26 4 cm is appropriate for most Raman applications. The smaller the resolution value, the higher (better) is the resolution. The resolution value, along with the number of scans, affects the collection time. iS50 Raman Module User Guide Thermo Scientific...
- Page 27 The “shifted” spectrum is displayed in the range between 4,000 and 100 cm where the peaks align with the mid-infrared spectrum. Thermo Scientific iS50 Raman Module User Guide...
- Page 28 0.0 (no similarity) to 1.0 (the spectra are identical). For more information, find “Comparing Spectra with QCheck” in OMNIC Help Topics. Use Analyze > QCheck Setup to set up the comparison. iS50 Raman Module User Guide Thermo Scientific...
- Page 29 Setup. For more information, choose Help from Experiment Setup. • Some settings appear in Experiment Setup and in Touch Point Setup. Setting these options in one location automatically changes them in the other. 9. Choose OK to close Touch Point Setup. Thermo Scientific iS50 Raman Module User Guide...
- Page 30 Raman module, and do not attempt to defeat the safety interlocks on the module housing and sample compartment cover—hazardous exposure to laser radiation could occur. iS50 Raman Module User Guide Thermo Scientific...
- Page 31 4. Prepare the sample. a. Place the sample on one of the provided sample holders. See “Preparing Samples” for more information. b. Open the Raman sample compartment door. Thermo Scientific iS50 Raman Module User Guide...
- Page 32 To select a cell, double-click Opens software which the laser power it or enter the cell location and shows a video image of the to approximately choose Move. selected sample location 0.05 W iS50 Raman Module User Guide Thermo Scientific...
- Page 33 Note If you can’t see an image in the video pane, in OMNIC software choose Collect > Experiment Setup, select the Bench tab and make sure Lamp is selected. This turns on the light in the Raman sample compartment. Thermo Scientific iS50 Raman Module User Guide...
- Page 34 Close the Z Position window (leave the View window open). iS50 Raman Module User Guide Thermo Scientific...
- Page 35 Adjust the laser power to an appropriate level for your sample. While you adjust the power, monitor the video image of your sample for signs of decomposition, especially if the sample is a dark color. Thermo Scientific iS50 Raman Module User Guide...
- Page 36 If your workflow is set up to preview or print auto reports, the report is displayed or printed using the default printer. Below is an example report showing a Raman spectrum of a pharmaceutical tablet taken with the iS50 Raman module. iS50 Raman Module User Guide Thermo Scientific...
- Page 37 Configuring Your Raman Workflow • Installing a Sample Holder • Adjusting the Sample Position • Turning on the Laser and Adjusting the Laser Power • Using the Defocusing Lens to Adjust the Beam Size Thermo Scientific iS50 Raman Module User Guide...
-
Page 38: Removing The Raman Module
This disengages the electrical connector at the back of the Raman module. After you release the latch handle, it snaps to it’s vertical position. Figure 19. Release iS50 Raman latch handle 5. Gently slide the module forward. iS50 Raman Module User Guide Thermo Scientific... - Page 39 Guide for instructions. Note The video USB cable can be left connected or removed. The cable connects the Video port on the back of the spectrometer to a USB port on the computer. Thermo Scientific iS50 Raman Module User Guide...
-
Page 40: Doing Experiments With Macros
These topics are covered: • Aligning the Interferometer • Verifying Raman Module Performance • Initializing the Sample Stage • Cleaning the Raman Module Housing • Cleaning the Sample Stage iS50 Raman Module User Guide Thermo Scientific... - Page 41 For detailed instructions, see “Installing the Raman Module.” To align the interferometer 1. Start the OMNIC software. 2. Press the sample compartment Touch Point to configure the system for Raman sampling. Thermo Scientific iS50 Raman Module User Guide...
- Page 42 For more information, find “Experiment Setup” in OMNIC Help Topics. Note Do not close Experiment Setup. If you inadvertently close it, choose Experiment Setup again and make sure the features are set correctly. iS50 Raman Module User Guide Thermo Scientific...
- Page 43 1. Place the polystyrene sample disk provided with the Raman module on the sample stage. 2. Close the sample compartment door. 3. In OMNIC software, choose Collect > Experiment Setup and set the following features: On the Collect tab: • Number of Scans: 50 Thermo Scientific iS50 Raman Module User Guide...
- Page 44 (set Laser Power to 0.5 W). 5. When you are finished, turn off the laser and remove the sample from the Raman sample compartment. 6. Store the polystyrene sample in its original shipping container. iS50 Raman Module User Guide Thermo Scientific...
- Page 45 NOTICE To avoid damaging delicate optics, always remove any samples from the sample stage before starting OMNIC software or initializing the sample stage. Thermo Scientific iS50 Raman Module User Guide...
- Page 46 Use a damp (not wet), soft cloth and a mild soap to clean the cover of the Raman module. Dry it with a clean cloth. Related Topics • Aligning the Interferometer • Verifying Raman Module Performance iS50 Raman Module User Guide Thermo Scientific...
- Page 47 Raman sample compartment. Related Topics • Aligning the Interferometer • Verifying Raman Module Performance • Initializing the Sample Stage • Cleaning the Raman Module Housing • Cleaning the Residue Tray • Storing the Raman Module Thermo Scientific iS50 Raman Module User Guide...
- Page 48 4. Set Front To Back to 0 and press Enter to move the stage all the way back. 5. Set Focus to 20,000 and press Enter to move the stage up and out of the way. iS50 Raman Module User Guide Thermo Scientific...
- Page 49 3. Close the Raman sample compartment door. 4. Initialize the sample stage. Choose Collect > Experiment Setup, select the Diagnostic tab and choose Reset iS50 Raman. Thermo Scientific iS50 Raman Module User Guide...
-
Page 50: Troubleshooting
To copy the diagnostics log to your Windows® desktop, start OMNIC software and choose File > Copy Diagnostics File to Desktop. You can attach the file to an e-mail message to our technical support representative. iS50 Raman Module User Guide Thermo Scientific... - Page 51 On the Bench tab, set Beamsplitter to CaF2. b. Set Detector to Top DTGS. c. Select the Diagnostic tab. d. Choose Align. 7. If no interferogram appears, select the Diagnostic tab and choose Reset Bench. Thermo Scientific iS50 Raman Module User Guide...
- Page 52 8. If there is still no interferogram, contact our local service representative. Related Topics • Applications Problems • Error Conditions • Advanced Diagnostics • Aligning the Interferometer • Verifying Raman Module Performance • Initializing the Sample Stage Applications Problems Noisy spectra If your spectra are abnormally noisy, follow these steps to troubleshoot the problem: 1.
- Page 53 1. Choose Collect > Experiment Setup. 2. If the interferogram peak is not centered in the live display, select the Diagnostic tab and choose Reset Bench. If the peak is still not centered, contact our local service representative. Thermo Scientific iS50 Raman Module User Guide...
- Page 54 (metal) sample holders and install the sample holder in the Raman sample stage. 2. In OMNIC software, choose Collect > Advanced Diagnostics. A diagnostics window is displayed. Figure 25. OMNIC Diagnostics window iS50 Raman Module User Guide Thermo Scientific...
- Page 55 If your Raman module fails this test, contact our local service representative for assistance. Related Topics • Hardware Problems • Applications Problems • Error Conditions • Aligning the Interferometer • Verifying Raman Module Performance • Initializing the Sample Stage Thermo Scientific iS50 Raman Module User Guide...
Need help?
Do you have a question about the Nicolet iS50 FT-IR and is the answer not in the manual?
Questions and answers