Table of Contents
Advertisement
Quick Links
Advertisement
Table of Contents

Subscribe to Our Youtube Channel
Related Manuals for Portwell NAR-4040


Summary of Contents for Portwell NAR-4040
- Page 1 NAR-4040 Communications Appliance User′s Manual Revision: 010 Portwell Inc. 3F, No. 92, Nei-Hu Rd., Sec. 1, Taipei 114, Taiwan, R.O.C. Headquarter: +886-2-2799-2020 Fax: +886-2-2799-1010 http://www.portwell.com.tw Email: info@mail.portwell.com.tw ITEM NO: B8980650...
-
Page 2: Table Of Contents
Watch-Dog Timer Sample code ...............31 Reset To Default Sample code ..............33 Chapter 5 EZIO-100 About EZIO-100 ..................46 Features ....................46 Mechanical Specification ................46 General Specification ................47 Product Outlook..................47 Interface Pin Assignment .................47 EZIO Function Command.................48 Character Generator ROM (CGROM) ............52 NAR-4040 User’s Manual... - Page 3 Sample Code....................53 NAR-4040 User’s Manual...
-
Page 4: Chapter 1 Introduction
Introduction 1.1 About This Manual This manual describes all required information for setting up and using the NAR-4040. NAR-4040 provides the essential components for delivering optimal performance and functionality in the value communications appliance market segment. This manual should help its users to get familiar with NAR-4040 to be able to fulfill requirements. -
Page 5: Text Conventions
Users may find helpful tips or related information on Portwell's Web site. http://www.portwell.com.tw. A direct contact to Portwell's technical person is also available. For further support Users may also contact our headquarter in Taipei or contact Portwell's distributors. NAR-4040 User’s Manual... -
Page 6: Chapter 2 Getting Started
Failure to do this can result in personnel injury or equipment damage. Avoid short-circuiting the lithium battery; this can cause it to superheat and cause burns if touched. Do not operate the processor without a thermal solution. Damage to the processor NAR-4040 User’s Manual... -
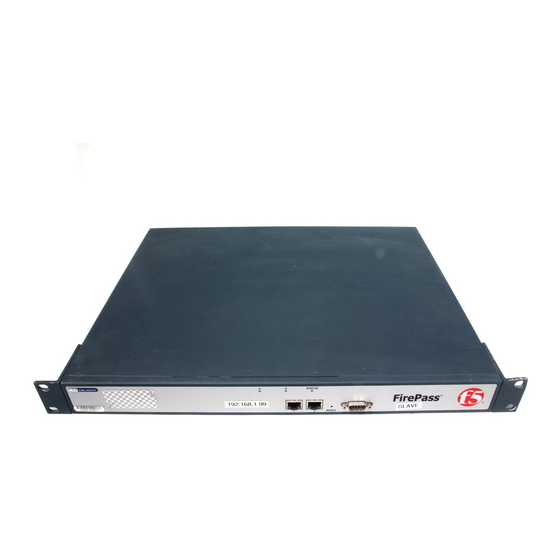
Page 7: The Chassis
(Fig. 2-1 , Fig. 2-2). Front accessible panel there are an EZIO, a LED panel and a set of LAN ports. The LAN ports number can be different according to model. Fig. 2-1 Front View of the Chassis Fig. 2-2 Rear View of the Chassis NAR-4040 User’s Manual... -
Page 8: Opening The Chassis
Fig. 2-4 Remove the screw on the arrow tip of the ear mount Fig. 2-5 Push the top-cover on both left and right upper Fig. 2-6 Slide lightly the top-cover to rear side until it is side at the same time stopped and then raise it up NAR-4040 User’s Manual... -
Page 9: Installing A Hard Disk Drive
They are one HDD-bracket, several screws and one 44pin IDE cable. (from left to right). Fig. 2-8 Fix the hard disk drive on the HDD Fig. 2-9 Plug the IDE cable into hard disk drive bracket with four sink-head screws connector NAR-4040 User’s Manual... -
Page 10: Installing A Cf (Compact Flash) Card
2.6 Installing a CF (Compact Flash) Card 1. To install a compact flash card, it needs only to insert the CF card into the white socket on the adaptor board (Fig. 2-14)(Fig. 2-15) NAR-4040 User’s Manual... -
Page 11: Upgrading The Ram Module
1. Pull out the lock arms on both side and the RAM module springs up automatically. (Fig.2-22) 2. Press down gently on both left and right edges of the module (Fig.2-23) until it "clicks". 3. Then reappear step 1 to 2 to install more RAM module.(Fig. 2-25) Fig. 2-22 Fig. 2-23 NAR-4040 User’s Manual... -
Page 12: Replace The Battery
2.9 Installing a Different Processor Installing CPU 1. Lift the handling lever of CPU socket outwards and upwards to the other end. 2. Align the processor pins with holes on the socket. Make sure that the notched corner or NAR-4040 User’s Manual... - Page 13 The system was designed to self-detect its CPU speed. So it does not require any system adjustment. Fig. 2-26 Lift the handling lever of CPU socket Fig. 2-27 insert CPU into theSocket outwards and upwards to the other end. NAR-4040 User’s Manual...
-
Page 14: Pci Card Install & Remove
Fig. 2-30 assembling completion diagram 2.10 PCI Card Install & Remove If the installation of PCI cards required, please follow the instructions with care. Fig. 2-31 PCI Card secure base Fig. 2-32 Install the secure base to the chassis NAR-4040 User’s Manual... -
Page 15: Assembling The System
However, by assembling the top cover, there is one importance point; the tongue of the cover must be inserted to the proper position, so the six screw holes on the cover can match to the chassis. Fig. 2-36 Fig. 2-37 NAR-4040 User’s Manual... -
Page 16: Configuring The System Board
This section gives the definitions and shows the positions of jumpers, headers and connectors. All of the configuration jumpers on PPAP-3711VL are in the proper position. The default settings set by factory are marked with a star ( ★ ). NAR-4040 User’s Manual... - Page 17 Secondary IDE Select Shot: Master / Open: Slave Clean CMOS 1-2: Normal , 2-3: Clean WDT Select Shot: WDT Reset / Open: SMI K/B, M/S Small 4 pin header Parallel port GPIO LAN6_LED LAN5_LED LAN4_LED LAN3_LED Load_Default NAR-4040 User’s Manual...
- Page 18 Clean CMOS JP3: WDT Select ● Pin No. Signal Description Shot WDT Reset WDT SMI J2: K/B , M/S ● Pin No. Signal Description MDAT MCLK KDAT KCLK J3: CRT ● Pin No. Signal Description GREEN BLUE VSYNCR NAR-4040 User’s Manual...
- Page 19 J7: Parallel port ● Pin No. Signal Description Pin No. Signal Description P_STB# P_PD0 P_PD1 P_PD2 P_PD3 P_PD4 P_PD5 P_PD6 P_PD7 ACK# BUSY SLCT P_AFD# ERR# P_INIT# P_SLIN# J8: GPIO ● Pin No. Signal Description Pin No. Signal Description NAR-4040 User’s Manual...
- Page 20 Pin No. Signal Description L4_1000# L4_LINK LED# L4_100# L4_ACT# J14 : LAN3_LED ● Pin No. Signal Description L3_1000# L3_LINK LED# L3_100# L3_ACT# J17/J30: Load_Default ● Pin No. Signal Description PRE# J18 : RESET ● Pin No. Signal Description NAR-4040 User’s Manual...
-
Page 21: Installing Memory
Normally, the DDR used could be 2.5V DDR with speed less than 70ns (-7), you need to use DDR with speed less than 70ns (-7). It is better to use PC2700-compliant memory chip on your system. For system compatibility and stability, don't use memory module without brand. You can also NAR-4040 User’s Manual... -
Page 22: Using A Client Computer
The console may be used to communicate with NAR-4040 If users would like to use console to access NAR-4040, using HyperTerminal will be one of many good choices. It can be set up by following the steps below: 1. - Page 23 4. Please make the port settings to Baud rate 19200,Parity None,Data bits 8, Stop bits 1. 5. Turn on the power of raid, after following screen was shown 6. You can then see the boot up information of NAR-4040 NAR-4040 User’s Manual...
- Page 24 7. This is the end of this section. If the terminal did not port correctly, please check the previous steps. NAR-4040 User’s Manual...
-
Page 25: Chapter 3 Operation Guides
The most up-to-date system architecture of PPAP-3711VL, includes two main VLSI chips, 845GL/GV Host Bridge and 82810DB, to support FC-PGA Celeron/P4 processor, DDR, PCI bus interface, USB 2.0 port, SMBus communication, and Ultra DMA/100 IDE Master. The on-board super I/O chip, W83627HF, supports two UARTs. NAR-4040 User’s Manual... - Page 26 PPAP-3711VL to support detection of CPU temperature. Provides 64Kbit nVRAM(non-volatile RAM), and One 2x5 pin connector for VGA supported. All detailed operating relations are shown in Fig. 3-2 PPAP-3711VL System Block Diagram. NAR-4040 User’s Manual...
- Page 27 Fig.3-2 PPAP-3711VL System Block Diagram NAR-4040 User’s Manual...
-
Page 28: Chapter 4 Appendix
#include <fcntl.h> #include <sys/types.h> #include <sys/stat.h> #include <asm/io.h> /* linux-specific */ #ifdef __GLIBC__ # include <sys/perm.h> #endif // #define DEBUG static unsigned int pmbase=0; unsigned int read_port(unsigned int port,int size) static int iopldone = 0; unsigned int val=0; NAR-4040 User’s Manual... - Page 29 (port > 1024) { if (!iopldone && iopl(3)) { fprintf(stderr, "iopl(): %s\n", strerror(errno)); return 1; iopldone++; } else if (ioperm(port,size,1)) { fprintf(stderr, "ioperm(%x): %s\n", port, strerror(errno)); return 1; if (size == 4) outl(val, port); else if (size == 2) NAR-4040 User’s Manual...
- Page 30 2: // (D10)Bit4: 0-> led ON, 1-> led OFF led=read_port(pmbase+0x37,1); led=( flag==1 ?(led & 0xEF) :(led | 0x10)); write_port(pmbase+0x37,led,1); break; case 3: // (D11)Bit3 0-> led ON, 1-> led OFF led=read_port(pmbase+0x37,1); led=( flag==1 ?(led & 0xF7) :(led | 0x08)); write_port(pmbase+0x37,led,1); NAR-4040 User’s Manual...
- Page 31 // unsigned int i, n, port, size, error = 0; int i; setuid(0); /* if we're setuid, force it on */ led_init(); #if 0 led_onoff(1,ON); led_onoff(2,ON); led_onoff(3,ON); led_onoff(4,ON); led_onoff(5,ON); led_onoff(6,ON); led_onoff(7,OFF); led_onoff(8,OFF); #endif #if 0 for(i=0;i<50000;i++) { NAR-4040 User’s Manual...
-
Page 32: Watch-Dog Timer Sample Code
Following list are PPAP-3711 Watch Dog Timer sample Code, this is for reference only: * PPAP-3711VL Watch Dog Sample: * Copyright (C) 2001 Portwell Inc. * Copyright (C) 1998,2000,2001,2002,2003. Chris Chiu * This program is free software; you can redistribute it and/or modify * it under the terms of the GNU General Public License as published by * the Free Software Foundation;... - Page 33 } else if (size == 2) { val=inw(port); #ifdef DEBUG printf("Read_port:(0x%04x)=>0x%04x\n", port, val); #endif } else { val=inb(port); #ifdef DEBUG printf("Read_port:(0x%04x)=>0x%02x\n", port, val); #endif return(val); static int write_port(unsigned int port, unsigned int val, int size) static int iopldone = 0; NAR-4040 User’s Manual...
-
Page 34: Reset To Default Sample Code
Reset To Default is a mechanism for the users to recover the settings to the original ones defined by the software provoder.. Below is the Sample Code for reference: ; For PPAP-3711, RESET to Default testing ; By Frank Hsu , 10/01/2003 Reset to default status can be read from ICH4_GPI6. NAR-4040 User’s Manual... - Page 35 GPI6 status MUST NOT be inverted First. GPI_INV (=GPIOBASE+2Ch)-bit6P0. ( GPI6 not inverted ) Get GPI6 status from GPE0_STS (=PMBASE+28h)-bit22 0 = low , 1= high level ====================================================== .MODEL tiny .386 .STACK 200h .data PROMP1 DB'PORTWELL PPAP-3711,3711RSTD.exe, V1.00 10-01-2003,All rights reserved.$' NAR-4040 User’s Manual...
- Page 36 ; ECX_bit[31..16] save GPIOBASE ( B0:D31:F0:Offset[58..5Bh] ) .code programstart: mov ax,@data mov ds,ax lea dx,PROMP_2_CR_LF mov ah,09h int 21h lea dx,PROMP1 mov ah,09h int 21h lea dx,PROMP_2_CR_LF mov ah,09h int 21h lea dx,PROMP1_1 mov ah,09h int 21h NAR-4040 User’s Manual...
- Page 37 Second: Enabe ACPI IO port by setting ACPI_CNTL bit4 B0:D31:F0:Offset_44h_bit4P1 Third : Get PMBASE ( ACPI I/O port BAR ) and save to EBX_bit[31..16]. PMBASE=:B0:D31:F0:Offset[40..43h] Let Bit0 = 0.( PCI_BAR bit0 returns 1 for a IO_BAR ) NAR-4040 User’s Manual...
- Page 38 Get GPIOBASE =: B0:D31:F0:Offset[58..5Bh] ;(and let bit0 = 0 ) GPIO_CNTL =: B0:D31:F0:Offset_5Ch_bit4P1 ;Enable ICH4 GPIO GPO19 GP_LVL (=:(GPIOBASE + 0Ch))_bit19P[0/1]; Write value 0/1 ------------------------------------------------------- How to read GPI6 ====================================================== GPI6 status must NOT be inverted First. GPI_INV (=GPIOBASE+2Ch)-bit6P0. ( GPI6 not inverted ) NAR-4040 User’s Manual...
- Page 39 ; make sure GPO19 = 1 start ( RST2DF F/F no cleared by GPO19 ) xor bx,bx mov bl,GP_LVL_OFFSET ; Write GPO19 1 mov dx,cx add dx,bx add dx,02h ; point to GPIO[16..23] register in al,dx ; read first call IODELAY ; io delay NAR-4040 User’s Manual...
- Page 40 ; okay , go on test ; no , error message display lea dx,promp_err1 mov ah,09h int 21h lea dx,promp_err1_1 mov ah,09h int 21h ror edx,10h ; error falg EDX_Bit16 , 1 --> Error happened or dl,01h rol edx,10h call KB_Wait NAR-4040 User’s Manual...
- Page 41 ; no , error message display lea dx,promp_err2 mov ah,09h int 21h ror edx,10h ; error falg EDX_Bit17 , 1 --> Error happened or dl,02h rol edx,10h call KB_Wait ; ---- t2 end next_test2 : ; ---- t3 start ,Clear RST2DF F/F NAR-4040 User’s Manual...
- Page 42 ; okay , then end test_end ; okay , then end ; no , error message display lea dx,promp_err3 mov ah,09h int 21h ror edx,10h ; error falg EDX_Bit18 , 1 --> Error happened or dl,04h rol edx,10h NAR-4040 User’s Manual...
- Page 43 ; Return to DOS int 21h ;------------------------------------------------------------------ t_end ; ==================================================== 2_end IODELAY PROC near push ax push dx mov dx,0edh al,dx jmp $+2 mov dx,0edh al,dx pop dx pop ax IODELAY ENDP KB_wait PROC near push ax NAR-4040 User’s Manual...
- Page 44 ; restore PMBASE from EBX_bit[31..16] to EBX_bit[15..0] mov dx,bx ror ebx,10h ; save PMBASE to EBX_Bit[31..16] mov bl,GPE0_STS_OFFSET add bl,02h ; Point to Bit22 add dx,bx in al,dx call IODELAY ; io delay NAR-4040 User’s Manual...
- Page 45 ; (CX), then return. Gives a programmed software delay. ;---------------------------------------------------------------; FIXDELAY PROC near push cx push dx push ax pushf mov cx,02h dx,61h al,dx al,00010000b ah,al fixed_delay_1: al,dx jmp $+2 jmp $+2 al,00010000b al,ah short fixed_delay_1 ah,al loop short fixed_delay_1 popf pop ax NAR-4040 User’s Manual...
- Page 46 FIXDELAY ENDP END programstart NAR-4040 User’s Manual...
-
Page 47: Chapter 5
Clearly display system status Single interface to SBC or M/B 5.3 Mechanical Specification • Module Size (mm): 101.6(W) x 26.0(H) x 30.6(D) (max.) • Display Format: 16 characters x 2 lines • Character Size: 3.0 x 5.23 mm NAR-4040 User’s Manual... -
Page 48: General Specification
There are only two connectors in this module, as shown in Figure 5-1: power connector and Serial Port connector. The power source into this module is 5 volt only. There are only three pins used in the Serial Port interface (Figure 5-2). NAR-4040 User’s Manual... -
Page 49: Ezio Function Command
RS-232 port. Both commands and data go thru RS-232 ports. To distinguish between data and commands, the LCD/key-pad module recognizes a command prefix, 254 (Hex 0FE). The byte following “254” will be processed as a command. For example, to NAR-4040 User’s Manual... - Page 50 For example, if Up and Down arrow keys are pressed at the same time while “read key” command received, the replied status will be “Hex045”. Note 2: This command can be used to place the cursor at any location. The corresponding address for each character on the screen is as follows: NAR-4040 User’s Manual...
- Page 51 Stop bit: 1 What follows is the default setup after LCD module initiated: ♦ 2-line display mode; every character is 5 x 8 dots. ♦ Display on; cursor off; cursor blink off. ♦ Display will be cleared. NAR-4040 User’s Manual...
- Page 52 ♦ Shift right for entry mode. ♦ Set address counter to “00 ”(cursor position to 0) ♦ In entry mode. NAR-4040 User’s Manual...
-
Page 53: Character Generator Rom (Cgrom)
5.8 Character Generator ROM (CGROM) NAR-4040 User’s Manual... - Page 54 5. A pooling method is implemented to get input from EZIO while any button is pressed. - NOTE: This program is a sample program provided " AS IS" with NO warranty. * Copyright (c) Portwell, Inc. All Rights Reserved. * ************************************************************************/ NAR-4040 User’s Manual...
- Page 55 = 12 ; /* Hide cursor & display blanked characters */ void Hide () { write(fd,&Cmd,1); write(fd,&hide,1); int turn = 13 ; /* Turn On (blinking block cursor) */ void TurnOn () { write(fd,&Cmd,1); write(fd,&turn,1); NAR-4040 User’s Manual...
- Page 56 = 64;/* Command */ void SetDis(){ write(fd,&Cmd,1); write(fd,&setdis,1); /* Add or Change Show Message here */ char mes1[] = "Portwell EZIO"; char mes2[] = "*************"; char mes3[] = "Up is selected"; char mes4[] = "Down is selected"; char mes5[] = "Enter is selected";...
- Page 57 { /* Switch the Read command */ case 0x4D : /* Up Botton was received */ Cls(); ShowMessage(mes1,mes3); /** display "Portwell EZIO" */ break; /** display "Up is selected */ case 0x47 : /** Down Botton was received */ Cls();...
Need help?
Do you have a question about the NAR-4040 and is the answer not in the manual?
Questions and answers