Suunto 9 PEAK PRO User Manual
Hide thumbs
Also See for 9 PEAK PRO:
- User manual (63 pages) ,
- Product safety & regulatory information (124 pages)
Table of Contents
Advertisement
Quick Links
Advertisement
Table of Contents

Related Manuals for Suunto 9 PEAK PRO


Summary of Contents for Suunto 9 PEAK PRO
- Page 1 SUUNTO 9 PEAK PRO USER GUIDE 2022-10-24...
-
Page 2: Table Of Contents
Suunto 9 Peak Pro 1. SAFETY................................5 2. Getting started...............................7 2.1. Touch screen and buttons.......................7 2.2. Adjusting settings..........................8 2.3. Software updates..........................9 2.4. Suunto app............................9 2.5. Optical heart rate..........................9 3. Settings................................11 3.1. Button and screen lock........................11 3.2. Automatic backlight........................11 3.3. - Page 3 Suunto 9 Peak Pro 4.6. Snorkeling and mermaiding......................27 4.7. Swimming............................28 4.8. Interval training..........................28 4.9. Autopause............................29 4.10. Display theme..........................29 4.11. Feeling............................. 30 4.12. Intensity zones..........................30 4.12.1. Heart rate zones.........................31 4.12.2. Pace zones.........................33 4.12.3. Power zones........................33 4.12.4.
- Page 4 Suunto 9 Peak Pro 9.2. Battery...............................57 9.3. Disposal............................57 10. Reference..............................58 10.1. Compliance.............................58 10.2. CE..............................58...
-
Page 5: Safety
WARNING: Do not entirely rely on the GPS or battery lifetime of the product. Always use maps and other backup material to ensure your safety. CAUTION: Only use the provided charging cable when charging your Suunto 9 Peak Pro. CAUTION: Do not apply solvent of any kind to the product, as it may damage the surface. - Page 6 Suunto 9 Peak Pro NOTE: At Suunto we use advanced sensors and algorithms to generate metrics that can help you in your activities and adventures. We strive to be as accurate as possible. However, none of the data our products and services collect is perfectly reliable, nor are the metrics they generate absolutely precise.
-
Page 7: Getting Started
CAUTION: Only use the provided charging cable when charging your Suunto 9 Peak Pro. 2.1. Touch screen and buttons Suunto 9 Peak Pro has a touch screen and three buttons you can use to navigate through displays and features. Swipe and tap swipe up or down to move in displays and menus •... -
Page 8: Adjusting Settings
Suunto 9 Peak Pro While recording an exercise: Upper button press to pause the activity (to access the exercise options) • keep pressed to change activity • Middle button press to change displays • keep pressed to open in-context options menu •... -
Page 9: Software Updates
NOTE: When the update is complete, the release notes will be visible in Suunto app. 2.4. Suunto app With the Suunto app, you can further enrich your Suunto 9 Peak Pro experience. Pair your watch with the mobile app to sync your activities, create workouts, get mobile notifications, insights and more. - Page 10 For higher accuracy and quicker responses to changes in your heart rate, we recommend • using a compatible chest heart rate sensor such as Suunto Smart Sensor. WARNING: The optical heart rate feature may not be accurate for every user during every activity.
-
Page 11: Settings
Suunto 9 Peak Pro 3. Settings 3.1. Button and screen lock While recording an exercise you can lock the buttons by keeping the lower button pressed and then select Lock. Once locked, you cannot perform any action that requires button interaction (create laps, pause/end exercise etc.), but it is possible to scroll the display views... -
Page 12: Bluetooth Connectivity
• 3.4. Bluetooth connectivity Suunto 9 Peak Pro uses Bluetooth technology to send and receive information from your mobile device when you have paired your watch with the Suunto app. Same technology is also used when pairing PODs and sensors. -
Page 13: Time And Date
You set time and date during the initial startup of your watch. After this, your watch uses GPS time to correct any offset. Once you have paired with Suunto app, your watch gets updated time, date, time zone and daylight-saving time from mobile devices. -
Page 14: Language And Unit System
You can change your watch language and unit system from the settings under General » Language. 3.9. Watch faces Suunto 9 Peak Pro comes with several watch faces to choose from, both digital and analog styles. To change the watch face: 1. -
Page 15: Power Saving
3.11. Pairing pods and sensors Pair your watch with Bluetooth Smart pods and sensors to collect additional information, such as cycling power, when recording an exercise. Suunto 9 Peak Pro supports the following types of pods and sensors: Heart rate •... -
Page 16: Calibrating Bike Pod
Suunto 9 Peak Pro If the pod has required settings, such as crank length for a power pod, you are prompted to enter a value during the pairing process. Once the pod or sensor is paired, your watch searches for it as soon as you select a sport mode that uses that sensor type. -
Page 17: Sunrise And Sunset Alarms
A significant drop in barometric pressure typically means a storm is coming and you should take cover. When the storm alarm is active, Suunto 9 Peak Pro sounds an alarm and displays a storm symbol when the pressure drops 4 hPa (0.12 inHg) or more during a 3-hour period. -
Page 18: Fusedspeed
If you temporarily lose the GPS signal, for example, Suunto 9 Peak Pro is able to continue showing accurate speed readings with the help of the GPS calibrated accelerometer. -
Page 19: Altimeter
Suunto 9 Peak Pro 3.16. Altimeter Suunto 9 Peak Pro uses barometric pressure to measure altitude. To get accurate readings, you need to define an altitude reference point. This can be your current elevation if you know the exact value. Alternatively, you can use FusedAlti (see 3.15. FusedAlti™) to set your reference point automatically. -
Page 20: Device Info
Suunto app. After a hard reset, you must go through the initial setup of your Suunto watch. Performing a factory reset on your watch may be performed in the following situations: a Suunto Customer Support representative has asked you to do so as part of the •... - Page 21 NOTE: The factory reset deletes the previous pairing information your watch might have had. To start the pairing process with the Suunto app again, we recommend you delete the previous pairing from the Suunto app and your phone's Bluetooth - under Paired devices.
-
Page 22: Recording An Exercise
Suunto 9 Peak Pro 4. Recording an exercise In addition to 24/7 activity monitoring, you can use your watch to record your training sessions or other activities to get detailed feedback and follow your progress. To record an exercise: 1. Put on a heart rate sensor (optional). -
Page 23: Sport Modes
POI, the GPS accuracy is changed to Best. To navigate during exercise: 1. Create a route or POI in Suunto app and sync your watch if you haven't done so already. 2. Select a sport mode that uses GPS. 3. Scroll down and select Navigation. -
Page 24: Find Back
4.2.1. Find back If you are using GPS when recording an activity, Suunto 9 Peak Pro automatically saves the starting point of your exercise. With Find back, Suunto 9 Peak Pro can guide you directly back to your starting point. -
Page 25: Battery Power Management
4. Scroll up and start your exercise. 4.4. Battery power management Your Suunto 9 Peak Pro has a battery power management system that uses intelligent battery technology to help ensure your watch does not run out of power when you need it most. -
Page 26: Multisport Exercise
CAUTION: Only use the provided charging cable when charging your Suunto 9 Peak Pro. 4.5. Multisport exercise Your Suunto 9 Peak Pro has predefined Triathlon sport modes that you can use to track your Triathlon exercises and races but if you need to track another sort of multisport activity, you can easily do so directly from the watch. -
Page 27: Snorkeling And Mermaiding
4. Recording an exercise. The Suunto 9 Peak Pro is capable of measuring depth up to 10 m. It is however waterproof up to 100 m according to ISO 22810. -
Page 28: Swimming
4.8. Interval training Interval workouts are a common form of training consisting of repetitive sets of high and low intensity efforts. With Suunto 9 Peak Pro, you can define in the watch your own interval training for each sport mode. -
Page 29: Autopause
Suunto 9 Peak Pro 1. Before you start an exercise recording, swipe up or press the lower button to scroll down to Intervals and tap the setting or press the middle button. 2. Toggle Intervals on and adjust the settings described above. -
Page 30: Feeling
Suunto 9 Peak Pro With the dark theme, the contrast is reverse, with the background dark and the numbers light. The theme is a global setting that you can change in your watch from any of your sport mode options. -
Page 31: Heart Rate Zones
HR, you should adjust the default value accordingly. Suunto 9 Peak Pro has default and activity-specific HR zones. The default zones can be used for all activities, but for more advanced training, you can use specific HR zones for running and cycling activities. - Page 32 Suunto 9 Peak Pro 2. Select your new max HR by swiping up or down or by pressing the upper or lower buttons. 3. Tap your selection or press the middle button. 4. To exit the HR zones view, swipe right or keep the middle button pressed.
-
Page 33: Pace Zones
The pace zones are shown either as metric or imperial value depending on your settings. Suunto 9 Peak Pro has five default pace zones that you can use or you can define your own. Pace zones are available for running and cycling. -
Page 34: Using Hr, Pace Or Power Zones When Exercising
Suunto 9 Peak Pro Set your activity specific power zones from the settings under Training » Intensity zones » Advanced zones. 1. Tap the activity (running or cycling) that you want to edit or press the middle button when the activity is highlighted. -
Page 35: Navigation
Suunto 9 Peak Pro 5. Navigation You can use your watch to navigate in various ways. You can for example use it to orient yourself in relation to magnetic north, navigate a route or to a point of interest (POI). -
Page 36: Bearing Navigation
Suunto 9 Peak Pro If you stray too far off from the route while using altitude navigation, your watch will give you an Off route message in the altitude profile display. If you see this message, scroll to the route navigation display to get back on track before continuing with altitude navigation. -
Page 37: Routes
10. End the navigation by pressing the top button. 5.3. Routes You can use your Suunto 9 Peak Pro to navigate routes. Plan your route with Suunto app and transfer it to your watch with the next sync. To navigate on a route: 1. -
Page 38: Turn-By-Turn Navigation Powered By Komoot
If you are a Komoot member, you can find or plan routes with Komoot and sync these to your Suunto 9 Peak Pro via Suunto app. In addition, your exercises recorded with your watch will automatically be synchronized to Komoot. -
Page 39: Points Of Interest
A point of interest, or POI, is a special location, such as camping spot or vista along a trail, you can save and navigate to later. You can create POIs in Suunto app from a map and do not have to be at the POI location. Creating a POI in your watch is done by saving your current location. -
Page 40: Navigating To A Poi
5. Select Start exercise if you want to use the POI for exercising or select Navigate only if you only want to navigate to the POI. NOTE: If you only navigate to the POI, nothing will be saved or logged in Suunto app. 6. Press the upper button again at any time to stop navigating. -
Page 41: Poi Types
The shortcuts give you quick access to POI details and actions such as saving your current location or selecting another POI to navigate to, as well as ending navigation. 5.5.3. POI types The following POI types are available in Suunto 9 Peak Pro: Begin Parking Home... - Page 42 Suunto 9 Peak Pro Cave Mountain Peak Rock Cliff Avalanche Valley Hill Road Trail River Water Waterfall Coast Lake Kelp forest Marine reserve Coral reef Big fish Marine mammal Wreck Fishing spot Beach Forest...
- Page 43 Suunto 9 Peak Pro Meadow Coast Stand Shot Scrape Big game Small game Bird Prints Crossroads Danger Geocache Sight Trailcam...
-
Page 44: Widgets
The notification history is cleared when you check the messages on your mobile device. 6.2. Media controls Your Suunto 9 Peak Pro can be used to control the music, podcast, other media played on your phone or being cast from your phone to another device. The media controls widget are on by default but can be turned off by swiping up from watch face and select Media controls. -
Page 45: Heart Rate
Suunto 9 Peak Pro In the media control widget, the buttons have the following functions: Play/Pause: Upper button • Next track/episode: Lower button • Previous track/episode: Upper button (long press) • Volume: Lower button (long press), will open volume controls •... -
Page 46: Steps And Calories
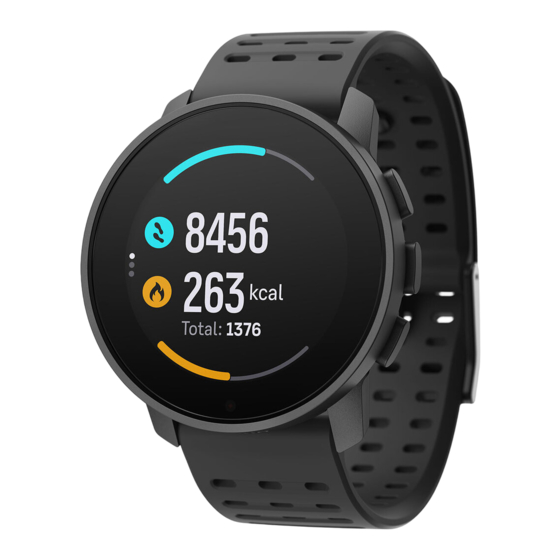
Suunto 9 Peak Pro Once activated, your watch needs 24 minutes before it can start display heart rate information. Swipe right or long press the middle button to return to the watch face view. 6.4. Steps and calories From the watch face, swipe left or press the middle button until you see your total steps and estimated calories for the day. -
Page 47: Training
To get your fitness level estimated, record a run or walk with a duration for at least 15 minutes while wearing your Suunto 9 Peak Pro. Your watch is able to provide an estimation of your fitness level for all running and walking workouts. -
Page 48: Sleep
A good night's sleep is important for a healthy mind and body. You can use your watch to track your sleep and follow how much sleep you are getting on average. When you wear your watch to bed, Suunto 9 Peak Pro tracks your sleep based on accelerometer data. -
Page 49: Resources
Suunto 9 Peak Pro NOTE: If you go to bed before your bedtime and also wake up after your bedtime, your watch does not count that as a sleep session. You should set your bedtime according to the earliest you may go to bed and the latest you may wake up. -
Page 50: Outdoor Insights
6.9. Outdoor insights Suunto 9 Peak Pro constantly measures absolute air pressure using the built-in pressure sensor. Based on this measurement and your altitude reference value, it calculates altitude or air pressure. -
Page 51: Compass
6.10. Compass Suunto 9 Peak Pro has a digital compass that allows you to orient yourself in relation to magnetic north. The tilt-compensated compass gives you accurate readings even if the compass is not horizontally level. -
Page 52: Calibrating Compass
Suunto 9 Peak Pro To exit the compass, swipe right or left until you reach the watch face. You can also use the middle button. While you are in the compass widget, you can swipe up from the bottom of the screen or press the lower button to open a list of shortcuts. -
Page 53: Timer
Suunto 9 Peak Pro is not intended for diagnosing or monitoring medical conditions. You can measure your blood oxygen levels with Suunto 9 Peak Pro. From the watch face view, swipe left or press the middle button to scroll to the Blood oxygen widget. - Page 54 Suunto 9 Peak Pro Normal blood oxygen levels are between 96% and 99% at sea level. At high altitudes, healthy values can be slightly lower. Successful acclimation to high altitude makes the value increase again. How to measure your blood oxygen level: 1.
-
Page 55: Suuntoplus™ Guides
4. Press the middle button until you reach the SuuntoPlus™ guide, which is shown as an own display. NOTE: Ensure that your Suunto 9 Peak Pro has the latest software version and that you have synced your watch with Suunto app. -
Page 56: Suuntoplus™ Sports Apps
Suunto 9 Peak Pro 8. SuuntoPlus™ sports apps SuuntoPlus™ sports apps equip your Suunto 9 Peak Pro with new tools and new insights to give you inspiration and new ways to enjoy your active lifestyle. You can find new sports apps from SuuntoPlus™... -
Page 57: Care And Support
9.3. Disposal Please dispose of the device in accordance with local regulations for electronic waste. Do not throw it in the garbage. If you wish, you may return the device to your nearest Suunto dealer. - Page 58 10. Reference 10.1. Compliance For compliance related information and detailed technical specifications, see “Product Safety and Regulatory Information” delivered together with your Suunto 9 Peak Pro or available at www.suunto.com/userguides. 10.2. CE Hereby, Suunto Oy, declares that the radio equipment type OW211. is in compliance with Directive 2014/53/EU.
- Page 59 Suunto 9 Peak Pro...
- Page 60 SUUNTO CUSTOMER SUPPORT www.suunto.com/support www.suunto.com/register Manufacturer: Suunto Oy Tammiston kauppatie 7 A, FI-01510 Vantaa FINLAND © Suunto Oy 10/2022 Suunto is a registered trademark of Suunto Oy. All Rights reserved.
Need help?
Do you have a question about the 9 PEAK PRO and is the answer not in the manual?
Questions and answers