
Related Manuals for Thermo Scientific TDE Series


Summary of Contents for Thermo Scientific TDE Series
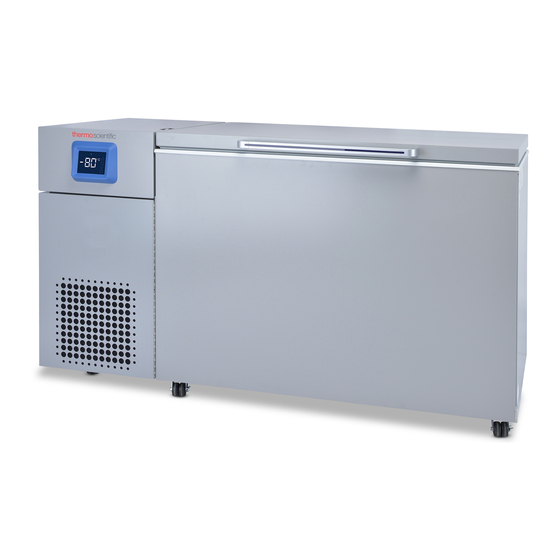
- Page 1 Ultra-Low Temperature Freezers Thermo Scientific TDE Series Installation and Operation 332851H01 • Revision A • July 2022...
- Page 2 IMPORTANT Read this Installation and Operation manual. Failure to follow the instructions in this manual can result in damage to the unit, injury to operating personnel, and poor equipment performance. CAUTION All internal adjustments and maintenance must be performed by qualified service personnel. Material in this manual is for informational purposes only.
-
Page 3: Table Of Contents
Contents Models................. 1 Safety Considerations ..........2 ELECTROMAGNETIC COMPATIBILITY (EMC) ..4 Symbols Glossary ............ 6 Unpacking ..............7 Packing List ............. 7 General Recommendations.......... 8 Temperature Monitoring system ....... 8 General Usage ............8 Initial Loading ............8 Grille Door Opening/Closing ........8 Operating Standards............ - Page 4 Operation Overview..........12 Display ..............12 Settings..............13 Power Down ............14 Ice Scraper Instruction ..........15 Purpose ..............15 Backup System (Optional)..........16 CO2 and LN2 Precautions ........16 Installation ..............16 Start Up ..............17 Operation ..............17 Chart Recorders (Optional)...........
- Page 5 Appendix A: Alarm Summary ........28 Appendix B: Modbus ASCII Parameter Table ............30 End of Life Care ............38 Contact Information ............ 39...
-
Page 6: Models
Models Table 1. Applicable Models Model Size (xxx) Voltage (*) Description TDECxxx86L* 063/252/396 A/D/V Medical Device Thermo Fisher Scientific ULT Freezers Models |... -
Page 7: Safety Considerations
Safety Considerations In this manual, the following symbols and conventions are Do not modify system components, especially used: the controller. Use OEM exact replacement equipment or parts. Before use, confirm that the This symbol used alone indicates important product has not been altered in any way. operating instructions which reduce the risk of WARNING: Your unit must be properly grounded injury or poor performance of the unit. - Page 8 WARNING: Portable RF communications CAUTION: Risk of fire or explosion. Flammable equipment (including peripherals such as refrigerant used. Consult repair manual/owner's antenna cables and external antennas) should be guide before attempting to install or service this used no closer than 30 cm (12 inches) to any part product.
-
Page 9: Electromagnetic Compatibility (Emc)
ELECTROMAGNETIC COMPATIBILITY (EMC) Guidance and Manufacturer’s Declaration—Electromagnetic Emissions Emission Test Compliance Electromagnetic Environment Guidance RF emissions The EMISSIONS characteristics of the freezer make it suitable for use in commer- Group 1 CISPR 11 cial, industrial or institutional occupancies (CISPR 11 class A). If it is used in a resi- dential environment (for which CISPR 11 class B is normally required), this equipment might not offer adequate protection to radio-frequency communication RF emissions... - Page 10 Guidance and Manufacturer’s Declaration—Electromagnetic Immunity 3 Vrms 3 Vrms 150 kHz to 80 MHz 150 kHz to 80 MHz Mains power quality should be that of a Conducted RF 6Vrms for ISM bands 6Vrms for ISM bands typical commercial or industrial environ- IEC 61000-4-6 between 150 kHz and between 150 kHz and...
-
Page 11: Symbols Glossary
Canadian ISED IC Notice This ISM digital apparatus complies with Canadian ICES-001, Medical Device Class A. à la norme NMB-001 du Cet appareil ISM est conforme Canada, Classe A. This product has been tested as per IEC 60601-1-2:2014 Warning: Low Temperature Hazard standard. -
Page 12: Unpacking
Unpacking At delivery, examine the exterior for physical damage while the carrier’s representative is present. If exterior damage is present, carefully unpack and inspect the unit and all accessories for damage. If there is no exterior damage, unpack and inspect the equipment within five days of delivery. -
Page 13: General Recommendations
General Recommendations Temperature Monitoring • Fill a chest by starting at the left side near the probe. Filling with room temperature racks will result in a long system pull-down time. CAUTION: Failure to follow these procedures or overloading the unit may cause undue stress on the compressors or jeopardize user product IMPORTANT NOTE: Thermo Fisher Scientific safety. -
Page 14: Operating Standards
Operating Standards Table 2. Electrical Specifications by Size and The freezers described in this manual are classified for use as stationary equipment in a Pollution Degree 2 and Over voltage Voltage (Continued) Category II environment. 396V 230 V 50 Hz 5.5 A These units are designed to operate under the following environmental conditions:... -
Page 15: Installation
Installation Wiring The safety of any system incorporating this equipment is the responsibility of the assembler of the system. WARNING: Do not exceed the electrical rating CAUTION: Connect the equipment to the printed on the data plate located on the lower correct power source. -
Page 16: Leveling
Leveling Installing the Remote Alarm Connector Make sure that the floor is level. The unit must be level both front to back and side to side. The remote alarm contacts are located on the back of the Ensure to lock the brakes for units equipped with casters. freezer above and to the left of the power switch. -
Page 17: Operation
Operation If the equipment is used in a manner not specified by the The control panel consists of the 5 touch-point buttons manufacturer, the protection provided by the equipment may located on the right side of the display. be impaired. Alarm Bell –... -
Page 18: Settings
The message panel on the top indicates freezer health status • After the value is saved, display will show the next option and the various alarm or warning states. in the settings menu. To return to the unit temperature display: Wrench –... -
Page 19: Power Down
Power Down To power down the ULT, first turn the breaker switch, located behind the front grille, to the off position. Once the switch is in the off position, the display will show “OFF” followed by “YES” and then “NO” in 2 second intervals. The checkmark will also be illuminated while “YES”... -
Page 20: Ice Scraper Instruction
Ice Scraper Instruction Purpose CAUTION: The manufacturer cannot be responsible for any damages deriving from improper, wrong or incautious use. The ice scraper is used to scrape any frost accumulated on the cabinet breaker and other hard surfaces inside the freezer. -
Page 21: Backup System (Optional)
Backup System (Optional) For all ultra-low temperature cold storage products, we CAUTION: When closing the cylinder valve, recommend the use of a backup system (BUS) for the make sure that the injection solenoid is energized security of your samples. to allow all the liquid to bleed off instead of being trapped in the supply hose. -
Page 22: Start Up
Operation washer. Ensure the correct nut fitting is supplied over the nipple (US or European). • Add 2 wraps of Teflon tape clockwise to the 1/4" The backup system can run for a minimum of 24 hours on NPT fitting (on the nipple) when viewed from the battery power. -
Page 23: Chart Recorders (Optional)
Chart Recorders (Optional) Panel-mounted six-inch seven-day recorders are available as CAUTION: Do not use sharp or pointed objects options for all freezer models except for the smaller 300 box to depress the chart buttons. This may cause capacity models. permanent damage to the recorder. Set Up and Operation Changing Chart Paper To prepare the recorder to function properly, complete the... -
Page 24: Maintenance
Maintenance WARNING: Unauthorized repair of your freezer will invalidate your warranty. Contact Technical Service. See Contact Information for phone numbers. CAUTION: Maintenance should only be performed by trained personnel. Cleaning the Condenser Defrosting the Freezer Clean the condenser at least every six months; more often if Defrost the freezer once per year or whenever the ice buildup the laboratory area is dusty. -
Page 25: Maintenance Schedule
The unit must be turned off and disconnected from power Item Interval before removing the side panel. To install a new battery, remove the side panel, remove the battery bracket, install the Replace the battery as indicated by new battery, then replace bracket and side panel. system alarms or as necessary per Failure to properly connect the battery can damage electrical individual status evaluation. -
Page 26: Troubleshooting Guide
Troubleshooting Guide This section is a guide to troubleshoot general operational problems. Problem Cause Solution Allow ample time to recover from loading warm product. Warm load/Over load. Do not overload cabinet. Refer Initial Loading in user manual for loading procedures. Check, if the location meets ambient requirements (within Hot environment. - Page 27 Problem Cause Solution Call service. Electromagnetic fields The freezer continues to maintain its set temperature For any other reason: Contact service person we recommend the use of a redundant and independent temperature monitoring system and that freezer be monitored 24/7 for performance commensurate with the value of product stored.
- Page 28 Problem Cause Solution Check whether the setpoint is in operating range. Change Freezer set point is low. the setpoint if necessary. Defrost the unit. Refer Defrosting the Freezer in user Frost build up. manual. Unit compressors run continuously. Dirty condenser. Clean the condenser and condenser filter.
- Page 29 Problem Cause Solution Check if the unit is installed in a level area free from Unit is not level. vibration. (Refer to Leveling in user manual). Loose side panels. Check side panel screws, tighten them if necessary. Vibration noise. Rubber tubing separators Rattling noise/Loud noise.
-
Page 30: Error Codes
Error Codes Error Code Description Undefined model Firmware Build Incompatible Control Probe Failure Heat Exchanger Probe Failure Power Failure Failure to Reach Setpoint BUS Battery - Low Voltage System Battery - Low Voltage Lost Communication Failure (Main to UI) Lost Communication Failure (BUS) Stuck Button Ambient Probe Failure System Battery Disconnected... -
Page 31: Warranty
Be sure to register your warranty online: www.thermofisher.com/labwarranty THERMO FISHER SCIENTIFIC USA FREEZER WARRANTY FOR Thermo Scientific TDE series. The Warranty Period starts two weeks from the date your equipment is shipped from our facility. This allows for shipping time so the warranty will go into effect at approximately the same time your equipment is delivered. -
Page 32: Warranty (International)
Warranty (International) THERMO FISHER SCIENTIFIC FREEZER INTERNATIONAL WARRANTY FOR Thermo Scientific TDE series. The Warranty Period starts two months from the date your equipment is shipped from our facility. This allows for shipping time so the warranty will go into effect at approximately the same time your equipment is delivered. The warranty protection extends to any subsequent owner during the warranty period. -
Page 33: Appendix A: Alarm Summary
Appendix A: Alarm Summary Alarm Summary Warning Remote Alarm Message Description Icon Alarm Event The freezer temperature has exceeded the warm alarm set point. Warm Alarm Thermometer Prolonged lid openings and warm product loading may cause warm alarms. The freezer temperature has exceeded the cold alarm set Cold Alarm Thermometer point. - Page 34 Alarm Summary Warning Remote Alarm Message Description Icon Alarm Event Invalid Control Model Alarm. Contact service to ensure the correct model is selected for the system to avoid cargo Wrong Model Alarm Wrench loss. Display will intermittently show “E00”. Firmware Build Firmware build indicates incompatibility that can result in Incompatible modules to be non-coherent.
-
Page 35: Appendix B: Modbus Ascii Parameter Table
Appendix B: Modbus ASCII Parameter Table The MODBUS interface is intended to be used with cable DLCPTDATA101 (328928H02) If you plan to use your own harness: J6, pin 3 is RS485A J6, pin 2 is RS485B J6, pin 5 is ground Protocol MODBUS ASCII Baud Rate... - Page 36 Relay Function Address in Modbus Data S.No Parameter Size Enclosure Data Remarks code hexadecimal command Type Response convert the data value into 3a 31 39 3A 31 39 signed 2’s complement 30 33 30 30 33 30 and divide with 10, which Cold Alarm 34 46 46 0xFF...
- Page 37 Relay Function Address in Modbus Data S.No Parameter Size Enclosure Data Remarks code hexadecimal command Type Response 3a 31 39 5 units sizes 3A 31 39 30 33 30 1 - 300, 30 33 30 35 39 44 2 - 400, Size 0x03 32 30 32...
- Page 38 Relay S.No Function Address in Modbus Data Parameter size Enclosure Data Remarks code hexadecimal command type response Convert the Float to 3a 31 39 3A 31 39 decimal with below steps: 30 33 30 30 33 30 1.Open the link 34 44 30 34 34 31 0x41...
- Page 39 Relay S.No Function Address in Modbus Data Parameter size Enclosure Data Remarks code hexadecimal command type response Convert the Float to 3A 31 39 decimal with below steps: 3a 31 39 30 33 30 1.Open the link 30 33 30 34 43 32 0xC2 https://www.h-schmidt.net/...
- Page 40 Relay Function Address in Data S.No Parameter Size Modbus Enclosure Data Remarks Code hexadecimal Type Response Convert the data value into 3A 31 39 signed 2's complement 3a 31 39 30 33 30 which gives the data. Display 30 33 30 34 46 46 Ex: Signed 2's complement 0x03...
- Page 41 Relay Function Address in Data S.No Parameter Size Modbus Enclosure Data Remarks Code hexadecimal Type Response b0 - Temperature pull down attained, 3a 31 39 3A 31 39 b1 - Power failure, 30 33 30 30 33 30 b2 - Main - UI comm failure, System 36 36 46 32 32 38...
- Page 42 Relay Function Address in Data S.No Parameter Size Modbus Enclosure Data Remarks Code hexadecimal Type Response 3a 31 39 3A 31 39 XX/XX Minor (numbers after 30 33 30 30 33 30 decimal point)/ Major Build 35 32 34 34 30 30 0x00 (numbers before decimal 0x03...
-
Page 43: End Of Life Care
End of Life Care Some considerations and suggestions are listed below for proper disposal of this product. While addressing these actions for safe recycling and disposal, please follow all guidelines, Safety Data Sheets (SDS), or regulations applicable to your country and region. - Page 44 This page is intentionally left blank.
- Page 45 This page is intentionally left blank.
-
Page 46: Contact Information
Contact Information Thermo Fisher Scientific products are backed by a global technical support team ready to support your applications. We offer cold storage accessories, including remote alarms, temperature recorders, and validation services. Visit www.thermofisher.com/cold or call: Countries Sales North America +1 866 984 3766 India toll free 1800 22 8374...
Need help?
Do you have a question about the TDE Series and is the answer not in the manual?
Questions and answers
What is the price for the two Ultra-Low Temp Freezers Thermo Scientific TDE Series? And what is the volumes?