Table of Contents
Advertisement
Advertisement
Table of Contents

Related Manuals for Pax Technology PRIORITY A920


Summary of Contents for Pax Technology PRIORITY A920
- Page 1 A920 Reference Guide 12-21-2021 V2.2...
- Page 2 PAX Technology, Inc. PAX is a registered trademark of PAX Technology Limited in China and/or other countries. All other trademarks or brand names are the properties of their respective holders.
- Page 3 A920 REFERENCE GUIDE Revision History Vesion v2.2| ii...
-
Page 4: Table Of Contents
[TERMINAL] REFERENCE GUIDE Table of Contents 1. Introduction ......................... 1 1.1 Purpose ............................1 1.2 Intended Audience ........................1 1.3 Acronyms and Terms ........................2 2. Terminal Identification ....................3 2.1 Serial Number Definition ......................3 2.2 Serial Number Location .......................3 2.3 Part Number Location .........................3 2.4 IMEI Number Location .........................4 3. - Page 5 [TERMINAL] REFERENCE GUIDE 12. Frequently Asked Questions ..................52 13. PAX Customer Support ..................... 53 14. Appendix A: Part Number and Serial Number Keys ..........54 14.1 Part Number Configuration Device Types ................54 14.1.1 E600 Part Number Configuration Key ....................54 14.2 Serial Number Definition ......................56 v2.2 | iv...
-
Page 6: Introduction
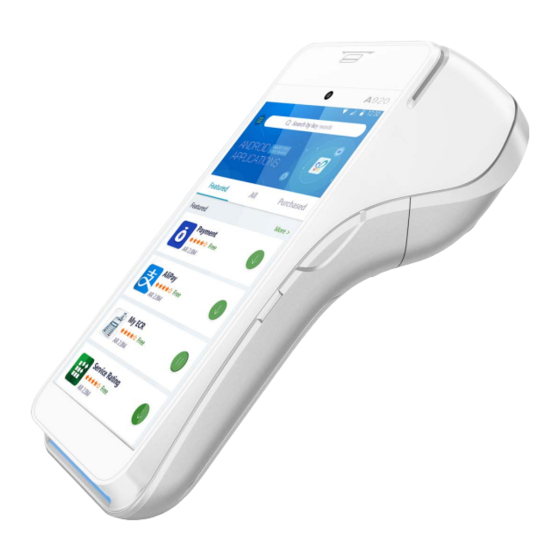
A920 REFERENCE GUIDE 1. Introduction The A920 is an all-in-one payment terminal with Android™ OS and a compact design that has a 5-inch IPS color touchscreen with high anti-glare. It combines the full features of an Android tablet in a powerful payment terminal. -
Page 7: Acronyms And Terms
A920 REFERENCE GUIDE 1.3 Acronyms and Terms Acronym Definition DHCP Dynamic Host Configuration Protocol - A network management protocol used on IP networks. The DHCP server dynamically assigns an IP address and other network configuration parameters to each device on the network. EMV®... -
Page 8: Terminal Identification
A920 REFERENCE GUIDE 2. Terminal Identification This sections provides information on terminal identification numbers and where to locate them. 2.1 Serial Number Definition Serial Number (SN) = Model code + Sequence number If the length of SN = 8, then the length of Model Code = 2 and contains ASCII(0 ~ 9 & A ~ Z, but without O &... -
Page 9: Imei Number Location
A920 REFERENCE GUIDE 2.4 IMEI Number Location The IMEI (International Mobile Equipment Identity) is a unique number for identifying a device on a mobile network. It has 15 digits and is assigned to every GSM phone — CDMA devices have a MEID number. - Page 10 A920 REFERENCE GUIDE 3. Select [Status]. 4. Scroll down to view the [IMEI number]. v2.2 | 5...
-
Page 11: Functional Information
A920 REFERENCE GUIDE 3. Functional Information This section covers the various software and hardware features and functions of the A920. 3.1 Technical Details and Specifications The technical details and specifications for the A920 are listed in the following table. Feature Description Operating System PAXBiz™... -
Page 12: Side Views
A920 REFERENCE GUIDE 3.2 Side Views The following images point out the various hardware features of the A920. Front View Contactless Area Front Facing Camera LCD Screen EMV Reader v2.2 | 7... - Page 13 A920 REFERENCE GUIDE Back View Rear 5-MP Auto Focus Camera POGO Pin Connectors v2.2 | 8...
- Page 14 A920 REFERENCE GUIDE Left Side View Volume Down Micro USB Right Side View Volume Up v2.2 | 9...
-
Page 15: Terminal Location
A920 REFERENCE GUIDE 4. Terminal Location Position the A920 on a counter-top, desktop, or tabletop when not in use. Keep the A920 away from direct sunlight, excessive dust, moisture, and heat. Avoid locating the A920 near electrical devices that might introduce interference such as microwave ovens and blow dryers. 5. -
Page 16: Power On/Off
A920 REFERENCE GUIDE 5.2 Power ON/OFF Power ON: Press and hold the power button on the right side of the device for 3-5 seconds. v2.2 | 11... - Page 17 A920 REFERENCE GUIDE Power OFF: Press and hold the power button on the right side of the device for 3-5 seconds. When prompted, select [Power Off]. v2.2 | 12...
-
Page 18: Reboot Device
A920 REFERENCE GUIDE 5.3 Reboot Device 1. Press and hold the power button on the right side of the device for 3-5 seconds. 2. When prompted, select [Reboot]. v2.2| 13... -
Page 19: Adjust The Display Brightness
A920 REFERENCE GUIDE 5.4 Adjust the Display Brightness Select [Settings]. Next, select [Display]. v2.2 | 14... -
Page 20: Adjust The Volume
A920 REFERENCE GUIDE 3. Within the Display Settings, select [Brightness level]. Slide the wheel left or right to adjust the brightness level of the screen. 5.5 Adjust the Volume There are two ways to adjust the volume: 1. Press the button on the right side of the device to raise the volume and/or press the volume on the left side of the device to decrease the volume. -
Page 21: Take A Screenshot
A920 REFERENCE GUIDE 2. In device [Settings], locate and select [Sound & notification] to adjust the device’s Media Volume, Alarm Volume, and Ring Volume. 5.6 Take a Screenshot 1. Press and hold both the power button and the volume down button at the same time. -
Page 22: Set Screen Sleep Time
A920 REFERENCE GUIDE 5.7 Set Screen Sleep Time 1. Select [Settings]. 2. Select [Display]. v2.2| 17... - Page 23 A920 REFERENCE GUIDE 3. Select [Sleep]. 4. Select the desired sleep time and tap [Save]. v2.2 | 18...
-
Page 24: Replace Paper Roll
A920 REFERENCE GUIDE 5.8 Replace Paper Roll 1. Open the receipt paper hatch. Receipt Paper Hatch 2. Install paper roll according to the diagram inside; ensure that the paper is coming out from the top of the roll. 3. Pull approximately 6” of paper from the roll and then press the paper hatch closed until it snaps into place. -
Page 25: Cleaning The Device
A920 REFERENCE GUIDE 5.9 Cleaning the Device WARNING Do not use industrial strength or abrasive cleaner as it may damage or scratch the device. • Do not immerse the device in water or liquid. • Do not spray water or cleaner into EMV Card Reader or ports. •... -
Page 26: Removing Battery
A920 REFERENCE GUIDE 6.2 Removing Battery 1. Slide the battery hatch tab to the right to unlock and remove the battery cover. 2. Gently push the battery up to unlatch and remove it from the device. R39249 Li- ion 00 6.3 Charging Battery The A920 will charge the battery until 100% full and then it will stop charging to avoid damage to the battery. -
Page 27: Battery Charge Status
A920 REFERENCE GUIDE 6 .3.1 B ATTERY HARGE TATUS There are two ways to check the battery’s charge status: 1. In the top right corner of the screen, the A920’s battery icon will show at what percentage the battery is charged. 2. -
Page 28: Charging Indicator
A920 REFERENCE GUIDE 6 .3.2 C HARGING NDICATOR When the battery is actively charging, a lightning bolt will display inside the battery icon and an upward fill pattern will continuously display. 7. Camera The A920 comes with dual cameras: a 0.3 MP fixed focus front camera and a 5MP auto focus rear camera. 7.1 Camera Location Front Facing Camera... -
Page 29: Taking A Photo
A920 REFERENCE GUIDE 7.2 Taking a Photo 1. Select [Camera]. 2. Tap the camera view icon at the top of the screen to select the desired camera view. v2.2 | 24... -
Page 30: Sim, Sam, And/Or Micro Sd Card Installation
A920 REFERENCE GUIDE 3. Tap the [Camera] icon at the bottom of the screen to take a photo. 8. SIM, SAM, and/or Micro SD Card Installation 1. Slide the battery hatch tab to the right to unlock and remove the battery cover. v2.2 | 25... - Page 31 A920 REFERENCE GUIDE 2. Gently push the battery up to unlatch and remove it from the device. R39249 Li- ion 00 3. Insert the SIM card, SAM card, or Micro SD card (with adapter) into its correlating card slot with the contacts facing upwards and the clipped corner of the card facing forward and to the right.
-
Page 32: Card Readers
A920 REFERENCE GUIDE 9. Card Readers This section describes the following card readers available on the A920: • Magnetic Stripe Reader (MSR) • EMV Card Reader • NFC (Near Field Communication)/Contactless Card Reader 9.1 Magnetic Stripe Reader The Magnetic Stripe Reader (MSR) is located at the top of the device. The reader includes triple track reading and bidirectional reading. -
Page 33: Emv Card Reader
A920 REFERENCE GUIDE 9.2 EMV Card Reader The A920 includes an EMV card reader at the bottom of the device. To use the EMV card reader, insert the card fully into the reader with the metallic contacts facing up and towards the device. -
Page 34: Nfc/Contactless Card Reader
A920 REFERENCE GUIDE 9.3 NFC/Contactless Card Reader The A920 has a contactless card reader with an RF antenna located at the top of the device. The read area is indicated by the contactless icon. The contactless card reader supports ISO14443 Type A/B. To use the contactless card reader, place the card roughly parallel to the contactless area. - Page 35 A920 REFERENCE GUIDE 1. Select [Settings] and input the device password when prompted. 2. Slide the [Wi-Fi] tab to the right to enable Wi-Fi. v2.2 | 30...
- Page 36 A920 REFERENCE GUIDE 3. Select [Wi-Fi] and then select desired network. Input the network password when prompted. 4. Select [Connect]. v2.2 | 31...
-
Page 37: Static Ip
A920 REFERENCE GUIDE 10.2 Static IP The A920 supports Static IP setup for network and Internet access. Static IP addresses allow network devices to keep the same IP address all the time instead of automatically assigning IP addresses such as in a DHCP setup. - Page 38 A920 REFERENCE GUIDE 3. Select desired network and input password. 4. Select [Advanced Options]. v2.2 | 33...
- Page 39 A920 REFERENCE GUIDE 5. Scroll to select [IP Settings]. 6. Select [Static] from the IP Settings drop-down menu. v2.2 | 34...
-
Page 40: Manual Static Ip
A920 REFERENCE GUIDE 7. Enter the IP address, Gateway, Network prefix length, DNS 1, and DNS 2. Tap [Connect] when done. 10.3 Manual Static IP If the broadcast SSID is disabled on an access point, the terminal will not display the SSID under available Wi-Fi network listings. - Page 41 A920 REFERENCE GUIDE 2. Select [Wi-Fi] and slide the Wi-Fi toggle right to turn on. 3. Tap the three vertical dots in the top right corner. v2.2 | 36...
- Page 42 A920 REFERENCE GUIDE 4. Select [Add network]. 5. Enter the case-sensitive [Network SSID] when prompted. v2.2 | 37...
- Page 43 A920 REFERENCE GUIDE 6. Select the security type from the pull-down menu. Selections include WPA/WPA2 PSK, 802.1 x EAP, FT PSK, FT EAP, WAPI PSK, WAPI CERT. 7. Select [Advanced options]. v2.2 | 38...
- Page 44 A920 REFERENCE GUIDE 8. Under the IP settings drop-down menu, select [Static]. 9. Enter the IP address, Gateway, Network prefix length, DNS 1, and DNS 2. Once all fields have been entered, select [SAVE]. v2.2 | 39...
-
Page 45: Proxy
A920 REFERENCE GUIDE 10.4 Proxy The A920 supports a proxy setup. In this case, another computer, or proxy server, acts as a hub through which the Internet requests for the A920 are processed. By connecting through the server, the A920 sends its requests to the server which, in turn, processes the request and then returns the response to the A920. - Page 46 A920 REFERENCE GUIDE 3. Tap the three vertical dots in the top right corner. 4. Select [Add network]. v2.2 | 41...
- Page 47 A920 REFERENCE GUIDE 5. Enter the case-sensitive [Network SSID] when prompted. 6. Select the security type from the pull-down menu. Selections include WPA/WPA2 PSK, 802.1 x EAP, FT PSK, FT EAP, WAPI PSK, WAPI CERT. v2.2 | 42...
- Page 48 A920 REFERENCE GUIDE 7. Select [Advanced options]. 8. Under [Proxy], select [Manual]. v2.2 | 43...
- Page 49 A920 REFERENCE GUIDE 9. Enter the Proxy hostname, Proxy port, and Bypass proxy. 10. Scroll down to IP settings and select [Static]. v2.2 | 44...
-
Page 50: Cellular
A920 REFERENCE GUIDE 11. Enter the IP address, Gateway, Network prefix length, DNS 1, and DNS 2. Once all inputs have been entered, select [SAVE]. 10.5 Cellular It is optional for the A920 to support cellular communications. Either an AT&T®, Verizon®, or T-Mobile® SIM card is required to support cellular communication. -
Page 51: Cellular Setup - Auto Detect
A920 REFERENCE GUIDE 10 .5.1 C ELLULAR ETUP UTO DETECT 1. Install SIM card. Please see “SIM, SAM, and/or Micro SD Card Installation” on page 25 for SIM card installation instructions. 2. After installing an activated SIM card, the device will display a SIM notification. Select [SET]. -
Page 52: Cellular Setup - Manual
A920 REFERENCE GUIDE 10 .5.2 C ELLULAR ETUP ANUAL 1. Select [Settings]. 2. Select [Data usage]. v2.2 | 47... - Page 53 A920 REFERENCE GUIDE 3. Slide the highlighted toggle right to enable cellular data. 4. Return to the main settings menu and select [More]. v2.2 | 48...
- Page 54 A920 REFERENCE GUIDE 5. Select [Cellular networks]. 6. Select the network APN to connect. Please Note: If the device is not automatically detecting the network, select the + sign in the top right- hand side of the APNs menu to add a new network. v2.2 | 49...
-
Page 55: Optional L920 Base
A920 REFERENCE GUIDE 11. Optional L920 Base The A920 has two optional bases: the L920-BC and the L920-BM. These sleek and elegant bases offer reliable and aesthetically-pleasing platforms for the A920. The optional L920-BC charging base is a counter-top base that is a simpler form of its multi-functional counterpart. While the L920-BC acts as a charging base only, the L920-BM is multi-functional charging base with integrated ports that support LAN, USB, RS232, and Micro USB connections. -
Page 56: L920-Bm Connection
A920 REFERENCE GUIDE 11.2 L920-BM Connection 1. Plug the provided A920 power cable and supply into the L920-BM charging port and then route the cable through the cable guides on the right side of the base. Charging Port RS232 USB (2) Cable Guides 2. - Page 57 A920 REFERENCE GUIDE Appendix A: Part Number and Serial Number Keys The following appendix provides part number and serial number key information and definitions. To locate terminal and terminal accessory part numbers for ordering purposes, please see the E600 Ordering Guide located on Confluence.
- Page 58 A920 REFERENCE GUIDE 1. PAX Product Naming Convention, Traditional only v2.2 | 53...
- Page 59 A920 REFERENCE GUIDE A2. Serial Number Definition If the length of SN = 8 digits, then the length of Model Code = 2 and contains ASCII(0 ~ 9 & A ~ Z, but without O & I), the length of the Sequence number = 6 and contains ASCII(0 ~ 9). If the length of SN = 10 digits, then the length of Model Code = 3 and contains ASCII(0 ~ 9), the length of the Sequence number = 7 and contains ASCII(0 ~ 9).
Need help?
Do you have a question about the PRIORITY A920 and is the answer not in the manual?
Questions and answers