Table of Contents
Advertisement
Advertisement
Table of Contents

Related Manuals for Pax Technology TSYS A920


Summary of Contents for Pax Technology TSYS A920
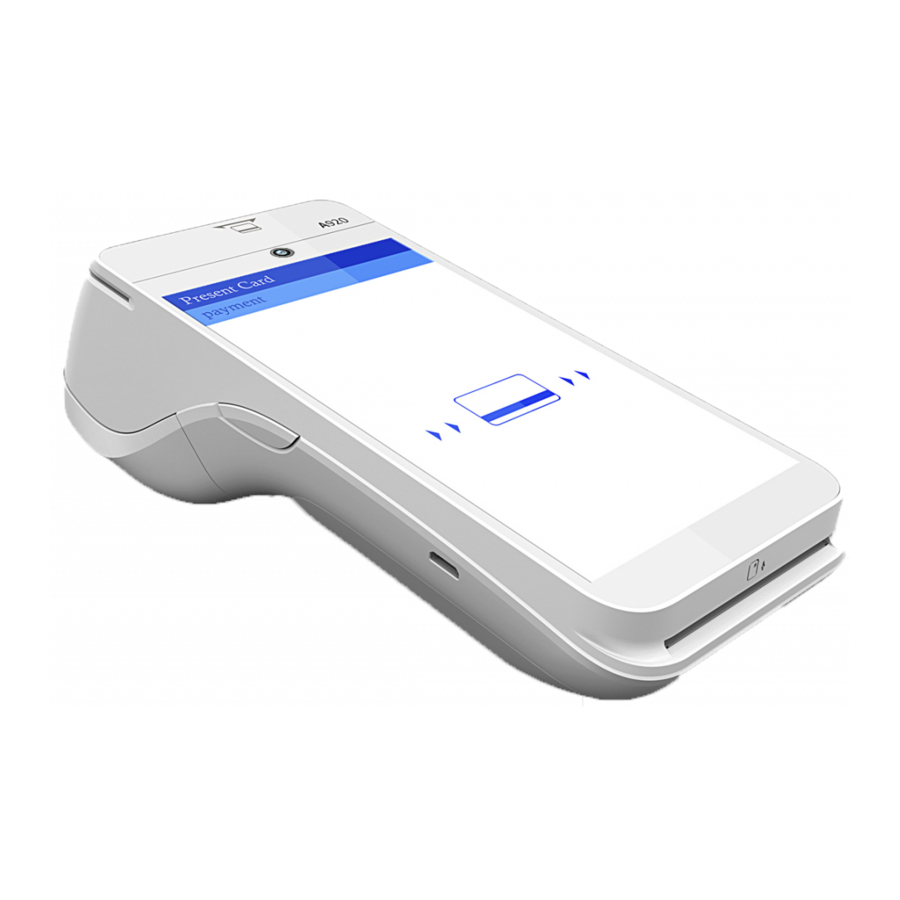
- Page 1 User Guide mPOS A920 Mobile Payment Acceptance User Guide...
- Page 2 Disclosure Statements Confidential Notice The information contained herein is the property of Total System Services, Inc. (TSYS ). This ® ® document contains CONFIDENTIAL information that is produced solely for the benefit of the named parties. All parties should keep all information contained herein confidential, and on no account should the information, in whole or in part, be disclosed or disseminated to any third party without the express written permission of TSYS.
-
Page 3: Table Of Contents
Table of Contents Introduction ..........................4 Account Activation and Login ....................5 Activate Your Account ..........................5 PIN Entry ..............................17 Login to Your Account ..........................18 The Main Menu ........................20 Manage Settings ............................22 View Account Information ........................30 Help ................................ -
Page 4: Table Of Contents
Table of Contents Declined Transaction ..........................90 Forced Authorizations ..........................92 Partial Authorizations ..........................95 Open Orders .............................. 97 Returns/Reversal/Void ......................102 History ............................104 Transaction History ..........................104 Process a Return from the Transaction History .................. 108 Back Office/Merchant Center .....................117 Log Into Merchant Center ........................ -
Page 5: Introduction
User Guide Introduction Mobile Payment Acceptance (MPA) is an easy-to-use application on your A920 device that provides reliable, secure, and portable transaction processing, as well as other useful features for managing your business. │ Mobile Payment Acceptance User Guide... -
Page 6: Account Activation And Login
User Guide Account Activation and Login Activate Your Account To begin processing payments with Mobile Payment Acceptance, you first need to activate your merchant account. During the account activation process, you will create a password for future login as well as a personal identification number (PIN) for quick access. In order to activate your merchant account, you will need the email address associated with your account which contains your merchant account information as well as your truncated 12- digit Merchant ID and 14-digit Device ID numbers. - Page 7 User Guide There are several links on the welcome screen: 1. If you have not yet received your welcome email, tap Haven’t received your welcome email? You can contact Customer Support at 600-654-9256 to request another one. 2. If the device shows a red icon and Device is not connected to a network, tap the link to start or set up the Wi-Fi connection.
- Page 8 User Guide Haven’t received your welcome email? If you did not receive a welcome e-mail, please contact Customer Support at 800-654-9256 to request another one. │ Mobile Payment Acceptance User Guide...
- Page 9 User Guide Not connected to the internet? If the device is not connected to the internet: 1. Tap the Device is not connected to the internet icon. │ Mobile Payment Acceptance User Guide...
- Page 10 User Guide 2. Connect to your Wi-Fi network. │ Mobile Payment Acceptance User Guide...
- Page 11 User Guide Activate your account and sign in for the first time 1. Enter the Email ID. This is the email used for correspondence related to your merchant account. 2. For the Device ID use your Merchant ID and add two digits to the end depending on the device you are using.
- Page 12 User Guide 4. Move the slider to indicate that you agree with the Terms and Conditions. 5. Tap Next. │ Mobile Payment Acceptance User Guide...
- Page 13 User Guide 6. Tap each security question prompt and select a question. 7. Enter answers for each of the four security questions. 8. Tap Next. │ Mobile Payment Acceptance User Guide...
- Page 14 User Guide 9. Use the number pad to create your new PIN and tap Next. Re-enter your PIN to confirm it. Record this PIN for future use, as it can be used to quickly log into the application after it times out, when the device is turned off, or when the application is closed and reopened.
- Page 15 User Guide 11. A dialog box displays. Tap Continue to run a test transaction to complete the device setup. │ Mobile Payment Acceptance User Guide...
- Page 16 User Guide 12. Initiate a test transaction by inserting a card, swiping a card, or selecting manual entry. │ Mobile Payment Acceptance User Guide...
- Page 17 User Guide 13. A confirmation screen displays showing that the test transaction has been approved. The setup process is now complete. │ Mobile Payment Acceptance User Guide...
-
Page 18: Pin Entry
User Guide PIN Entry After you activate and create a PIN, you normally only need to enter the PIN to access the application. If you tap the forgot PIN button, and see the message, “Admin PIN Cannot be Reset”, you will need to clear all application data for Payments 3.0 through Device Settings and Log back in to the application. -
Page 19: Login To Your Account
User Guide Login to Your Account If you have already activated tap the Already have a password? Login Here! link to log in. │ Mobile Payment Acceptance User Guide... - Page 20 User Guide A login screen displays. Enter your login information. 1. Enter your TA# in the Username field 2. Enter your Password. 3. Enter the Device ID. This is your 12 digit merchant number followed by the two digit device ID. 4.
-
Page 21: The Main Menu
User Guide The Main Menu The Main Menu of MPA application gives you access to all of the features that allow you to customize transactions, view sales data, manage product inventory, manage customer information, and view or update settings. You can access the Main Menu from anywhere in MPA by tapping the upper-left corner of the screen. - Page 22 User Guide Inventory Products – Create, view and edit your products. Categories – View, add and edit product categories. Discounts – View, add and edit your discounts. Settings Transactions – View, add and modify tax rate, tip settings, signature requirements, and invoice numbers;...
-
Page 23: Manage Settings
User Guide Settings, Account Information, and Help Manage Settings Mobile Payment Acceptance is customizable, allowing you to choose the transaction settings that best fit your business needs. You can access and change settings from the Main Menu. Transaction Settings The Transactions option under Settings gives you access to the following functions: ... - Page 24 User Guide Create a New Tax Rate There are two types of tax rates: global taxes, which are applied to all products by default, and individual taxes, which must be assigned to each product. Global taxes can only be created in Merchant Center, whereas individual tax rates can be created in both Merchant Center and MPA—for more information on creating global taxes, see the Back Office-Merchant Center section in this guide.
- Page 25 User Guide 4. Tap Save. Once a tax has been created, you can tap it to make changes or tap the slider on the right to make it active or inactive. You can apply active taxes to products from the Products page.
- Page 26 User Guide Enable Tips If you want to be able to accept tips in your business, turn the Tip feature on from the Transaction Settings. You may set four tip options. A Custom option is available to allow your customers to set their own desired tip amount or percentage. Select four tip options to display to your customers.
- Page 27 User Guide Tip Settings Tap to save your tip options. Choose four tip options. │ Mobile Payment Acceptance User Guide...
- Page 28 User Guide Set Amount for Signature Mobile Payment Acceptance lets you set the maximum transaction amount you will accept without a signature. This amount may be overwritten by the processor, chipped card or if you have enabled tips. If you do not set a limit, the application will not require a signature unless the setting is overwritten.
- Page 29 User Guide Signature Settings Tap to Set Required Signature save to your tip options. Tap the slider to change the signature requirement amount. │ Mobile Payment Acceptance User Guide...
- Page 30 User Guide Enable Invoice Numbers Adding Invoice Numbers to transactions is another option you may choose. Simply turn on the Invoice Number feature under Transaction Settings and you will begin seeing a field for invoice numbers every time you process a transaction. The invoice number is user-defined. If a number isn’t entered, the transaction ID will be used as a default.
-
Page 31: View Account Information
User Guide View Account Information The Account page gives you a quick view of the transaction amount you have processed in the last 15 days and the last 30 days, the amount still pending settlement, some basic account information like your username, and the current application version you have installed on your device. -
Page 32: Help
User Guide Help If you need help, you can access the Help page from the Main Menu. The Help page provides you with customer service contact information, a brief explanation of how to process a credit card, and a link to the privacy policy. Help Page │... -
Page 33: Products, Categories, Discounts And Customers
User Guide Products, Categories, Discounts and Customers Viewing Products Your Products page serves as an inventory of all your products and services. It contains your product names, their descriptions and categories, and any associated discounts and tax rates. Managing your products is simple and helps you keep your inventory updated and organized. You can access the Products page any time from the Main Menu. -
Page 34: Add A Product
User Guide Add a Product Mobile Payment Acceptance allows you to add as many products as you wish. When you add a new product, you can assign identifying information, tax rates, discounts, categories, and quantity for the product. Taxes, discounts, and categories must already have been created in order for them to be assigned to a product. - Page 35 User Guide 2. Enter the appropriate product information, and assign available taxes, discounts, and categories. Product name, price, and Code/SKU fields. Tap Save to create the product and return to the Products page. │ Mobile Payment Acceptance User Guide...
-
Page 36: Remove A Product
User Guide Remove a Product You may have seasonal products that you do not sell all the time. Change a product’s status to inactive so it is no longer visible in your product list but remains on an inactive list. You can make the product available for sale again at any time by changing its status back to active. - Page 37 User Guide 2. Tap Product Details. │ Mobile Payment Acceptance User Guide...
- Page 38 User Guide 3. Tap the Active Product slider to make a product active or inactive. 4. Tap Save. │ Mobile Payment Acceptance User Guide...
- Page 39 User Guide 5. Tap Product Details. │ Mobile Payment Acceptance User Guide...
- Page 40 User Guide 6. Tap Delete and confirm your decision to permanently remove the product. │ Mobile Payment Acceptance User Guide...
-
Page 41: Categories
User Guide Categories You can use categories to organize your inventory for more efficient transactions. Products can be assigned to one or more categories, or you can choose not to assign a category at all. However, products viewed in the Register are organized by category, so if no category is assigned it will only appear under the All Products category. - Page 42 User Guide 2. Enter a category name and description. 3. Tap Save. Product categories become active by default. │ Mobile Payment Acceptance User Guide...
- Page 43 User Guide Modify an Existing Category To modify an existing category from the Category page: 1. Tap the category you wish to modify. │ Mobile Payment Acceptance User Guide...
- Page 44 User Guide 2. Modify the product category name and description fields as needed. 3. Tap the slider to activate or deactivate the product category. 4. Tap Save. Note: Disabling an active category will cause it to no longer display in the register.
-
Page 45: Discounts
User Guide Discounts You may wish to discount certain products for promotions or other reasons. MPA gives you the flexibility to assign single discounts to products in your product list or multiple individual and cart level discounts to an order. Discounts can be for a dollar amount or a percentage, and you can make discounts active or inactive similar to products in your inventory. - Page 46 User Guide 2. Enter a discount name, value, and description, and customize it using the sliders on the right. A discount can be limited to products or transactions or made available to both. A stackable discount can be added to a product or transaction along with other discounts.
- Page 47 User Guide Add a Single Discount to a Product When discount is added to a product in the Products page, every time that product is added to a transaction, that discount will automatically be applied. To add single discounts to products from the Products page: 1.
- Page 48 User Guide 2. Tap Product Details. │ Mobile Payment Acceptance User Guide...
- Page 49 User Guide 3. Tap the + on Discounts to view active and inactive discounts. │ Mobile Payment Acceptance User Guide...
- Page 50 User Guide Note: The ‘+’ changes to an ‘x’ while the discounts are displayed. Tap the x to close the discounts view. 4. Tap the slider for the discount you wish to activate. 5. Tap Save. The active discount will now automatically be applied when the product is added to an order.
-
Page 51: Manage Customer Information
User Guide Manage Customer Information Your business needs may require recording customer information. Mobile Payment Acceptance allows you to manage this information to provide excellent customer service. You can view, add, and edit customer information from the Customers page, which is accessible from the Main Menu. -
Page 52: Add New Customer
User Guide Add New Customer You can add a customer using the Create New Customer button or by duplicating an existing customer’s profile and changing the necessary information. Create a New Customer To add a new customer using the Create New Customer button: 1. - Page 53 User Guide 2. Enter all available customer information, including name, address, and business information. The minimum required information for a new customer is a first and last name. If you provide an email address, it will be used for the email receipt feature. 3.
- Page 54 User Guide Duplicate a Customer To add a new customer by duplicating an existing customer’s profile: 1. Tap the customer’s profile you wish to use as a template. │ Mobile Payment Acceptance User Guide...
- Page 55 User Guide 2. Tap Customer Details. │ Mobile Payment Acceptance User Guide...
- Page 56 User Guide 3. Tap Duplicate Customer. The duplicate customer will appear. │ Mobile Payment Acceptance User Guide...
- Page 57 User Guide 4. Tap the newly created duplicate profile. 5. Tap Customer Details. │ Mobile Payment Acceptance User Guide...
- Page 58 User Guide 6. Edit the customer information as needed. 7. Tap Save. │ Mobile Payment Acceptance User Guide...
-
Page 59: Remove Customer Information
User Guide Remove Customer Information You can change a customer’s visibility from the Customer Details screen so their information no longer shows on your active customer list. You can reactivate the customer’s information at any time by turning on the visibility again. Customer Information Page Activate or deactivate a customer. - Page 60 User Guide Remove a Customer To remove a customer from your customer list: 1. Tap Customer Details for the customer you wish to remove. │ Mobile Payment Acceptance User Guide...
- Page 61 User Guide 2. Tap Remove. Follow the prompt and confirm or cancel your decision to complete the process. │ Mobile Payment Acceptance User Guide...
-
Page 62: Transactions
User Guide Transactions Mobile Payment Acceptance makes it easy to perform a transaction. The Register, which is used to start a transaction, is the default home screen, so you can start a transaction as soon as you are logged in. Due to screen display optimization, the Register and Cart screens are displayed on separate screens. -
Page 63: Add A Customer To A Transaction
User Guide Add a Customer to a Transaction 1. If you would like to add a customer your transaction, tap Customer section of the cart page. │ Mobile Payment Acceptance User Guide... -
Page 64: Begin A Transaction
User Guide 2. Tap Search Customer to find the customer in your customer database. 3. If the customer is not in your customer database, tap Create New Customer to create a new customer record. 4. If the customer record you need appears at the top of the list, simply tap that record to add it to your transaction. - Page 65 User Guide Begin a Transaction Using a Quick Sale To begin a transaction using a Quick Sale: 1. Tap Quick Sale. 2. Enter a dollar amount on the number pad. 3. Tap Add to add the amount to the order. 4.
- Page 66 User Guide Begin a Transaction by Adding a Product Depending on your business, you may sell different types of products. Some products will only come in one configuration, while others will have variations (e.g., size, color, etc.) or modifiers (i.e., extras, add-ons, etc.). MPA enables you to sell both simple and customizable products; however, products with variations and modifiers can only be added and modified from Merchant Center.
- Page 67 User Guide Adding a Customizable Product to a Transaction To begin a transaction by adding a product with modifiers or variations from your product list: 1. Tap Products. 2. Select the desired product from your product list. 3. The Product Options window will open automatically for any Product with a Modifier or Variation.
- Page 68 User Guide 4. Select the desired Product Variations from the dropdown that displays. Note: If a product has variations, you MUST select a variation to continue. │ Mobile Payment Acceptance User Guide...
- Page 69 User Guide 5. Select any desired Product Modifiers by tapping them to select or unselect them. Modifiers show as red when they are currently selected. 6. Tap Save. │ Mobile Payment Acceptance User Guide...
- Page 70 User Guide 7. Tap the Cart Subtotal in the top right to display the Cart screen. 8. Tap Process Order. │ Mobile Payment Acceptance User Guide...
- Page 71 User Guide Begin a Transaction by Creating a Product To begin a transaction by creating a product: 1. Tap Products. 2. Tap the Create Product button. │ Mobile Payment Acceptance User Guide...
- Page 72 User Guide 3. Enter the appropriate product information, and assign available taxes, discounts, and categories. 4. Tap Save to save the new product to your product list and return to the Register. │ Mobile Payment Acceptance User Guide...
- Page 73 User Guide 5. Tap Products. 6. Select the newly created product from your product list to add it to your order. 7. Tap the Cart Subtotal in the top right to display the Cart screen. 8. Tap Process Order. │ Mobile Payment Acceptance User Guide...
- Page 74 User Guide Discounts Add a Discount to an Entire Order To add one or more discounts to an entire order during a transaction: 1. Add one or more products to your order. 2. Tap Discounts. │ Mobile Payment Acceptance User Guide...
- Page 75 User Guide 3. Tap the discount you wish to apply. │ Mobile Payment Acceptance User Guide...
- Page 76 User Guide 4. Review the applied discount and add additional discounts by repeating this process. Once you are satisfied with your selections, proceed as you would with a regular transaction. Note: Individual discounts may only be applied once to an order or a product;...
- Page 77 User Guide Add Multiple Discounts to a Single Product To add multiple discounts to a single product during a transaction: 1. Add a product to your order. 2. Tap the product you wish to discount. │ Mobile Payment Acceptance User Guide...
- Page 78 User Guide 3. Tap Enter Discount to manually add a discount amount. 4. Tap Select Discounts and then tap a discount to apply a pre-defined discount. │ Mobile Payment Acceptance User Guide...
- Page 79 User Guide 5. Tap Add Discounts if you wish to apply additional discounts. 6. Tap Done to return to the Register. │ Mobile Payment Acceptance User Guide...
- Page 80 User Guide 7. Review the applied discounts and add additional discounts by repeating this process. Once you are satisfied with your selections, proceed as you would with a regular transaction. │ Mobile Payment Acceptance User Guide...
-
Page 81: Processing A Payment
User Guide Processing a Payment Before you can finish processing an order, you must process a payment. At this stage in the transaction, you can review the order total, select a payment method, or cancel the order. There are three ways you can process a payment: ... - Page 82 User Guide Card Reader 1. The customer can dip or tap their chip card, tap their NFC-enabled wireless device or swipe a non-EMV card. This automatically begins processing the payment. │ Mobile Payment Acceptance User Guide...
- Page 83 User Guide Manual Card Entry To process an order using manual card entry: 1. Tap Manual Card Entry. │ Mobile Payment Acceptance User Guide...
- Page 84 User Guide 2. Enter the card information in the available fields. If you enter incorrect information, you may not be able to proceed until you correct it. 3. Tap Process Order. │ Mobile Payment Acceptance User Guide...
- Page 85 User Guide After you enter all requested information and tap Process Order, the screen will display SUCCESSFUL or DECLINED. If you see NO CONNECTION, you may not be connected to a network. If the transaction was successful, you will be prompted to hand the device to the customer to complete the transaction.
- Page 86 User Guide Cash Transaction To process a cash transaction: 1. Tap Cash Payment. │ Mobile Payment Acceptance User Guide...
- Page 87 User Guide 2. Enter the cash amount using the number pad. 3. Tap Process. │ Mobile Payment Acceptance User Guide...
- Page 88 User Guide 4. Tap Confirm to complete the transaction. │ Mobile Payment Acceptance User Guide...
-
Page 89: Tips And Signature
User Guide Tips and Signature 1. If you have enabled the tip option in the settings, the customer will select the tip amount. 2. If the customer selects Other, a keypad displays to enter the tip amount. 3. The customer taps SAVE before confirming the transaction total for an EMV transaction and after credit card approval for non-EMV transaction. -
Page 90: Approved Transaction
User Guide Approved Transaction The last screen in a successful transaction is the confirmation screen. 1. Tap Print Receipt and would like to provide the customer with a printed receipt. 2. Enter an email address to send the customer their receipt electronically. If you added a customer while in the register, their email address will be pre-populated. -
Page 91: Declined Transaction
User Guide Declined Transaction When a credit card is declined, you will have the option to go back to the Select Payment Type screen or cancel the order. 1. A declined transaction will include a decline or error message. Tap OK to clear the message. - Page 92 User Guide 2. On the next screen, tap Choose Another to return to the Select Payment Type screen. 3. Tap Cancel Order to cancel the transaction completely. │ Mobile Payment Acceptance User Guide...
-
Page 93: Forced Authorizations
User Guide Forced Authorizations There may be times when you need to enter a forced authorization. Access the Forced Authorization Only feature from the Main Menu. Once you obtain the authorization code provided by voice authorization, you can enter the authorized amount and proceed as you would with a regular transaction. - Page 94 User Guide 3. Enter the credit card information as you would with a manual card transaction. 4. Tap Process Order. │ Mobile Payment Acceptance User Guide...
- Page 95 User Guide 5. Enter the 5- or 6-digit Authorization code obtained from the Issuer or Voice Authorization Center. 6. Tap Authorize and follow any and all additional steps in order to complete the transaction. │ Mobile Payment Acceptance User Guide...
-
Page 96: Partial Authorizations
User Guide Partial Authorizations When a customer presents a payment type that does not have sufficient funds to cover their purchase, instead of a decline, you may be given the option to accept a partially authorized transaction. 1. If a payment is authorized for less than the full transaction amount, you will receive a message with the Balance due amount. - Page 97 User Guide 4. If you choose to submit an additional payment, a new transaction will open with the balance due already added to the Register. Simply complete this transaction as you would any other to collect the remaining balance. │ Mobile Payment Acceptance User Guide...
-
Page 98: Open Orders
User Guide Open Orders Mobile Payment Acceptance allows you to generate and save orders for future processing or maintain open tabs for same-day processing. Once an order has been saved, you can view, modify, cancel, or process the transaction from the Open Orders page, which is accessible from the Main Menu. - Page 99 User Guide 4. Add any pertinent order details, including customer name, pick-up date, pick-up time, and notes. 5. Tap Save Order. │ Mobile Payment Acceptance User Guide...
- Page 100 User Guide Process an Open Order To process an open order: 1. From the Main Menu, tap Open Orders. 2. Tap the order you wish to process. │ Mobile Payment Acceptance User Guide...
- Page 101 User Guide 3. Tap Process Order to close it out; tap View Order to view or modify. │ Mobile Payment Acceptance User Guide...
- Page 102 User Guide 4. Modify the order by adding or removing products, as needed. 5. Tap Process Order and proceed as you would with a regular transaction. Tap Save Order to keep the order open. │ Mobile Payment Acceptance User Guide...
-
Page 103: Returns/Reversal/Void
User Guide Returns/Reversal/Void Mobile Payment Acceptance lets you process a full or partial return if a transaction has settled, or a full or partial reversal/void if a transaction has not yet settled. You can force a return for a specified amount or process returns using transaction history. To force a return: 1. - Page 104 User Guide 5. Swipe the card that will be refunded using an available payment device or tap Manual Card Entry to proceed as you would with a regular transaction. │ Mobile Payment Acceptance User Guide...
-
Page 105: History
User Guide History Transaction History You can access a list of your transactions from the Transaction History option on the Main Menu of the MPA application. From Transaction History you can filter and search transaction history, view individual transactions and initiate returns. Transaction History provides details for up to 13 months of data as well as the status of each transaction. - Page 106 User Guide Sorting Transactions You can Sort by Date, Customer, Price and Payment Type. │ Mobile Payment Acceptance User Guide...
- Page 107 User Guide Filtering Transactions Filter and Search by Transaction ID, Card #, Customer Name, Transaction Status, Payment Type, Date Range and Price Range. │ Mobile Payment Acceptance User Guide...
- Page 108 User Guide Transaction History Actions Tapping an individual transaction enables you to take the following actions: 1. View Receipt Details. 2. Process a full or partial return (for settled transactions). │ Mobile Payment Acceptance User Guide...
-
Page 109: Process A Return From The Transaction History
User Guide Process a Return from the Transaction History Processing a return using transaction history allows you to grant returns for specific items and amounts. If you process a partial return, the remaining balance can still be returned; however, you will no longer be able to return the full original amount. Locate a Transaction To bring up an order for a return using transaction history: 1. - Page 110 User Guide 5. Tap the transaction you wish to view. Process a Return by Item To process a return by item for a selected transaction: 1. Tap By Item (this option is selected by default). 2. Tap the + and – buttons to modify the number of items being returned. 3.
- Page 111 User Guide Process a Return by a Partial Amount To process a return by amount for a selected transaction: 1. Tap By Amount. 2. Enter the amount being returned using the number pad. 3. Tap Process Return. │ Mobile Payment Acceptance User Guide...
- Page 112 User Guide Process a Return for the Full Amount To process a return for the full amount for a selected transaction: 1. Tap Full Amount. 2. Tap Process Full Return. │ Mobile Payment Acceptance User Guide...
- Page 113 User Guide After a return has been successfully processed, the Confirmation page will give you the option of printing or emailing the receipt. │ Mobile Payment Acceptance User Guide...
- Page 114 User Guide Receipt Details 1. Tap the + next to a record to expand it within the list and view additional details. │ Mobile Payment Acceptance User Guide...
- Page 115 User Guide 2. In the expanded transaction record, view payment type and cardholder name or resend the receipt email. │ Mobile Payment Acceptance User Guide...
- Page 116 User Guide 3. Tap View Receipt Details to view the remaining transaction details. │ Mobile Payment Acceptance User Guide...
- Page 117 User Guide Receipt Details 1. View additional transaction details on the View Receipt Details screen. 2. Email the transaction receipt. │ Mobile Payment Acceptance User Guide...
-
Page 118: Back Office/Merchant Center
User Guide Back Office/Merchant Center Merchant Center is an online centralized resource for merchants on the TransIT platform. In Merchant Center, you can manage and support your business, control employee access to Mobile Payment Acceptance features, upload or create your product database and track customers. - Page 119 User Guide 3. Enter your password and click Next. │ Mobile Payment Acceptance User Guide...
-
Page 120: Creating User Profiles In Merchant Center
User Guide Creating User Profiles in Merchant Center Mobile Payment Acceptance lets you use multiple user profiles for more control over employee access. You can create and modify MPA user profiles using Merchant Center. As a merchant, there are two roles that you can assign to a new user profile: Supervisor and Operator. - Page 121 User Guide 2. Click Admin to expand the dropdown menu. 3. Select Manage Users. 4. Click Add. │ Mobile Payment Acceptance User Guide...
- Page 122 User Guide 5. Select Supervisor or Operator from the User Type dropdown menu. Doing so will auto- populate user permissions that are typical for that role. 6. Complete the required fields under Add User. Note that the email address you provide will receive a confirmation email with a temporary password for this user upon completion of the new profile.
-
Page 123: Creating And Managing Products In Merchant Center
User Guide Creating and Managing Products In Merchant Center For Mobile Payment Acceptance Users, Merchant Center provides the ability to flexibly create and manage product information. To add a new product to your inventory, you only need a few pieces of basic information. For greater customization, you can assign product categories, taxes, discounts, modifiers (i.e., extras, add-ons, etc.), and variations (e.g., size, color, etc.). -
Page 124: Product Categories
User Guide Product Categories Product categories help you manage your inventory by letting you group similar products together. For example, you could assign coffee, tea, and soda to a single “Drinks” category. Conversely, you can add a single product to multiple categories. From the Product Categories page, you can add new categories or view and manage existing ones. - Page 125 User Guide 2. Type a name in the Product Category Name field. 3. Type a description in the Description field. 4. Click Save. Your product category will now be available to be assigned to your new product. Deactivating Product Categories Once you have created a product category, you cannot delete it;...
-
Page 126: Tax Rates
User Guide 2. Select Inactive from the Status dropdown menu. 3. Click Save. Note: All assigned products must be removed from the product category before it can be deactivated. Tax Rates Sales tax must be collected for the sale of goods and services, but before you can apply a tax to a product, you must first create it in Merchant Center. - Page 127 User Guide Adding Individual Taxes To add an individual tax, access the Tax Rates page under the Admin section of the Main Menu and complete the following steps: 1. Click the Add Tax button. This will open the Tax Rate page. 2.
- Page 128 User Guide Deactivating Taxes Taxes cannot be deleted in Merchant Center, but you can deactivate them. There are two ways to deactivate taxes. For the first method of deactivating a tax, complete the following steps: 1. From the Tax Rates page, select the checkbox next to the tax you wish to deactivate. This will open a prompt to edit or deactivate the tax.
- Page 129 User Guide Adding Global Taxes To add a global tax, access the Tax Rate page as you would for an individual tax and complete the following steps: 1. Type a name in the Tax Rate Name field. 2. Enter the desired tax rate in the Tax Rate field. 3.
- Page 130 User Guide Removing Global Taxes To remove a global tax from existing products, complete the following steps: 1. From the Tax Rate page for the desired tax, click Remove from All Products. This will open a confirmation dialog box. 2. Click Yes to confirm your decision. 3.
-
Page 131: Add A New Product
User Guide Add a New Product Merchant Center allows you to add as many products as you wish. Creating a new product only requires three pieces of information—Product Name, Product Code, and Price—however, you can also add a description, quantity, and other information. In order to add Tax Rates and Product Categories to a product, they must already have been created. - Page 132 User Guide Adding a New Product To add a new product from the Products page: 1. Click Add Product. 2. Enter the product information in the appropriate fields. At a minimum, you must provide a Product Name, a unique Product Code, and a Price. 3.
- Page 133 User Guide 4. Select one or multiple Product Categories from the list of Available Product Categories. 5. Click the Right Arrow button to move the selection to the Selected Product Categories list. 6. Click Back. 7. If you wish to assign one or more tax rates to this product, click Tax Rates. This will open the Tax Rates page.
- Page 134 User Guide 8. Select one or multiple Tax Rates from the list of Available Tax Rates. Note: Only twenty (20) tax rates can be applied to a product at one time, including global taxes. 9. Click the Right Arrow button to move the selection to the Selected Tax Rates list. 10.
- Page 135 User Guide Discounts Merchant Center lets you conveniently manage all of your discounts in one place. Discounts can be for a dollar amount or a percentage, and you can apply them to individual products or to entire transactions in Mobile Payment Acceptance (MPA). For more information on transactions in MPA, see Module 3: Mobile Payment Acceptance.
- Page 136 User Guide 2. Type a discount name in the Discount Name field. 3. Select whether you wish your discount to apply as an amount or as a percentage from the Type dropdown menu. 4. Type a value in the Value field. 5.
- Page 137 User Guide Deactivating Discounts There are times when you may wish for certain discounts to be unavailable (e.g., seasonal discounts, etc.). There are two ways to deactivate discounts and make them unavailable for use in transactions. For the first method of deactivating a discount, complete the following steps: 1.
- Page 138 User Guide Adding Discount Reasons There are times when existing discounts do not provide sufficient flexibility. For this reason, Merchant Center allows you to add discount reasons for use with manual discounts. Discount reasons can be managed from the Discount Reasons tab, which is accessible from the Discounts page.
-
Page 139: Modifiers
User Guide Modifiers Modifiers are product options used to define customizable products. You can assign included modifiers to a product to indicate the standard options included with the price as well as additional modifiers that give the customers extra options, possibly for an extra cost. For example, a latte sold from a local coffee shop might include three shots of espresso in its base price, but the shop could also offer an additional shot for an additional charge. - Page 140 User Guide Adding New Modifiers To add a new modifier, complete the following steps: 1. From the Modifiers page, click Add Modifier. This will open the Modifier page. 2. Type a name in the Modifier Name field. 3. Enter a dollar amount in the Price field. 4.
- Page 141 User Guide Alternatively, you can deactivate a modifier from the Modifier page using the following steps: 1. Access the Modifier page for the modifier you wish to deactivate by clicking the Modifier Name in the Modifier List. 2. Select Inactive from the Status dropdown menu. 3.
-
Page 142: Variations
User Guide Variations Variations are product options used to distinguish between single products with multiple offerings. For example, a bookstore might carry several versions of the same book: paperback, hardcover, collector’s edition, etc. Each variation can be offered for a different price. Unlike modifiers, variations must be created for each product in the Product Options. - Page 143 User Guide 3. Type a name for your variation in the Variant Name field. 4. Type one or more names for the values in the Value(s) field, separating each value with a comma. After you enter the first value, the Variations page will expand to include the Manage Variations section.
- Page 144 User Guide Modifying Variations To modify variations for a product, complete the following steps: 1. Access the product options for the product you wish to modify from the Products page by clicking the Product Name in the Product List. This will open the Product page. 2.
- Page 145 User Guide 5. Click Save to complete this process. Removing Variations To remove variations from a product, complete the following steps: 1. Access the product options for the product you wish to modify from the Products page by clicking the Product Name in the Product List. This will open the Product page. 2.
- Page 146 User Guide 3. Click the Remove Variant icon for any variations you wish to remove. A confirmation dialog box will appear—Click Yes to confirm your decision. 4. Click Done to return to the Product page. 5. Click Save to complete this process. │...
-
Page 147: Manage Product Options
User Guide Manage Product Options Once a product has been added, you will have the option to modify additional options, including Discount, Modifiers, and Variations. If you choose to skip this step, you can access these additional options by clicking the product in the Product List on the Products page. When modifying an existing product, all product information except Product Code can be changed as needed. - Page 148 User Guide Assigning Discounts in Product Options Only one discount can be assigned to a product in the Product Options; however, additional discounts can be added to single products or to an entire order during a transaction. To assign a discount to an individual product in the Product Options, complete the following steps: 1.
- Page 149 User Guide Assigning Modifiers in Product Options To assign Modifiers to a product in the Product Options, complete the following steps: 1. From the Products page, select the product you wish to manage from the Product List. If necessary, use the Search function to narrow the number of available choices. 2.
- Page 150 User Guide 3. Click and drag all modifiers you want to include in the base product from the Available Modifiers field to the Included Modifiers field. 4. Click and drag all modifiers you want to include as add-ons from the Available Modifiers field to the Additional Modifiers field.
-
Page 151: Importing Products
User Guide Importing Products If you prefer to upload multiple products at once rather than entering them individually, you can access the Import Products tab from the Products screen. From here, you can download a template file and enter the product data as needed. When you have finished entering products into the template, you can upload the file to Merchant Center.
Need help?
Do you have a question about the TSYS A920 and is the answer not in the manual?
Questions and answers