HandyTrac Key Control System Installation & Operating Manual
Hide thumbs
Also See for Key Control:
- Easy manual installation and operation (14 pages) ,
- Installation and operation manual (20 pages)
Table of Contents
Advertisement
Quick Links
System
System
Installation
Installation
& &
Operation
Operation
Guide
Guide
HARDWARE INSTALLATION
New System Setup...........................................................
What You Need ...............................................................
Mounting Cabinet & Door Alignment ...................
Mounting System & Key Panels ...............................
Double Cabinet Setup ..................................................
POWER AND NETWORK SET UP
System Power ..................................................................
Establishing Communications ..................................
Connecting Using Wireless Connection ..............
handytrac.com
2
3
4
5
6
8
9
10
© HandyTrac Systems. All Rights Reserved.
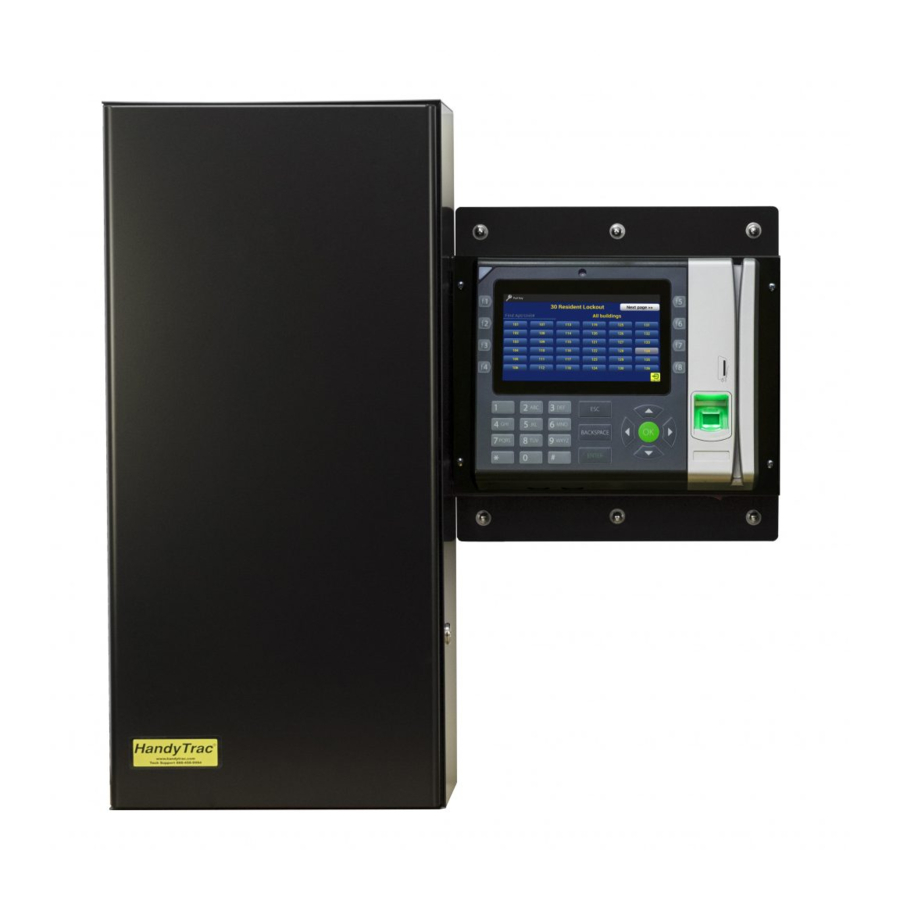
HandyTrac Touch
Key Control System
INITIAL SETUP
Website Access ..............................................................
The Key Map ....................................................................
Adding & Removing Badges ...................................
Programming Fingerprints .......................................
SYSTEM USAGE
Pulling a Key ....................................................................
Returning a Key ..............................................................
Editing Key Tags .............................................................
Changing Apt/Unit# ....................................................
Website Features ..........................................................
HandyTrac Touch
User Guide
13
14
15
16
19
21
26
27
28
1
service@handytrac.com
Advertisement
Table of Contents

Related Manuals for HandyTrac Key Control


Summary of Contents for HandyTrac Key Control
-
Page 1: Table Of Contents
Pulling a Key ..............POWER AND NETWORK SET UP Returning a Key .............. System Power ..............Editing Key Tags ............. Establishing Communications ........Changing Apt/Unit# ............ Connecting Using Wireless Connection ....Website Features ............handytrac.com © HandyTrac Systems. All Rights Reserved. service@handytrac.com... -
Page 2: New System Setup
HandyTrac Touch User Guide New System Setup Congratulations on the purchase of your new HandyTrac Touch Key Control System. This guide includes installation and usage information for both the HandyTrac Touch Premium and HandyTrac Touch Standard Key Control systems. If you have any questions regarding this process, please contact a HandyTrac technician at 888-458-9994 or email service@handytrac.com. -
Page 3: What You Need
HandyTrac Touch User Guide Customer Supplied 1. An Uninterruptible Power Supply (UPS) Minimum rating of 450VA. Required for surge protection and backup battery power. 2. Mounting fasteners Minimum 50 lbs load capacity for masonry, drywall, wood or metal studs. Tools Needed 1. -
Page 4: Mounting Cabinet & Door Alignment
The basic installation order is as follows: 1. Mount the cabinet on the wall. Note: Do not place the 2. Mount the HandyTrac Touch system and control manual backup keys inside box on the wall. the cabinet. They are the only 3. -
Page 5: Mounting System & Key Panels
HandyTrac Touch User Guide Mount the Control Box 1. Hold the control box flush against the side of the cabinet. The Electronic Lock port on the side of the cabinet must be aligned with the electronic lock cables from the control box. -
Page 6: Double Cabinet Setup
HandyTrac Touch User Guide Installation of Second Cabinet (if applicable) Install the included spacer on the outside of the Right-Hand cabinet (marked RH). This will allow enough space for employees to comfortably scan keytags and also provide protection for the electronic lock and light wiring. - Page 7 2. Larger systems (over 800 hooks) will contain additional labeling on the packaging to indicate which panels belong with each touchpad. 3. If you are unsure which panels belong in which cabinet, please contact HandyTrac Support at 888-458-9994.
-
Page 8: System Power
System Power Power Switch UPS Battery Backup (Customer Supplied) 1. Plug the HandyTrac Touch power cable into a UPS Battery Backup. Be sure the HandyTrac Touch System is connected to a plug that includes both Battery Backup and Surge Protection. -
Page 9: Establishing Communications
WiFi connection. 2. Once powered on, the system will display the main HandyTrac Touch system Time and Date screen. (pictured below) 3. If the wired connection is not active, you will receive a “No Network”... -
Page 10: Connecting Using Wireless Connection
HandyTrac Touch User Guide Connecting to a Wireless Network 1. Once the system is powered on and at the main Time and Date screen, log in with the Master Badge. If you have the “No Network” popup on the display, tap on “OK”... - Page 11 HandyTrac Touch User Guide 4. Tap “Administration” in the top right- 5. Tap the “System Settings” icon. hand corner of the touch screen. 6. Select “Wi-Fi” from the settings list. 7. Make sure the Wi-Fi is toggled “On” and tap on your network to select it.
- Page 12 1. Select “Ethernet” from the settings list. 2. Select “Ethernet Configuration” for advanced ethernet networking options. 3. Static IP information can be entered if required. NOTE: The HandyTrac system does not support on-system VPN login or additional guest network terms and conditions acceptance.
-
Page 13: Website Access
4. Once logged in, you can manage many aspects of your system including reporting, alerts, employee access, and notifications. The HandyTrac Home page will display any configured alerts, the full Keys Out Report, and open Work Orders if applicable. For the initial setup, only employee information needs to be updated. The website offers... -
Page 14: The Key Map
HandyTrac Touch User Guide Matching Up Keys Using the Key Map A printed key map is included with a new system. The key map must be used to match keys to tags as unit and tag locations are random. The key panels will ship prepopulated with key tags on the indicated hooks. -
Page 15: Adding & Removing Badges
Master Access. Master Access allows editing units, tags, and fingerprints. 5. Choose a language that is displayed to the employee when they sign in to the HandyTrac system. 6. Once all your employees are added on the website, go to the HandyTrac system touchpad and tap on the yellow HandyTrac Logo one time. -
Page 16: Programming Fingerprints
1. Make sure the employee is in the Active Employees list on the website. 2. Before logging in to the HandyTrac system, tap on the HandyTrac Logo on the screen one time. This will force a communication and update the system with all current employees. - Page 17 Notes: • It is recommend you test your fingerprint access by logging out of the HandyTrac system and signing back in by placing your finger on the reader. • Badges and PINs can still be used in the event a finger is cut or no longer reads properly.
- Page 18 HandyTrac Touch User Guide Using the HandyTrac Touch System The HandyTrac Touch system must be at the default Time and Date screen for an employee to gain access. HandyTrac Touch Premium HandyTrac Touch Standard Use the biometric fingerprint reader (HandyTrac Touch Premium only) OR scan your...
-
Page 19: Pulling A Key
HandyTrac Touch User Guide Pulling a Key 1. Tap the “Pull Key” icon 2. Select an Activity from the drop-down list. Choosing an accurate Activity makes your audit trail more accurate. 3. Tap your unit from the list. You can use 4. - Page 20 HandyTrac Touch User Guide Pulling a Key: Notes If the Apartment/Unit# you are looking Tapping the grayed-out apartment/unit# for is “grayed-out”, it is not available in the will let you know who last pulled the key system as it has already been pulled or is and when, or if it is a restricted apartment/ restricted.
-
Page 21: Returning A Key
HandyTrac Touch User Guide Returning a Key 1. Log in to the HandyTrac system. 4. Place the keytag on the hook the system 2. Tap on Return Key. assigns. If you have more keys to return, 3. Scan the keytag. - Page 22 Touch Premium Only - Work orders can be entered via 3rd party software integration. Contact HandyTrac Service to see if the Touch Premium system is compatible with your 3rd party work order software. 1. If a work order number has been 2.
- Page 23 User Guide Using Building Pull (Buildings must be programmed in the system to use Building Pull) 1. Log in to the Handytrac system and 2. Select the Activity that will be select the Building Pull icon. performed for the Building Pull.
- Page 24 HandyTrac Touch User Guide On System Reports 1. The Keys Out Report is available to all employees when they log in to the HandyTrac Touch system. 2. The Transactions Report is available to those with Master Access.
- Page 25 Administration Menu (Master Access is required) Fingerprint Setup is only available on HandyTrac Touch Premium systems. The Administration Menu, located in the top-right corner of the touch screen after logging in to the system, includes system functions and advanced settings.
-
Page 26: Editing Key Tags
HandyTrac Touch User Guide Editing Key Tags (Master access is required) 1. Under the Administration Menu, tap on 2. You have the option to change a tag based on the Unit OR Tag Number. “Edit Key Tags.” 3. To edit based on UNIT, select the unit 4. -
Page 27: Changing Apt/Unit
2. Replace the keytag as detailed on the previous page if required. If you need to add keys beyond what is currently in your system, it is possible to add additional hooks to the system by purchasing a System Expansion. Contact HandyTrac Service if you require a System Expansion. -
Page 28: Website Features
HandyTrac Touch User Guide Website Features After logging in to the HandyTrac website with your credentials, you can manage all aspects of your system including reports, alerts, and employees. Website Menu 1. If your login includes access to multiple locations, you will see those locations available in the property drop-down on the left side of the header. - Page 29 User Guide Reports The HandyTrac system includes many reports to help you manage your system. 1. Keys Out Report - Displays the list of keys that are currently out of the system. The Keys Out report is a real-time report only. There is no date range search option. This report is also available on the HandyTrac Touch system.
- Page 30 2. Door Alarm Emails - Allows email notifications when door is opened or left open without a valid login to the HandyTrac Touch system. (HandyTrac Touch Premium only) 3. Property Alert Settings - Allows configuration of alerts to display on your Home page.
- Page 31 Service The Service section includes Frequently Asked Questions and additional support materials such as a digital copy of the most up to date HandyTrac Touch User Guide. Supplies You can place Supplies orders directly on the website for additional keytags, badges,...
- Page 32 1. The Property’s current information such as management, ownership, billing, etc. is listed here. If this information needs to be updated, please email service@handytrac.com. 2. The Actions panel is where you can find many of the editable options and settings to better help you manage your system efficiently.
- Page 33 In addition to important items such as Key Maps and Employee Badges, the Actions panel includes the following Advanced options: Editable Activity Codes Employee restrictions for specific units (HandyTrac Touch Premium only) Unit Notes to display when a key is Resident Email notifications when keys are requested on the system...
- Page 34 HandyTrac Touch User Guide Basic Maintenance and Upkeep Checks The HandyTrac system must be operated in a proper environment and utilize a functioning Uninterruptible Power Supply (UPS). The HandyTrac system must be connected to the “Surge+Battery” power plug. The system must be installed and operated in a room reasonably free of dust and air particles;...
- Page 35 8:30AM - 6:30PM Eastern Phone: 678-990-2305 Fax: 678-990-2311 The HandyTrac website and system is routinely updated with new features and improvements. To find the most up to date version of this manual, scan the QR code with your smartphone or visit:...
Need help?
Do you have a question about the Key Control and is the answer not in the manual?
Questions and answers
I purchased a new property. How do I add this new unit with a key tag into the system?