Advertisement
1 -1 T
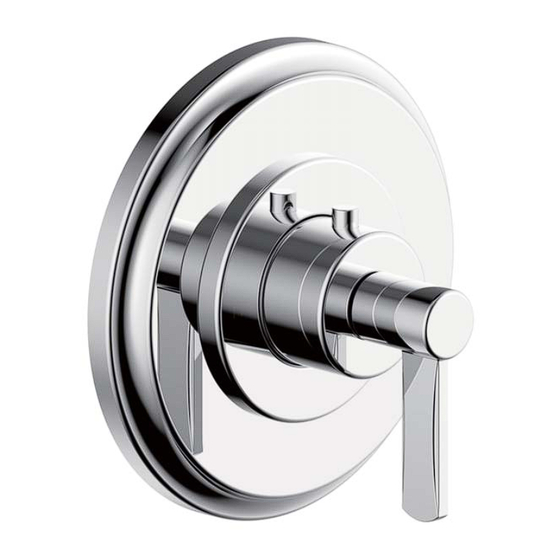
Installation Instructions
Adjustable Wrench
For ease of installation you will need:
To read the installation instructions completely before beginning.
To read all warnings, care, and maintenance information.
To complete the valve rough-in prior to installing this trim kit.
Trim
Tools You Will Need
Adjustable Pliers
Screwdriver
Before beginning installation, check for any
damage that may have occurred during transport.
Note: Damage claims cannot be made during
or after installation.
15123035
Advertisement
Table of Contents

Subscribe to Our Youtube Channel
Related Manuals for Crosswater Darby 15-16-T


Summary of Contents for Crosswater Darby 15-16-T
- Page 1 Trim 1 -1 T Installation Instructions Tools You Will Need Adjustable Wrench Adjustable Pliers Screwdriver Before beginning installation, check for any For ease of installation you will need: damage that may have occurred during transport. To read the installation instructions completely before beginning. Note: Damage claims cannot be made during To read all warnings, care, and maintenance information.
-
Page 2: Installation Instructions
Slide on escutcheon engaging the extension kit is necessary. stem making sure the temperature Install escutcheon with 2 screws. Please contact your Crosswater override button facing straight up. Do not overtighten the screws. London dealer. Secure with screw. - Page 3 Safety Temperature Rotate the cartridge stem to adjust safety temperature. Rotate clockwise Reinstall the temperature control to reduce temperature, rotate Turn off the water supply. Remove handle and escutcheon making sure counterclockwise to increase the temperature control handle and the temperature override button is on temperature.
-
Page 4: Cleaning Instructions
Installation completed. Cleaning Instructions Rinse away any traces of soap and gently dry with a clean, soft cloth after each use. Rinse completely with water and dry any overspray. This will maintain the finish and avoid water spotting. To remove mineral deposits, use a 50/50 solution of white vinegar and water. Do not allow the solution to soak on the product. -
Page 5: Replacement Parts
15-16-T Replacement Parts NO. Description Part NO. Screw M X 0 5T0F0266NT Washer Spring utton Pin Handle Assembly Hex Set Screw & Allen Key 9Q1356NT Extension kit(Polished Chrome) 9Q1172CP Extension kit(Satin Nickel) 9Q1172AP Extension kit(Polished Nickel) 9Q1172RN Ordered Separately 15123035... -
Page 6: Installation Dimensions
-1/4" 1/2" -1/2" Warranty - This Crosswater London product is covered by a limited lifetime warranty. For full details, terms and conditions please visit our website. For further information contact: Crosswater London, 393 Fortune Blvd., Milford, MA 01757 www.crosswaterlondon.com Toll free number: 844-XWATER-1 (844-992-8371)
Need help?
Do you have a question about the Darby 15-16-T and is the answer not in the manual?
Questions and answers