Stahl 8186 Series Operating Instructions Manual
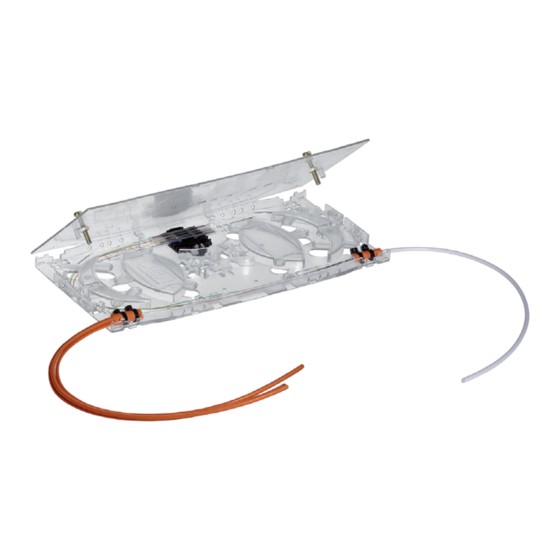
Optical fibre splice cassette zone 1
Hide thumbs
Also See for 8186 Series:
- Operating instructions manual (21 pages) ,
- Operating instructions manual (20 pages)
Chapters
Table of Contents

Related Manuals for Stahl 8186 Series


Summary of Contents for Stahl 8186 Series
- Page 1 Betriebsanleitung Additional languages r-stahl.com Lichtwellenleiter-Spleißkassette Zone 1 Reihe 8186...
-
Page 2: Table Of Contents
Inhaltsverzeichnis Allgemeine Angaben ...................3 Hersteller ......................3 Angaben zur Betriebsanleitung ................3 Weitere Dokumente ....................3 Konformität zu Normen und Bestimmungen ............3 Erläuterung der Symbole ..................4 Symbole in der Betriebsanleitung ...............4 Warnhinweise .....................4 Symbole am Gerät ....................5 Sicherheitshinweise ....................5 Aufbewahrung der Betriebsanleitung ..............5 Qualifikation des Personals ................5 Sichere Verwendung ...................6 Umbauten und Änderungen ................7... -
Page 3: De De
Diese ist rechtsverbindlich in allen juristischen Angelegenheiten. Weitere Dokumente • Datenblatt • Datenblatt des LWL–Kabels (Hersteller des LWL-Kabels kontaktieren!) Dokumente in weiteren Sprachen, siehe r-stahl.com. Konformität zu Normen und Bestimmungen Zertifikate und EU-Konformitätserklärung, siehe r-stahl.com. Das Gerät verfügt über eine IECEx-Zulassung. Zertifikat siehe IECEx-Homepage: http://iecex.iec.ch/... -
Page 4: Erläuterung Der Symbole
Erläuterung der Symbole Erläuterung der Symbole Symbole in der Betriebsanleitung Symbol Bedeutung Tipps und Empfehlungen zum Gebrauch des Geräts Gefahr durch explosionsfähige Atmosphäre Warnhinweise Warnhinweise unbedingt befolgen, um das konstruktive und durch den Betrieb bedingte Risiko zu minimieren. Die Warnhinweise sind wie folgt aufgebaut: •... -
Page 5: Symbole Am Gerät
Normen und Bestimmungen umfasst. Für Tätigkeiten in explosionsgefährdeten Bereichen sind weitere Kenntnisse erforderlich! R. STAHL empfiehlt einen Kenntnisstand, der in folgenden Normen beschrieben wird: • IEC/EN 60079-14 (Projektierung, Auswahl und Errichtung elektrischer Anlagen) • IEC/EN 60079-17 (Prüfung und Instandhaltung elektrischer Anlagen) •... -
Page 6: 3.3 Sichere Verwendung
• Bei Betriebsbedingungen, die durch die technischen Daten des Geräts nicht abgedeckt werden, unbedingt bei der R. STAHL Schaltgeräte GmbH rückfragen. • Sicherstellen, dass das Gerät unbeschädigt ist. • Für Schäden, die durch fehlerhaften oder unzulässigen Einsatz des Geräts sowie durch Nichtbeachtung dieser Betriebsanleitung entstehen, besteht keine Haftung. -
Page 7: Umbauten Und Änderungen
Funktion und Geräteaufbau Umbauten und Änderungen GEFAHR Explosionsgefahr durch Umbauten und Änderungen am Gerät! Nichtbeachten führt zu schweren oder tödlichen Verletzungen. • Gerät nicht umbauen oder verändern. Für Schäden, die durch Umbauten und Änderungen entstehen, besteht keine Haftung und keine Gewährleistung. Funktion und Geräteaufbau GEFAHR Explosionsgefahr durch zweckentfremdete Verwendung! -
Page 8: 4.2 Geräteaufbau
Mechanische Daten Mindestbiegeradius 35 mm Gehäusematerial Polycarbonat, flammwidrig, halogenfrei, UL94 V-0 Max. Anzahl LWL 6 mit 1 Spleißschutzhalter, 12 mit 2 Spleißschutzhaltern, 4 x Kabelbinder Weitere technische Daten, siehe r-stahl.com. Lichtwellenleiter-Spleißkassette Zone 1 203681 / 818660300010 Reihe 8186 2020-06-23·BA00·III·de·04... -
Page 9: Projektierung
Projektierung Projektierung Bei der Projektierung folgende Bedingungen beachten: • Installation des Geräts nur gemäß bestimmungsgemäßen Verwendung. • Zulässige Montagelagen für den Betrieb des Geräts (siehe Kapitel "Montage / Demontage, Gebrauchslage"). Transport und Lagerung • Gerät nur in Originalverpackung transportieren und lagern. •... -
Page 10: Montage / Demontage, Gebrauchslage
Montage und Installation Montage / Demontage, Gebrauchslage HINWEIS Fehlfunktion oder Geräteschaden durch unsachgemäße Montage. Nichtbeachten kann Sachschäden verursachen! • Gerät ausschließlich flach auf Gehäusewand montieren. 8.2.1 Montage 210 [8,27] 175 [6,89] 42 [1,65] 21488E00 Beschreibung Verwendung Ø 6,0 mm für Gewindestehbolzen M5 zur Führung und Befestigung der (Anzugsdrehmoment 0,5 Nm) LWL-Spleißkassette... - Page 11 Montage und Installation Montage einer LWL-Spleißkassette • Montagefläche gemäß Befestigungsmaßen vorbereiten/bohren und Gewinde schneiden. • Gewindestehbolzen anbringen. 21476E00 • LWL-Spleißkassette mit einem Gewindestehbolzen M5 (1) auf der Montage- fläche befestigen. 21725E00 • Um ein Verdrehen der LWL-Spleißkassette zu vermeiden, zusätzlich mit zwei Senkschrauben M3 (1) auf die Montagefläche fixieren.
- Page 12 Montage und Installation Montage mehrerer LWL-Spleißkassetten im Stapel • Montagefläche gemäß Befestigungsmaßen vorbereiten/bohren und Gewinde schneiden. • Gewindestehbolzen anbringen. 21476E00 • LWL-Spleißkassette mit einem Gewindestehbolzen M5 (1) auf der Montage- fläche befestigen. 21725E00 • Um ein Verdrehen der LWL-Spleißkassette zu vermeiden, zusätzlich mit zwei Senkschrauben M3 (1) auf die Montagefläche...
- Page 13 Montage und Installation 8.2.2 Demontage • LWL-Spleißkassette öffnen: Schrauben (1) lösen und Deckel abheben. • Gegebenenfalls Kabelbinder von der Gehäuseseite der LWL-Spleißkassette entfernen. 21731E00 • Gegebenenfalls LWL-Fasern aus dem Spleißschutzhalter ausklipsen. • Gegebenenfalls Spleißschutzhalter ausklipsen, dabei die zwei Haltenasen leicht zusammendrücken.
-
Page 14: Installation
Montage und Installation Installation Die Lichtwellenleiter dürfen nur mit den zugehörigen Spleißschutzhaltern mit Schrumpfspleißschutz montiert werden. Zubehör-Set (Art.Nr. 203682): 1 x Spleißschutzhalter, 6 x Schrumpfspleißschutz, 4 x Kabelbinder Vor dem Anschluss • Sicherstellen, dass alle Strahlungsquellen ausgeschaltet und gegen unbefugtes Wiedereinschalten gesichert sind. - Page 15 Montage und Installation 21485E00 21484E00 21483E00 203681 / 818660300010 Lichtwellenleiter-Spleißkassette Zone 1 2020-06-23·BA00·III·de·04 Reihe 8186...
- Page 16 Montage und Installation 8.3.2 Lichtwellenleiter anschließen • Falls erforderlich, die LWL-Spleißkassette öffnen (siehe Kapitel 8.2.2). • Kabelummantelung (10) und Bündeladern (11) 1500 [59,06] 50 [1,97] mit geeignetem 21482E00 Werkzeug abisolieren. Dabei erforderliche Abmessungen für Bündeladern (11) und LWL-Fasern (12) berücksichtigen, siehe Abbildung.
-
Page 17: Inbetriebnahme
Die geltenden nationalen Bestimmungen im Einsatzland beachten. 10.3 Reparatur GEFAHR Explosionsgefahr durch unsachgemäße Reparatur! Nichtbeachten führt zu schweren oder tödlichen Verletzungen. • Reparaturen an den Geräten ausschließlich durch R. STAHL Schaltgeräte GmbH ausführen lassen. 203681 / 818660300010 Lichtwellenleiter-Spleißkassette Zone 1 2020-06-23·BA00·III·de·04 Reihe 8186... -
Page 18: 10.4 Rücksendung
Reinigung 10.4 Rücksendung • Rücksendung bzw. Verpackung der Geräte nur in Absprache mit R. STAHL durchführen! Dazu mit der zuständigen Vertretung von R. STAHL Kontakt aufnehmen. Für die Rücksendung im Reparatur- bzw. Servicefall steht der Kundenservice von R. STAHL zur Verfügung. - Page 19 Operating instructions Additional languages r-stahl.com Optical Fibre Splice Cassette Zone 1 Series 8186...
- Page 20 Contents General Information ....................3 Manufacturer .......................3 Information regarding the Operating Instructions ..........3 Further Documents .....................3 Conformity with Standards and Regulations ............3 Explanation of the Symbols ................4 Symbols in these Operating Instructions ............4 Warning Notes ....................4 Symbols on the Device ..................5 Safety Notes .......................5 Operating Instructions Storage ................5 Personnel Qualification ..................5...
-
Page 21: En En
• Data sheet for FO cable (contact manufacturer of FO cable!) For documents in additional languages, see r-stahl.com. Conformity with Standards and Regulations See certificates and EU Declaration of Conformity: r-stahl.com. The device has IECEx approval. For certificate please refer to the IECEx homepage: http://iecex.iec.ch/ Further national certificates can be downloaded via the following link: https://r-stahl.com/en/global/support/downloads/. -
Page 22: Explanation Of The Symbols
Explanation of the Symbols Explanation of the Symbols Symbols in these Operating Instructions Symbol Meaning Tips and recommendations on the use of the device Danger due to explosive atmosphere Warning Notes Warnings must be observed under all circumstances, in order to minimize the risk due to construction and operation. -
Page 23: Symbols On The Device
Specialists who perform these tasks must have a level of knowledge that meets applicable national standards and regulations. Additional knowledge is required for tasks in hazardous areas! R. STAHL recommends having a level of knowledge equal to that described in the following standards: •... -
Page 24: 3.3 Safe Use
• Use the device in accordance with its intended and approved purpose only. • Always consult with R. STAHL Schaltgeräte GmbH if using the device under operating conditions which are not covered by the technical data. • Make sure that the device is not damaged. -
Page 25: Modifications And Alterations
Function and Device Design Modifications and Alterations DANGER Explosion hazard due to modifications and alterations to the device! Non-compliance results in severe or fatal injuries. • Do not modify or alter the device. No liability or warranty for damage resulting from modifications and alterations. -
Page 26: 4.2 Device Design
Polycarbonate, flame retardant, halogen-free, UL94 V-0 Max. number of FO 6 with 1 splice protector holder, 12 with 2 splice protector holders, 4 x cable ties For further technical data, see r-stahl.com. Optical Fibre Splice Cassette Zone 1 203681 / 818660300010 Series 8186 2020-06-23·BA00·III·en·04... -
Page 27: Engineering
Engineering Engineering The following conditions must be observed during project engineering: • Only install the device according to its intended use. • Approved mounting positions for operation of the device (see the "Mounting/dismounting, operating position" chapter). Transport and Storage • Transport and store the device only in the original packaging. •... -
Page 28: Mounting / Dismounting, Operating Position
Mounting and Installation Mounting / Dismounting, Operating Position NOTICE Malfunction or device damage caused by improper mounting. Non-compliance can result in material damage! • Only mount the device flat on the enclosure wall. 8.2.1 Assembly 210 [8,27] 175 [6,89] 42 [1,65] 21488E00 Description Dia. - Page 29 Mounting and Installation Mounting a FO splice cassette • Prepare/drill the mounting surface according to the fastening dimensions and cut the thread. • Attach the threaded studs. 21476E00 • Mount the FO splice cassette using an M5 threaded stud (1) on the mounting surface.
- Page 30 Mounting and Installation Mounting multiple FO splice cassettes in a stack • Prepare/drill the mounting surface according to the fastening dimensions and cut the thread. • Attach the threaded studs. 21476E00 • Mount the FO splice cassette using an M5 threaded stud (1) on the mounting surface.
- Page 31 Mounting and Installation 8.2.2 Disassembly • Open the FO splice cassette: Undo the screws (1) and lift the cover. • If necessary, remove cable ties from the enclosure side of the FO splice cassette. 21731E00 • If necessary, unclip FO fibres from the splice protector holder.
-
Page 32: Installation
Mounting and Installation Installation The fibre optics must only be installed with the associated splice protector holders with shrink splice protector. Accessories set (item no. 203682): 1 x splice protector holder, 6 x shrink splice protector, 4 x cable tie Before connection •... - Page 33 Mounting and Installation 21485E00 21484E00 21483E00 203681 / 818660300010 Optical Fibre Splice Cassette Zone 1 2020-06-23·BA00·III·en·04 Series 8186...
- Page 34 Mounting and Installation 8.3.2 Connecting the Optical Fibre Cables • If necessary, open the FO splice cassette (see chapter 8.2.2). • Strip the cable sheath (10) and multifibre loose buffers 1500 [59,06] 50 [1,97] (11) using a suitable tool. 21482E00 When doing so, observe the required dimensions for multifibre loose buffers (11)
-
Page 35: Commissioning
DANGER Explosion hazard due to improper repair! Non-compliance results in severe or fatal injuries. • Repair work on the devices must be performed only by R. STAHL Schaltgeräte GmbH. 203681 / 818660300010 Optical Fibre Splice Cassette Zone 1 2020-06-23·BA00·III·en·04 Series 8186... -
Page 36: 10.4 Returning The Device
• Only return or package the devices after consulting R. STAHL! Contact the responsible representative from R. STAHL. R. STAHL's customer service is available to handle returns if repair or service is required. • Contact customer service personally. • Go to the r-stahl.com website.
Need help?
Do you have a question about the 8186 Series and is the answer not in the manual?
Questions and answers