Table of Contents
Advertisement
Quick Links
Advertisement
Table of Contents

Related Manuals for Oliver 10040 Series


Summary of Contents for Oliver 10040 Series
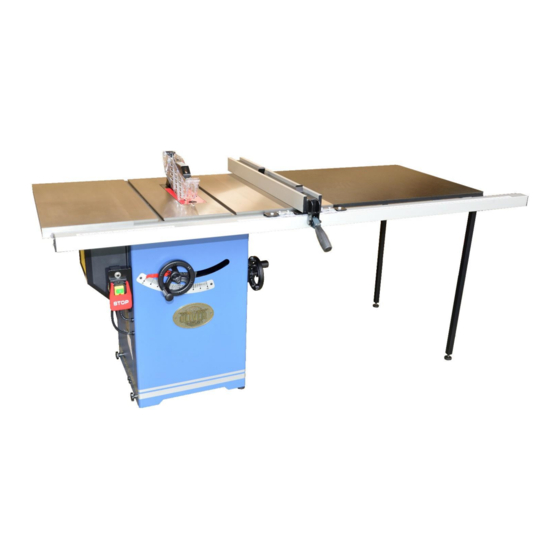
- Page 1 Table Saw Model 10040 Series Owner’s Manual For Models Manufactured Since 01/2017 175370 Oliver Machinery 1-800-559-5065 921 Thomas Ave SW, Renton, WA 98057 Stock Number: 10040.101 info@olivermachinery.net 10040.102 WWW.OLIVERMACHINERY.NET Manual Version: 2.0.0...
- Page 3 USAGE OF SAFETY AND PROTECTION DEVICES. OLIVER MACHINERY DISCLAIMS ANY LIABILITY FOR MACHINES THAT HAVE BEEN ALTERED OR ABUSED. OLIVER MACHINERY RESERVES THE RIGHT TO EFFECT AT ANY TIME, WITHOUT PRIOR NOTICE, THOSE ALTERATIONS TO PARTS, FITTINGS, AND ACCESSORY EQUIPMENT WHICH THEY MAY DEEM NECESSARY FOR ANY REASON WHATSOEVER.
-
Page 4: Table Of Contents
Table of Contents Cutting with Dado Set ······························· 42 Introduction············································· 5 After Using the Table Saw ························· 43 Specifications ·········································· 6 Changing Saw Blade·································· 44 Identification ··········································10 Calibrations and Adjustments ················ 45 Safety ·····················································12 Blade to Miter Slot Alignment ··················· 45 General Safety Guidelines ·························... -
Page 5: Introduction
Introduction Thank you for choosing Oliver! This manual contains important information on how to safely set up, operate, and maintain this machine. Please take the time to read through this manual, and make sure you understand all instructions. While this manual may provide tips on optimizing the result of your workpiece, the manual is not intended as a substitute for formal woodworking training. -
Page 6: Specifications
Right Extension Table Packaging Cardboard Box Dimensions 34”(L) x 29”(W)x 3-1/4”(H) Weight 25lbs. Approx. Setup Time 120 Minutes Must Ship Upright Stackable NO – The table saw wood crate is not stackable. 6 | Page Oliver Machinery 10040 Table Saw... - Page 7 Electricals Power Requirement 115V / 230V, 1Ph, 60Hz Prewired Voltage 115V Full Load Current Rating 14.8A @ 115V 7.4A @ 230V Recommended circuit size 20A @ 115V 15A @ 230V Power Switch Type Lockable Magnetic Paddle Switch Connection Type NEMA 5-15 Plug with 6’ 14AWG Cord Saw Details Table Saw Type Cabinet...
- Page 8 1.75HP Power Requirement 115V / 230V, 1Ph, 60Hz Full Load Current Rating 14.8A @ 115V 7.4A @ 230V Speed 3450 RPM Power Transfer Mechanism Poly V-Belt Bearing type Permanently Sealed Ball Bearing 8 | Page Oliver Machinery 10040 Table Saw...
- Page 9 Cabinet Type Steel cabinet with built-in storage for accessories. Mobility Built-in fixed casters with locks Safety Blade Guard Quick-release blade guard. Riving Knife Quick-release riving knife. Number of Dust Ports Dust Port Size 4” Minimum CFM Required 500 CFM Sound Rating 85 dB at 3’...
-
Page 10: Identification
Identification 10040.101 with Miter Gauge and Riving Knife Setup 10040.102 with Rip Fence and Blade Guard Setup 10 | Page Oliver Machinery 10040 Table Saw... - Page 11 Table Saw Cabinet Rear View 10040 Table Saw OLIVERMACHINERY.NET 11 | Page...
-
Page 12: Safety
Safety Oliver Machinery has made every attempt to provide a safe, reliable, easy-to-use piece of machinery. Safety, however, is ultimately depending on the individual machine operator. Please become familiar with the following safety labels that are used throughout this manual. -
Page 13: General Safety Guidelines
7. NEVER STAND ON THE MACHINE. This prevents injuries from tipping-related accidents and accidental contact with cutters. 8. REPLACEMENT PARTS: Use only genuine Oliver Machinery replacement parts and accessories recommended for this machine. Generic parts made by other manufacturers may create a safety hazard and WILL void the factory warranty and other guarantees. -
Page 14: Electricals
GFCI protection device as an alternative, if this complies with the electric code in your area. When in doubt, consult a licensed electrician in your area. 14 | Page Oliver Machinery 10040 Table Saw... -
Page 15: Electrical Wiring
Electrical Wiring This machine is pre-wired for 115V, with a cord and a NEMA 5-15 plug. Please refer to the section “Wiring Diagrams” on page 60 for rewiring this machine to a 230V power source. The rewiring work requires a different power switch (Part #: 937910-001) and a 230V compatible plug. -
Page 16: Setup
Air resistance and leakage in a dust collection system impact its effectiveness. Use a dust collection system that is rated above 500 CFM at the dust port. Doing so CAUTION improves air quality in the workplace, and prevents the machine from jamming. 16 | Page Oliver Machinery 10040 Table Saw... -
Page 17: Receiving
Receiving Your shipment should arrive in multiple packages. Upon receiving your shipment, please verify all packages are delivered. Check for any significant damages before signing the delivery confirmation. IMPORTANT If items are missing or damaged, please call us immediately at 1-800-559-5065 For stock# 10040.101 with 36”... - Page 18 The cast iron extension wing is heavy. Please handle with care and wear protective footwear. CAUTION Always wear safety goggles and gloves when removing packing straps for securing your package. Straps may spring back violently when released and cause CAUTION injury. 18 | Page Oliver Machinery 10040 Table Saw...
-
Page 19: Inventory
Inventory Carefully unwrap the packaging and make sure all components are included in the shipment. Inventory all items received and put them in groups. Group 1 – Tabled Insert Assemblies Group 3 – Blade Guard Assembly Item Description Item Description Zero Clearance Insert &... - Page 20 Leveling Feet Locking Nuts Group 8 – Tools Already Mounted On Saw’s Storage Plate Item Description Item Description Push Stick Table Saw Blade Wrench 11/13mm Wrench Miter Gauge Hex Wrench (2.5/6mm) 1 Set 20 | Page Oliver Machinery 10040 Table Saw...
-
Page 21: Cleaning
NOTICE: If you cannot find an item in the list above, please check if it is still attached to the packaging. Occasionally the item may have been pre-installed in the factory. See section “Parts List” to check if a component is included or installed. NOTICE: This machine comes with various standard-sized, non-proprietary parts. -
Page 22: Essential Checks Before Assembly
If not, see the steps in section “Changing Saw Blade” on page 44 to install the saw blade. 3. Use the blade tilt handwheel to set the blade to 0° so it is perpendicular to the table°. 22 | Page Oliver Machinery 10040 Table Saw... - Page 23 Test 2: Blade / Miter Slot Alignment Check 3. Move the reference point towards the rear CAUTION of the saw and measure the distance. This test involves moving the blade. Wear thick leather gloves to prevent injuries from accidental blade contact. Remove the gloves before operating the saw.
- Page 24 If the riving knife drifts beyond the alignment zone, it will either catch the workpiece or push the workpiece sideways. This will increase the risk of kickback and impact cut quality. 24 | Page Oliver Machinery 10040 Table Saw...
- Page 25 Test 4: Spreader Alignment Check Test 5: Motor and Switch Functionality 1. Remove the riving knife and install the blade 1. Put on safety goggles and ear protection. guard assembly. 2. Connect the saw to the power source. 2. Loosen the blade guard locking knob and 3.
-
Page 26: Assembly
4. While tightening the bolts, make sure the top and the front surfaces of the extension wing are flush with the main table. 26 | Page Oliver Machinery 10040 Table Saw... - Page 27 Table Saw Rails Installation 1. Gather the mounting hardware that comes 5. The left end of the front rail should recess with the rails package. approximately 1-1/8 to 1-1/4 from the left edge of the table. 6. When securing the front rail, make sure the rail runs in parallel with the table surface.
-
Page 28: Right Extension Table Installation
Lock the leveling foot by tightening the locking nut. 28 | Page Oliver Machinery 10040 Table Saw... - Page 29 Table Insert Setup 1. The table inserts have 4. Install the table insert and adjust the four set adjustment/locking hardware pre-installed screws until the insert is flush with the table, at the factory. If not, it will come with a set then rotate the lock knob clockwise to of hardware.
- Page 30 14. Disconnect the table saw from power after setting up the table insert. 30 | Page Oliver Machinery 10040 Table Saw...
-
Page 31: Fence Setup
Fence Setup 1. Gather the fence storage brackets and the Refer to section “Fence to Miter Slot mounting bolts. Item #5 and #6. Alignment” on page 46 for details about checking and readjusting the fence to miter slot alignment. 2. Mount the fence storage brackets on the back of the cabinet. -
Page 32: Push Stick Storage
11. Adjust the position of the rail until the reading is zero while the fence is barely touching the blade. 12. Re-tighten the nuts to secure the front rail. 13. Lower the saw blade when the fence is set 32 | Page Oliver Machinery 10040 Table Saw... -
Page 33: Dust Collection
Dust Collection The use of the table saw will generate wood dust which is harmful to the body. Connect this machine to a dust collection system. The minimum CFM requirement for this table saw is 500 CFM at the dust port, which means the dust collection system should have a rating greater than 500 CFM, as air friction and leakage can reduce effective CFM at the dust port. -
Page 34: Accessories
Touchup Paint Keeping all painted surfaces in good condition not only makes your machine look nice but also keeps rust away. Oliver Machinery has pre-mixed spray paint available in Oliver-Blue for purchase. Accessories are available on our website: OLIVERMACHINERY.NET To order by phone, please call us at 1-800-559-5065. -
Page 35: Operation
Operation The table saw is recognized as one of the most dangerous tools in the shop and it should be treated with respect. This chapter provides general guidelines to operate a table saw safely. It is not intended as a substitute for formal woodworking training. - Page 36 Only use saw blades that are sharp, clean, starting the table saw. and free of defects. Choose the blade type that is designed for the material and the type of cut. 36 | Page Oliver Machinery 10040 Table Saw...
- Page 37 19. PROPER USE: Do not use this machine for supported throughout the entire cut. anything other than its intended use. If used for other purposes, Oliver Machinery 14. EYE PROTECTION: Always wear an approved disclaims any real or implied warranty and...
-
Page 38: Safety Guidelines For Using The Table Saw
• To avoid kickback accidents, a deep non- NEVER perform freehand cuts. • through cut can be done in multiple light NEVER feed a workpiece sideways. passes. 38 | Page Oliver Machinery 10040 Table Saw... -
Page 39: Making A Rip Cut
Making a Rip Cut A rip cut is to cut a workpiece lengthwise. When 8. Turn on the dust collection device and start working with materials with directional wood the saw. grains, this typically means cutting along the 9. Begin the rip cut by holding the workpiece grain. -
Page 40: Making A Cross Cut
5. Hold the workpiece against the miter gauge, to keep hands away from the blade. then place the setup near the blade. Adjust the position of the workpiece to line up the 40 | Page Oliver Machinery 10040 Table Saw... -
Page 41: Notes For Making A Miter Cut
Notes for Making a Miter Cut Notes for Making a Bevel Cut A miter cut is a cross cut made at a miter angle. A bevel cut is performed with the blade tilted. Either rip cuts or cross cuts can be made at a 1. -
Page 42: Cutting With Dado Set
Failure to comply will increase the risk of kickback which can cause serious injuries or death. 42 | Page Oliver Machinery 10040 Table Saw... -
Page 43: After Using The Table Saw
After Using the Table Saw STOP THE MACHINE immediately after the work completes, or when the operator leaves the machine for any reason. WAIT until the motor comes to a complete stop. LOWER the saw blade so it goes below the table. CLEAN UP before departure. -
Page 44: Changing Saw Blade
5. Push the spring-loaded arbor lock to the right, then rotate the arbor until the arbor lock engages. 11. Reinstall the table insert and blade guard after changing the saw blade. 44 | Page Oliver Machinery 10040 Table Saw... -
Page 45: Calibrations And Adjustments
Calibrations and Adjustments 5. Move the reference point towards the rear Blade to Miter Slot Alignment of the table, then slide the dial indicator to The blade to miter slot parallelism is calibrated the back so the dial indicator’s contact point at the factory and should not require further is again resting on the reference point. -
Page 46: Fence Lock Tightness
Lock the fence and then set the 1/64”. Doing so may impact cut quality. dial indicator to zero. 46 | Page Oliver Machinery 10040 Table Saw... -
Page 47: Fence Squareness Adjustment
Fence Squareness Adjustment Fence Height Adjustment 1. The fence face should be perpendicular to 1. There should be a 1/16” gap between the the cast iron table. Check the squareness of fence face and the table. The gap allows the the fence with a machinist square. -
Page 48: Fence Scale Adjustment
6. If the error is less than 1/8”, loosen the screws that hold the indicator in place, reposition the indicator, and then retighten the screws. 4. Adjust the indicator and tighten the mounting screw. 48 | Page Oliver Machinery 10040 Table Saw... -
Page 49: Miter Gauge Positive Stop Adjustment
Miter Gauge Positive Stop Adjustment Blade Tilt Angle Pointer Adjustment There are three positive stops on the miter The blade tilt angle pointer was calibrated at the gauge for quick miter angle adjustments. If a factory and requires no further adjustments. If positive stop is not setting the correct angle, it the pointer has shifted, it can be adjusted. -
Page 50: Blade Angle Positive Stops Adjustments
0, it will expose the 45 positive stop bolt on the right. 4. When setting the blade angle to 45, the 0 positive stop bolt on the left will appear. 50 | Page Oliver Machinery 10040 Table Saw... -
Page 51: Spreader/Riving Knife Alignment
Spreader/Riving Knife Alignment Adjustment The spreader/riving knife alignment was calibrated in the factory and should not require further adjustments. If a riving knife or spreader is not aligned with the blade, make sure it is not bent. Follow these steps below if the quick release mechanism needs an adjustment. 1. -
Page 52: Maintenance
Disconnect the machine from the power source before performing any maintenance work. After servicing the table saw, remove all tools before WARNING restarting the machine. Failure to comply can cause serious injury! 52 | Page Oliver Machinery 10040 Table Saw... -
Page 53: Cleaning And Lubrication
Cleaning and Lubrication Clean the trunnion slides, worm gear, and elevation rails every 6-12 months or when it becomes difficult to adjust the saw blade positions. 1. Disconnect the saw from the power source. Blade height worm gear and elevation slides: 2. -
Page 54: Belt Tension Adjustment
DO NOT remove the fasteners. 6. Pull the motor down to tighten the belt. At the same time tighten the motor mounting bolt and then the cap screw. 54 | Page Oliver Machinery 10040 Table Saw... -
Page 55: Belt Replacement
Belt Replacement 1. Disconnect the saw from the power source. 6. Loosen the cap screw (#1) and the motor mounting bolt (#2), so the motor can be 2. Remove the motor cover, table insert, and raised or lowered by hand. DO NOT remove saw blade. -
Page 56: Troubleshooting
Motor is not wired Use the wiring diagram to properly wire up the properly for the motor. operating voltage. Motor/capacitor issue. Contact customer service for further assistance. 56 | Page Oliver Machinery 10040 Table Saw... - Page 57 Problem Possible Cause Solution Machine stopped Tripped circuit breaker Reconnect circuit. Reduce feed pressure. during the operation. or blown fuse. Saw was overloaded and Wait for at least 5 minutes for the motor to thermal protection was cool down, then press the RESET button on the triggered.
- Page 58 Install the blade guard. installed. Workpiece catches the Table insert is not flush Adjust the height of the table insert so all table insert when with the table. edges are flush with the table. feeding. 58 | Page Oliver Machinery 10040 Table Saw...
- Page 59 Quality-Related Issues Problem Possible Cause Solution Stock burns Stock binds with the Adjust alignment between the miter slot, blade. blade, fence, and riving knife/spreader. Feeding motion paused Maintain feeding speed while cutting the during operation. entire length of the stock. Feeding speed too low Increase feeding speed and cut with a sharp, clean blade.
-
Page 60: Wiring Diagrams
Faulty electrical work can cause electrocution and is a fire hazard. All electrical work must be completed by a licensed electrician and must meet the WARNING local electrical code in your area or the warranty is void. 60 | Page Oliver Machinery 10040 Table Saw... -
Page 61: Parts List
Parts List Table and Cabinet 10040 Table Saw OLIVERMACHINERY.NET 61 | Page... -
Page 62: Motor And Trunnion Assembly
Motor and Trunnion Assembly 62 | Page Oliver Machinery 10040 Table Saw... -
Page 63: Rip Fence Assembly
Rip Fence Assembly 10040 Table Saw OLIVERMACHINERY.NET 63 | Page... -
Page 64: Right Table Assembly (Stock #10040.102)
Right Table Assembly (Stock #10040.102) 64 | Page Oliver Machinery 10040 Table Saw... -
Page 65: Blade Guard And Miter Gauge
Blade Guard and Miter Gauge 10040 Table Saw OLIVERMACHINERY.NET 65 | Page... - Page 66 Blade Guard Assembly 251246-000 Right Cover 290073-905 Shoulder Shaft 251247-000 Left Cover 043317-000 O-Ring P006 130365-903 Clamper Support 008302-100 Lock Nut M5*0.8P(8B*6H) 000303-101 Pan Head Screw M5*0.8P*6 230336-615 Knob 130270-903 Rod Bracket -Left 66 | Page Oliver Machinery 10040 Table Saw...
- Page 67 Index Part Number Descriptions Specifications 2.10 130271-903 Rod Bracket -Right 2.11 000302-103 Pan Head Screw M4*0.7P*10 2.12 360960-901 2.13 171154-904 Blade Guard Body 2.14 171378-904 Anti-Kick Finger -Left 2.15 280162-901 Spring 2.16 090149-910 Block 2.17 360864-000 2.18 360865-901 Spreader Shaft 2.19 280160-901 Spring...
- Page 68 Spring 010206-000 Retaining Ring 042608-000 Clamp 60-80mm(I.D.) 2.5”(I.D.)*800mm 042615-000 Dust Hose 008316-200 Lock Nut M10*1.5P(17B*8H) 006001-076 Flat Washer 10.3*23*2.0t 010103-000 Retaining Ring RTW-35 030211-002 Ball Bearing 6003 190270-901 Spacer 174305-901 Fixed Plate 68 | Page Oliver Machinery 10040 Table Saw...
- Page 69 Index Part Number Descriptions Specifications 014354-000 Poly V-Belt 135J7 381281-902 Arbor 000002-103 Hex Screw M6*1.0P*16 006001-020 Flat Washer 6.2*20*3.0t 006007-114 Flat Washer 6.4*16*1.6t 361245-901 Lead Screw 010007-000 Retaining Ring STW-16 012002-003 Key 4*4*8 174324-000 Washer 031011-001 Bearing 51100 090324-000 Trunnion 130257-000 Bevel Gear 006001-025 Flat Washer 6.4*16*1.0t...
- Page 70 52" Rail with Right Table Assembly 127-1 924534-001 52" Rail Assembly 127-1.1 001803-102 Cap Screw w/ Spring Washer M8*1.25P*20/8.2*15.4 127-1.2 006001-049 Flat Washer 8.5*16*2.0t 127-1.3 008006-100 Hex Nut M8*1.25P(13B*6.5H) 127-1.4 048701-101 Square Bolt M8*1.25P*20 70 | Page Oliver Machinery 10040 Table Saw...
- Page 71 Index Part Number Descriptions Specifications 127-1.6 174394-308 Rear rail 127-1.7 924510-001 Front Rail w/Scales & End Caps 12" L / 52" R 127-2 924532-001 Right Table Assembly 127-2.1 001803-102 Cap Screw w/ Spring Washer M8*1.25P*20/8.2*15.4 127-2.2 006001-049 Flat Washer 8.5*16*2.0t 127-2.3 008006-100 Hex Nut...
-
Page 72: Maintenance Record
Maintenance Record Date Task Operator 72 | Page Oliver Machinery 10040 Table Saw... -
Page 73: Notes
Notes 10040 Table Saw OLIVERMACHINERY.NET 73 | Page... -
Page 74: Warranty And Service
Oliver Machinery makes every effort to assure that its equipment meets the highest possible standards of quality and durability. All products sold by Oliver Machinery are warranted to the original purchaser to be free from defects for a period of two (2) years on all parts excluding electronics and motors which are warranted for one (1) year from the date of shipment. - Page 76 Oliver Machinery is always adding new Industrial Woodworking products to the line. For complete, up-to-date product information, visit us online at: WWW.OLIVERMACHINERY.NET or call toll free 1-800-559-5065 ** SAVE THIS MANUAL FOR FUTURE REFERENCE. **...
Need help?
Do you have a question about the 10040 Series and is the answer not in the manual?
Questions and answers