Table of Contents
Advertisement
Quick Links
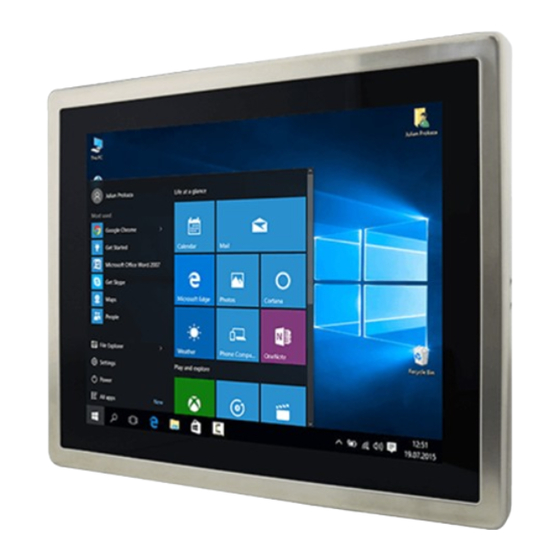
15" Full IP65 Stainless
User Manual
Document Version 1.3
Document Part No. 9171150I1003
Please read these instructions carefully before using this product, and save this manual for future use.
Class I Division 2
Intel® Celeron® Bay Trail-M N2930, 1.83 GHz
Intel® ATOM® N2600, 1.6 GHz
Model no.:
R15IB3S-65EX
R15ID3S-65EX
Advertisement
Table of Contents

Related Manuals for Winmate R15ID3S-65EX


Summary of Contents for Winmate R15ID3S-65EX
- Page 1 Intel® Celeron® Bay Trail-M N2930, 1.83 GHz Intel® ATOM® N2600, 1.6 GHz Model no.: R15IB3S-65EX R15ID3S-65EX User Manual Document Version 1.3 Document Part No. 9171150I1003 Please read these instructions carefully before using this product, and save this manual for future use.
-
Page 3: Table Of Contents
15" ATEX Panel PC User Manual Contents Preface ............................3 About This User Manual ......................7 Chapter 1: Introduction ......................... 8 1.1 Overview ......................... 9 1.2 Product Features ......................9 1.3 Packing List ........................10 1.4 Mechanical Dimensions ....................11 1.4.1 Dimensions 15”... - Page 4 15" ATEX Panel PC User Manual 6.1 Software Developer Support ..................56 6.2 Problem Report Form ....................56 Appendix............................57 Appendix A: Product Specifications..................57 Appendix B: Touchscreen ....................59...
-
Page 5: Preface
Preface Preface Copyright Notice No part of this document may be reproduced, copied, translated, or transmitted in any form or by any means, electronic or mechanical, for any purpose, without the prior written permission of the original manufacturer. Trademark Acknowledgement Brand and product names are trademarks or registered trademarks of their respective owners. - Page 6 15" ATEX Panel PC User Manual Advisory Conventions Four types of advisories are used throughout the user manual to provide helpful information or to alert you to the potential for hardware damage or personal injury. These are Notes, Important, Cautions, and Warnings. The following is an example of each type of advisory. NOTE: A note is used to emphasize helpful information IMPORTANT:...
- Page 7 Preface Safety Precautions For your safety carefully read all the safety instructions before using the device. All cautions and warnings on the equipment should be noted. Keep this user manual for future reference. CAUTION/ATTENTION Do not cover the openings! Ne pas couvrir les ouvertures! *Let service personnel to check the equipment in case any of the following problems appear: o The power cord or plug is damaged.
- Page 8 15" ATEX Panel PC User Manual Important Information Federal Communications Commission Radio Frequency Interface Statement This device complies with part 15 FCC rules. Operation is subject to the following two conditions: This device may not cause harmful interference. ⚫ This device must accept any interference received including interference ⚫...
-
Page 9: About This User Manual
(Accredited by IEC 17025) About This User Manual This User Manual provides information about using the Winmate® 15-inch Stainless Panel PC. The documentation set provides information for specific user needs, and includes: • 15-inch Stainless Panel PC User Manual – contains detailed description on how to use the display, its components and features. -
Page 10: Chapter 1: Introduction
15" ATEX Panel PC User Manual Chapter 1: Introduction This chapter gives you product overview, describes features and hardware specification. You will find all accessories that come with the HMI in the packing list. Mechanical dimensions and drawings included in this chapter. -
Page 11: Overview
• NEMA 4 (IP65) dust proof and water protection • Robust and fanless design for reliable operation • Fanless cooling system and ultra-low power consumption • Projected capacitive (PCAP) multi-touch screen (for R15IB3S-65EX) • Resistive touch screen (Explosion-proof, for R15ID3S-65EX) • Protection enclosure with cable gland... -
Page 12: Packing List
15" ATEX Panel PC User Manual 1.3 Packing List Carefully remove the box and unpack your device. Please check if all the items listed below are inside your package. If any of these items are missing or damaged contact us immediately. Standard factory shipment list: Panel PC AC to DC adapter... -
Page 13: Mechanical Dimensions
Chapter 1: Introduction 1.4 Mechanical Dimensions 1.4.1 Dimensions 15” Unit: mm 1.4.2 LED Indicators LED Type Status Description Power is on. Power Power is off. Blinking Storage activity (data is being read or written). System is idle. Storage... -
Page 14: Hazardous Locations
15" ATEX Panel PC User Manual 1.5 Hazardous Locations This equipment (R15IB3S-65EX / R15ID3S-65EX) is primarily intended for use in Class I, Division 2 Groups A, B, C, and D; or non-hazardous locations only. It is suitable for use in oil, gas, and petrochemical manufacturing plants and locations where ignitable gases or vapor may be presented. -
Page 15: Chapter 2: Getting Started
Chapter 2: Getting Started Chapter 2: Getting Started This chapter provides information on how to connect the device to the source of power, connector pinouts and the guideline to turn on/off the Panel PC. -
Page 16: Turning On And Off Your Device
15" ATEX Panel PC User Manual 2.1 Turning On and Off Your Device IMPORTANT: Power button is located under the enclosure on the rear side of the Panel PC. In order to access it, you need to open the enclosure. To Turn ON the device: 1. -
Page 17: Adjusting The Lcd Display Brightness
Chapter 2: Getting Started 2.2 Adjusting the LCD Display Brightness 1. Tap the arrow on the system tray to display the hidden icons. 2. Double-tap the icon ( ) to display the brightness menu. 3. Drag the brightness bar to adjust the brightness level according to your preference. -
Page 18: Connectors
15" ATEX Panel PC User Manual 2.3 Connectors 2.3.1 Wiring Requirements The following common safety precautions should be observed before installing any electronic device: • Strive to use separate, non-intersecting paths to route power and networking wires. If power wiring and device wiring paths must cross make sure the wires are perpendicular at the intersection point. -
Page 19: Connecting The Interface
Chapter 2: Getting Started 2.3.2 Connecting the Interface This Panel PC comes with various interfaces located on the bottom panel. All of these connectors have been shipped with protective caps and tethers. If you wish to detach the tethers, the screws securing them to the bottom panel will need to be removed. -
Page 20: Workstation
15" ATEX Panel PC User Manual 2.3.3 Workstation 2.3.3.1 ATEX Zone 2 The connector cables are located under the enclosure. You need to connect wires first (refer to Chapter 1.4 to find the connector placement), install the pipe, insert the wires into the pipe opening, and then secure the cover box to the Panel PC. -
Page 21: Connector Pinouts
Chapter 2: Getting Started 2.3.4 Connector Pinouts This Panel PC is equipped with four connectors which are IP65 level and fool-proofing design. Use only the cables that are included in the package. The pin assignments of the cables are as follows: IMPORTANT: Minimum input cables size is 18AWG, Minimum temperature rating of the cables is 105°C. - Page 22 15" ATEX Panel PC User Manual 2.3.4.2 Ethernet (LAN) Cable 2.3.4.3 RS-232 Cable (Optional RS-422/485)
- Page 23 Chapter 2: Getting Started 2.3.4.4 Power Adapter NOTE: The adapter is certified by UL, CUL TUV/GS CE, FCC, BSMI, EK, DOIR+C-TICK, CCC, PSE. 2.3.4.5 DC Power Cable (Open Wire) WARNING!/ AVERTISSEMENT! Ensure that the external power source is OFF before connecting or disconnecting the DC IN jack.
-
Page 24: Chapter 3: Installation
15" ATEX Panel PC User Manual Chapter 3: Installation This chapter provides mounting guide for all available mounting options and hardware installation instructions. Pay attention to cautions and warning to avoid any damages. -
Page 25: Cable Mounting Considerations
Chapter 2: Getting Started 3.1 Cable Mounting Considerations For a nice look and safe installation, make sure cables are neatly hidden behind the Panel PC. Refer to Chapter 2.3 for the cable installation instruction. CAUTION/ ATTENTION Follow mounting instructions and use recommended mounting hardware to avoid the risk of injury. -
Page 26: Vesa Mount
15" ATEX Panel PC User Manual 3.3.1 VESA Mount 3.3.1.1 Wall Mount Standalone Stainless Panel PC comes with VESA Mount solution. Follow the instruction below to complete mounting. Tools needed: Size Where used Quantity Appearance Screw M3x 6 Secure the metal plate to the bottom side Secure the box cover on the top side... - Page 27 Chapter 2: Getting Started Mounting Steps: Step 1 First, you need to open the enclosure (box cover) to install VESA Plate to the enclosure of the Panel PC. *with customer’s bracket Exploded drawing: Item No. Description Top cover lid of the enclosure (Only for IB32 model) Bottom cover plate of the enclosure The conduit...
- Page 28 15" ATEX Panel PC User Manual To open the enclosure, follow the steps below: Description Picture 1. Turn the Panel PC face down 2. Loosen screws (M4 x 6) on two metal plates that secure enclosure to the Panel PC from each side; 3.
- Page 29 Chapter 2: Getting Started Step 2 After you opened the box cover, install VESA plate to the enclosure. To install VESA Plate, follow the steps below: Description Picture 1. Fasten four Philips M5x10 flathead screws from the inside of the box top cover.
- Page 30 15" ATEX Panel PC User Manual Step 3 Align all the wires and insert into the pipe opening (refer to Chapter 2.3 for pipe installation instructions). Step 4 Secure the cover box on both top (three screws) and bottom (four screws) sides with M3 x 6 Philips flathead screws, and fasten the screws (M3 x 6) that secure box cover on the left and right sides;...
- Page 31 Chapter 2: Getting Started Step 6 Carefully mount the device to the fixture (for ex. wall). Step 7 When the installation is complete; plug the power cord into a grounded AC outlet. Turn on the power. 3.3.1.2 Swing Arm The device can be installed on a swing arm. You can purchase swing arm from RAM Mount. NOTE: You need to secure VESA Plate to the Panel PC enclosure with four M5x10 screws from outside and fasten metal nuts from inside.
-
Page 32: Chapter 4: Maintenance
15" ATEX Panel PC User Manual Chapter 4: Maintenance This chapter provides information on regular cleaning and maintenance procedures. Follow all the recommendations included in this chapter in order to ensure long product lifecycle. -
Page 33: Cleaning The Display Screen
Chapter 4: Maintenance 4.1 Cleaning the Display Screen • Wipe the screen with a clean, soft, lint-free cloth. This removes dust and other particles. Do not use acetone, ethyl alcohol, toluene, ethyl acid or methyl chloride to clear the panel. It may permanently damage the display screen. -
Page 34: Chapter 5: Bios Setup Utility
15" ATEX Panel PC User Manual Chapter 5: BIOS Setup Utility BIOS Setup Utility is a program for configuration basic Input / Output system settings of the Panel PC for optimum use. This chapter provides information on how to use BIOS setup, its functions and menu. -
Page 35: When And How To Use Bios Setup
Chapter 5: BIOS Setup Utility 5.1 When and How to Use BIOS Setup To enter the BIOS setup, you need to connect an external USB keyboard, press <Del> key when the prompt appears on the screen during start up. The prompt screen shows only few seconds, you need to press <Del>... -
Page 36: Bios Menu
15" ATEX Panel PC User Manual 5.3 BIOS Menu 5.3.1 Main Menu When you enter BIOS setup, the first menu that appears on the screen is the main menu. The Main menu displays the basic information about yoursystem including BIOS version, processor RC version, system language, time, and date. -
Page 37: Advanced Menu
Chapter 5: BIOS Setup Utility 5.3.2 Advanced Menu The advanced menu also uses to set configuration of the CPU and other system devices. There are sub menus on the left frame of the screen. Important: Handle advanced BIOS settings page with caution. Any changes can affect the operation of your computer. - Page 38 15" ATEX Panel PC User Manual BIOS Setting Description Setting Option Effect Miscellaneous Configures Miscellaneous Enter Opens Configuration Parameters submenu CSM Configuration Configures CSM Parameters Enter Opens submenu USB Configuration Configures USB Settings Enter Opens submenu Platform Trust Configures Platform Trust Enter Opens Technology...
- Page 39 Chapter 5: BIOS Setup Utility 5.3.2.2 F81866 Super IO Configuration You can use the screen to select options for Super IO Configuration, and change the value of the option selected. A description of the selected item appears on the right side of the screen. For items marked with ►, please press <Enter>...
- Page 40 15" ATEX Panel PC User Manual GPI0 Port Configuration You can use the screen to change GPI0 Port setting. Use these items to set parameters related to PIN3-PIN14 Control. 5.3.2.3 Hardware Monitor You can check PC Health Status parameters such as system temperature, fan speed etc.
- Page 41 Chapter 5: BIOS Setup Utility 5.3.2.4 S5 RTC Wake Settings Wake System from S5 with fixed time setting Wake system from S5 enables or disables system wake on alarm event. It allows you to wake up the system in a certain time. Select Fixed Time to set the system to wake on the specified time.
- Page 42 15" ATEX Panel PC User Manual Wake system from S5 after dynamic time setting Select Dynamic Time to set the system to wake on the current time + increase minute (s). 5.3.2.5 CPU Configuration Press <Enter> to view current CPU configuration and make settings for the following sub-items.
- Page 43 Chapter 5: BIOS Setup Utility BIOS Setting Description Setting Option Effect Socket CPU This item contains Enter Open sub-menu Information socket specific CPU information. CPU Thermal Thermal control Enter Open sub-menu Configuration Limit CPUID Limits CPIID Disabled/ Enable/Disable Maximum Maximum Enabled this function Execute Disable...
- Page 44 15" ATEX Panel PC User Manual 5.3.2.7 Thermal Configuration BIOS Setting Description Setting Option Effect Critical Trip Specifies the 90C, 87C, 85C, Select the Point temperature at which the 79C, 71C, disable OS will shut down the 63C,55C,47C, temperature for system 39C, 31C, 23C, the system to...
- Page 45 Chapter 5: BIOS Setup Utility 5.3.2.8 IDE Configuration BIOS Setting Description Setting Option Effect Serial- ATA Responsible for Enabled/ Enable or disable this function (SATA) supporting chipset drives Disabled with SATA interface. SATA Speed Allows forcing the speed Gen1 The maximum speed will be Support limit SATA II ports limited to 150 MB/s...
- Page 46 15" ATEX Panel PC User Manual BIOS Setting Description Setting Option Effect Serial- ATA The option turns on or off Enabled/ Turn on (Enabled) or turn off Port 0 Port 0 of SATA channels Disabled (Disabled) Port 0 of standard IDE / SATA- controller chipset.
- Page 47 Chapter 5: BIOS Setup Utility 5.3.2.10 CSM Configuration BIOS Setting Description Setting Option Effect CSM Support The Compatibility Support Module Enabled/ Enable or disable (CSM) is a component of the UEFI Disabled the Compatibility firmware that provides legacy BIOS Support Module compatibility by emulating a BIOS environment, allowing legacy operating systems and some option...
- Page 48 15" ATEX Panel PC User Manual 5.3.2.11 USB Configuration BIOS Setting Description Setting Option Effect Legacy USB User can enable or Disable Will keep USB devices Support disable USB port. available only for EFI applications. Enable Enable all the USB devices USB 3.0 User can enable or Enable...
- Page 49 Chapter 5: BIOS Setup Utility 5.3.2.12 Platform Trust Technology BIOS Setting Description Setting Option Effect fTPM Trusted Platform Module Enabled/Disabled Enables or parameters disables this function...
- Page 50 15" ATEX Panel PC User Manual Security Configuration BIOS Setting Description Setting Option Effect Trusted Execution Enabled/Disabled Enables or Technology parameters disables this function TXE HMRFPO TXE HMRFPO Enabled/Disabled Enables or parameters disables this function TXE Firmware TXE Firmware Update Enabled/Disabled Enables or Update parameters...
-
Page 51: Chipset Menu
Chapter 5: BIOS Setup Utility 5.3.3 Chipset Menu For items marked with ►, please press <Enter> for more options. BIOS Setting Description Setting Option Effect High Precious Allow to set up High Enabled/ Enables/Disables Timer Precious Timer Disabled this function settings Restore AC This function allows to... - Page 52 15" ATEX Panel PC User Manual 5.3.4 Security Menu In the Security menu, users can set administrator password, user password, and HDD security configuration. BIOS Setting Description Setting Option Effect Administrator Displays whether or not Enter Enter password Password an administrator password has been set.
- Page 53 Chapter 5: BIOS Setup Utility 5.3.5 Boot Configuration The Boot menu sets the sequence of the devices to be searched for the operating system. The bootable devices will be automatically detected during POST and shown here, allowing you to set the sequence that the BIOS use to look for a boot device from which to load the operating system.
- Page 54 15" ATEX Panel PC User Manual BIOS Setting Description Setting Option Effect USB Key Drive USB Key Drive BBS Priorities Enter Open sub-menu BBS Priorities Hard Disk Drive Hard Disk Drive BBS Priorities Enter Open sub-menu BBS Priorities Network Drive Network Drive BBS Priorities Enter Open sub-menu...
- Page 55 Chapter 5: BIOS Setup Utility BIOS Setting Description Setting Option Effect Save Changes This saves the changes to the <YES> Save changes and Exit CMOS and exits the BIOS Setup program. Discard This exits the BIOS Setup <YES> Saves the Changes and without saving the changes made changes...
-
Page 56: Using Recovery Wizard To Restore Computer
15" ATEX Panel PC User Manual 5.4 Using Recovery Wizard to Restore Computer IMPORTANT: Before starting the recovery process, be sure to backup all user data, as all data will be lost after the recovery process. Follow the procedure below to enable quick one-key recovery procedure: •... -
Page 57: Chapter 6: Technical Support
Chapter 5: BIOS Setup Utility Chapter 6: Technical Support This chapter includes technical support documents and software developing kit (SDK). If any problem occurs fill in problem report form enclosed and immediately contact us. -
Page 58: Software Developer Support
15" ATEX Panel PC User Manual 6.1 Software Developer Support Download SDK from Winmate Download Center. 6.2 Problem Report Form Stainless Flat Touch Series Customer name: Company: Tel.: Fax: E-mail: Date: Product Serial Number: ________________________________________________________________ Problem Description: Please describe the problem as clearly as possible. Detailed description of the occurred problem will allow us to find the best solution to solve the problem as soon as possible. -
Page 59: Appendix
Appendix Appendix Appendix A: Product Specifications Model Name R15IB3S-65EX R15ID3S-65EX Item Specifications Specifications System Specifications: Processor Intel® Celeron N2930, 2.16 GHz Intel Atom® N2600 (1M Cache, 1.6 GHz) System Chipset Intel® SoC Intel® NM10 BIOS AMI BIOS AMI BIOS System Memory... - Page 60 Measured at maximum backlight and high CPU load. Accessories and Integrated Options may vary depending on your configuration. The product shown in this user manual is a standard model. For diagrams that contain customized or optional I/O, please contact the Winmate Sales Team for more information.
-
Page 61: Appendix B: Touchscreen
Appendix Appendix B: Touchscreen This section includes information on projected capacitive touchscreen (p-cap), its technology and specifications. Overview Projected Capacitive Touch (PCAP) technology is a variant of capacitive touch technology. All PCAP touch screens are made up of a matrix of rows and columns of conductive material, layered on sheets of glass. - Page 62 Winmate Inc. 9F, No.111-6, Shing-De Rd., San-Chung District, New Taipei City 24158, Taiwan, R.O.C www.winmate.com Copyright © 2022 Winmate Inc. All rights reserved.
Need help?
Do you have a question about the R15ID3S-65EX and is the answer not in the manual?
Questions and answers