Table of Contents
Advertisement
Quick Links
SPECO 960H series
I
I
I
I
I
n
n
n
n
n
n
n
te
e
e
e
e
n
n
n
n
n
n
n
s
s
s
s
s
s
s
s
s
s
s
i
i
i
i
i
i
i
i
i
i
i
i
i
i
i
i
f
f
f
f
f
f
f
f
i
i
i
i
W
W
W
W
W
e
e
e
e
e
e
e
e
e
e
d
d
d
d
d
g
g
g
g
g
g
g
g
g
e
e
e
e
e
C
C
C
C
C
C
C
C
C
C
C
C
C
HINT81H
H H H H H H H H H H H H H H
e
e
e
e
e
e
e
r
r
r
r
r
r
r
r
r
r
r
r
r
r
H
H
H
H
H
H
H
H
H
H
H
H
H
H
H
H
H
H
H
I
I
I
I
I
I
I
n
n
n
n
n
n
n
n
n
n
n
n
n
d
d
d
d
d
d
d
d
a
a
a
a
a
a
a
a
a
a
m
m
m
m
m
m
m
m
m
m
m
e
e
e
e
e
e
e
e
e
e
e
e
e
e
e
e
e
e
e
r
r
r
r
r
r
r
r
r
r
r
a
a
a
a
a
a
o
o
o
o
o
o
o
o
o
o
o
o
o
o
o
o
o
o
o
o
r
r
r
/
/
/
/
/
/
/
/
/
/
/
/
/
O
O
O
O
O
O
O
u
u
u
u
u
u
u
u
u
u
u
t
t
t
t
t
t
d
d
d
d
d
Installation and
Operation Manual
o
o
o
o
o
o
o
o
o
o
o
o
r
r
r
r
r
r
r
Advertisement
Chapters
Table of Contents

Subscribe to Our Youtube Channel
Related Manuals for Speco Intensifier H HINT81H


Summary of Contents for Speco Intensifier H HINT81H
- Page 1 SPECO 960H series H H H H H H H H H H H H H H HINT81H Installation and Operation Manual...
- Page 2 User Information C A U T I O N RISK OF ELECTRIC SHOCK DO NOT OPEN CAUTION! TO REDUCE THE RISK OF ELECTRIC SHOCK, DO NOT REMOVE COVER (OR BACK). NO USER SERVICEABLE PARTS INSIDE. REFER SERVICING TO QUALIFIED SERVICE PERSONNEL. Explanation of two Symbols The lightning flash with arrowhead symbol, within an equilateral triangle, is intended to...
- Page 3 Regulatory Notice This equipment has been tested and found to comply with limits for a Class A digital device, pursuant to part 15 of the FCC Rules. These limits are designed to provide reasonable protection against harmful interference when the equipment is operated in a commercial environment.
-
Page 4: Table Of Contents
Contents Important Safety Instructions Features Composition 3.1. Parts Installation 4.1. Connection 4.1.1. Make the connections 4.2. Camera mounting Name and Functions 5.1. Camera controls 5.1.1. Menu navigation 5.1.2. Monitoring and switches Operating Camera 6.1. Camera OSD menu 6.2. PRESET 6.3. EXPOSURE 6.3.1. - Page 5 D-WDR (Digital Wide Dynamic Range), DEFOG 6.6.2.1. OFF – Disable 6.6.2.2. D-WDR 6.6.2.3. DEFOG 6.7. SPECO DNR – Digital Noise Reduction 6.8. IMAGE 6.8.1. SHARPNESS – To adjust SHARPNESS of the image. 6.8.2. CHROMA – To adjust the color intensity of the image. 6.8.3.
-
Page 6: Important Safety Instructions
Important Safety Instructions Read these instructions. Keep these instructions. Heed all warnings. Follow all instructions. Clean only with a dry cloth. Do not block any ventilation openings. Install in accordance with the manufacturer's instructions. Do not install unit near any heat sources such as radiators, heat registers, stoves, or other apparatus (including amplifiers) that produce heat. -
Page 7: Features
– Adjustable sharpness enhancement [700 TV Lines] – Adjustable privacy mask [8 masks] – Adjustable motion detection [4 areas] – SPECO DNR [Digital Noise Reduction] – INTENSIFIER [X32] – BLC [Backlight Compensation] – POSI / NEGA – MIRROR [Horizontal] –... -
Page 8: Composition
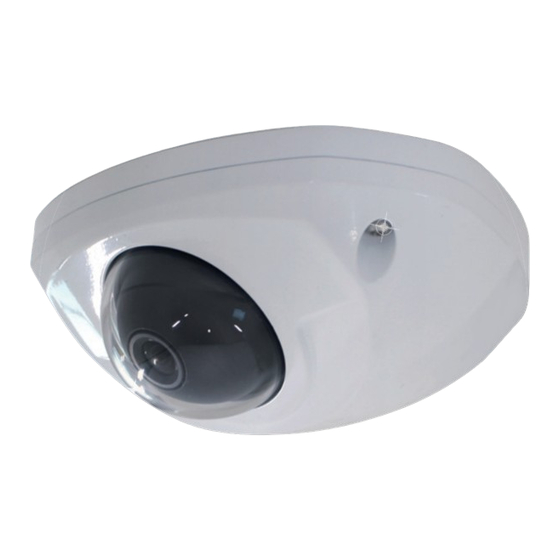
Composition 3. 1. Parts The camera unit consists of the following parts: Parts Guide pattern Plastic anchors Rubber pad Dome base Mounting screws Dome cover L-wrench for dome cover mounting • CAUTION: Installation should only be performed by qualified service personnel in accordance with the National Electrical Code or applicable local codes. -
Page 9: Installation
Installation 4. 1. Connection Connecting to Power and Video 4.1.1. Make the connections • The wire is non-polarized. • Use 24V AC power source or 12V DC power source. Video Output 12V DC 24V AC Function Terminal Color Remarks Video Output Yellow 1.0 Vp-p Power Input... -
Page 10: Name And Functions
Name and Functions 5. 1. Camera controls LEFT RIGHT < – – > LEFT RIGHT < – – > DOWN DOWN 5.1.1. Menu navigation Parts Remarks Move the cursor up in the screen. Down Move the cursor down in the screen. Left Move the cursor left in the screen. -
Page 11: Operating Camera
Operating Camera 6. 1. Camera OSD menu S PECO TE C H PRESET INDOOR, OUTDOOR, LOW LIGHT, HALLWAY, LOBBY(D-WDR), ELEVATOR LENS BRIGHTNESS 0 ~ 20 AUTO, 1/60, 1/120, 1/250, 1/500, 1/700, SHUTTER 1/1K, 1/1600, 1/2500, 1/5K, 1/7K, 1/10K, 1/30K, 1/60K, 1/120K OFF, ON 0 ~ 20 INTENSIFY... - Page 12 D-WDR / RETURN DEFOG MODE DEFOG DEFOG LEVEL LOW, MIDDLE, HIGH RETURN SPECO DNR OFF, LOW, MIDDLE, HIGH 0 ~ 20 SHARPNESS 0 ~ 20 CHROMA GAMMA 0.35, 0.40, 0.45, 0.50, 0.55, 0.60, 0.65, 0.70 PED. LV. 0 ~ 20...
-
Page 13: Area
AREA 1 ~ 4 DISPLAY OFF, ON SENSITIVITY 0 ~ 30 0 ~ 54 (NTSC) MOTION BOTTOM 1 ~ 55 (NTSC) LEFT 0 ~ 217 (NTSC) RIGHT 1 ~ 218 (NTSC) RETURN IMAGE AREA 1 ~ 8 DISPLAY OFF, ON BLACK, GRAY-1, GRAY-2, GRAY-3. -
Page 14: Preset
Use UP and DOWN buttons to move the cursor to a desired menu item and user LEFT/ RIGHT buttons to change its option. LEFT / RIGHT SPECO TECH PRESET INDOOR MAIN SETUP EXIT 6. -
Page 15: Flk (Flickerless)
6.3.4. FLK (FLICKERLESS) Select this when you experience picture flicker, this happens when there is a clash with the installed lighting frequency. ON: Hold shutter speed (NTSC: 1/100) 6.3.5. AGC (Auto Gain Control) It is possible to adjust it within 0 ~ 20 using the LEFT or RIGHT button. When the Low illumination: The higher the gain level, the brighter the picture but the higher the noise. -
Page 16: Day / Night
6. 5. DAY / NIGHT – You can set the day and night switching mode. – Select DAY/NIGHT using the UP and DOWN buttons, and then press MENU to enter the DAY/NIGHT setup. – Available options are AUTO, DAY, NIGHT, EXTERN and IRED. 6.5.1. -
Page 17: Night - For Black And White Mode Only
6.5.3. NIGHT – For BLACK and WHITE mode only. Select B/W using the LEFT or RIGHT button and press the MEUN button to activate DAY/NIGHT option. DAY/NIGHT MODE NIGHT BURST RETURN MODE You can select NIGHT using the LEFT or RIGHT button. BURST You can select between ON/OFF using the LEFT or RIGHT button. -
Page 18: Ired
6.5.5. IRED To switch between COLOR or BLACK and WHITE depending on Photo sensor or AGC data. Select IRED using the LEFT or RIGHT button and press the MEUN button to activate DAY/NIGHT option. DAY/NIGHT MODE IRED DELAY TIME 3 SEC BURST IR LED INTELLI. -
Page 19: Hlc - Force Blocking The Bright Part
BACKLIGHT BACKLIGHT D-WDR/DEFOG RETURN BACKLIGHT MODE LEVEL MIDDLE DISPLAY BOTTOM LEFT RIGHT RETURN – MODE: Select MODE using the UP or DOWN button. You can select between OFF, BLC, HLC using the LEFT or RIGHT button. – LEVEL (Adjust level of the BLC function): You can select between LOW, MIDDLE, HIGH using the LEFT or RIGHT button. -
Page 20: D-Wdr (Digital Wide Dynamic Range), Defog
– LEVEL (Adjust level of the DEFOG function): You can select between LOW, MIDDLE, HIGH using the LEFT or RIGHT button. 6. 7. SPECO DNR – Digital Noise Reduction – To reduce the image noise especially during the low ambient lighting conditions. -
Page 21: Image
6. 8. IMAGE – Select IMAGE using the UP or DOWN button and press the MENU button to activate IMAGE option. 6.8.1. SHARPNESS – To adjust SHARPNESS of the image. You can adjust the sharpness from 0 ~ 20 using the LEFT or RIGHT button. -
Page 22: Motion - Motion Detect
6.8.7. MOTION – Motion detect Press the MENU button to activate MOTION option. 6.8.7.1. OFF – Disable 6.8.7.2. ON MOTION AREA DISPLAY SENSITIVITY BOTTOM LEFT RIGHT RETURN • AREA: To specify MOTION detection area. You can select from area 1 ~ 4 position using the LEFT or RIGHT button. •... -
Page 23: Bottom
6.8.8. PRIVACY Select PRIVACY using the UP or DOWN button and select ON using the LEFT or RIGHT button. Press the MENU button to activate PRIVACY option. 6.8.8.1. OFF – Disable 6.8.8.2. ON PRIVACY PRIVACY AREA AREA DISPLAY DISPLAY SENSITIVITY BLUE SENSITIVITY BLUE... -
Page 24: Off - Disable
6. 9. SYSTEM – Select SYSTEM using the UP or DOWN button and press the MENU button to activate SYSTEM mode. 6.9.1. OSD – On Screen Display Select OSD using the UP or DOWN button and press the MENU button to activate the OSD mode. SYSTEM CAM ID SYNC... -
Page 25: Cam Id - Camera Id (Rs-485 Communication Id)
6.9.2. CAM ID – CAMERA ID (RS-485 Communication ID) You can select between the range 000 ~ 255 using the LEFT or RIGHT button. • NOTE: When the INITIAL is set, the CAM ID is remained previous selected CAM ID. 6.9.3. -
Page 26: Exit
6. 10. EXIT – Select EXIT using the UP or DOWN button. You can exit out from the OSD MENU by selecting menu button. 6.10.1. SAVE Change item is saved automatically when you change a menu. 6.10.2. PRESET – In the state of the EXIT, press menu button exit. Located in the exit menu the menu cursor, if you press the left/right keys, reset is displayed. -
Page 27: Troubleshooting
Troubleshooting 7. 1. Resolving problems The following table is intended to help identify the causes of malfunctions and correct them where possible. Malfunction Solution Check that the power cord and line No image connection between the camera and on screen. monitor are fixed properly. -
Page 28: Technical Data
1/60, 1/120, 1/250, 1/500, 1/700, 1/1K, 1/1.6K, 1/2.5K, Manual Shutter 1/5K, 1/7K, 1/10K, 1/30K, 1/60K, 1/120K Image Sensor 1/3 inch High Sensitivity CCD SPECO DNR OFF, LOW, MIDDLE, HIGH Intensify OFF, X2, X4, X8, X16, X32, X64, X128, X256, X512 Min Illumination INTENSIFIER (X32) : Color 0.005 Lux... - Page 29 8. 2. Dimensions 129.8 (5.11) 85 (3.34) 17 (0.66) mm (inch) Technical Data...
Need help?
Do you have a question about the Intensifier H HINT81H and is the answer not in the manual?
Questions and answers