Table of Contents
Advertisement
Quick Links
INSTRUCTION
MANUAL
Speco Technologies is constantly developing product improvements.
We reserve the right to modify product design and specifications without notice and without incurring any obligation.
EN771T IMX323_speco LPR.indd 1
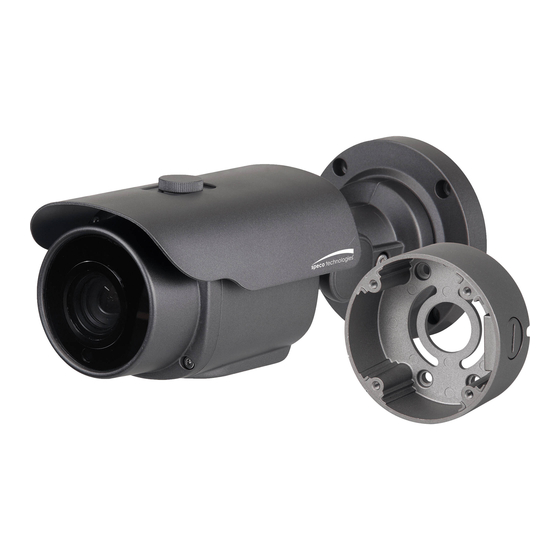
2MP TVI LPR Camera
HLPR1G
(IR Bullet Camera)
Rev. 07/01/2020
2020-07-22 오후 3:20:16
Advertisement
Table of Contents

Related Manuals for Speco HLPR1G


Summary of Contents for Speco HLPR1G
- Page 1 MANUAL 2MP TVI LPR Camera HLPR1G (IR Bullet Camera) Speco Technologies is constantly developing product improvements. We reserve the right to modify product design and specifications without notice and without incurring any obligation. Rev. 07/01/2020 EN771T IMX323_speco LPR.indd 1 2020-07-22 오후 3:20:16...
-
Page 2: Table Of Contents
Contents Contents ............2 ◑ Precautions ..........3, 4 ◑ Safety Instructions ........5 ◑ Package Contents ........6 ◑ Camera Installation ........7-9 ◑ Specifications ..........10 ◑ Camera Dimension ........11 ◑ Features ............12 ◑ OSD Menu Details ........13- 26 ◑... -
Page 3: Precautions
Precautions Do not install the camera in Do not install the camera under Do not touch the front lens of the extreme temperature conditions. unstable lighting conditions. camera. Only use the camera under conditions Severe lighting change or flicker can This is one of the most important parts of where temperatures are between cause the camera to work improperly. - Page 4 CAUTION RISK OF ELECTRIC SHOCK DO NOT OPEN CAUTION:TO REDUCE THE RISK OF ELECTRIC SHOCK DO NOT REMOVE COVER(OR BACK). NO USER-SERVICEABLE PARTS INSIDE. REFER SERVICING TO QUALIFIED SERVICE PERSONNEL. ISO14001 The lightning flash with an arrowhead symbol, within an equilateral triangle is intended to alert the user to the presence of uninsulated dangerous voltage within the product's enclosure that may be of sufficient magnitude to constitute a risk of electric shock to persons.
-
Page 5: Safety Instructions
Safety Instructions Precautions for use ◑ This camera should be installed by qualified personnel only ◑ There are no user serviceable parts inside ◑ Do not disassemble this camera other than to make initial adjustments ◑ Use a UL approved regulated 24 volt AC or 12 volt DC power supply ◑... -
Page 6: Package Contents
Package Contents Please make sure that the following items are included in the Package: 1) HLPR1G Included Junction Box 1 Power Jack ● 1 Mount Base Sticker ● 1 Wrench ● Set Screw ● - 3 Tapping Screws 4x25 - 4 Hexagon Socket Screws M4x14... -
Page 7: Camera Installation
Camea Installation - 7 - EN771T IMX323_speco LPR.indd 7 2020-07-22 오후 3:20:24... - Page 8 Camea Installation Compatibility 1) HLPR1G INTCM - 8 - EN771T IMX323_speco LPR.indd 8 2020-07-22 오후 3:20:25...
- Page 9 Camea Installation 1. HLPR1G WALL ANCHOR, WHT, 6X30, PLASTIC, 4EA JUNCTION BOX SCREW-TAP, SLV, SUS, BH_4X25, TP1, 3EA SCREW-MS, WHT, SUS, PH_M4X10, 3EA SCREW-MS, WHT, SUS, PH_M4X14, 4EA - 9 - EN771T IMX323_speco LPR.indd 9 2020-07-22 오후 3:20:26...
-
Page 10: Specifications
2MP TVI LPR Camera 5-50mm Motorized Lens ■ HLPR1G (5-50mm) ● 5-50mm motorized auto iris varifocal lens, (10x auto focus / zoom) ● High-contrast imaging performance that delivers sharp, clear license-plate captures ● Full HD 1080p over coax (HD-TVI) ● Supports full UTC control over coax for Zoom / Focus and camera's OSD ●... -
Page 11: Camera Dimension
Camera Dimension 1) HLPR1G 3.74” 9” - 11 - EN771T IMX323_speco LPR.indd 11 2020-07-22 오후 3:20:29... -
Page 12: Features
TV system is switchable 'NTSC' or 'PAL' with built-in OSD. ● Intelligent Function An extraordinary technology that enables Speco Technologies TVI to become the ultimate solution by providing intelligent features based on motion detection. It also strengthens crime prevention and detection. -
Page 13: Osd Menu Details
How to Set Up the camera menu ● Setup Menu MENU MENU SETUP AF MODE AUTO/MANUAL SCANNING HALF/FULL 1.2MOTOR ONEPUSHAF ON-PUSHING SYNC TDN OFF/ON INITIAL ON-PUSHING RETURN (LEFT,RIGHT PUSH : EXIT----SAVE/EXIT----CANCEL) BRIGHTNESS 0~20 default : 10 AUTO NORMAL/DEBLUE SHUTTER MANUAL 1/30, 1/60, 1/120, 1/240, 1/480, 1/1000, 1/2000, 1/4000, 1/8000, 1/15000, 1/30000 2.EXPOSURE FLICKER... - Page 14 How to Set Up the camera menu ● Setup Menu LED LEVEL 0~10 default : 10 D -> N THRES 0~20 default : 8 N -> D THRES 0~20 default : 15 DELAY LOW, MIDDLE, HIGH RETURN (LEFT,RIGHT PUSH : EXIT----SAVE/EXIT----CANCEL) AUTO/AWB/AWC-SET ↓...
- Page 15 Menu Set Up Menu setting can be selected by the button inside the camera. 1. Press the set button. * The Set Up menu will be displayed on the monitor. MENU SETUP 1.2MOTOR 2.EXPOSURE 3.BACKLIGHT 4.DAY&NIGHT B&W 5.WHITE BAL AUTO 6.DNR 7.IMAGE 8.SYSTEM...
- Page 16 3. Change menu settings using the Left or Right button. * Available values or Status are displayed by pressing the Left or Right buttons. Press the button until desired value / status is displayed. 4. After Changing the setting move the arrow indicator to EXIT and press the SET button to EXIT.
- Page 17 1. 2MOTOR AF MODE AUTO SCANNING HALF ONEPUSHAF SYNC TDN INITIAL RETURN ◆ AF MODE - AUTO : Adjust zoom and focus automatically. - MANUAL : Adjust zoom and focus manually. ◆ SCANNING - HALF : Adjust auto focusing when lens focus fixed. If lens focus is not fixed well, adjust focus manually. - FULL : Scanning full size of scree and adjust autofocusing.
- Page 18 2. EXPOSURE BRIGHTNESS 10 IIIIIIIIIIIIIIIIIII| SHUTTER AUTO SENS-UP 10 IIIIIIIIIIIIIIIIIII| RETURN ◆ BRIGHTNESS : The brightness can be adjusted. The brightness control range is 1~20. ◆ SHUTTER : Select one of AUTO/MANUAL/FLICKER to adjust the electronic shutter speed. MANUAL mode can adjust shutter speed 1/30~1/3,0000. →...
- Page 19 MENU SETUP 1.2MOTOR 2.EXPOSURE 3.BACKLIGHT 4.DAY&NIGHT B&W 5.WHITE BAL AUTO 6.DNR 7.IMAGE 8.SYSTEM 9.EXIT ◆ Off : Deactivated status. ◆ HLC : This function is used to surpress or strong light source (for example, headlights of cars during nighttime) so that other subjects can be seen in more detail. If you select HCL, a submenu appears where you can make finer adjustments.
- Page 20 ◆ WDR : The WDR (Wide Dynamic Range) function works to correct excessive light within the frame to produce a usable image. When the image has simultaneous bright and dark areas, it makes both areas distinct. If you select WDR, a submenu appears where you can make finer adjustments. -MODE[NORMAL/ROI] can be selected.
- Page 21 ◆ AUTO : Automatically, It shifts into the color mode in the bright environment and the B/W mode in the low light condition. It can adjust the delay time, starting brightness and end brightness according to the ambient conditions by pressing the Set button. - D>N THRES : 0~20 CDS THRES level adjustable.
- Page 22 ◆ AUT0 : Use this mode when the color temperature is from 3,000k to 8,000k. ◆ AWB : The function to search for the color which is matched well with the ambient environment. ◆ AWC→SET : After letting camera focus on the blank white paper to the best condition of current lighting environment, press the SET button.
- Page 23 IMAGE When selecting, the following submenu will appear. MENU SETUP 1.2MOTOR 2.EXPOSURE 3.BACKLIGHT 4.DAY&NIGHT B&W 5.WHITE BAL AUTO 6.DNR 7.IMAGE 8.SYSTEM 9.EXIT Here you can optimise the image quality by adjusting different options. 7. IMAGE SHARPNESS 10 IIIIIIIIIIIIIIIIIII| COLOR GAIN 10 IIIIIIIIIIIIIIIIIII| GAMMA MIRROR...
- Page 24 ◆ PRIVACY [ON, OFF] : This is used to hide certain areas on the monitor. You can designate each different 16 area. The size of a designated area can be adjusted. The color of a privacy area can be selected various colors. When you select the return, the setting values in this function menu are saved, then get out of this menu.
- Page 25 MENU SETUP 1.2MOTOR 2.EXPOSURE 3.BACKLIGHT 4.DAY&NIGHT B&W 5.WHITE BAL AUTO 6.DNR 7.IMAGE 8.SYSTEM 9.EXIT 8.SYSTEM OUTPUT FRAME RATE 1080_30P FREQ 60HZ IMAGE RANGE FULL LANGUAGE CAM TITLE RESET RETURN ◆ OUTPUT : TVI - Y GAIN [0~32] : The more higher level, The more brighter image it is. - CB GAIN [0~255] : The more higher level, The more bluer image it is.
- Page 26 ◆ CAM TITLE [ON/ OFF] : It can be adjusted when you get into the Cam Title menu. This function is to display the letters of the camera on the monitor. The 15 camera titles can be displayed and the location of the camera title on the screen can be adjusted. Move the triangular indicator to CAMERA ID using the Up and Down button on the Setup menu and then Set to On using the Left or Right button.
-
Page 27: Trouble Shooting
Trouble Shooting PROBLEM POSSIBLE CAUSE Nothing appears on ☞Check the power cable, power supply output and video the screen. connection between the camera and monitor. ☞Are the camera lens or the lens glass dirty? Clean the lens / glass with a soft clean cloth. The image on the ☞Adjust the monitor controls, as required. - Page 28 EN771T IMX323_speco LPR.indd 28 2020-07-22 오후 3:20:35...
- Page 29 EN771T IMX323_speco LPR.indd 29 2020-07-22 오후 3:20:36...
- Page 30 EN771T IMX323_speco LPR.indd 30 2020-07-22 오후 3:20:36...
- Page 31 EN771T IMX323_speco LPR.indd 31 2020-07-22 오후 3:20:36...
- Page 32 200 New Highway Amityville, NY 11701 631-957-8700 1 800 645 5516 www.specotech.com EN771T IMX323_speco LPR.indd 32 2020-07-22 오후 3:20:36...
Need help?
Do you have a question about the HLPR1G and is the answer not in the manual?
Questions and answers