Table of Contents
Advertisement
Quick Links
Advertisement
Table of Contents

Related Manuals for KEENCUT Material Guide


Summary of Contents for KEENCUT Material Guide
- Page 1 Worktop Material Guide Installation Manual The world’s finest cutting machines www.keencut.com +44 (0) 1536 263158 sales@keencut.co.uk (UK HQ) Scan the QR code or +1 (716) 748 6203 sales@keencut.com (US sales) click here to view this document online > Page 1 of 17...
-
Page 2: Table Of Contents
2.4 Fix and calibrate the measuring scale ........................2.5 Fixing in position ............................... 3. Squaring check ..............................3.1 Squaring check - Material Guide on the right ......................3.2 Squaring check - Material Guide on the left ......................The world’s finest cutting machines www.keencut.com +44 (0) 1536 263158 sales@keencut.co.uk (UK HQ) -
Page 3: Before You Start
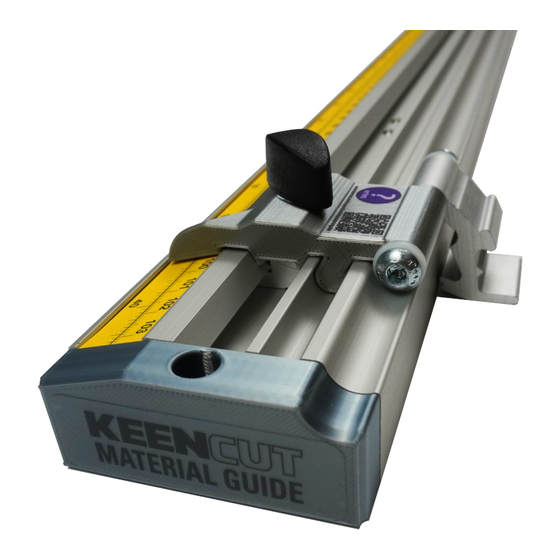
1.1 Overview The Material Guide has been designed to work on any worksurface to assist with measuring and aligning rigid and semi- rigid materials. It can be used in conjunction with many Keencut cutters or most other situations where precise positioning of workpieces is required. -
Page 4: Preparation
Worktop Material Guide Installation Manual 1.2 Preparation Components and tools included The world’s finest cutting machines www.keencut.com +44 (0) 1536 263158 sales@keencut.co.uk (UK HQ) Scan the QR code or +1 (716) 748 6203 sales@keencut.com (US sales) click here to view this document online >... - Page 5 Worktop Material Guide Installation Manual Tools not included Assembly time You will need approximately 30 minutes to install and calibrate your WorkTop Material Guide. The world’s finest cutting machines www.keencut.com +44 (0) 1536 263158 sales@keencut.co.uk (UK HQ) Scan the QR code or +1 (716) 748 6203 sales@keencut.com (US sales)
-
Page 6: Installation
2.1 Quick Start The installation process should follow a set procedure: A. Place the Material Guide in its approximate position and fix down using the four in-board screws. B. The two adjusters can then be used to fine-tune its position and angle: –... -
Page 7: Position
Worktop Material Guide Installation Manual 2.2 Position IMPORTANT: Be careful to place the Material Guide so it will not be in the way of any moving equipment or provide finger traps. Lay the Material Guide in the desired position using measured pencil lines or paper tape to assist. -
Page 8: Fine Adjustment
Fine squaring corrections can be made using a 4mm Allen (hex) in the two squaring adjusters. Firstly, make any required adjustment to the angle of the Material Guide. This can be carried out using either adjustment screw. When turning the screw clockwise the Material Guide at that point advances, rotating the guide about the other adjuster. -
Page 9: Fix And Calibrate The Measuring Scale
Take a piece of rigid card or similar board around 50cms (18”) long and place it against the Material Guide such that one end overlaps the ‘zero’ position. Slide the measuring stop onto the Material Guide and fasten it in position against the edge of the board. - Page 10 Once the scale sticker is firmly attached, slide the measuring scale out of the Material Guide to give easy access to the end of the measuring scale. Trim the excess using a craft knife. Slide the measuring scale back into position, Check the scale measures accurately, and make any fine adjustments by pressing down on the scale with finger and thumb and sliding left or right.
-
Page 11: Fixing In Position
Worktop Material Guide Installation Manual 2.5 Fixing in position Once fully aligned slide on the material stop before inserting the two end caps. Use the remaining two screws to fix the plastic end caps in position with a posi head screwdriver. -
Page 12: Squaring Check
3.1 Squaring check - Material Guide on the right If the Material Guide is being used as a 90 degree gauge on a cutting table the following test can be used to calibrate the squareness. You will need an easy to cut semi-rigid board (art board, grey board, thin PVC foamboard or similar) at least 60cms (24”) or larger will be required. - Page 13 Repeat again, X should be on the opposite edge to the Material Guide Rotate the board a final time and align the board with the Material Guide, if it has been positioned at exactly 90 degrees edge X will align with the cut line. The world’s finest cutting machines www.keencut.com...
- Page 14 Worktop Material Guide Installation Manual If not, edge X will show a discrepancy with the cut line that is FOUR TIMES THE ERROR. Remove the two screws in the plastic end caps if fitted and rotate the fine adjustment screws to remove a QUARTER of the discrepancy.
-
Page 15: Squaring Check - Material Guide On The Left
3.2 Squaring check - Material Guide on the left If the Material Guide is being used as a 90 degree gauge on a cutting table the following test can be used to calibrate the squareness. You will need an easy to cut semi-rigid board (art board, grey board, thin PVC foamboard or similar) at least 60cms (24”) or larger will be required. - Page 16 Repeat again, X should be on the opposite edge to the Material Guide Rotate the board a final time and align the board with the Material Guide, if it has been positioned at exactly 90 degrees edge X will align with the cut line. The world’s finest cutting machines www.keencut.com...
- Page 17 Worktop Material Guide Installation Manual If not, edge X will show a discrepancy with the cut line that is FOUR TIMES THE ERROR. Remove the two screws in the plastic end caps if fitted and rotate the fine adjustment screws to remove a QUARTER of the discrepancy.
Need help?
Do you have a question about the Material Guide and is the answer not in the manual?
Questions and answers