
Related Manuals for Welbilt maxx pro


Summary of Contents for Welbilt maxx pro
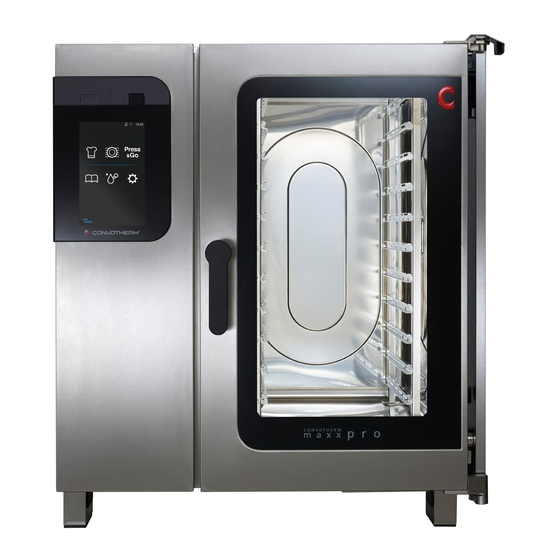
- Page 1 Combi oven Convotherm UI easyTouch maxx pro / deluxe Operating instructions - Original, ENG Advancing Your Ambitions...
-
Page 3: Table Of Contents
Table of Contents Table of Contents General information About these operating instructions Essential reading relating to safety The user interface at a glance How the user interface works The basic layout of the software The Home Screen Power-save mode Custom cooking - nice and easy Custom cooking at a glance The 'Custom cooking' menu Principles of entering a cooking profile... - Page 4 Table of Contents The workflow for semi-automatic oven cleaning Making settings in the Settings menu The Settings at a glance The 'Settings' menu Operating the appliance in the event of a fault 10.1 Working in the event of a fault 10.2 The 'Error messages' menu Operating instructions...
-
Page 5: General Information
1 General information 1 General information 1.1 About these operating instructions Purpose These operating instructions are intended to provide all those people who use the combi oven with an overview of the easyTouch software and how to use it, and to enable them to perform essential tasks using the software. -
Page 6: Essential Reading Relating To Safety
1 General information 1.2 Essential reading relating to safety Safety information in the customer documentation Safety information relating to the combi oven appears only in the installation manual and the user manual. The installation manual contains the safety information for the tasks covered by the manual and which are performed when moving, setting up and installing the appliance and when putting the appliance into service and removing the appliance from service. -
Page 7: The User Interface At A Glance
2 The user interface at a glance 2 The user interface at a glance 2.1 How the user interface works Principle of operation easyTouch is the name of the user interface for your combi oven. You can operate this software easily with one finger via a touch screen. All the combi-oven functions can be accessed from various menus of this easyTouch user interface. -
Page 8: The Basic Layout Of The Software
2 The user interface at a glance 2.2 The basic layout of the software The software layout Header Main area Footer The indicators in the header The header displays various indicators depending on the menu and function selected: Selected cooking profile Indicates a selected cooking profile e.g. - Page 9 2 The user interface at a glance The main area The main area displays various buttons and indicators depending on the menu and function selected. Light grey button Function available or selected e.g. core temperature Dark grey button Function unavailable or not selectable Scroll bar Scroll vertically to display more menu content Close the menu...
-
Page 10: The Home Screen
2 The user interface at a glance 2.3 The Home Screen Access to the Home Screen Access to this menu is password-protected and available only to certain users, for instance in order to edit existing cooking profiles. The functions in the Home Screen Access to all the available operating modes ■... - Page 11 2 The user interface at a glance The Home Screen buttons The main area of the menu displays the main functions for selection: Custom cooking 'Custom cooking' operating mode Opens the 'Custom cooking' menu Manual input of cooking profiles Regenerating 'Regenerate' operating mode Opens the 'Regenerating' menu Manual input of cooking profiles...
-
Page 12: Power-Save Mode
2 The user interface at a glance 2.4 Power-save mode The power-save mode screen The combi oven automatically goes into standby mode if it has not been used for about 30 minutes. The 'Power-save mode' screen is displayed. To resume operation, press the button in the centre of the screen. -
Page 13: Custom Cooking - Nice And Easy
3 Custom cooking - nice and easy 3 Custom cooking - nice and easy 3.1 Custom cooking at a glance Access to the 'Custom cooking' menu Access to this menu is password-protected and available only to certain users, for instance in order to edit existing cooking profiles. -
Page 14: The 'Custom Cooking' Menu
3 Custom cooking - nice and easy 3.2 The 'Custom cooking' menu The functions in the 'Custom cooking' menu Manual input of cooking data for your custom cooking profile; see page 18 to find out how ■ Making changes to cooking data for a cooking profile opened from the cookbook ■... - Page 15 3 Custom cooking - nice and easy The Cooking parameters buttons Cooking temperature Enter the cooking temperature in °C or °F Cooking time Enter the cooking time in hh:mm:ss Core temperature Enter the core temperature in °C or °F Fan speed Regulate the flow speed in the cooking chamber, 5 levels HumidityPro...
- Page 16 3 Custom cooking - nice and easy The buttons in the Start/Stop area Start Start a cooking operation Start with preheat After starting, heat the cooking chamber to the set cooking temperature with the appliance door closed Start with cool down After starting, cool the cooking chamber to the set cooking temperature with the appliance door open and fan running Stop...
- Page 17 3 Custom cooking - nice and easy The Message step buttons Message step Function that displays messages during the cooking opera‐ tion Text field Enter a text prompt which is to be displayed during the cooking operation Pause cooking Set the display period of a message, i.e. until it is confirmed by the operator or until the cooking operation is finished Repeat step Repeat the last cooking step...
-
Page 18: Principles Of Entering A Cooking Profile
3 Custom cooking - nice and easy 3.3 Principles of entering a cooking profile This is how you enter a cooking profile via the 'Custom cooking' menu Select a cooking mode e.g. convection Enter the cooking temperature. Enter the cooking time. Select a level for the fan speed. -
Page 19: Saving Cooking Profile In The Cookbook
3 Custom cooking - nice and easy 3.4 Saving cooking profile in the cookbook Requirements You have entered a new cooking profile in the 'Custom cooking' menu. ■ This is how you save a new cooking profile in the cookbook Press the 'Save' button In the 'Custom cooking' menu. Enter a new cooking profile name. -
Page 20: The 'Custom Cooking' Process Menu
3 Custom cooking - nice and easy 3.5 The 'Custom cooking' process menu The functions available during the cooking process Adjust the cooking temperature ■ Use TrayTimer ■ Cancel a cooking operation ■ Layout of the 'Custom cooking' process menu Cooking settings Progress and action indicator Action area The cooking settings buttons... - Page 21 3 Custom cooking - nice and easy The Progress and action indicator buttons Do not open the ap‐ Indicator that the appliance door must not be opened during pliance door the process Appliance door open Indicator that the appliance door must be open during the process Text Prompt...
- Page 22 3 Custom cooking - nice and easy Inserting the smoker Prompt to place the smoker drawer into the cooking cham‐ drawer Removing the smok‐ Prompt to remove the smoker drawer from the cooking er drawer chamber Cooking operation Cooking operation has started It runs until the end of the displayed cooking time.
-
Page 23: The Cooking Workflow For 'Custom Cooking
3 Custom cooking - nice and easy 3.6 The cooking workflow for 'Custom cooking' Requirements You have consulted the user manual to acquaint yourself with the hazards and safety precautions ■ and also with the tasks and cooking workflows. You have entered a cooking profile in the 'Custom cooking' menu; see page 18 to find out how. ■... -
Page 24: The 'Smoker' Cooking Workflow
3 Custom cooking - nice and easy 3.7 The 'Smoker' cooking workflow Requirements You have consulted the user manual to acquaint yourself with the hazards and safety precautions ■ and also with the tasks and cooking workflows. You have entered a cooking profile in the 'Smoker' cooking method in the 'Custom cooking' menu. ■... -
Page 25: Regenerating - Nice And Easy
4 Regenerating - nice and easy 4 Regenerating - nice and easy 4.1 Overview of regenerating Access to the 'Regenerating' menu Access to this menu is password-protected and available only to certain users, for instance in order to edit existing cooking profiles. The cooking modes From the 'Regenerating' menu you can enter your cooking profiles via the following cooking modes: À... -
Page 26: The 'Regenerating' Menu
4 Regenerating - nice and easy 4.2 The 'Regenerating' menu The functions in the 'Regenerating' menu Manual input of cooking data for your custom cooking profile; the procedure is similar to see page ■ Making changes to cooking data for a cooking profile opened from the cookbook ■... - Page 27 4 Regenerating - nice and easy The Cooking parameters buttons Cooking temperature Enter the cooking temperature in °C or °F Cooking time Enter the cooking time in hh:mm:ss Core temperature Enter the core temperature in °C or °F Core temperature, external Input of the core temperature in °C or °F, external core tem‐...
- Page 28 4 Regenerating - nice and easy The buttons for cooking step navigation Delete cooking step Delete all data for the current cooking step Go back one cooking step Scroll back one step in the cooking profile Cooking steps view Indicates current cooking step / total number of cooking ■...
- Page 29 4 Regenerating - nice and easy The Auto Start buttons Auto Start Function that delays the start time for a cooking operation Start time Set the planned starting time for a cooking profile Finish time Set the planned finish time for a cooking profile Select one or more days of the week Start Start Auto Start...
-
Page 30: Quick-Select Cooking With Press&Go
5 Quick-select cooking with Press&Go 5 Quick-select cooking with Press&Go 5.1 How Press&Go works Quick-select cooking with Press&Go In 'Press&Go' you can provide the user with specific preset cooking profiles, which the user can now simply select but not modify. The user selects the cooking profile required and the cooking operation starts running immediately. -
Page 31: The 'Press&Go' Menu
5 Quick-select cooking with Press&Go 5.2 The 'Press&Go' menu The functions in the 'Press&Go' menu Open tried and-tested cooking profiles and start cooking immediately ■ Select shelf levels; see page 33 to find out how ■ Layout of the 'Press&Go' menu Indicates selected cooking profile Shelf levels Additional cooking profiles... - Page 32 5 Quick-select cooking with Press&Go The shelf buttons Number identifying the available shelves Empty Shelf unoccupied Selected Shelf selected Indicates the cooking profile by Photo ■ Name of cooking profile ■ Cooking Shelf occupied and cooking operation in progress Indicates the cooking profile by Photo ■...
-
Page 33: Selecting Shelves In Press&Go
5 Quick-select cooking with Press&Go 5.3 Selecting shelves in Press&Go This is how you select the shelves for cooking in Press&Go Select a product group from the 'Press&Go' menu. Select a cooking profile. Select one or more shelves. Caution: The next step of loading the food onto the shelves will start the cooking operation immediately. -
Page 34: The 'Press&Go' Cooking Workflow
5 Quick-select cooking with Press&Go 5.4 The 'Press&Go' cooking workflow Requirements You have consulted the user manual to acquaint yourself with the hazards and safety precautions ■ and also with the tasks and cooking workflows. You have selected a cooking profile in the 'Press&Go' menu, selected the shelves, and followed ■... -
Page 35: Cancelling A Cooking Operation
5 Quick-select cooking with Press&Go 5.5 Cancelling a cooking operation This is how you cancel the cooking operation Select one or more shelves. Confirm within 5 seconds. Operating instructions... -
Page 36: Automatic Cooking With Convosense
6 Automatic cooking with ConvoSense 6 Automatic cooking with ConvoSense 6.1 How ConvoSense works Automatic cooking with ConvoSense When cooking with the ConvoSense assistance system, certain preset cooking profiles are recognized automatically by the appliance as foods are loaded, and they are then cooked fully automatically. The operator loads the food and the cooking sequence begins immediately after the appliance door is closed. -
Page 37: The 'Convosense' Menu
6 Automatic cooking with ConvoSense 6.2 The 'ConvoSense' menu Layout of the 'ConvoSense' menu Shelf levels Cooking profiles The shelf buttons Number identifying the available shelves Empty No food recognized for this shelf level Recognized Food recognized for this shelf level Indicates the cooking profile by Photo ■... - Page 38 6 Automatic cooking with ConvoSense The Action buttons Confirm Confirm action Cancel Cancel operation The Progress and action indicator buttons Preheat Preheats the cooking chamber to the set cooking tempera‐ ture Cool down Cools the cooking chamber to the set cooking temperature Loading Prompt to load the shelf levels for food recognition Open...
-
Page 39: Selecting Shelf Levels In Convosense
6 Automatic cooking with ConvoSense 6.3 Selecting shelf levels in ConvoSense This is how to select the shelf levels for cooking in ConvoSense Wait until the cooking chamber has been preheated. Follow the prompt to load food. Load food onto one shelf level. Check to be sure the correct cooking profile and the desired shelf level were recognized au‐... -
Page 40: The 'Convosense' Cooking Workflow
6 Automatic cooking with ConvoSense 6.4 The 'ConvoSense' cooking workflow Requirements You have consulted the user manual to acquaint yourself with the hazards and safety precautions ■ and also with the tasks and cooking workflows. You have carried out the software prompt to load the food. ■... -
Page 41: Cancelling A Cooking Operation
6 Automatic cooking with ConvoSense 6.5 Cancelling a cooking operation This is how you cancel the cooking operation Select one or more shelves. Confirm within 5 seconds. Operating instructions... -
Page 42: Working With The Cookbook
7 Working with the cookbook 7 Working with the cookbook 7.1 How the cookbook works Access to the 'Cookbook' menu Access to this menu is password-protected and available only to certain users, for instance to edit ex‐ isting cooking profiles, product groups and favourites. The cooking profiles in the cookbook A cooking profile is a combination of cooking parameters such as cooking temperature and cooking time. -
Page 43: The 'Cookbook' Menu
7 Working with the cookbook 7.2 The 'Cookbook' menu The functions in the 'Cookbook' menu Open cooking profiles and then edit and re-save them via the 'Custom cooking' menu. ■ Group and manage similar cooking profiles in product groups ■ Define favourites for cooking with 'Press&Go' ■... - Page 44 7 Working with the cookbook The buttons in the area for selecting product groups / cooking profiles Product group e.g. Crois‐ Icons of all available product groups sants Cooking profile e.g. Crois‐ Icons of all available cooking profiles sants Tick Tick your selection Scroll bar Scroll vertically to display more menu content...
-
Page 45: Creating A New Product Group
7 Working with the cookbook 7.3 Creating a new product group This is how you create a new product group in the cookbook In the 'Cookbook' menu in the 'Product groups' main selection area, press the 'Edit' button. Press the 'Add' button. Enter a new product name. -
Page 46: Deleting A Cooking Profile From The Cookbook
7 Working with the cookbook 7.4 Deleting a cooking profile from the cookbook This is how you delete a cooking profile from the cookbook In the 'Cookbook' menu, in the 'Cooking profiles' main selection area, press the 'Edit' button. Select the cooking profile. Press the 'Delete' button. -
Page 47: Cleaning
8 Cleaning 8 Cleaning 8.1 Summary of the cleaning operations What do I need in order to clean? In order to clean the cooking chamber of your combi oven, you need a cleaning profile suitable for the level of soiling. You can select this cleaning profile in the 'Cleaning' menu. Before starting a cleaning process, you must always be familiar with the rules and hazard warnings in the user manual that relate to safe working during cleaning, and you must follow the instructions given there. -
Page 48: The 'Cleaning' Menu
8 Cleaning 8.2 The 'Cleaning' menu The functions in the 'Cleaning' menu Select and run cleaning profiles ■ Layout of the 'Cleaning' menu Main selection Select cleaning profile Cleaning favourites Cleaning options Action area The Main selection buttons Favourites Cleaning profiles available for quick selection ConvoClean+ Selection of fully automatic cleaning profiles, cleaning lev‐... - Page 49 8 Cleaning The Cleaning profile selection buttons Flush Rinse with water only Ecological cleaning duration Regular Standard cleaning program length Express Short cleaning program length Cleaning level 1 Light cleaning level Cleaning level 2 Middle cleaning level Cleaning level 3 Intense cleaning level Cleaning level 4 Very intense cleaning level...
- Page 50 8 Cleaning The Cleaning options buttons ConvoCare Clean just with rinse aid from connected cannisters ConvoCare S Clean using only rinse aid from single-measure dispensing bottles Semi-automatic Semi-automatic oven cleaning with user guidance Tick Tick your selection The Action area buttons Add cleaning favourite Save Save selected cleaning parameter as cleaning favourite...
- Page 51 8 Cleaning The Schedule buttons Select one or more days of the week Start time Set the planned start time Reminder Set the number of reminders Interval Set the time interval for reminders Cancel Cancel operation Confirm Confirm the interval Slider Display cleaning profile in overview Operating instructions...
-
Page 52: Principles Of Entering A Cleaning Profile
8 Cleaning 8.3 Principles of entering a cleaning profile This is how you enter a cleaning profile via the 'Cleaning' menu In the 'Fully automatic cleaning' main selection, select a cleaning mode, such as Eco. Select a cleaning level, e.g. Level 2. Select the extra function of Steam disinfection. -
Page 53: The 'Cleaning' Process Menu
8 Cleaning 8.4 The 'Cleaning' process menu The functions available during the cleaning process Cancel the cleaning operation ■ Layout of the 'Cleaning' process menu Indicators area Progress and action indicator Action area Operating instructions... - Page 54 8 Cleaning The Progress and action indicator buttons Do not open the ap‐ Indicator that the appliance door must not be opened during pliance door the process Appliance door open Indicator that the appliance door must be open during the process Text Prompt...
- Page 55 8 Cleaning The Action area buttons Stop Stop a cleaning operation that is in progress Confirm Confirm action Cancel Cancel operation Operating instructions...
-
Page 56: The Workflow For Fully Automatic Oven Cleaning
8 Cleaning 8.5 The workflow for fully automatic oven cleaning Requirements You have consulted the user manual to acquaint yourself with the hazards and safety precautions ■ and also with the tasks and cleaning workflows. The appliance door is closed. ■ A cleaning profile for fully automatic oven cleaning has been selected. -
Page 57: The Workflow For Semi-Automatic Oven Cleaning
8 Cleaning 8.6 The workflow for semi-automatic oven cleaning Requirements You have consulted the user manual to acquaint yourself with the hazards and safety precautions ■ and also with the tasks and cleaning workflows. The appliance door is closed. ■ Semi-automatic oven cleaning has been selected. ■... - Page 58 8 Cleaning Operating instructions...
-
Page 59: Making Settings In The Settings Menu
9 Making settings in the Settings menu 9 Making settings in the Settings menu 9.1 The Settings at a glance Appliance settings and access permissions You can make appliance settings for your combi oven via the 'Settings' menu. Access to appliance settings can be linked to access permissions for different user groups, in other words they can only be accessed with a password. -
Page 60: The 'Settings' Menu
9 Making settings in the Settings menu 9.2 The 'Settings' menu Layout of the 'Settings' menu Settings Selection Action area Operating instructions... - Page 61 9 Making settings in the Settings menu The Settings buttons Device information Information about the appliance and the software version General settings Language setting for the user interface ■ Date and time settings ■ Selection of °C or °F for the temperature display ■...
- Page 62 9 Making settings in the Settings menu The Action area buttons Confirm Confirm selection Delete Clear selection Add new Cancel Cancel operation Operating instructions...
-
Page 63: Operating The Appliance In The Event Of A Fault
10 Operating the appliance in the event of a fault 10 Operating the appliance in the event of a fault 10.1 Working in the event of a fault The procedure in the event of a fault If the 'System error' indicator is displayed, this indicates that a system fault has occurred during opera‐ tion of your combi oven. -
Page 64: The 'Error Messages' Menu
10 Operating the appliance in the event of a fault 10.2 The 'Error messages' menu Layout of the 'Error messages' menu Display area for errors Operating instructions... - Page 66 Order no. Additional technical documentation can be found in the download center at : www.convotherm.com Welbilt offers fully-integrated kitchen systems and our products are backed by KitchenCare aftermarket parts and service. Welbilt’s portfolio of award- ® winning brands includes Cleveland™, Convotherm ®...
Need help?
Do you have a question about the maxx pro and is the answer not in the manual?
Questions and answers