Welbilt Convotherm 4 easyTouch Operating Instructions Manual
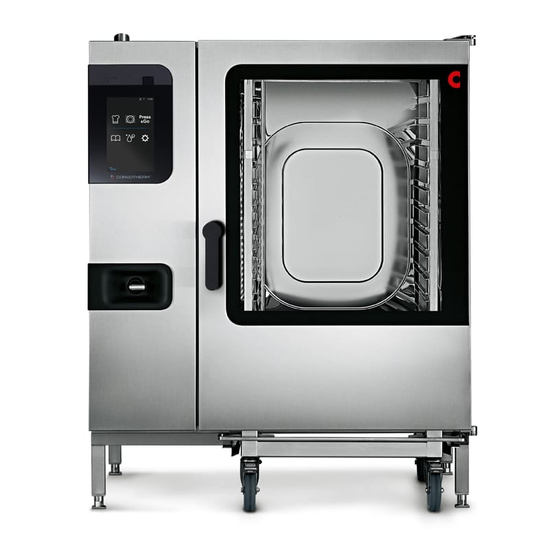
Combi oven
Hide thumbs
Also See for Convotherm 4 easyTouch:
- Training manual (156 pages) ,
- Installation manual (120 pages) ,
- User manual (116 pages)

Related Manuals for Welbilt Convotherm 4 easyTouch


Summary of Contents for Welbilt Convotherm 4 easyTouch
- Page 1 Combi Oven Read this manual before using Convotherm 4 easyTouch Operating instructions - Original, ENG...
-
Page 3: Table Of Contents
Table of Contents Table of Contents General Customer Documentation Structure Safety Information That Must Be Read without Exception About These Operating Instructions easyTouch at a Glance The easyTouch Home Page easyTouch Functions at a Glance Using easyTouch Using the On-Screen Help The On-Screen Help Home Page Accessing the On-Screen Help Pages On-Screen Help Page Navigation Tools... - Page 4 Table of Contents Using the Cookbook The Cookbook at a Glance Cookbook Page Accessing a Cooking Profile in the Cookbook Delete the Cooking Profile from the Cookbook Selecting Cooking Profiles as Favorites Creating New Product Groups Adding Cooking Profiles to a Product Group Using Press&Go / Press&Go+ Press&Go at a Glance Press&Go page...
-
Page 5: General
1 General 1 General Purpose of this section This section explains how to use these operating instructions. 1.1 Customer Documentation Structure Customer documentation parts The customer documentation for the combi oven is made up of the following: Installation manual ■ Operating manual ■... - Page 6 1 General Operating instructions and on-screen help topics The operating instructions and the on-screen help are intended for briefed staff and trained qualified staff; see 'Staff Requirements' in the operating manual. For units with easyTouch, the operating in‐ structions will be an extract from the on-screen help pages. The operating instructions and the on-screen help cover the following topics: User interface layout: Goes over the combi oven's user interface ■...
-
Page 7: Safety Information That Must Be Read Without Exception
1 General 1.2 Safety Information That Must Be Read without Exception Safety information found in the documentation for the customer Only the installation manual and operating manual provide safety information for the combi oven. The installation manual provides safety information for the transportation, setup, installation, placing- into-operation, and removal-from-service tasks it describes. -
Page 8: About These Operating Instructions
1 General 1.3 About These Operating Instructions Purpose The purpose of these operating instructions is to provide everyone working with/on the combi oven with an overview of its easyTouch software and how to use it, as well as to enable them to carry out basic tasks with the software. - Page 9 1 General Section / sub-section Purpose Target group Configuring Settings in Explains how to configure the various settings Cook easyTouch Operating the Combi Explains how to operate the unit in the event of a malfunc‐ Cook Oven in the Event of a tion Operator Malfunction...
-
Page 10: Easytouch At A Glance
2 easyTouch at a Glance 2 easyTouch at a Glance Purpose of this section easyTouch is the name of the control interface for your combi oven. These operating instructions provide an overview of the most important functions in the easyTouch user interface. Moreover, they go over the most important input pages and the buttons and functions available on them. - Page 11 2 easyTouch at a Glance Home page If the software is ready for operation, the home page for the easyTouch user interface will be dis‐ played: Used to indicate the page you are cur‐ rently on Current time of day Cook Used to access the 'Cooking' page Can be used to manually enter cooking...
-
Page 12: Easytouch Functions At A Glance
2 easyTouch at a Glance 2.2 easyTouch Functions at a Glance Operating modes and cooking methods easyTouch features the following operating modes, which can be selected on the 'Cooking' page: Steam ■ Combi-steam ■ Convection ■ Smoker (available only in units with the ConvoSmoke option) ■... -
Page 13: Using Easytouch
2 easyTouch at a Glance 2.3 Using easyTouch Navigating in easyTouch All of the combi oven’s functions can be accessed using the easyTouch user interface’s various pa‐ ges. These pages will provide the functions in the form of buttons. The 'Home page' functions as a hub with buttons that can be used to access all other pages in the easyTouch user interface (the 'Cooking' page, for example): The input pages in easyTouch The buttons on the various input pages can be used to select the functions you want:... -
Page 14: Using The On-Screen Help
3 Using the On-Screen Help 3 Using the On-Screen Help Purpose of this section The on-screen help pages explain, in detail, how to use the easyTouch user interface and operate the combi oven. These pages can be viewed on the user interface. This section explains how to access the on-screen help pages and navigate through them. -
Page 15: Accessing The On-Screen Help Pages
3 Using the On-Screen Help 3.2 Accessing the On-Screen Help Pages Accessing the On-screen help home page To access the on-screen help home screen directly, press the question mark icon at the bottom of the easyTouch user interface's Home page: Accessing a description for the screen that is currently open To directly access a description of the easyTouch user interface screen that is currently open, press the question mark icon at the bottom of the screen:... -
Page 16: On-Screen Help Page Navigation Tools
3 Using the On-Screen Help 3.3 On-Screen Help Page Navigation Tools Navigation bar Press to go to the on-screen help home page Press to go to the list of user videos Double-arrow 'Back' button: Press to go back to the screen you were view‐ ing before the current one Single-arrow 'Back' button: Press to go one screen back in the on-screen... - Page 17 3 Using the On-Screen Help Text area buttons Press to view the list of topics for 'easyTouch User Interface Layout' Press to get a description of the following screen Press to get additional information Press to get instructions Navigating Within Process Page Descriptions Press to get a description of the following proc‐...
-
Page 18: Entering Cooking Profiles - Cooking Page
4 Entering Cooking Profiles – Cooking Page 4 Entering Cooking Profiles – Cooking Page Purpose of this section This section provides an overview of your combi oven's operating modes, as well as of its available cooking functions (ACS+ extra functions) and extra functions. In addition, it goes over the various spe‐ cial cooking methods and explains how they work. - Page 19 4 Entering Cooking Profiles – Cooking Page Available extra functions The extra functions for your cooking profiles available on the 'Extra functions' page will depend on the operating mode you are using: Steam Combi-steam Hot air Smoker Program lock Program lock Program lock Program lock ■...
-
Page 20: Cooking Page
4 Entering Cooking Profiles – Cooking Page 4.2 Cooking page Indicates that you are on the cooking screen Current time of day Steam operating mode, selected Combi-steam operating mode Hot air operating mode Used to enter a cooking temperature Shows the cooking temperature you entered Pressing on the temperature value will show the current oven temperature Press to enter the cooking time... - Page 21 4 Entering Cooking Profiles – Cooking Page Manual steaming Press to add moisture to the oven cavity dur‐ ing the cooking sequence. Available only dur‐ ing the cooking sequence. Start Press to start the cooking sequence Start with pre-heating Press to heat up the oven cavity while the unit door is closed Start with Cool down Press to cool down the oven cavity with the fan...
-
Page 22: Extra Functions Page
4 Entering Cooking Profiles – Cooking Page 4.3 Extra Functions Page Indicates that you are on the cooking screen Current time of day Low-temperature cooking (LT cooking) Cooking method in which food is cooked at low temperatures. Features three settings Delta-T cooking Cooking method in which the oven tempera‐... -
Page 23: Entering A Cooking Profile With A Cooking Time
4 Entering Cooking Profiles – Cooking Page 4.4 Entering a Cooking Profile with a Cooking Time Entering the cooking profile Press the 'Cook' button on the 'Home page'. On the 'Cooking' page, select one of the operating modes, e.g., 'Hot air'. Press the 'Cooking temperature' button. -
Page 24: Entering A Cooking Profile That Uses The Core Temperature Measurement
4 Entering Cooking Profiles – Cooking Page 4.5 Entering a Cooking Profile That Uses the Core Temperature Measurement Function Entering the cooking profile Press the 'Cook' button on the 'Home page'. On the 'Cooking' page, select one of the operating modes, e.g., 'Hot air'. Press the 'Cooking temperature' button. -
Page 25: Entering A Cooking Profile With A Preset Start Time
4 Entering Cooking Profiles – Cooking Page 4.6 Entering a Cooking Profile with a Preset Start Time Applications The 'Preset start time' extra function can be used to set the start time for a cooking sequence to a defined time in the future. If you enter a start time, the unit will calculate the ending cooking time by itself based on the cooking profile's duration. -
Page 26: Entering A Cooking Profile With Bakepro
4 Entering Cooking Profiles – Cooking Page 4.7 Entering a Cooking Profile with BakePro Applications The 'BakePro' extra function is a special baking function with steaming. Entering the cooking profile On the 'Cooking' page, select the 'Convection' op‐ erating mode. Enter the cooking data you want (e.g., 'Cooking temperature') for the cooking profile on the 'Cook‐... -
Page 27: Entering A Cooking Profile With Step Prompts
4 Entering Cooking Profiles – Cooking Page 4.8 Entering a Cooking Profile with Step Prompts Applications The 'Message step' extra function is a function that prompts the operator to perform a specific action during a cooking sequence. There are two steps involved in entering a prompt. First, the corresponding text needs to be entered. Then, the time when the prompt will be displayed needs to be selected. - Page 28 4 Entering Cooking Profiles – Cooking Page Next steps: Stopping the cooking sequence. For more information, please refer to page 51 ■ Cook with the cooking profile (for more on how to do this, please refer to the 'How to Cook with ■...
-
Page 29: Entering A Cooking Profile With Grease Management
4 Entering Cooking Profiles – Cooking Page 4.9 Entering a Cooking Profile with Grease Management Applications The 'Grease management' extra function will perform the required automatic grease management tasks during the cooking sequence. The 'Grease management' extra function will only be available in units with the ConvoGrill option. Be‐ fore using this operating mode, the unit needs to be specifically set up for it. -
Page 30: Cooking Page - Smoker
4 Entering Cooking Profiles – Cooking Page 4.10 Cooking page – Smoker Indicates that you are on the cooking screen Current time of day Steam operating mode Combi-steam operating mode Hot air operating mode Smoker operating mode (selected) Used to smoke food; optional Press to enter the smoking time Shows the smoking time Press to select extra functions... -
Page 31: Entering A Cooking Profile That Uses The Smoker
4 Entering Cooking Profiles – Cooking Page 4.11 Entering a Cooking Profile That Uses the Smoker Applications The 'Smoker' operating mode is suitable for smoking food. The 'Smoker' operating mode will only be available in units with the ConvoSmoke option. Before using this operating mode, the unit needs to be specifically set up for it. -
Page 32: Saving The Configured Cooking Profile In The Cookbook
4 Entering Cooking Profiles – Cooking Page 4.12 Saving the Configured Cooking Profile in the Cookbook Prerequisites This section assumes that you are on the 'Cooking' or 'Rethermalization' page. ■ You must have configured a cooking profile already. ■ Saving the Configured Cooking Profile in the Cookbook On the 'Cooking' or 'Rethermalization' page, press the 'Save as cooking profile' button. -
Page 33: Selected Cooking Profile
4 Entering Cooking Profiles – Cooking Page 4.13 Selected cooking profile Various cooking profiles Product ACS+ Baguette, frozen 170°C 15 min Baked potato 180°C 93°C Flan 80°C 35 min Fish sticks 210°C 12 min Leavening baked goods 35°C 3 min Roasted chicken breast 235°C 72°C Fresh carrots... -
Page 34: Entering Special Cooking Methods - Cooking Page
5 Entering Special Cooking Methods – Cooking Page 5 Entering Special Cooking Methods – Cooking Page Purpose of this section This section provides an overview of the various special cooking methods and explains how they work. Moreover, this section contains step-by-step instructions on how to enter cooking profiles using the 'Cooking' page. -
Page 35: Entering A Cooking Profile For The Low-Temperature Cooking Method
5 Entering Special Cooking Methods – Cooking Page 5.2 Entering a Cooking Profile for the Low-Temperature Cooking Method Applications Low-temperature cooking is a cooking method in which food is cooked at low temperatures. This means that a longer cooking time will be required. When using this method, you will always have to use the core temperature probe. - Page 36 5 Entering Special Cooking Methods – Cooking Page Preset hot air cooking data Doneness Cooking Operating mode Cooking Cooking Core tem‐ ACS+ step tempera‐ time in min. perature in ture in °C °C Well-done Hot air Hot air Hot air Hot air Hot air Medium...
-
Page 37: Entering A Cooking Profile For The Delta-T Cooking Method
5 Entering Special Cooking Methods – Cooking Page 5.3 Entering a Cooking Profile for the Delta-T Cooking Method Applications Delta-T cooking is a cooking method in which the oven temperature increases depending on the food's core temperature When using this method, you will always have to use the core temperature probe. Delta-T cooking is particularly well-suited to cooking boiled ham, whole fish, galantine, and custard royale. - Page 38 5 Entering Special Cooking Methods – Cooking Page Next steps: Starting the cooking sequence. For more information, please refer to page 51 ■ Saving the cooking profile in the cookbook. For more information, please refer to page 32 ■...
-
Page 39: Entering A Cooking Profile For The Ecocooking Method
5 Entering Special Cooking Methods – Cooking Page 5.4 Entering a Cooking Profile for the ecoCooking Method Applications ecoCooking is a cooking method in which intelligent pulse technology is used to reduce energy con‐ sumption by 25%. The ecoCooking method has an initial cooking phase and a finishing cooking phase. In the initial cook‐ ing stage, ecoCooking simply uses one of the standard cooking methods in order to quickly transfer heat to the food you are cooking. -
Page 40: Entering A Cooking Profile For The Cook&Hold Cooking Method
5 Entering Special Cooking Methods – Cooking Page 5.5 Entering a Cooking Profile for the Cook&Hold Cooking Method Applications Cook&Hold is a two-stage cooking method. It consists of a cooking phase and a phase in which a spe‐ cific temperature is maintained (the hold phase). During the cooking phase, the food is cooked using the steaming, combi-steam, or hot air operating mode. - Page 41 5 Entering Special Cooking Methods – Cooking Page Confirm your selections. On the 'Cooking' page, change the cooking temper‐ ature for the cooking profile’s hold phase if neces‐ sary. Result: The two-stage 'Cook&Hold' cooking profile has now been entered. Next steps: Starting the cooking sequence.
-
Page 42: Editing A Cooking Step In A Cooking Profile
5 Entering Special Cooking Methods – Cooking Page 5.6 Editing a Cooking Step in a Cooking Profile Applications Cooking steps can be edited when entering a cooking profile on the 'Cooking' page and when select‐ ing a multi-step cooking profile from the 'Cookbook'. During a cooking sequence, only the cooking step that is currently in progress can be modified. -
Page 43: Moving Or Deleting A Cooking Step In A Cooking Profile
5 Entering Special Cooking Methods – Cooking Page 5.7 Moving or Deleting a Cooking Step in a Cooking Profile Applications Cooking steps can be moved and deleted while entering a cooking profile on the 'Cooking' page and when selecting a multi-step cooking profile from the 'Cookbook'. However, cooking steps cannot be moved or deleted during a cooking sequence. -
Page 44: Entering Cooking Profiles - Rethermalization Page
6 Entering Cooking Profiles – Rethermalization Page 6 Entering Cooking Profiles – Rethermalization Page Purpose of this section This section provides an overview of your combi oven's rethermalization functions. The 'Rethermalization' page is covered here, as are the buttons available on it and what these buttons do. -
Page 45: Rethermalization Page
6 Entering Cooking Profiles – Rethermalization Page 6.2 Rethermalization page Indicates that you are on the 'Rethermalization' screen Current time of day à la Carte rethermalization function (selected) Banquet rethermalization function Plate rethermalization function Used to enter a cooking temperature Shows the cooking temperature you entered Pressing on the temperature value will show the current oven temperature Press to enter the cooking time (selected) - Page 46 6 Entering Cooking Profiles – Rethermalization Page Save cooking profile in cookbook Home page Back Settings Help Cookbook...
-
Page 47: Extra Functions Page
6 Entering Cooking Profiles – Rethermalization Page 6.3 Extra Functions Page Indicates that you are on the cooking screen Current time of day Reduced power Function that reduces heat output in order to prevent load peaks during the cooking se‐ quence Program protection (selected) Function that prevents connected energy opti‐... -
Page 48: Entering A Cooking Profile That Uses Rethermalization
6 Entering Cooking Profiles – Rethermalization Page 6.4 Entering a Cooking Profile That Uses Rethermalization Entering the cooking profile Press the 'Rethermalize' button on the 'Home page.' On the 'Rethermalization' page, select one of the rethermalization functions, e.g., 'à la Carte retherm‐ alization.' Press the 'Cooking temperature' button. -
Page 49: Cooking And Rethermalizing Food With Easytouch
7 Cooking and Rethermalizing Food with easyTouch 7 Cooking and Rethermalizing Food with easyTouch Purpose of this section This section provides a general description of a cooking sequence in easyTouch, as well as step-by- step instructions for the most important tasks that need to be carried out when cooking and rethermal‐ izing food. - Page 50 7 Cooking and Rethermalizing Food with easyTouch The Cooking Process Page Example showing an easyTouch cooking process page: Header: Shows the page you are currently on, the cur‐ rent time, and the name of the selected cook‐ ing profile Main process page area: Shows the cooking profile data ■...
-
Page 51: Starting A Cooking Sequence
7 Cooking and Rethermalizing Food with easyTouch 7.2 Starting a Cooking Sequence Prerequisites Before starting a cooking sequence, read and understand the rules, risks, and hazards associated ■ with safely using the unit (as described in the operating manual) and follow all the corresponding instructions. -
Page 52: Using The Cookbook
8 Using the Cookbook 8 Using the Cookbook Purpose of this section This section provides a general description explaining how to use the Cookbook, as well as step-by- step instructions for the most important tasks required in order to use it. The section goes over the 'Cookbook' page and explains the buttons on it and what they do. -
Page 53: Cookbook Page
8 Using the Cookbook 8.2 Cookbook Page Indicates that you are on the 'Cookbook' screen Current time of day Favorites (selected) Selected cooking profile Product groups Cooking profiles grouped together in groups Cooking profiles All the cooking profiles in the cookbook, max. -
Page 54: Accessing A Cooking Profile In The Cookbook
8 Using the Cookbook 8.3 Accessing a Cooking Profile in the Cookbook Accessing a Cooking Profile in the Cookbook Press the 'Cookbook' button while on the 'Home page'. In the 'Cookbook' page, press the 'Cooking profiles' button in order to view all the cooking profiles in the cookbook. -
Page 55: Delete The Cooking Profile From The Cookbook
8 Using the Cookbook 8.4 Delete the Cooking Profile from the Cookbook Delete the Cooking Profile from the Cookbook Press the 'Cookbook' button while on the 'Home page'. In the 'Cookbook' page, press the 'Cooking profiles' button in order to view all the cooking profiles in the cookbook. -
Page 56: Selecting Cooking Profiles As Favorites
8 Using the Cookbook 8.5 Selecting Cooking Profiles as Favorites Selecting Cooking Profiles as Favorites Press the 'Cookbook' button while on the 'Home page'. On the 'Cookbook' page, press the 'Favorites' but‐ ton. On the 'Favorites' page, press the 'Edit favorites' button. -
Page 57: Creating New Product Groups
8 Using the Cookbook 8.6 Creating New Product Groups Creating New Product Groups On the 'Cookbook' page, press the 'Product groups' button. On the 'Product Groups' page, press the 'Edit prod‐ uct groups' button. On the 'Edit Product Groups' page, press the 'Add product group' button. -
Page 58: Adding Cooking Profiles To A Product Group
8 Using the Cookbook 8.7 Adding Cooking Profiles to a Product Group Adding Cooking Profiles to a Product Group On the 'Cookbook' page, press the 'Product groups' button. On the 'Product Groups' page, press the button for the product group you want. On the page for the product group, press the 'Edit product groups' button. -
Page 59: Using Press&Go / Press&Go
9 Using Press&Go / Press&Go+ 9 Using Press&Go / Press&Go+ Purpose of this section This section provides a general description explaining how to use the 'Press&Go' and 'Press&Go+' functions. The section goes over the 'Press&Go' page and explains the buttons on it and what they do. More‐ over, it provides step-by-step instructions for the most important tasks required in order to use the Press&Go function. -
Page 60: Press&Go Page
9 Using Press&Go / Press&Go+ 9.2 Press&Go page Current time of day Product groups or cooking profiles Final baking run, optional Function used to carry out a final baking run after a cooking profile is completed Preset start time, optional Function that can be used to set the start time for a cooking sequence to a defined time in the future Press to scroll down... -
Page 61: The Shelf Levels Page In Press&Go
9 Using Press&Go / Press&Go+ 9.3 The Shelf Levels Page in Press&Go Software user prompt Icon for the selected cooking profile Name of cooking profile Used to select an additional cooking profile Shelf level number Shelf level not in use (gray color) Shelf level selected (yellow color) Shelf level in use, cooking sequence in pro‐... -
Page 62: Selecting And Starting A Cooking Profile
9 Using Press&Go / Press&Go+ 9.4 Selecting and Starting a Cooking Profile Prerequisites Before starting a cooking sequence, read and understand the rules, risks, and hazards associated with safely using the unit (as described in the operating manual) and follow all the corresponding in‐ structions. -
Page 63: Cancelling A Cooking Profile Before It Is Done
9 Using Press&Go / Press&Go+ 9.5 Cancelling a Cooking Profile Before It Is Done Cancelling a Cooking Profile Before It Is Done Select the cooking profile you want to cancel on the 'Cooking In Progress' page. Press the 'Cancel' button within five seconds. On the 'Confirm Cancellation' page, press the 'Con‐... -
Page 64: Entering A Preset Start Time In Press&Go
9 Using Press&Go / Press&Go+ 9.7 Entering a Preset Start Time in Press&Go Applications The 'Preset start time' in Press&Go can be used to set the start time for the cooking sequence for a selected cooking profile to a defined time in the future If you enter a start time, the unit will calculate the ending cooking time by itself based on the cooking profile's duration. -
Page 65: Press&Go+ At A Glance
9 Using Press&Go / Press&Go+ Next steps: Cook with the cooking profile (for more on how to do this, please refer to the 'How to Cook with ■ Your Combi Oven' section in the operating manual) Cancelling a cooking profile before it is done. For more information, please refer to page 63 ■... -
Page 66: Cleaning With Easytouch
10 Cleaning with easyTouch 10 Cleaning with easyTouch Purpose of this section This section provides an overview of the available cleaning profiles, a general description of a cleaning sequence, and step-by-step instructions for the most important tasks required in order to use the sys‐ tem's cleaning features. - Page 67 10 Cleaning with easyTouch The Cleaning Process Page Example showing an easyTouch cleaning user interface: easyTouch header: Shows the page you are currently on, the cur‐ rent time, and the selected cleaning profile Main process page area: Indicates cleaning profile data ■...
-
Page 68: Cleaning Page - Options
10 Cleaning with easyTouch 10.2 Cleaning Page – Options Cleaning screen icon Clean Current time of day Options cleaning system (selected) Press to clean with water or rinse aid only ConvoClean+ cleaning system Press to use fully automatic oven cleaning with cleaning agents supplied from connected can‐... -
Page 69: Cleaning Page - Convoclean
10 Cleaning with easyTouch 10.3 Cleaning Page – ConvoClean+ Cleaning screen icon Clean Current time of day Options cleaning system Press to clean with water or rinse aid only ConvoClean+ cleaning system (selected) Press to use fully automatic oven cleaning with cleaning agents supplied from connected can‐... - Page 70 10 Cleaning with easyTouch Home page Back Settings Help...
-
Page 71: Cleaning Page - Semi-Automatic
10 Cleaning with easyTouch 10.4 Cleaning Page – Semi-Automatic Cleaning screen icon Clean Current time of day Options cleaning system Press to clean with water or rinse aid only ConvoClean+ cleaning system Press to use fully automatic oven cleaning with cleaning agents supplied from connected can‐ isters Semi-automatic cleaning system (selected) Press to clean with the program issuing... -
Page 72: Configuring The Fully Automatic Oven Cleaning Profile
10 Cleaning with easyTouch 10.5 Configuring the Fully Automatic Oven Cleaning Profile Configuring the cleaning profile Press the 'Clean' button while on the 'Home page'. On the 'Clean' page, select the 'ConvoClean+' cleaning system. Select the cleaning level you want ('Cleaning level 2', for example). -
Page 73: Starting A Cleaning Sequence
10 Cleaning with easyTouch 10.6 Starting a Cleaning Sequence Prerequisites Before starting a cleaning profile, read and understand the rules, risks, and hazards associated ■ with safely using the unit (as described in the operating manual) and follow all the corresponding instructions. -
Page 74: Configuring Settings In Easytouch
11 Configuring Settings in easyTouch 11 Configuring Settings in easyTouch Purpose of this section This section provides step-by-step instructions for the most important tasks involved in the use of easyTouch's 'Settings'. The section goes over the 'Settings' page and explains the buttons on it and what they do. For more detailed information, please consult the on-screen help pages. -
Page 75: Settings Pages
11 Configuring Settings in easyTouch 11.2 Settings Pages Indicates that you are on the 'Settings' page Current time of day General General unit settings for cooking and cleaning Language Language setting for the user interface Cookbook Used to select a cookbook Service Support for maintenance work and trouble‐... -
Page 76: Setting A Language
11 Configuring Settings in easyTouch 11.3 Setting a language Setting a language Press the 'Settings' button while on the 'Home page', for example In the 'Settings' page, the 'Languages' button. In the 'Languages' screen, select the language you want. Confirm your selections. Result: The language setting will be applied. -
Page 77: Setting A Date And Time
11 Configuring Settings in easyTouch 11.4 Setting a date and time Setting a date and time Press the 'Settings' button while on the 'Home page', for example In the 'Settings' page, press the 'Date/Time' button. In the 'Date/Time' screen, select the date you want. Select the time zone you want. -
Page 78: Configuring Acoustic Signals
11 Configuring Settings in easyTouch 11.5 Configuring Acoustic Signals Configuring Acoustic Signals Press the 'Settings' button while on the 'Home page', for example In the 'Settings' page, the 'Sound' button. On the 'Sound' page, press on the area showing the acoustic signal you want. On the 'Configure Acoustic Signal' page, press the button for the acoustic signal currently selected. -
Page 79: Setting A Password For Press&Go
11 Configuring Settings in easyTouch 11.6 Setting a Password for Press&Go Setting a Password for Press&Go Press the 'Settings' button while on the 'Home page', for example In the 'Settings' page, press the 'Password' button. On the 'Password' page, enter a four-digit pass‐ word using the numbers on the keypad. -
Page 80: Switching From Press&Go To Press&Go
11 Configuring Settings in easyTouch 11.7 Switching from Press&Go to Press&Go+ Switching from Press&Go to Press&Go+ Press the 'Settings' button while on the 'Home page', for example In the 'Settings' page, press the 'General' button. In the 'General' screen, press the 'Oven cavity' but‐ ton. -
Page 81: Configuring Cleaning Settings
11 Configuring Settings in easyTouch 11.8 Configuring Cleaning Settings Configuring general settings Press the 'Settings' button while on the 'Home page', for example In the 'Settings' page, press the 'General' button. In the 'General' screen, press the 'Cleaning' button. On the 'Cleaning' page, check the current settings for ConvoClean+ fully automatic cleaning and change them if necessary. -
Page 82: Configuring Oven Cavity Settings
11 Configuring Settings in easyTouch 11.9 Configuring Oven Cavity Settings Configuring general settings Press the 'Settings' button while on the 'Home page', for example In the 'Settings' page, press the 'General' button. In the 'General' screen, press the 'Oven cavity' but‐ ton. -
Page 83: Configuring Press&Go Settings
11 Configuring Settings in easyTouch 11.10 Configuring Press&Go Settings Configuring general settings Press the 'Settings' button while on the 'Home page', for example In the 'Settings' page, press the 'General' button. On the 'General' page, press the 'Press&Go' but‐ ton. On the 'Press&Go' page, check the current settings for Press&Go and change them as necessary. -
Page 84: Importing Cookbooks
11 Configuring Settings in easyTouch 11.11 Importing Cookbooks Prerequisites You must have a USB flash drive containing cookbook data. ■ Importing Cookbooks Press the 'Settings' button while on the 'Home page', for example In the 'Settings' page, press the 'Import/Export' but‐ ton. -
Page 85: Selecting A Cookbook
11 Configuring Settings in easyTouch 11.12 Selecting a Cookbook Prerequisites You must have imported a cookbook. ■ Selecting a Cookbook Press the 'Settings' button while on the 'Home page', for example In the 'Settings' page, press the 'Cookbook' button. In the 'Cookbook' page, select the cookbook you want. -
Page 86: Operating The Combi Oven In The Event Of A Malfunction
12 Operating the Combi Oven in the Event of a Malfunction 12 Operating the Combi Oven in the Event of a Malfunction Purpose of this section This section explains how to operate your combi oven with easyTouch in the event of a malfunction. It goes over the 'System error' page and explains the buttons on it and what they do. -
Page 87: System Error Page
12 Operating the Combi Oven in the Event of a Malfunction 12.2 System Error Page System error Current time of day List with system errors and error codes Service phone number Press to scroll down Press to confirm the error Press to scroll up Back Settings Fault... - Page 89 Item no. Order No. Additional technical documentation can be found in the download center at : www.convotherm.com Welbilt off ers fully-integrated kitchen systems and our products are ® backed by KitchenCare aftermarket parts and service. Welbilt’s portfolio of award-winning brands includes Cleveland™, Convotherm , Delfi...
- Page 90 Item no. Order No. Additional technical documentation can be found in the download center at : www.convotherm.com Welbilt off ers fully-integrated kitchen systems and our products are ® backed by KitchenCare aftermarket parts and service. Welbilt’s portfolio of award-winning brands includes Cleveland™, Convotherm , Delfi...
Need help?
Do you have a question about the Convotherm 4 easyTouch and is the answer not in the manual?
Questions and answers