
Related Manuals for Welbilt Merrychef eikon e1s


Summary of Contents for Welbilt Merrychef eikon e1s
- Page 1 Microwave combination oven Service and repair guide – USA/Canada Part number: 32Z9001 Read instructions before use...
-
Page 2: Safety Symbols Used In This Document Or On Appliance
eikon e1s Service and repair guide Safety symbols used in this document or on appliance Symbols on appliance Area Symbol Descriptionsosidrive Microwaves warning There is a risk of external and internal burns of body parts following exposure to microwave energy. Electric shock warning There is a risk of electric shock if the appliance is serviced without disconnecting the electrical supply. -
Page 3: Symboles De Sécurité Utilisés Dans Ce Document Ou Sur Appareil
eikon e1s Service and repair guide Symboles de sécurité utilisés dans ce document ou sur appareil Symboles sur l'appareil Zone Symbole Descriptions Alerte micro-ondes Risque de brûlures externes et internes de parties du corps suite à exposition à l'énergie du micro-ondes. - Page 4 eikon e1s Service and repair guide FOR THE INSTALLER, OPERATOR, RESPONSIBLE OWNER WARNING Improper installation, adjustment, alteration, service or maintenance can cause property damage, injury and death. Read the installation, operating and maintenance instructions thoroughly before installing or servicing this equipment. WARNING PRECAUTIONS TO AVOID POSSIBLE EXPOSURE TO EXCESSIVE MICROWAVE...
- Page 5 eikon e1s Service and repair guide À L'ATTENTION DE L'INSTALLATEUR, DE L'OPÉRATEUR, DU PROPRIÉTAIRE RESPONSABLE AVERTISSEMENT L´installation, le réglage, la modification, la réparation ou l´entretien incorrect de cet appareil peut causer des dommages matériels, des blessures ou la mort. Lire attentivement les instructions d´installation, de fonctionnement et d´entretien avant de procéder à...
-
Page 6: Table Of Contents
eikon e1s Service and repair guide Table of contents Safety symbols used in this document or on appliance ......................2 Symboles de sécurité utilisés dans ce document ou sur appareil ................... 3 Document information ................................10 Section 1: Safety ................................... 11 Environmental protection ............................... - Page 7 eikon e1s Service and repair guide Hazards and safety precautions during cleaning ......................38 Personal protective equipment requirement ..........................38 General cleaning safety rules and requirements ........................... 38 Potential risks during cleaning ............................... 38 Hazards and safety precautions during servicing and repair ..................40 Personal Protective Equipment ..............................
- Page 8 eikon e1s Service and repair guide Moving a cooking profile in a group of cooking profiles ........................ 61 Moving a cooking profile in a list ..............................62 Adding a new cooking profile group .............................. 62 Adding a cooking profile to a group of cooking profiles ........................ 63 Deleting a cooking profile group ..............................
- Page 9 eikon e1s Service and repair guide Fault Finding ..................................93 Error code list ....................................93 Tests ....................................95 Test types ...................................... 95 Equipment required for tests ................................ 95 Testing selected components (casing mounted) ........................... 96 Microwave Leakage test ................................97 Temperature Control test: measuring the cavity temperature .....................
-
Page 10: Document Information
This guide should be read prior to servicing or repairing the appliance. This document is intended for all trained service technicians who work with the Merrychef eikon e1s microwave combination oven, and provides them with the necessary information for carrying out servicing and repair work properly and safely. -
Page 11: Section 1: Safety
eikon e1s Service and repair guide Section 1: Safety... - Page 12 eikon e1s Service and repair guide Important information / Information importante Users are cautioned that maintenance and repairs should be performed by a Merrychef authorized service agent using genuine Merrychef replacement parts. Merrychef will have no obligation with respect to any product that has been improperly installed, adjusted, operated or not maintained in accordance with national and local codes or installation instructions provided with the product, or any product that has its serial number defaced, obliterated or removed, or which has been modified or repaired using unauthorized parts or by unauthorized service agents.
-
Page 13: Environmental Protection
Service and repair guide 1A.Environmental protection Welbilt employs a quality management system in accordance with EN ISO 9001:2008 and a certified environmental management system in accordance with EN ISO 14001. Statement of principles Our customers' expectations, the legal regulations and standards and our company's own reputation set the quality and service for all our products. -
Page 14: Identifying Your Microwave Combination Oven
eikon e1s Service and repair guide 1B. Identifying your microwave combination oven Position of nameplate The nameplate is located on the rear of your microwave combination oven and contains various pieces of information as detailed below. Item Model Number Serial Number Year of manufacture •... -
Page 15: General Safety / Sécurité Générale
eikon e1s Service and repair guide 1C. General safety / Sécurité générale The information in this section should be read and understood by Facility Managers, Chefs, Users and Service Technicians. Basic safety code Object of this safety code This safety code aims to ensure that all persons who use the microwave combination oven have a thorough knowledge of the hazards and safety precautions, and that they follow the warning notices given in the Installation and User manual and on the appliance. - Page 16 eikon e1s Service and repair guide Working with the microwave combination oven Follow the instructions below: Only those persons who satisfy the requirements stipulated in this Safety Guide are permitted to use the • microwave combination oven. Only use the microwave combination oven for the specified use. Never, under any circumstances, use the •...
-
Page 17: Important Safety Instructions
eikon e1s Service and repair guide IMPORTANT SAFETY INSTRUCTIONS All appliances When using electrical appliances, basic safety precautions should be followed including the following. WARNING – To reduce the risk of burns, electric shock, fire, injury to persons, or exposure to excessive microwave energy: 1) Read all instructions before using the appliance. - Page 18 eikon e1s Service and repair guide Do not overcook food. Carefully attend appliance when paper, plastic, or other combustible materials are placed inside the oven to facilitate cooking. Remove wire twist-ties from paper or plastic bags before placing a bag in the oven.
-
Page 19: Consignes De Sécurité Importantes
eikon e1s Service and repair guide CONSIGNES DE SÉCURITÉ IMPORTANTES Tous les appareils Lorsque vous utilisez des appareils électriques, des précautions de sécurité de base doivent être observées, notamment. AVERTISSEMENT – Afin de réduire le risque de brûlures, de choc électrique, d’incendie, de blessure ou d’exposition à... - Page 20 eikon e1s Service and repair guide le Guide d'installation et d'utilisation – Section 2H. 16) Pour réduire le risque d'incendie dans l'enceinte du four Ne pas cuire excessivement les aliments. Surveiller attentivement l'appareil en cas d'insertion de papier, plastique ou autre matière combustible à l'intérieur du four pour faciliter la cuisson.
-
Page 21: Other Safety Considerations And Instructions
eikon e1s Service and repair guide Other safety considerations and instructions General cautions Installation of the microwave combination oven must comply with all national and regional laws and regulations as • well as the local regulations of the relevant utility companies and local authorities along with any other related requirements. - Page 22 eikon e1s Service and repair guide Extra precautions must be taken when heating and handling liquid: • When heating liquids using microwave only or combination function, the contents should be stirred prior − to heating to help prevent eruptive boiling. Only use containers of appropriate size.
- Page 23 eikon e1s Service and repair guide appliance in a clean condition could lead to deterioration of the surface, which could adversely affect the life of the appliance and possibly result in a hazardous situation. Details for cleaning door seals, cavities and adjacent parts are provided in Section 2H.
-
Page 24: Summary Of Design, Operational Hazards And Safety Devices
eikon e1s Service and repair guide 1D.Summary of design, operational hazards and safety devices The information in this section should be read and understood by Facility Managers, Chefs, Users and Service Technicians. The microwave combination oven is designed to protect the user from all hazards that can reasonably be avoided by design measures. - Page 25 eikon e1s Service and repair guide Figure 1.3: e1s front and rear views – parts and safety devices Item Part / safety device Function and precautions ON/OFF appliance Used to turn the microwave combination oven on and off. However, turning this switch off switch does not isolate the appliance from the electricity supply.
- Page 26 eikon e1s Service and repair guide Other safety devices Safety device Functions Checks / Actions Door interlocks - Electric door sensor Ensures that the microwave generation Check door switch: ▪ for appliance door system cannot be powered when the door Action: Open the appliance door ▪...
-
Page 27: Hazard Points
eikon e1s Service and repair guide Hazard points Heat generation (1) The microwave combination oven becomes hot inside the cavity and on the inside of the appliance door. This poses a risk of burns on hot surfaces inside the microwave combination oven, and also on hot appliance parts, food containers and other accessories used for cooking. -
Page 28: Intended Use Of Your Microwave Combination Oven
eikon e1s Service and repair guide Intended use of your microwave combination oven The microwave combination oven must only be used for the purposes specified below: The microwave combination oven is designed and built solely for cooking different foodstuffs in containers •... -
Page 29: Requirements To Be Met By Operating Personnel Working Positions
eikon e1s Service and repair guide 1E.Requirements to be met by operating personnel working positions The information in this section should be read and understood by Facility Managers, Chefs, Users and Service Technicians. Personnel Qualifications Tasks Has relevant professional training Responsible for staff safety. -
Page 30: Hazards And Safety Precautions During Installation And Setting Up
eikon e1s Service and repair guide 1F.Hazards and safety precautions during installation and setting up The information in this section should be read and understood by Facility Managers, Equipment Movers and Service Technicians. Personal protective equipment requirement When installing or moving the appliance, ensure the following personal protective equipment is used: Protective gloves •... -
Page 31: Grounding Instructions
eikon e1s Service and repair guide The appliance must be installed so that there is absolutely no possibility that liquid from the appliance or liquid • coming from cooking processes can reach deep-fat fryers or appliances that use hot, uncovered fat. Deep-fat fryers or appliances that use hot, uncovered fat, and which are located in the vicinity must lie at a minimum distance of 500mm / 20in. -
Page 32: Potential Risks During Installation And Setting Up
eikon e1s Service and repair guide Potential risks during installation and setting up Risk of injury from lifting heavy weights incorrectly When lifting the appliance, the weight of the appliance may lead to injuries, especially in the torso are. To avoid this: Use a fork-lift truck/pallet truck to move the appliance. -
Page 33: Hazards And Safety Precautions When Preparing Appliance For Use
eikon e1s Service and repair guide 1G.Hazards and safety precautions when preparing appliance for use The information in this section should be read and understood by Facility Managers, Chefs, Users and Service Technicians. Personal protective equipment requirement Ensure work wear as specified in country-specific standards and directives for kitchen work is used, in particular: Protective clothing •... -
Page 34: Hazards And Safety Precautions During Operation
eikon e1s Service and repair guide 1H.Hazards and safety precautions during operation The information in this section should be read and understood by Facility Managers, Chefs, Users and Service Technicians. Personal protective equipment requirement Ensure work wear as specified in country-specific standards and directives for kitchen work is used, in particular: Protective clothing •... -
Page 35: Potential Risks During Operation
eikon e1s Service and repair guide Potential risks during operation Hot surfaces There is a risk of burn if any of the interior parts of the cavity (Figure 1.3, item 11), the inside of the appliance door or any parts that are or have been inside the oven during cooking are touched. Ensure the personal protective equipment detailed at the beginning of this section is used. -
Page 36: Risques Potentiels Pendant L'utilisation
eikon e1s Service and repair guide Note: Modifications should only be carried out by the manufacturer or authorized representative to ensure continuing conformance. Break in the cold chain To minimize risk of microbiological contamination of foods: Never use the appliance for temporary storage of food. •... - Page 37 eikon e1s Service and repair guide Cet équipement produit et utilise de l'énergie en fréquence radio et s'il n'est pas installé et utilisé correctement, en • respectant strictement les instructions du constructeur, peut causer des interférences nocives aux services de communication radio autorisés.
-
Page 38: Hazards And Safety Precautions During Cleaning
eikon e1s Service and repair guide 1I. Hazards and safety precautions during cleaning The information in this section should be read and understood by Facility Managers, Chefs, Users and any other personnel charged with cleaning the appliance. Personal protective equipment requirement When cleaning the appliance cavity by hand, and using spray cleaning products, the following personal protective equipment should be used: Breathing mask... - Page 39 eikon e1s Service and repair guide Risk of scalding from hot steam If water or cleaning agent is sprayed into the hot cavity, steam will be produced and this may scald. To minimize this risk: Before starting cleaning tasks, wait until the cavity has cooled to below 50°C / 122°F or use the 'Cool Down' •...
-
Page 40: Hazards And Safety Precautions During Servicing And Repair
eikon e1s Service and repair guide 1J. Hazards and safety precautions during servicing and repair The information in this section should be read and understood by Service Technicians. Personal Protective Equipment When repairing or servicing the appliance, ensure work wear and personal protective equipment is used as specified in applicable national regulations. -
Page 41: Risk Of Burns
eikon e1s Service and repair guide Risk of burns Before starting servicing and repair work, wait until the cooking chamber has cooled to below 50°C / 122°F or use the ‘Cool- Down' function (Section 2H: Cleaning Procedures) to cool the cooking chamber. Wear personal protective equipment suitable for handling hot surfaces before touching any of the interior parts of the cooking chamber, the inside of the appliance door or any parts that were inside the oven during cooking. -
Page 42: Hazards And Safety Precautions When Taking The Appliance Out Of Service
eikon e1s Service and repair guide 1K. Hazards and safety precautions when taking the appliance out of service The information in this section should be read and understood by Facility Managers and Service Technicians or other suitably qualified service engineer. Personal protective equipment When disconnecting the appliance, ensure work wear and personal protective equipment is used as specified in applicable national regulations. -
Page 43: Section 2: Operations And Installation
eikon e1s Service and repair guide Section 2: Operations and Installation... -
Page 44: Introduction To E1S
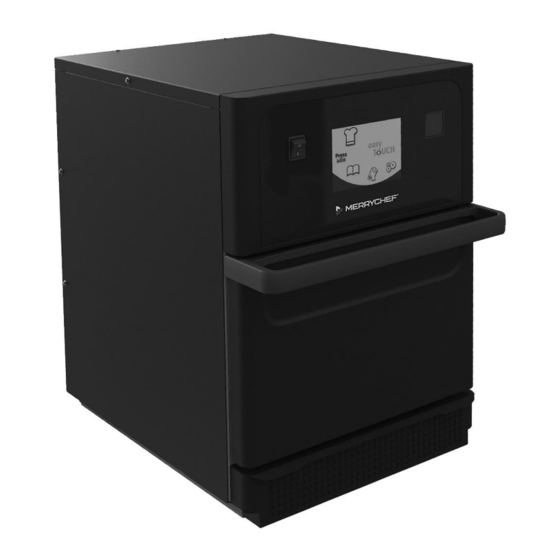
Service and repair guide 2A.Introduction to e1s The Merrychef eikon e1s microwave combination oven offers you the flexibility of combination cooking with additional control over fan speed and microwave power. Combination cooking enables high quality results to be achieved in a fraction of the time taken by conventional cooking, particularly when baking, browning, roasting and grilling dishes. - Page 45 eikon e1s Service and repair guide Figure 2.3: Appliance parts and their functions ON/OFF appliance switch – Used to turn the microwave combination oven on and off. Turning this switch off does not isolate the appliance from the electricity supply. easyTouch®...
-
Page 46: Equipment And Accessories Supplied
eikon e1s Service and repair guide Equipment and accessories supplied The e1s microwave combination oven is supplied with the following equipment and accessories. Cook plate Air filter Paddle The cook plate sits inside the appliance The air filter situated at the lower The paddle is used to remove food from the and food is placed on top of it using front of the appliance is part of... -
Page 47: Installing The Appliance
eikon e1s Service and repair guide 2B.Installing the appliance Users must read Sections 1A to 1K (Safety Guide) before installing or using the microwave oven. Unpacking Cut the box banding straps and Remove the customer Remove the packaging to remove the lid. documentation and any product reveal your microwave accessories:... -
Page 48: Installation Location Requirements
eikon e1s Service and repair guide Installation location requirements Minimum space required Figure 2.4 shows the space required to install the appliance. It also shows the minimum horizontal distances from adjacent walls and surfaces. The safety clearance on the top must also always be complied with. Figure 2.4: Minimum space requirements Safety clearance from the top (A) = 50mm (2”) •... -
Page 49: Electrical Installation Requirements
eikon e1s Service and repair guide Electrical installation requirements Safety rules Observe the following rules to prevent hazards caused by faulty electrical connections: Only electricians qualified under the terms of EN 50110-1 and from an authorized service company are permitted •... - Page 50 13A. EU13 A models are fitted with a moulded plug to CEE 7/7 (Type F Schuko) rated at 16 A. ROW 13 A models are fitted with country specific 15/16 A plugs. Please contact your local Welbilt representative further information. Table 2.2: e1s electrical specifications...
-
Page 51: Getting Started
eikon e1s Service and repair guide Getting started Before turning on the oven, users must read Section 1E: Hazards and safety precautions when preparing appliance for use. Fitting the air filter The air filter is fitted in position below the cavity door. -
Page 52: Settings On First Usage
eikon e1s Service and repair guide Settings on first usage The system is preconfigured with all the required settings to start cooking immediately following installation. However, you may want to configure the following before using the oven. Date and time •... -
Page 53: Selecting Suitable Utensils
eikon e1s Service and repair guide Selecting suitable utensils You may want to ensure you have suitable utensils before using the oven. Only use utensils that are suitable for use in microwave combination ovens. Check the manufacturer’s instructions and temperature rating to determine the suitability of individual containers or utensils. -
Page 54: Understanding The Main Menu And Keyboard
eikon e1s Service and repair guide Understanding the main menu and keyboard The easyTouch ® screen display, layout and icons shown herein are for guidance purposes only and are not intended to be an exact representation of those supplied with the appliance. -
Page 55: Cooking Procedures
eikon e1s Service and repair guide 2D. Cooking procedures How to cook On a preheated oven, select a Open the appliance door and Close the appliance door again. cooking profile from the cookbook place the prepared food on the The cooking process will or enter a new cooking profile. -
Page 56: Using A Cooking Profile - Quick Serve Mode
eikon e1s Service and repair guide Using a cooking profile – quick serve mode Select the ‘cookbook’ symbol from the main menu screen and then select the All Menus option. Use the scroll up/down arrows to find the cooking profile. Note: If a picture has a red frame around it, this means the cavity temperature is set too high or too low for that cooking profile. -
Page 57: Using A Cooking Profile - Full Serve Mode
eikon e1s Service and repair guide Using a cooking profile – full serve mode Select the ‘cookbook’ symbol from the main menu screen and then select a group of cooking profiles, for example ‘ITALIAN SUBS’, to display the individual cooking profiles. Select a cooking profile from the options available in the selected group, for example ‘ITALIAN SUB x 2’. -
Page 58: Choosing Cooking Profiles For Press&Go Menu
eikon e1s Service and repair guide Choosing cooking profiles for Press&Go menu Select ‘Press&Go’ from the main menu screen, and then select the ‘edit cookbook’ symbol. Two lists are displayed. The list on the left shows the cooking profiles that are part of the •... - Page 59 eikon e1s Service and repair guide a value unsuitable for a cooking profile, it will need to be changed before that cooking profile can be used. Cooking profiles unsuitable for the set temperature are highlighted with a red border. To change the cavity temperature: Take note of the cavity temperature required for the cooking profile and then press the green checkmark to continue.
-
Page 60: Cooking Profiles
eikon e1s Service and repair guide Cooking profiles Creating a cooking profile 1. Enter development mode 3. Set the cooking time 5. Set the fan speed Select the ‘chef’s hat’ symbol from Select the ‘clock’ symbol and enter Select the ‘fan’ symbol and set the fan the main menu screen to enter the cooking time for each stage up speed within the limits shown on the... -
Page 61: Viewing And Editing Cooking Profiles
eikon e1s Service and repair guide Viewing and editing cooking profiles Select the ‘cookbook’ symbol from Select the ‘All menus’ symbol from Select the ‘edit cookbook’ symbol. the main menu screen. the cookbook screen. Use the up/down scroll arrows to Select the ‘view/edit cooking View or adjust the cooking profile find the cooking profile. -
Page 62: Moving A Cooking Profile In A List
eikon e1s Service and repair guide Moving a cooking profile in a list Select the ‘cookbook’ symbol from the main menu Use the big scroll arrows to locate cooking profile screen and then select the ‘edit cookbook’ symbol in groups and then use the small arrows in the centre of the cookbook screen. -
Page 63: Adding A Cooking Profile To A Group Of Cooking Profiles
eikon e1s Service and repair guide Adding a cooking profile to a group of cooking profiles Select ‘cookbook’ from the main Select the cooking profile group Select the ‘edit cookbook’ symbol in menu screen. you want to add to. the cooking profile screen. Use the up/down scroll arrows on Select the green ‘left’... -
Page 64: Editing A Selected Cooking Profile Group Name
eikon e1s Service and repair guide Editing a selected cooking profile group name Select ‘cookbook’ from the main Select the ‘edit cookbook’ symbol Select the cooking profile group menu screen. from the cookbook screen. that you want to edit. Select the ‘edit cooking profile Enter the new name of the cooking group’... -
Page 65: Changing Settings
eikon e1s Service and repair guide Changing settings Changing settings process Select the ‘settings’ symbol from the main menu screen. Note: The main menu is displayed after the oven is pre-heated. If you want to change settings without pre-heating the oven, for example change settings before first usage, you should tap the first screen to hold it and then press the hidden key at the top right-hand corner to load the password screen, shown in step 2. -
Page 66: Operating Mode / Navigation Settings
eikon e1s Service and repair guide Operating mode / navigation settings Select the ‘operating mode/navigation’ symbol from the settings menu. Select ‘QUICK SERVE MODE’ for cooking only. Select ‘FULL SERVE MODE’ for creating cooking profiles. Select ‘MANUAL MODE’ to manually cook only via the ‘chef’s hat’ symbol on the main menu screen. -
Page 67: Cavity Temperature Settings And Labels
eikon e1s Service and repair guide Cavity temperature settings and labels Select the ‘temperature’ symbol from the settings menu. The temperature screen is displayed if two or more cavity temperatures are set above the minimum. You can now: Change a temperature set Edit the existing temperature labels Add a new temperature D) Change the measurement unit... -
Page 68: Service Information And Error Logs
eikon e1s Service and repair guide Service information and error logs The service information and error log function is required for servicing and repairing the system and therefore covered in Section 3: Service and Repair. Cooking profile counters Select the 'clipboard' symbol to display a listing of cooking profile counters. -
Page 69: Setting The Date And Time
eikon e1s Service and repair guide Setting the date and time Select the ‘clock/date’ symbol from the settings menu to display the setting options. Change the date: Select ‘MONTH’, enter the correct month on the keypad and select OK. Select ‘DAY’, enter the correct day on the keypad and select OK. Select ‘YEAR’, enter the correct last two digits of the year on the keypad and select OK. -
Page 70: Sound Settings
eikon e1s Service and repair guide Sound settings Select the ‘speaker’ symbol to access the volume, tone and further sound settings. Make changes as required: Select the ‘speaker’ symbol to adjust the volume level suitable for the environment from none (OFF) to the loudest (100%). Select the ‘music note’... -
Page 71: Temperature Timer Setting
eikon e1s Service and repair guide Temperature timer setting Select the ‘thermometer / timer’ symbol from the settings menu. Select the ‘timer enabled’ checkbox (green checkmark). Select a weekday using the up/down arrows at the bottom of the screen. Select an empty ‘time’ box (maximum of five per day) or clear an existing ‘time’... -
Page 72: Usb Program Downloads
eikon e1s Service and repair guide USB program downloads Switch the appliance OFF and open the cover to the USB port on the control panel. Plug in the USB memory stick and switch on the oven. Note: If the USB memory stick is too large, use a standard commercial adapter cable. -
Page 73: Temperature Band Setting
eikon e1s Service and repair guide Temperature band setting Select the ‘temperature band’ symbol. Select the required temperature band checkbox, shown by a green checkmark. Note: Generally, the lowest practical ‘Temp Band’ should be chosen. If the set cavity temperature falls by more than the selected temperature band value, the ready-to-cook mode and the temperature band are deactivated until the cavity reaches the preset preheat temperature. -
Page 74: Set Screen Saver
eikon e1s Service and repair guide Set screen saver 12. Select the ‘ENABLED’ checkbox to switch the screen saver ON or OFF and select the ‘time’ box below it. Enter a time delay on the keypad from 1 to 60 minutes before the screen saver starts. -
Page 75: Cool-Down Procedures
eikon e1s Service and repair guide 2G. Cool-down procedures The microwave combination oven must be cooled down properly before cleaning, servicing or repairing. Users must read Section 1H: Hazards and safety precautions during servicing and repair and Section 1I: Hazards and safety precautions when taking the appliance out of service. -
Page 76: Cleaning Procedures
eikon e1s Service and repair guide 2H. Cleaning procedures Daily cleaning tasks What must be cleaned? Procedure Cleaning chemicals Cavity Clean by hand with a soft cloth or paper Cleaning and protective chemicals towel approved by the manufacturer Outside of appliance Clean by hand with a soft cloth Common household stainless-steel cleaner or hard surface cleaner... -
Page 77: Cleaning Instructions
eikon e1s Service and repair guide Cleaning instructions Ensure the oven has been cooled down as per the instructions in Section 2G: Cool-down procedures. • Users must read Section 1G: Hazards and safety precautions during cleaning. • Wear protective glasses and protective rubber gloves during cleaning. •... - Page 78 eikon e1s Service and repair guide Stage 1: Clean and dry the oven and oven parts In a cooled-down oven (see section Wash all removed oven parts in Use a dry clean brush to remove 2G), open the door and remove the warm soapy water.
- Page 79 eikon e1s Service and repair guide Stage 2: Apply oven protector (optional) Spray Merrychef protector or a Spread the protective chemical Replace the cleaned and dried cook Merrychef approved protector lightly onto all internal surfaces, plate. onto a clean sponge. avoiding the roof (jet plate) and door seal.
-
Page 80: End Of Day Operations
eikon e1s Service and repair guide Stage 4: Cure protective chemical (if oven protector applied) Switch ON the appliance using the Preheat the cavity. Once reaching The protective chemical turns light on/off button. the preset operating temperature brown when cured and the oven is it will take about 30 minutes to ready to be used again. -
Page 81: Warranty Information And Contacting Customer Services
The warranty does not cover damage resulting from improper setup, installation, use, cleaning, use of cleaning chemicals, servicing or repair. Required information Please have the following appliance data to hand when contacting Welbilt customer service: Serial number of your appliance •... -
Page 82: Section 3: Service And Repair
eikon e1s Service and repair guide Section 3: Service and Repair... -
Page 83: Technical Data Summary
eikon e1s Service and repair guide 3A. Technical data summary Dimensions and weight Size and weight (without packaging) Width of appliance = 406.4mm (16”) • Total depth with door open = 806.9mm (31.8”) • Depth with door closed = 538mm (21.2”) •... -
Page 84: Dimensional Drawings
eikon e1s Service and repair guide Dimensional drawings Front view (door closed) Cavity dimensions (door closed) View from the top (door closed) View from the right-hand side (door open) Figure 3.5: e1s dimensions with doors open and closed... -
Page 85: Diagnostics
eikon e1s Service and repair guide Diagnostics Checking the condition of your appliance Servicing procedure: overview Disconnect/isolate the appliance from the power supply. Check the appliance is correctly installed as described in the “Installation” section of this manual. Visually check the cleanliness/condition of the power supply/cable/gland, casing, cavity and door of the appliance for signs of wear, damage, distortion etc. -
Page 86: Errors And Diagnostics
eikon e1s Service and repair guide Functions of the Service Mode Once in ‘Service Mode’, you can do the following by selecting the relevant option on screen: Check the ‘Error Log’ for details of any logged appliance errors. Check the ‘Oven Counters’ to find the usage of components and the controls area temperature within the cabinet. Check the operational performance of the main components using ‘Visual View’. - Page 87 eikon e1s Service and repair guide Viewing the Error Log Enter service mode and select ‘Error Log’ to display a listing of oven component errors. Scroll down the list (if necessary) and select an error from the list to display individual records. Note: The ‘Failure’...
- Page 88 eikon e1s Service and repair guide Copying error messages onto USB sticks Open the cover of the USB port 10. Select ‘Files to USB’ on the USB Enter settings menu select the and insert the USB memory stick screen. ‘USB’ symbol. The USB screen into the slot.
-
Page 89: Health Checks Of Components
eikon e1s Service and repair guide Oven counters The Oven Counters option in service mode is used to to display the oven component usage. This information can be requested by service and manufacturer engineers to give indication of component life expectancy. In Service Mode, select ‘Oven Counters’... - Page 90 eikon e1s Service and repair guide Check oven door Open the oven door. • Check the colour of the door symbol changes from green • to red on the display to check the door microswitch circuit is operating. Place door spacers onto the oven door (refer to Adjusting •...
- Page 91 eikon e1s Service and repair guide Check magnetron Select the magnetron and check it is operating correctly. Place a microwave safe container of water into the cavity, and close the oven door. Select the magnetron to test the current draw at maximum output, this will time-out after 30 seconds.
- Page 92 eikon e1s Service and repair guide Touchscreen calibration Should the touchscreen behave in an inconsistent manner, the touchscreen can be re-calibrated. Apply continuous light pressure to the screen while switching the appliance on. Continue to hold until the progress bar has completed. Using a non-abrasive pointer, such as a ball point pen, accurately press the centre of each crosshair displayed on the screen.
-
Page 93: Fault Finding
eikon e1s Service and repair guide Fault Finding There are many error codes that the system may display, depending on the cause of the problem and the parts associated. The tables below list the error codes that may be displayed with their meaning and the system’s response to the errors. Error code list Error Error Condition... - Page 94 eikon e1s Service and repair guide Error Error Condition Description Trigger Possible Causes System Response Action Code Cavity sensor Cavity sensor The controller is reading The thermocouple is Display error message Replace E 111 error broken / an open circuit across not connected.
-
Page 95: Tests
eikon e1s Service and repair guide 3D. Tests All service engineers must familiarize themselves with the information in Section 1: Safety. before using this Service and Repair Guide to carry out tests. Test types The following tests can be performed by service engineers: Components test with a Portable Appliance Tester (PAT) •... -
Page 96: Testing Selected Components (Casing Mounted)
eikon e1s Service and repair guide Testing selected components (casing mounted) Microwave Power test: Measuring the microwave power output of the magnetron(s) Check and ensure that the appliance is cool before starting this test. The power output is established under IEC 705 standard method which is only workable in laboratory controlled conditions. -
Page 97: Microwave Leakage Test
eikon e1s Service and repair guide Microwave Leakage test Follow these instructions when measuring: Make sure that the survey meter you are using has been calibrated and is suitable for measuring frequencies of • 2,450 MHz. Do not exceed meter full scale deflection. The leakage meter should initially be set to the highest scale, then •... - Page 98 eikon e1s Service and repair guide Readings must be below 5 mW/cm² to pass the microwave leakage test. Any leakage that is observed in terms of the level and position on the appliance should be recorded and kept with the appliance user documentation. If a level greater than 5 mW/cm²...
-
Page 99: Temperature Control Test: Measuring The Cavity Temperature
eikon e1s Service and repair guide Temperature Control test: measuring the cavity temperature Re-calibrating the temperature sensor / thermocouple with the SRB is normally only required when the thermocouple has been replaced or the appliance is under or over cooking. Place the probe of a temperature reader on the metal plate in the centre of the oven cavity and close the door. - Page 100 eikon e1s Service and repair guide If the temperature reading is unstable: Disconnect and isolate the appliance from the electricity supply. Take protective measures to ensure the power cannot be switched on again. Allow the appliance to cool down. Remove the side and top panels of the casing. Check the cavity temperature sensor wire and connections.
-
Page 101: Recommission Test
eikon e1s Service and repair guide Recommission test The Recommission Tests are performed following the completion of a service or repair to ensure that the appliance is working correctly before handing back to the customer. It is not necessary to perform this test upon initial installation. Some of the tests have a countdown timer where failing to carry out a test within the time limit will cause a test failure and the Recommission Test will have to be restarted. -
Page 102: Commissioning The Oven After Service/Repair/Testing
eikon e1s Service and repair guide Commissioning the oven after service/repair/testing Complete the following checks after the oven has been serviced/repaired/tested before connecting to the mains electricity power supply: All internal electrical connections are correct (see Section 3G). All wiring insulation is correct and is not touching any sharp edges. All grounding connections are electrically and mechanically secure. -
Page 103: High Voltage Components (Casing Removed)
eikon e1s Service and repair guide High voltage components (casing removed) High Voltage Transformer test Ensure the following requirements have been met before starting the test: The appliance has been disconnected from the power supply and protective measures have been taken to ensure •... - Page 104 eikon e1s Service and repair guide High Voltage Capacitor test Ensure the following requirements have been met before starting the test: The appliance has been disconnected from the power supply and protective measures have been taken to ensure • the power cannot be switched on again. The appliance is cool.
-
Page 105: Mains Voltage Components (Casing Removed)
eikon e1s Service and repair guide High Voltage Magnetron test Ensure the following requirements have been met before starting the test: The appliance has been disconnected from the power supply and protective measures have been taken to ensure • the power cannot be switched on again. The appliance is cool. - Page 106 eikon e1s Service and repair guide LED flashes Warning Type Warning Condition Recover Condition Over voltage Input power voltage >270V Input power voltage < 238V Under voltage Input power voltage < 150V Input power voltage > 160V Software over current More than 9A Less than 9A Motor over temperature...
-
Page 107: Firmware Updates
eikon e1s Service and repair guide Firmware updates There are three firmwares required for the e1s: QTS, SRB and Icon. All firmwares are pre-installed but may require updating as per instruction from the manufacturer or as part of hardware replacement. Firmwares are updated by loading the required files to a USB memory stick and then downloading this information to the appliance using the USB memory stick slot on the oven. - Page 108 eikon e1s Service and repair guide Enter the password and select the green checkmark. Select the USB symbol from the Settings menu. Select from the USB screen ‘Firmware’ (for QTS and SRB updates). Install updates by selecting the correct files. Updates should be installed in this order: SRB update –...
- Page 109 eikon e1s Service and repair guide SRB firmware update When you select Firmware, the current QTS (Quick Touch Screen) and SRB (Smart Relay Board) firmware versions are displayed at the top left of the screen. Select the ‘SRB’ file with the correct file version number. Note: A tinted band over a file name indicates the file is not valid for your oven.
- Page 110 eikon e1s Service and repair guide QTS firmware update Select the ‘QTS’ file with the correct file version number. Note: A tinted band over a file name indicates the file is not valid for that appliance. Check if the file information shown is correct before selecting OK. If not, select ‘X’...
- Page 111 eikon e1s Service and repair guide Automatic updates using Autoupd.ATE files Load the USB stick with the Autoupd.ATE file. Copy the following firmware files to the ROOT directory of the USB memory stick: QTS-eX-XXX-VX.X.XX.BIN • SRB-eX_X_X_XXX.BIN • VX-APP-eX.CBR • Autoupd.ATE •...
- Page 112 eikon e1s Service and repair guide The file starts downloading. The CBR file is checked and the download progress from the USB memory stick is displayed followed by the update status and confirmation screens. The QTS, SRB and Application Icon files then download automatically showing the progress, status and reboot confirmation screens for each file update.
- Page 113 eikon e1s Service and repair guide Confirming the firmware update After an update of the appliance firmware certain files are copied back to the USB memory stick. You can check if the file transfer was successful with the following procedure: Load the files from the USB memory stick to a computer.
- Page 114 eikon e1s Service and repair guide Select the USB symbol. Open the cover to the USB port and insert the USB memory stick into the slot. Note: The USB memory stick may take several seconds to load before the screen will respond. Do not remove the USB memory stick until the process is complete.
- Page 115 eikon e1s Service and repair guide Check the file information shown is correct before selecting OK. If not, select ‘X’ and locate the correct file. When completed, select menu file to load the cooking profiles. Once the cooking profiles are loaded the appliance restarts. 10.
-
Page 116: Replacing Components
eikon e1s Service and repair guide Replacing components Safe working when replacing appliance parts All service engineers must familiarize themselves with the information in Section 1: Safety, before using this Service and Repair Guide and carrying out tests. Before starting service / repair work, it is essential that you familiarize yourself with the all the rules and hazard warnings specified and follow the instructions given. - Page 117 eikon e1s Service and repair guide Live components Risk of electric shock from live parts When the covers of the microwave combination oven are removed, there is a risk of electric shock from touching live parts. Make sure that any work on the electrical system is performed solely by a qualified electrician from an authorized •...
-
Page 118: Overview Of Parts
eikon e1s Service and repair guide Overview of parts ⑪ ① ⑫ ② ⑬ ③ ⑭ ④ ⑮ ⑤ ⑯ ⑥ ⑰ ⑦ ⑱ ⑧ ⑲ ⑨ ⑳ ⑩ The exact position of the parts and components may vary depending on the version of the oven that you have purchased. - Page 119 eikon e1s Service and repair guide Component List Item Name Function Front panel The front panel houses the touch screen and the QTS assembly. Smart Relay Board (SRB) The SRB controls all electrical oven components. Stirrer Motor A stirrer motor turns a stirrer distributing microwave energy in the cavity. Diode (high voltage) The diode completes the magnetron circuit for required high voltage.
-
Page 120: Removing / Fitting The Casing
eikon e1s Service and repair guide Removing / fitting the casing Requirements and tools Check that the following requirements have been met: The appliance has been disconnected from the power supply and protective measures have been taken to ensure • the power cannot be switched on again. -
Page 121: Removing / Fitting The Door Assembly And Door Seal
eikon e1s Service and repair guide Removing / fitting the door assembly and door seal Requirements and tools Check that the following requirements have been met: The appliance has been disconnected from the power supply and protective measures have been taken to ensure •... - Page 122 eikon e1s Service and repair guide Removing and fitting door seal Place a stanley knife underneath the door seal and go all the way to break the seal. Ensure you do all four sides avoiding the metal clips on each corner. Gently pull the metal clip out of each corner and lift off the door seal Remove excess sealant using the stanley knife or similar to make the surface as flat as possible and then clean the inner surface area wiping off...
- Page 123 eikon e1s Service and repair guide Refitting the door Keeping the removed door flat at 90 degrees to the oven, push the two metal hinges inside the available slots at the bottom of the oven. You should feel the hinges fitting in place. Close the appliance door.
-
Page 124: Replacing A Magnetron
eikon e1s Service and repair guide Replacing a magnetron Requirements and tools Check that the following requirements have been met: The appliance has been disconnected from the power supply and protective measures have been taken to ensure • the power cannot be switched on again. The appliance is cool. - Page 125 eikon e1s Service and repair guide Preparing a spare magnetron The spare magnetron comes with four pressed bolts. Remove the bolts before fitting the magnetron to the oven. Note: The bolts can be removed by knocking them out of the tabs with a •...
- Page 126 eikon e1s Service and repair guide Carefully remove the cooling duct so as not to pull on the cables. Remove the four M8 nuts from the magnetron base. The magnetron can then be removed by lifting the magnetron body. Fitting a magnetron Follow the steps in the reverse order to fit a spare magnetron.
-
Page 127: Replacing The Cooling Fan
eikon e1s Service and repair guide Replacing the cooling fan Requirements and tools Check that the following requirements have been met: The appliance has been disconnected from the power supply and protective measures have been taken to ensure • the power cannot be switched on again. The appliance is cool. -
Page 128: Replacing The Qts (Quick Touch Screen) Assembly
eikon e1s Service and repair guide Unplug the door microswitch connections on the left side of the appliance. Loosen the M7 hex nut to free the metal bracket holding the cooling fan. The cooling fan can then be removed by lifting upward and sliding out on the left side of the appliance. - Page 129 eikon e1s Service and repair guide Removing the QTS assembly Disconnect all cables connecting the QTS assembly. Unfasten the M5.5 hex head flange bolt that fixes the front panel to the appliance body. Remove the top front panel (including the touch screen and QTS assembly) from the frame of the casing by lifting upward and towards the front of the appliance.
-
Page 130: Replacing The Srb (Smart Relay Board)
eikon e1s Service and repair guide Replacing the SRB (Smart Relay Board) Requirements and tools Check that the following requirements have been met: The appliance has been disconnected from the power supply and protective measures have been taken to ensure •... -
Page 131: Replacing The Touchscreen Overlay
eikon e1s Service and repair guide Fitting the SRB Follow the steps in the reverse order to fit the SRB. • Reconnect all electric connections to the SRB. • For details see SRB circuit board in Section 3G. (1) = Thermocouple connector (2) = Personality Module Ensure the thermocouple negative (-) connection (white) and positive (+) connection (green) are fitted the correct way round or the oven temperature readings will be wrong. -
Page 132: Adjusting The Door Microswitches
eikon e1s Service and repair guide Adjusting the door microswitches Requirements and tools Check that the following requirements have been met: The appliance has been disconnected from the power supply and protective measures have been taken to ensure • the power cannot be switched on again. The appliance is cool. - Page 133 eikon e1s Service and repair guide Open the appliance door to replace the green 2mm spacers with red 4mm spacers and close the door. Slacken the pivot screw using a M7 hex socket wrench. Release the adjusting screws and move the backplate until microswitch SW2 just activates. Then secure all screws. Remove the spacers, then open and close the appliance door 5-10 times.
-
Page 134: Replacing The Impinger Plate
eikon e1s Service and repair guide Replacing the impinger plate Requirements and tools Check that the following requirements have been met: The appliance is cool • Tools required – none • Removing the impinge plate The impinger plate rests on brackets in the upper part of the cavity. To assist removal, a larger hole is provided at the front of the impinger plate big enough to insert a finger. -
Page 135: Replacing The Stirrer
eikon e1s Service and repair guide Replacing the stirrer Requirements and tools Check that the following requirements have been met: The appliance has been disconnected from the power supply and protective measures have been taken to ensure • the power cannot be switched on again. The appliance is cool. - Page 136 eikon e1s Service and repair guide To remove the stirrer from the motor spindle, the motor must be prevented from moving. This is most easily achieved by holding one of the white cogs located below the motor. The stirrer can then be removed by turning clockwise. Remove the remains of the old gasket before fitting the new impinger plate (comes with gasket).
-
Page 137: Replacing The Stirrer Motor
eikon e1s Service and repair guide Replacing the stirrer motor Requirements and tools Check that the following requirements have been met: The appliance has been disconnected from the power supply and protective measures have been taken to ensure • the power cannot be switched on again. The appliance is cool. -
Page 138: Replacing The Convection Fan Motor And Heating Element
eikon e1s Service and repair guide Replacing the convection fan motor and heating element Requirements and tools Check that the following requirements have been met: The appliance has been disconnected from the power supply and protective measures have been taken to ensure •... - Page 139 eikon e1s Service and repair guide Removing the convection motor and heating element To remove the convection motor assembly, the silver insulation blanket must be peeled back to give access to the 10 x M7 nuts located at the positions indicated in this picture.
-
Page 140: Replacing A Transformer (High Voltage)
eikon e1s Service and repair guide Replacing a transformer (high voltage) Requirements and tools Check that the following requirements have been met: The appliance has been disconnected from the power supply and protective measures have been taken to ensure • the power cannot be switched on again. - Page 141 eikon e1s Service and repair guide Unfasten two M8 nuts and washers to remove the transformer. The transformer is heavy. Wear safety shoes to protect your feet from a transformer falling down. Fitting a transformer (high voltage) Follow the steps in the reverse order to fit the high voltage transformer(s). If the electric connections have not been restored properly this may lead to malfunction/damage of the oven.
-
Page 142: Replacing The Convection Fan Motor Speed Controller
eikon e1s Service and repair guide Replacing the convection fan motor speed controller Requirements and tools Check that the following requirements have been met: The appliance has been disconnected from the power supply and protective measures have been taken to ensure •... -
Page 143: Overview Of Further Components
eikon e1s Service and repair guide Overview of further components Before carrying out any procedure on the parts described below, ensure the following requirements have been met: The appliance has been disconnected from the power supply and protective measures have been taken to ensure •... - Page 144 eikon e1s Service and repair guide Cavity high limit The cavity thermostat is located besides the cooling duct on the left hand side of the oven (when looking at the oven from the rear). It continuously measures the temperature of the cavity and switches the oven off should overheating occur. The thermostat uses a temperature sensor which is pinned within a holder located towards the rear of the top left edge of the cavity.
-
Page 145: Circuit Boards And Diagrams
eikon e1s Service and repair guide 3G. Circuit boards and diagrams QTS circuit board assembly ④ ⑤ ⑥ Item Name Power, Run, P-Bus, C-Bus X6 – speaker X5 – USB socket X4 – Communications to X11 – Screen backlight X13 – Touch pad X9 –... -
Page 146: Srb Circuit Board
eikon e1s Service and repair guide SRB circuit board Item Name ① X1 – 24V supply from low voltage transformer ② X8 – Cooling fan X17 – Not used ③ X9 – Mains output, convection fan controller ④ X103.1 – Mains output to low voltage transformer ⑤... -
Page 147: Circuit Diagrams
eikon e1s Service and Repair Guide Circuit diagrams... - Page 148 If you want to find out more about Welbilt and its company brands, please visit us at www.welbilt.com Welbilt UK Limited, Ashbourne House, The Guildway, Old Portsmouth Rd, Guildford GU3 1LR, United Kingdom...
Need help?
Do you have a question about the Merrychef eikon e1s and is the answer not in the manual?
Questions and answers