Table of Contents
Advertisement
Quick Links
i
INTRODUCTION
INTRODUCTION
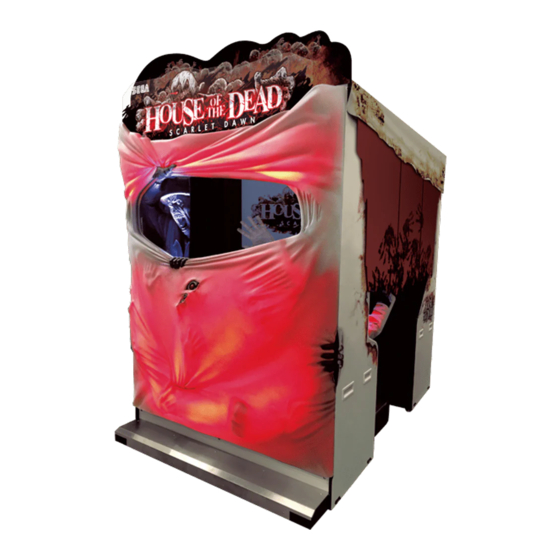
This manual presents information and explanations on how to run software for, "HOUSE OF THE DEAD:
SCARLET DAWN"
This manual is intended for the owners, personnel and managers in charge of operation of the product. Operate the
product after carefully reading and sufficiently understanding the instructions. After reading this manual, be sure to
keep it near the product or in a convenient place for easy reference when necessary.
Refer to Owner's manual for information on installation, operation, maintenance, inspection, transportation, parts
and wiring.
In the event that you cannot carry out the work in accordance with the instructions provided in this manual, or,
if you cannot achieve normal functioning of the product, contact the office listed in this manual or the point-of-
purchase for this product.
Do not touch the internal system unless you are a technician.
Note: Descriptions herein contained may be subject to improvement changes without notice.
Advertisement
Table of Contents

Related Manuals for Sega HOUSE OF THE DEAD: SCARLET DAWN


Summary of Contents for Sega HOUSE OF THE DEAD: SCARLET DAWN
- Page 1 INTRODUCTION INTRODUCTION This manual presents information and explanations on how to run software for, "HOUSE OF THE DEAD: SCARLET DAWN" This manual is intended for the owners, personnel and managers in charge of operation of the product. Operate the product after carefully reading and sufficiently understanding the instructions. After reading this manual, be sure to keep it near the product or in a convenient place for easy reference when necessary.
-
Page 2: Introduction
INTRODUCTION DESCRIPTION OF WARNING DISPLAYS To ensure the safe operation of this product, be sure to read the following before usage. After carefully reading and sufficiently understanding the warning displays and cautions, handle the product appropriately. Depending on the degree of severity, the terms of DANGER, WARNING, CAUTION, etc., are used. Be sure to understand the contents of the warning displays before reading the text. -
Page 3: Definition Of 'Site Maintenance Personnel Or Other Qualified Professionals
INTRODUCTION Definition of 'Site Maintenance Personnel or Other Qualified Professionals' Procedures not described in this manual or marked as 'to be carried out by site maintenance personnel or other qualified professionals' should not be carried out by personnel without the required knowledge and technical expertise. Work carried out by unqualified persons may cause serious accidents, including electrocution. -
Page 4: Table Of Contents
TABLE OF CONTENTS TABLE OF CONTENTS INTRODUCTION DESCRIPTION OF WARNING DISPLAYS ..............ii Definition of 'Site Maintenance Personnel or Other Qualified Professionals' ....iii TABLE OF CONTENTS GAME DESCRIPTION 1-1 GAME OUTLINE ....................... 1 1-2 OPERATING INSTRUCTIONS ................. 2 1-3 GAME FLOW......................3 HOW TO PLAY......................4 1-4-1 INSERTING CREDITS ................4 1-4-2 MODE SELECT .................. -
Page 5: Table Of Contents
TABLE OF CONTENTS LIST OF THIRD-PARTY RIGHTS SEGA AMUSEMENTS OFFICES... -
Page 7: Game Description
GAME DESCRIPTION GAME DESCRIPTION 1-1 GAME OUTLINE - This product is a light gun game in which players shoot down enemies using gun-shaped cabinet controllers. The game features dynamic graphics and sound that offer a realistic gameplay experience. - One or two people can play at the same time. - There are two game modes: STORY MODE and SELECT PATH MODE. -
Page 8: Operating Instructions
GAME DESCRIPTION 1-2 OPERATING INSTRUCTIONS Subtrigger Trigger Select lever Controller Xtreme audio button P2 START button Motion sensor Rear cover button P1 START button Control panel Cabinet Rear MENU ITEMS Controller Aims crosshair in the direction of the controller / moves the cursor. Trigger Pulling the trigger fires bullets during gameplay / acts as a confirmation button on the selection screen. -
Page 9: Game Flow
GAME DESCRIPTION 1-3 GAME FLOW Advertise Insert the minimum number of credits required to play a single-player game. Press the START button on either the left or right seat. Insert the minimum number of credits required to play a two-player game. Press the START button on both seats. "MODE SELECT"→"OFF" "MODE SELECT"→"ON" MODE SELECT (See 1-4-2.) STORY MODE SELECT PATH MODE Mode to play from the beginning. Mode to play from any chapter and practice a specific route. ITEM SELECT (See 1-4-3.) ITEM SELECT (See 1-4-3.) Select two starter items. Select two starter items. STORY MODE GAMEPLAY SELECT PATH MODE GAMEPLAY CONTINUE (See 1-4-5.) CONTINUE (See 1-4-5.) Insert the minimum number of credits required to... -
Page 10: How To Play
GAME DESCRIPTION 1-4 HOW TO PLAY 1-4-1 INSERTING CREDITS Insert coins or use the Swipe card to increase the credit display at the bottom of the screen. (See 6-5.) When you insert enough coins for a game, the message at the bottom will change from "INSERT COIN(S)" to "PRESS START BUTTON,"... -
Page 11: Item Select
GAME DESCRIPTION 1-4-3 ITEM SELECT The player can select up to two items to use in the game. Each item has its own characteristics and restrictions such as ammo. Select and shoot two items with the controller to display the confirmation screen. ITEM SELECT screen Shoot "YES"... -
Page 12: Game
GAME DESCRIPTION 1-4-4 GAME When the game starts, a cutscene will play before proceeding to gameplay. Cutscene screen Displays items obtained. The flame mark shows the player’s remaining LIFE. Game is over when the player’s LIFE becomes zero. When the player's LIFE is six or higher, it is displayed as a number. Displays number of CREDITS inserted. GAME screen To join a game in progress, insert a sufficient number of credits to play. When sufficient number of credits have been inserted, the START button on the vacant side starts blinking. Join the game by pressing the blinking START button. - Page 13 GAME DESCRIPTION 1-4-5 CONTINUE "CONTINUE" is displayed when the player’s LIFE becomes zero. Insert a sufficient number of credits to continue. Press the START button to continue once a sufficient number of credits have been inserted. Note: Credits can be inserted by inserting coins or using the Swipe card. Continue screen...
-
Page 14: Ranking
GAME DESCRIPTION 1-4-6 RANKING After completing all the stages in the game, the player can enter their name into the rankings if their total points rank among the existing high scores. The player name entered in the NAME ENTRY screen after completing the game is displayed. The player can enter their name by shooting letters with the controller and then shooting the END button to move to the ranking screen. -
Page 15: Test Mode Controls
TEST MODE CONTROLS TEST MODE CONTROLS Do not touch undesignated places. Touching undesignated places can cause an electric shock, short circuit or fire. When opening/closing or attaching/removing doors or other parts, be careful that your hands or fingers do not get caught in anything. 2-1 SWITCH UNIT Unlock the Control panel with the master key and then open it. -
Page 16: Controller
TEST MODE CONTROLS 2-2 CONTROLLER Input devices on the controller can also be used in GAME TEST MODE. Subtrigger Select lever Trigger CONTROLLER MENU ITEMS Subtrigger Used to select items (move the cursor upward) in TEST MODE. Select lever Used to select items (move the cursor downward) in TEST MODE. Trigger Used to confirm items and change setting values in TEST MODE. -
Page 17: Game Test Mode
GAME TEST MODE GAME TEST MODE 3-1 GAME TEST MENU Select menu items to conduct various tests or change game settings. GAME TEST MENU BOOKKEEPING INPUT TEST OUTPUT TEST GAME ASSIGNMENTS CONTROLLER ADJUSTMENT OUTPUT ADJUSTMENT BACKUP DATA CLEAR SYSTEM TEST MODE ->... -
Page 18: Bookkeeping
GAME TEST MODE 3-2 BOOKKEEPING Checks each game data. BOOKKEEPING PAGE 1/2 COIN 1 COIN 2 TOTAL COINS COIN CREDITS SERVICE CREDITS TOTAL CREDITS PRESS TEST TO CONTINUE BOOKKEEPING screen(1/2) CONTROLS Press the TEST button or Trigger to display the next page. MENU ITEMS COIN 1 Number of coins inserted in coin chute 1. - Page 19 GAME TEST MODE BOOKKEEPING PAGE 2/2 NUMBER OF GAMES FIRST PLAY CONTINUE PLAY MODE SELECT STORY MODE SELECT PATH MODE TOTAL TIME ****D **H **M **S PLAY TIME ****D **H **M **S GAME TIME ****D **H **M **S AVERAGE PLAY TIME **M **S AVERAGE GAME TIME **M **S...
-
Page 20: Input Test
GAME TEST MODE 3-3 INPUT TEST Checks each input device. INPUT TEST PLAYER1 PLAYER2 CONTROLLER TRIGGER CONTROLLER SELECT CONTROLLER SUBTRIGGER CONTROLLER X CONTROLLER Y CONTROLLER SCREEN IN P1 START P2 START XTREME AUDIO REAR COVER EYE MOTION SENSOR SERVICE TEST PRESS TEST BUTTON AND SERVICE BUTTON TO EXIT INPUT TEST screen CONTROLS... - Page 21 GAME TEST MODE REAR COVER EYE It is working correctly if it switches from OFF to ON when the Rear cover button on the back of the cabinet is pressed. MOTION SENSOR Checks the Motion sensor on the back of the cabinet. It is working correctly if it switches from OFF to ON when the back of the cabinet is approached.
-
Page 22: Output Test
GAME TEST MODE 3-4 OUTPUT TEST Checks each output device. OUTPUT TEST P1 START LAMP P2 START LAMP XTREME AUDIO LAMP P1 CONTROLLER HOLDER LAMP P2 CONTROLLER HOLDER LAMP P1 CEILING LAMP P2 CEILING LAMP REAR COVER LAMP REAR COVER EYE LAMP FIGURE LAMP COIN1 BLOCKER ON(REJECT) - Page 23 GAME TEST MODE MENU ITEMS P1 START LAMP Lights up/off P1 START button lamp when ON/OFF respectively. P2 START LAMP Lights up/off P2 START button lamp when ON/OFF respectively. XTREME AUDIO LAMP Lights up/off Xtreme audio button lamp when ON/OFF respectively. P1 CONTROLLER HOLDER Checks the Holder lamp on P1 controller side.
- Page 24 GAME TEST MODE XTREME AUDIO LAMP P2 CONTROLLER HOLDER LAMP P1 CONTROLLER HOLDER LAMP P1 START LAMP P2 START LAMP P1 CEILING LAMP FIGURE LAMP REAR COVER LAMP P2 CEILING LAMP REAR COVER EYE LAMP...
-
Page 25: Game Assignments
GAME TEST MODE 3-5 GAME ASSIGNMENTS Configures each game setting. GAME ASSIGNMENTS LANGUAGE(INSTRUCTION ONLY) ENGLISH GAME DIFFICULTY NORMAL LIFE MAX LIFE INITIAL LIFE MODE SELECT CONTINUE COUNTDOWN NORMAL SELECT COUNTDOWN NORMAL DRESS CODE ROUTE MAP XTREME AUDIO DEFAULT REAR COVER LAMP AUTO REAR COVER MOTION SENSOR SWIPE CARD TO PLAY... - Page 26 GAME TEST MODE CONTINUE COUNTDOWN Configures the countdown timer when a game is continued. When configured to SHORT/NORMAL/LONG, the countdown timer is set to 10/20/30 seconds respectively. (Default setting: NORMAL, setting values: SHORT, NORMAL, LONG) SELECT COUNTDOWN Configures the countdown timer for MODE SELECT, ITEM SELECT, STAGE SELECT and NAME ENTRY between SHORT, NORMAL and LONG.
-
Page 27: Controller Adjustment
GAME TEST MODE 3-6 CONTROLLER ADJUSTMENT Configures and checks crosshair alignment of each controller. CONTROLLER ADJUSTMENT PLAYER1 PLAYER2 **(**) **(**) LEFT **(**) LEFT **(**) CENTER X **(**) CENTER X **(**) **(**) **(**) RIGHT **(**) RIGHT **(**) BOTTOM **(**) BOTTOM **(**) DEFAULT DEFAULT CANCEL... - Page 28 GAME TEST MODE MENU ITEMS PLAYER1 Configures the controller on P1 side. PLAYER2 Configures the controller on P2 side. Configures the correction value (analog value) for the upper limits of the Y-axis. Aim at the mark at the top of the screen with the controller, and pull the trigger to determine the analog value.
- Page 29 GAME TEST MODE Configuring the Controller's Aim This chapter explains settings with PLAYER 1. PLAYER 2 can be set with the same steps. Front sight Rear sight Trigger Controller Sit in P1 seat and hold P1 controller. Sit down securely in front of the sticker backrest. Sticker backrest P2 seat P1 seat...
- Page 30 GAME TEST MODE Hold the controller with both hands. With either the left or right eye, align the controller's front sight and rear sight so that they make a straight line with the marker displayed at the top of the screen, and then pull the trigger.
- Page 31 GAME TEST MODE Press the P1 START button to select LEFT. Hold the controller with both hands and refer to step 3. With the same eye used in step 3, align the controller's front sight and rear sight so that they make a straight line with the marker displayed at the left side of the screen, and then pull the trigger.
- Page 32 GAME TEST MODE Press the P1 START button to select CENTER X. Hold the controller with both hands and refer to step 3. With the same eye used in step 3, align the controller's front sight and rear sight so that they make a straight line with the marker displayed at the center of the screen, and then pull the trigger.
- Page 33 GAME TEST MODE Press the P1 START button to select RIGHT. Hold the controller with both hands and refer to step 3. With the same eye used in step 3, align the controller's front sight and rear sight so that they make a straight line with the marker displayed at the right side of the screen, and then pull the trigger.
- Page 34 GAME TEST MODE Hold the controller with both hands and refer to step 3. With the same eye used in step 3, align the controller's front sight and rear sight so that they make a straight line with the marker displayed at the bottom of the screen, and then pull the trigger.
- Page 35 GAME TEST MODE Press the P1 START button to select CHECK. Aim the controller at the screen and a crosshair will be displayed. Move the controller to move the crosshair along the edge of the screen. If the crosshair does not disappear while moving, the configuration is complete.
-
Page 36: Output Adjustment
GAME TEST MODE 3-7 OUTPUT ADJUSTMENT Configures volume settings and checks operation of speakers/gimmick output devices. OUTPUT ADJUSTMENT SPEAKER TEST FRONT LEFT SPEAKER FRONT RIGHT SPEAKER REAR LEFT SPEAKER REAR RIGHT SPEAKER CENTER SPEAKER WOOFER SPEAKER XTREME AUDIO SPEAKER GIMMICK OUTPUT TEST SEAT VIBRATION STEP VIBRATION AIR GIMMICK... - Page 37 GAME TEST MODE MENU ITEMS SPEAKER TEST Checks output devices of the speaker. FRONT LEFT SPEAKER When ON, the speaker is normal if a sound is emitted from front left speaker. FRONT RIGHT SPEAKER When ON, the speaker is normal if a sound is emitted from front right speaker.
- Page 38 GAME TEST MODE Front left speaker Center speaker Front right speaker Rear left speaker Rear right speaker Right woofer Seat Controller Air gimmick Left woofer Step Controller...
-
Page 39: Backup Data Clear
GAME TEST MODE 3-8 BACKUP DATA CLEAR Deletes various game data. BACKUP DATA CLEAR YES(CLEAR) -> NO(CANCEL) SELECT WITH SERVICE BUTTON AND PRESS TEST BUTTON BACKUP DATA CLEAR screen CONTROLS - Press the SERVICE button or Subtrigger / Select lever to select an item. - Press the TEST button or Trigger to confirm the selected item. -
Page 40: System Test Mode
SYSTEM TEST MODE SYSTEM TEST MODE For each setting, select "Exit" on each test screen, and press the TEST button to start saving. The saving process is completed once the screen automatically shifts to the previous screen. If the power is turned OFF before the saving process is complete, the setting change will not be valid. -
Page 41: Error Display
ERROR DISPLAY ERROR DISPLAY ● If an error is displayed, have site maintenance personnel or other qualified professionals resolve it. If someone without specialized or technical knowledge attempts to rectify the problem, an electric shock, short circuit or fire may result. -
Page 42: 26 5-1 Error Display
ERROR DISPLAY 5-1 ERROR DISPLAY 0917 Display USB Flash Drive Remain Error Cause USB flash drive remains connected. Measures Remove the USB flash drive. (See "Chapter 17 SOFTWARE INSTALLATION" in the Owner’s manual.) 3001 Display Controller Board Not Found Cause Network communication with the controller failed Measures Check the connection with the Controller board. - Page 43 LIST OF THIRD-PARTY RIGHTS HarfBuzz unicode.org/Public/ External Link, http://www.unicode.org/reports/ External Link, and http:// ___________________________________________________________________________ www.unicode.org/cldr/data/ External Link. HarfBuzz is licensed under the so-called "Old MIT" license. Details follow. NOTICE TO USER: Carefully read the following legal agreement. BY DOWNLOADING, For parts of HarfBuzz that are licensed under different licenses see individual INSTALLING, COPYING OR OTHERWISE USING UNICODE INC.'S DATA FILES files names COPYING in subdirectories where applicable.
- Page 44 # - Its license terms and conditions are shown below. # Use, reproduction, and distribution of this software is permitted. #---------COPYING.libtabe ---- BEGIN-------------------- # Any copy of this software, whether in its original form or modified, # must include both the above copyright notice and the following # paragraphs.
- Page 45 OggVorbis ___________________________________________________________________________ Legal Terms Copyright (c) 2002-2004 Xiph.org Foundation =========== Redistribution and use in source and binary forms, with or without 0. Definitions modification, are permitted provided that the following conditions -------------- are met: Throughout this license, the terms `package', `FreeType Project', - Redistributions of source code must retain the above copyright and `FreeType archive' refer to the set of files originally notice, this list of conditions and the following disclaimer.
- Page 46 Redistribution and use in source and binary forms, with or without There are two mailing lists related to FreeType: modification, are permitted provided that the following conditions are met: o freetype@nongnu.org * Redistributions of source code must retain the above copyright notice, this list of conditions and the following disclaimer.
- Page 47 * EXPRESSED OR IMPLIED WARRANTIES, INCLUDING, BUT NOT LIMITED TO, BUSINESS INTERRUPTION) HOWEVER CAUSED AND ON ANY THEORY OF LIABILITY, WHETHER IN * IMPLIED WARRANTIES OF MERCHANTABILITY AND FITNESS FOR A CONTRACT, STRICT LIABILITY, OR TORT (INCLUDING NEGLIGENCE OR PARTICULAR * PURPOSE ARE DISCLAIMED.
- Page 48 PicoJSON 1.3.0 ___________________________________________________________________________ Copyright 2009-2010 Cybozu Labs, Inc. Copyright 2011-2014 Kazuho Oku All rights reserved. Redistribution and use in source and binary forms, with or without modification, are permitted provided that the following conditions are met: 1. Redistributions of source code must retain the above copyright notice, this list of conditions and the following disclaimer.
- Page 49 General Tech: +1 224 265 4283 Facsimile: +1 630 860 7775 SEGA Interactive Co., Ltd. 1-2-12, Haneda, Ohta-ku, Tokyo 144-8531, Japan DISTRIBUTOR Sega Logistics Service Co., Ltd. 6F Kamata Higashi-Nihon Bldg., 1-1-25, Minami Kamata, Ohta-ku, Tokyo, 144-0035 JAPAN Telephone: +81-(0)3-6428-7605 Facsimile: +81-(0)3-6428-7613 PRINTING 2018.09...
Need help?
Do you have a question about the HOUSE OF THE DEAD: SCARLET DAWN and is the answer not in the manual?
Questions and answers