Table of Contents
Advertisement
Quick Links
Advertisement
Table of Contents

Summary of Contents for DAK 900-EH Series
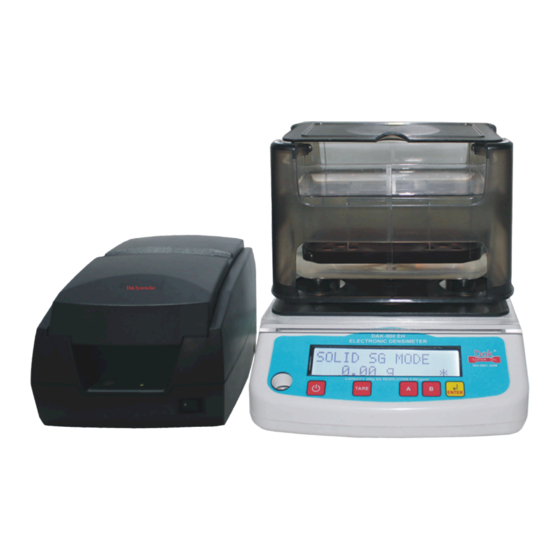
- Page 2 Series 900-EH Electronic Densimeter Dak System Inc. Printer Densimeter __________________________________________________________________________________...
-
Page 3: Table Of Contents
Liquid Mode 21-22 How to Compensate Liquid Sample Temperature Steps of Measurement Special Measurement Cases: To Measure A Floating Sample How To Measure The Pellet 25-26 Alloy Mode PC Operation through DAK Densimeter Data Analysis Software Densimeter Assembly Directions 29-31 __________________________________________________________________________________... -
Page 4: The Densimeter- At A Glance
The Densimeter- At a glance. AC Mains Chord Thermometer Air Tight Wind Shield Tweezers Metal Angle (optional) Water Tank Sensor 200 gm Standard Weight For Calibration Holder & Support __________________________________________________________________________________... -
Page 5: The Set Up Protocol
The Set up Protocol SUPPORT HOLDER 1- Place the unit on a stable location where there is no Vibration or airflow. 2- This unit is equipped with a Spirit Level on the front left bottom corner, twist the adjustment on the underside so that the tear drop falls in the centre of the circle, twist it clockwise to increase the height and anti-clockwise to reduce the height. - Page 6 SENSOR 7- Fit the Support’s rail line carefully; take the lid off to sink the Measuring Tray in to water 8- Air bubbles and Oil on the sample will produce buoyancy in water and these could be factors leading to inaccurate results.
-
Page 7: Salient Features Of Series 900Eh
Salient features of Series 900-EH Electronic Densimeter Dak System Inc. Principle: According to ASTM, JIS, GB/T, ISO standards, adopting the buoyancy method and the water displacement method of Archimedean principle, can accurately and directly measure the value of density. Salient Features: ... -
Page 8: Solid Mode
To measure different samples successively, just simply replace the beaker. A measurement result represents only value obtained through measurement at room temperature. Operating Instruction for DAK Densimeter. There are 5 keys for operating the Densimeter. They are as follows: 1. -
Page 9: Operating Modes
Operating Modes There are 4 types of operating modes. They are as follows: 1. Idle / Default Mode – This is the default/ stand by mode of the Densimeter. 2. Density Measuring – This mode is used for measuring the density of the specimen. 3. -
Page 10: Setting Modes
Setting Modes: In setting modes, press Enter to dig in a menu option and tare to go back to the parent menu option. Use A to scroll up and B to scroll down. Types of menu: 1. General Setting Menu 2. -
Page 11: Set Liquid Type
SET LIQUID TYPE - After entering the Gen Set Menu - Select “SET LIQUID TYPE” - Press “Enter” Select the option “WATER or AS PER SET SG” by pressing keys “A” or “B”, press “Enter” to confirm. Importance of AS PER SET SG: In cases where liquid in use is not Water you can enter the SG of this liquid in the “Configuration Menu”... -
Page 12: Lead Zero Blank
LEAD ZERO BLANK Importance: This option is mainly for users who want the reading up to 3 digits before the decimal point. E.g. Reading for the sample is 3gms a) If Lead Zero Blank is “Disabled” then the reading would be displayed as 003.00g b) If Lead Zero Blank is “Enabled”... -
Page 13: Key Beep Set
KEY BEEP SET Importance: For a buzzer sound of every click the user makes, this ensures the confirmation of that click. However the user can also switch it this sound off in case not required. - After entering the Gen Set Menu - Select “KEY BEEP SET”... -
Page 14: Auto Power Off
AUTO POWER OFF Importance: This is a power saving option. On enabling Auto Power Off the equipment switches off automatically if it remains un-operated for 30mins. - After entering the Gen Set Menu - Select “AUTO POWER OFF” - Press “Enter” - Select “DISABLE or ENABLE”... -
Page 15: Print Baud Rate
PRINT BAUD RATE Importance: For operating the Printer the user needs to configure the Densimeter with a Baud rate required for Printer operation. - After entering the Gen Set Menu - Select “PRINTING MODE” - Press “Enter” - Select out of the following options: (9600 / 19200) The options can be viewed by pressing the key “A”... -
Page 16: Set Time & Date
SET TIME & DATE Importance: This option can be used to set the Date and time of operation which in the Idle mode can also be used as a Digital Table Clock. - After entering the Gen Set Menu - Select “SET TIME & DATE” - Press “Enter”... -
Page 17: Calibration
Calibration Step 1 Step 2 Step 3 Calibration is the most important procedure required for finding the % accuracy of the results, especially if the equipment is moved or shifted. Hence to ensure accuracy this step should be performed. The steps for the calibration are as follows: From the Idle Mode press A + Enter (for 3 seconds) key till you enter into the Calibration mode. -
Page 18: Comparator Set
2. Comparator Set: Importance: This function enables to the user to set limits for the readings of that particular batch of samples. Once he enters the upper and the lower limits, a range has been defined for the reading, if this crosses the upper side then there will be and indication of “HI”... -
Page 19: Liquid Sg Set Mode
4. Liquid SG Set Mode: Importance: If the liquid used during testing is other than Water then you can set the specific gravity of the liquid in use with this option. The Density for sample under test is calculated accordingly. In this you can set the SG of the liquid in use. -
Page 20: To Measure Density
To Measure Density: 1. Solid Mode: Assumed that all the mechanical arrangements are with respect to solid mode you can start the measurement by following the below steps: Step 1 Step 2 (a) Step 2(b) Step 3 Step 4 Step 5 Step 6 (a) Step 6 (b) Step 9... -
Page 21: Liquid Mode
2. Liquid Mode Measurement: The Dak Densimeter also has the provision for Liquid density measurement. To measure the liquid density, an optional Liquid Density Kit would be required. This machine calculates density of a liquid sample by comparing the weight of a Standard Glass Sample in water with its weight in liquid test sample. - Page 22 Measuring the density of liquid. Assumed that all mechanical arrangements are with respect to the liquid mode: 1. Select LIQUID MODE by keeping the A Key pressed while pressing B along with “A” till you reach the required mode 2. Place the GLASS REFERENCE in the sample liquid and press OK. 3.
-
Page 23: How To Compensate Liquid Sample Temperature
HOW TO COMPENSATE LIQUID SAMPLE TEMPERATURE PREPARATION 4 - If the temperature compensation is necessary, follow the procedure below to change the compensated liquid temperature and the compensating temperature rate of liquid sample. What is "the compensating temperature rate"- The changing number of the density when the liquid is raised by1 degree centigrade. -
Page 24: Steps Of Measurement
STEP OF MEASUREMENT 1 Make sure the display is 0.00g. 2. Pour about 50cc. of liquid sample in a Beaker. 3. Put the Standard Glass Sample used for memorizing data into the Beaker at the preparation 4. Set the Beaker prepared at Step 2. Correctly on the Beaker Line of Beaker Stage 5. -
Page 25: Special Measurement Cases
CAUTION FOR LIQUID DENSITY MEASUREMENT: 1) Do not use the liquid sample as to erode the machine body or spare parts. 2) Do not spill liquid sample on the machine body or spare parts. 3) Open the Airtight Wind Shield when measuring highly volatile liquid. Fullness of the gas may cause the machine defect. - Page 26 Step 1 Step 3(a) Step 3 (b) Step 4 1. From display 0.00g, sink one Petri dish on the Measuring Tray in water, and put the other Petri dish onto the lid of Sensor like in the aerial mode of measurement. - The weight will be displayed.
-
Page 27: Alloy Mode
3. ALLOY MODE Preparation: 1. All mech. arrangements are as per solid mode. 2. Enter known densities of pure materials of alloy constituents in the “Alloy SG Set” option using “Configuration Menu” Configuration Menu Alloy SG Set Press “Tare + Key A” till you enter into the “Configuration Mode” to set the SG values of the constituents of which your test sample is composed of. -
Page 28: Pc Operation Through Dak Densimeter Data Analysis Software
PC Operation through Dak Densimeter Data Analysis Software Dak has designed simple yet sophisticated software, which is easy to operate, interpret and print results. Connections: After switching on the Densimeter, Printer and the Computer/ Lap top. Connect the Densimeter to the PC via the USB. Click on the Icon for the Densimeter software on your desktop, the “Communication Status”... -
Page 29: Densimeter Assembly Directions
Air tight Wind Shield Assembly: Parts: Left Board Right Board Back Board Upper Panel Front Panel Base Board Aluminum Stick Screw __________________________________________________________________________________... - Page 30 1) Set the Base Board to the Machine 2) Screw on from the Inside. Back Board Aluminum Stick Aluminum Stick Left Board Right Board 3) Adjust the machine level in the horizontal position by using the Spirit level and then assemble the windshield. 4) Set the Water tank and the Sensor on the machine and slid in the front and the upper panels.
- Page 31 Upper Panel Front Panel __________________________________________________________________________________...
- Page 32 __________________________________________________________________________________...
- Page 33 __________________________________________________________________________________...
Need help?
Do you have a question about the 900-EH Series and is the answer not in the manual?
Questions and answers