
Related Manuals for arcelik BEKO G91629NWU


Summary of Contents for arcelik BEKO G91629NWU
- Page 1 36’’ 3 DOORS WARDROBE TYPE REFRIGERATOR / REV NO: 01 FOUREVER 3-DOOR G91629NWU SERVICE MANUAL REVISION HISTORY REVISION DATE First publication 10.10.2015 TND eklendi 18.10.2018...
-
Page 2: Table Of Contents
36’’ 3 DOORS WARDROBE TYPE REFRIGERATOR / REV NO: 00 1. GENERAL SAFETY WARNINGS 1.1.HCA warning 1.2.For products with water dispenser 1.3.Intended use 1.4.Child safety 1.5.Compliance with the WEEE directive and disposal of the waste product 1.6.Packaging information 1.7.Disposal of the waste product 2.General appearance of the product 2.1.General Dimensions of the Product 2.2.Opened View of Product at 90°... - Page 3 36’’ 3 DOORS WARDROBE TYPE REFRIGERATOR / REV NO: 00 9.7.E9 Icematic Motor Error 9.8.E13 Cyclic freezer fan error 9.9.E15 Speed Condenser Fan Error 9.10.Cooling failure due to electrical issues 9.11.Freezing error due to electrical issues 10.TROUBLESHOOTING 10.1.The refrigerator is not operating 10.2.Condensation in the fridge compartment 10.3.Compressor is not running 10.4.Refrigerator runs either frequently or for a long time...
- Page 4 36’’ 3 DOORS WARDROBE TYPE REFRIGERATOR / REV NO: 00 11.23.Water system connection 11.24.Crisper rails 11.25.Telescopic rail and rail gripper 11.26.Cooler rear illumination glass group 11.27.Cooler ceiling illumination glass 11.28.Fridge illumination glass and LED card 11.29.Filter cover group 11.30.Bypass cover / water filter 11.31.Filter head 11.32.Cooler evaporator cover screw plug 11.33.Cooler evaporator cover...
- Page 5 36’’ 3 DOORS WARDROBE TYPE REFRIGERATOR / REV NO: 00 11.56.Thermal fuse 11.57.Heated pipe group 11.58.Discharge groups 11.59.Middle hinge group and pin 11.60.The metal door puller mechanism 11.61.The condenser fan motor 11.62. Sound damper 11.63. Service hatch 12. Service equipment 13.
-
Page 6: General Safety Warnings
36’’ 3 DOORS WARDROBE TYPE REFRIGERATOR / REV NO: 00 1. GENERAL SAFETY WARNINGS Children must not play with the device. Cleaning and user maintenance must not be performed by the children unless they are supervised by an adult. If the product is out of order, it must not be operated before being repaired by the authorised service! Risk of electric shock! Connect the product to a grounded socket which is being protected by a fuse conforming to the values on the Type Label. -
Page 7: Hca Warning
36’’ 3 DOORS WARDROBE TYPE REFRIGERATOR / REV NO: 00 1.1.HCA warning If the product has a refrigeration system containing R600a gas, make sure that the refrigeration system and piping are not damaged during usage and transportation. This gas is flammable. If the refrigeration system is damaged, keep the product away from potential fire sources that may cause it to catch fire and immediately ventilate the room where the unit is placed. -
Page 8: General Appearance Of The Product
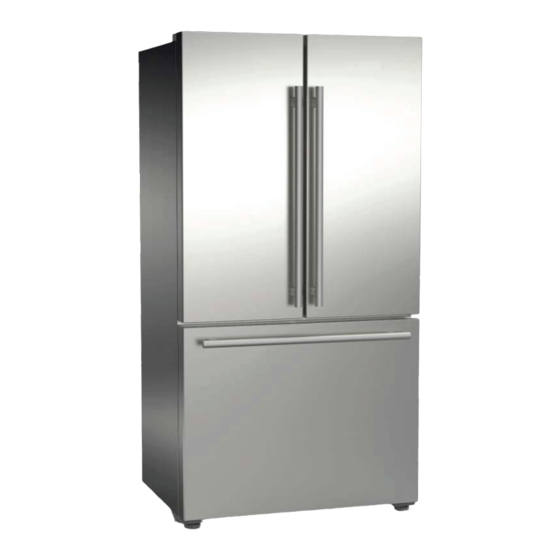
36’’ 3 DOORS WARDROBE TYPE REFRIGERATOR / REV NO: 00 2.General appearance of the product The figure given is for schematic purposes and may not be exactly the same with the product. If the relevant parts are not available in the product, it applies to other models. -
Page 9: General Dimensions Of The Product
36’’ 3 DOORS WARDROBE TYPE REFRIGERATOR / REV NO: 00 2.1.General Dimensions of the Product... - Page 10 36’’ 3 DOORS WARDROBE TYPE REFRIGERATOR / REV NO: 00...
-
Page 11: Opened View Of Product At
36’’ 3 DOORS WARDROBE TYPE REFRIGERATOR / REV NO: 00 2.2.Opened View of Product at 90°... -
Page 12: Maximum Opened View Of The Product
36’’ 3 DOORS WARDROBE TYPE REFRIGERATOR / REV NO: 00 2.3.Maximum Opened View of the Product... -
Page 13: Installation
36’’ 3 DOORS WARDROBE TYPE REFRIGERATOR / REV NO: 00 3. INSTALLATION 3.1.Handling Instructions 1. This appliance must be transported only in upright position. Shipping package must not be damaged during transportation. 2. If the appliance is to be transported in horizontal position, it must only be leaned towards right-hand side when you are facing the front of the appliance. -
Page 14: Appropriate Place For Installation
36’’ 3 DOORS WARDROBE TYPE REFRIGERATOR / REV NO: 00 3.3.Appropriate place for installation WARNING: If the door of the room where the refrigerator will be placed is too narrow to let the product to pass through, the doors of the unit must be dismantled and the appliance must be passed in a horizontal position. -
Page 15: Electrical Connection
36’’ 3 DOORS WARDROBE TYPE REFRIGERATOR / REV NO: 00 3.5.Electrical Connection Connect the product to a grounded socket which is protected by a fuse conforming to the values on the Type Label. Our company shall not be liable for any damages which may arise if the machine is used without a proper grounding which conforms to the local regulations. -
Page 16: Product Use
36’’ 3 DOORS WARDROBE TYPE REFRIGERATOR / REV NO: 00 4.PRODUCT USE For air circulation in the place where the refrigerator is located, necessary clearance must be allocated under, top, right and left of the unit. As the water inlet is at the rear side of the refrigerator for products equipped with water dispenser, make sure that the hose is not kinked or squeezed. -
Page 17: Gas Flow Diagram And Parts
36’’ 3 DOORS WARDROBE TYPE REFRIGERATOR / REV NO: 00 6.Gas Flow Diagram and Parts Cooling system parts 1- Compressor / KMP.MTS200MT 2- Coil Condenser 3- Freezer heating pipe 4- Dryer 5- Capillary (Capillary pipe) 6- Freezer evaporator group 7- Cooler evaporator group 8- Return Pipe Welding Points A- Compressor - Coil Condenser... -
Page 18: Electronic And Controlling System
36’’ 3 DOORS WARDROBE TYPE REFRIGERATOR / REV NO: 00 7.ELECTRONIC AND CONTROLLING SYSTEM 7.1.Component List and Operating Principles Component Compressor Defrosting heater DC Speed Freezer fan DC Speed Condenser fan Sensors (Frz Eva, Frz Air, FF Eva, FF Air, Icematic) DC Fresh Food Fan Flange Heater FF Eva heater... - Page 19 36’’ 3 DOORS WARDROBE TYPE REFRIGERATOR / REV NO: 00 FF Eva sensor (Fridge Compartment Eva Sensor): It is used to detect the tail Evaporator temperature of the Fridge compartment. Defrost sensor: It is located on the evaporator at the capillary outlet. It detects the temperature on the evaporator and transmits it to the microprocessor.
-
Page 20: U4 Control Card Forever Display Dealer Mode
36’’ 3 DOORS WARDROBE TYPE REFRIGERATOR / REV NO: 00 8.ELECTRONIC CONTROL SYSTEM 8.1.U4 CONTROL CARD FOREVER DISPLAY DEALER MODE DEALER MODE ACTIVATION The display board we use in the refrigerator has a six-key system. Set values are shown on the display. The figure given is for schematic purposes and may not be exactly the same with the product. - Page 21 36’’ 3 DOORS WARDROBE TYPE REFRIGERATOR / REV NO: 00 If the key configuration is pressed correctly, dealer mode is enabled with a buzzer sound. Alarm icon lights continuously. Related icons light as the display button is pressed; no cooling is made. If the door is opened, "door open"...
-
Page 22: U4 Control Card Forever Display Service Test Activation
36’’ 3 DOORS WARDROBE TYPE REFRIGERATOR / REV NO: 00 8.2.U4 CONTROL CARD FOREVER DISPLAY SERVICE TEST ACTIVATION OF SERVICE TEST The display board we use in the refrigerator has a six-key system. Set values are shown on the display. *(pressing for 3 seconds) Step 1: Press and hold On/Off and Alarm Off buttons for 3 sec anytime after energizing to switch to password entry screen. - Page 23 36’’ 3 DOORS WARDROBE TYPE REFRIGERATOR / REV NO: 00 8.3.U4 CONTROL CARD FOREVER DISPLAY SERVICE TEST VERSION NUMBER DISPLAY Once entered in the service test, icons work for ON for 0.5 sec. and OFF for 0.5 sec. Once any button is pressed, Step 1 is terminated. Step 2: Firstly, the display software version info is shown on the FF compartment and the revision info is shown on the FRZ compartment.
-
Page 24: U4 Control Card Forever Display Service Test Sensor Temperatures Display
36’’ 3 DOORS WARDROBE TYPE REFRIGERATOR / REV NO: 00 8.4.U4 CONTROL CARD FOREVER DISPLAY SERVICE TEST SENSOR TEMPERATURES DISPLAY Step 3: When any button is pressed, sensor display step is entered. Sensor display is as follows. View (Value-Sensor) : Sensor value at FRZ compartment, at FF compartment:... - Page 25 36’’ 3 DOORS WARDROBE TYPE REFRIGERATOR / REV NO: 00 View (Value-Cabin Code) : Sensor value and cabinet code CA: 0 Fridge CA: 1 Freezer Switch between sensors can be made by pressing Fridge Set button in forward direction and Quick Fridge button in backward direction.
- Page 26 36’’ 3 DOORS WARDROBE TYPE REFRIGERATOR / REV NO: 00 8.5.U4 CONTROL CARD FOREVER DISPLAY SERVICE TEST COMPONENT DRIVE STEP Step 5: Product ON/OFF and Alarm Off buttons are shortly pressed simultaneously to switch to the component drive step. Component Selection Component Selection Component On/Off...
-
Page 27: Termination Of Service Mode
36’’ 3 DOORS WARDROBE TYPE REFRIGERATOR / REV NO: 00 to OFF-22-14-OFF... with FRZ setting button. Fan speed could be different for different products. Fan off Fan speed When Icematic 'Ir' is selected, Icematic is rotated in pouring direction by selecting '1' using FRZ Set button and in the correction direction when '2' is selected. - Page 28 TPM Single Point Lesson LESSON NO: U4 CONTROL BOARD FOUREVER 3 DOOR TOP TRIM DISPLAY SUBJECT SERVICE TEST ACTIVATION The fourever top trim display board we use in the refrigerator has an six-key system. Set values are shown on the display. On / Off Quick Fridge Fridge Set...
- Page 29 TPM Single Point Lesson LESSON NO: U4 CONTROL BOARD FOUREVER 3 DOOR TOP TRIM DISPLAY SUBJECT SERVICE TEST ACTIVATION The Fridge set button is pressed once. Press one times The buzzer mode is activated with the buzzer sound. The display shows the set values and the warning icon does not illuminate.
-
Page 30: Production Test Of The Control Card (4934262300)
36’’ 3 DOORS WARDROBE TYPE REFRIGERATOR / REV NO: 00 If the following states occur, service test is aborted. Power failure Product on-off and Alarm Off buttons are pressed simultaneously Operating in service test for 30 minutes 8.7.PRODUCTION TEST OF THE CONTROL CARD (4934262300) When the refrigerator is energised, it starts with production test as long as it is not switched to service test or dealer mode. -
Page 31: Control Card Gr U4 G91629Ne Fourever V0B (4934262300)
36’’ 3 DOORS WARDROBE TYPE REFRIGERATOR / REV NO: 00 14.2 16.0 2 Water pipe heaters - HAB Heater 16.2 Compressor 8.9.CONTROL CARD GR U4 G91629NE FOUREVER V0b (4934262300) I/O type I/O name Connector name INPUT Fridge Air Sensor KN6-1,2 INPUT Fridge Eva Sensor KN6-3,4... - Page 32 36’’ 3 DOORS WARDROBE TYPE REFRIGERATOR / REV NO: 00 FF/FRZ Light KN10-13 KN10-14 KN10-15 INPUT DC FF Door KN9-1,2 Analogue (LV) INPUT DC FRZ Door KN9-4,5 VALVE B - KN11-6 KN11-7 VALVE A - 12V DC OUTPUT KN11 KN11-8 12 VDC VALVE B + KN11-9...
-
Page 33: Control Card Gr U4 G91629Ne V0B A+ Tr (4934262800)
36’’ 3 DOORS WARDROBE TYPE REFRIGERATOR / REV NO: 00 8.10.CONTROL CARD GR U4 G91629NE V0b A+ TR (4934262800) I/O type I/O name Connector name INPUT Fridge Air Sensor KN6-1,2 INPUT Fridge Eva Sensor KN6-3,4 Analogue (LV) INPUT Freezer Air Sensor KN6-5,6 INPUT Freezer Eva Sensor... - Page 34 36’’ 3 DOORS WARDROBE TYPE REFRIGERATOR / REV NO: 00 INPUT DC FF Door KN9-1,2 Analogue (LV) INPUT DC FRZ Door KN9-4,5 KN11-6 VALVE B - KN11-7 VALVE A - 12V DC OUTPUT KN11 12 VDC KN11-8 KN11-9 VALVE B + KN11-10 VALVE A + 5V DC OUTPUT...
-
Page 35: Electric Circuit Diagram
36’’ 3 DOORS WARDROBE TYPE REFRIGERATOR / REV NO: 00 8.11. Electric Circuit Diagram... -
Page 36: U4 Malfunction Error Codes
36’’ 3 DOORS WARDROBE TYPE REFRIGERATOR / REV NO: 00 9.U4 MALFUNCTION ERROR CODES... -
Page 37: E0 Freezer Air Sensor Error
36’’ 3 DOORS WARDROBE TYPE REFRIGERATOR / REV NO: 00 ERROR ERROR DEFINITION CODE Freezer Compartment Air Sensor Error Freezer Compartment Evaporator Sensor Error Fridge Compartment Evaporator Sensor Error Fridge Compartment Air Sensor Error Freezer Compartment Defrost Heater Error Icematic Air Sensor Error Icematic Failure Speed Frz Fan Error Speed Condenser Fan Error... -
Page 38: E1 Freezer Evaporator Sensor Error
36’’ 3 DOORS WARDROBE TYPE REFRIGERATOR / REV NO: 00 Freezer E0 Error flashes Sensor Error Check cables connected to control card sensor socket (KN6) pins 5 and 6 If cables are disconnected, re-connect them, turn on the refrigerator and check Any errors on display? Remove KN6 socket from control card. -
Page 39: E2 Fridge Evaporator Sensor Error
36’’ 3 DOORS WARDROBE TYPE REFRIGERATOR / REV NO: 00 Freezer E1 Error flashes Evaporator Sensor Error Check cables connected to control card sensor socket (KN6) pins 7 and 8 If cables are disconnected, re-connect them, turn on the refrigerator and check Any errors on display? Use a multimeter to measure sensor... -
Page 40: E3 Fridge Air Sensor Error
36’’ 3 DOORS WARDROBE TYPE REFRIGERATOR / REV NO: 00 Fridge E2 Error flashes Evaporator Sensor Error Check cables connected to control card sensor socket (KN6) pins 3 and 4 If cables are disconnected, re-connect them, turn on the refrigerator and check Any errors on display? Use a multimeter to measure sensor... -
Page 41: E4 Freezer Defrost Heater Error
36’’ 3 DOORS WARDROBE TYPE REFRIGERATOR / REV NO: 00 Fridge Air E3 Error flashes Sensor Error Check cables connected to control card sensor socket (KN6) pins 1 and 2 If cables are disconnected, re-connect them, turn on the refrigerator and check Any errors on display? Use a multimeter to measure sensor... -
Page 42: E8 Icematic Air Sensor Error
36’’ 3 DOORS WARDROBE TYPE REFRIGERATOR / REV NO: 00 Freezer E4 Error flashes Defrost Heater Error Plug the refrigerator to wattmeter and operate freezer defrost heater in service test. Check if the value read from wattmeter conforms to the total power of defrost heater+drain heater Is the value suitable? Open Freezer eva cover, remove... -
Page 43: E9 Icematic Motor Error
36’’ 3 DOORS WARDROBE TYPE REFRIGERATOR / REV NO: 00 Icematic E8 Error flashes Sensor Error Check cables connected to control board sensor socket (KN4) pins 14 and If cables are disconnected, re-connect them, turn on the refrigerator and check Any errors on display? Use a multimeter to measure sensor... -
Page 44: E13 Cyclic Freezer Fan Error
36’’ 3 DOORS WARDROBE TYPE REFRIGERATOR / REV NO: 00 Icematic E9 Error flashes Motor Error In service test, rotate icematic motor in In service test, rotate icematic motor in pouring direction. Check if there is 12V correcting direction. Check if there is at control card motor socket (KN4) pins 12V at control card motor socket (KN4) 7 and 8. -
Page 45: E15 Speed Condenser Fan Error
36’’ 3 DOORS WARDROBE TYPE REFRIGERATOR / REV NO: 00 E13: Speed E13 Error flashes Frz Fan Error Check cables connected to control card DC Input-Output socket (KN10) pins 1, 2 and 3 If cables are disconnected, re-connect them, turn on the refrigerator and check Any errors on display? Remove the rear compartment wall of... -
Page 46: Cooling Failure Due To Electrical Issues
36’’ 3 DOORS WARDROBE TYPE REFRIGERATOR / REV NO: 00 E15: Speed E15 Error flashes Condenser Fan Error Check cables connected to control card DC Input-Output socket (KN10) pins 4, 5 and 6 If cables are disconnected, re-connect them, turn on the refrigerator and check Any errors on display? Remove the protective cover of the... - Page 47 36’’ 3 DOORS WARDROBE TYPE REFRIGERATOR / REV NO: 00 Cooling failure due Refrigerator does not cool to electrical issues Enter service test and operate Step-3 compressor. Check if it is running. Remove the connector of the cables entering the body from the Is compressor compressor’s side.
-
Page 48: Freezing Error Due To Electrical Issues
36’’ 3 DOORS WARDROBE TYPE REFRIGERATOR / REV NO: 00 Freezing error due to Refrigerator freezes the foods electrical issues Plug the refrigerator to wattmeter and operate freshfood heater in service test. Check if the value read from wattmeter conforms to the power of freshfood heater. -
Page 49: The Refrigerator Is Not Operating
36’’ 3 DOORS WARDROBE TYPE REFRIGERATOR / REV NO: 00 10.1.The refrigerator is not operating refrigerator is not operating. Is the fuse of the socket to Is the refrigerator which your refrigerator is connected or the main correctly plugged in? fuse blown out? Insert the plug Check the... -
Page 50: Compressor Is Not Running
36’’ 3 DOORS WARDROBE TYPE REFRIGERATOR / REV NO: 00 Condensation on the side wall of the fridge compartment (MULTIZONE or COOL SELECT). REASONS OF THINGS TO TAKE INTO CONDENSATION ACCOUNT Very cold Switching the set ambient position to a colder conditions. -
Page 51: Refrigerator Runs Either Frequently Or For A Long Time
36’’ 3 DOORS WARDROBE TYPE REFRIGERATOR / REV NO: 00 Compresso r is not running. THINGS TO TAKE REASONS INTO ACCOUNT Protective thermal of the compressor will blow on the sudden power interruptions or while The refrigerator will start running plugging the appliance in and out as the approximately after 6 refrigerant pressure in the cooling system of the... -
Page 52: Temperatures Are Too Low
36’’ 3 DOORS WARDROBE TYPE REFRIGERATOR / REV NO: 00 The fridge is running frequently or for a long time. This is normal. Operation times of the Volume of the refrigerators may vary refrigerator may be depending on their volumes. large. -
Page 53: The Refrigerator Operates Tumultuously
36’’ 3 DOORS WARDROBE TYPE REFRIGERATOR / REV NO: 00 temperature s are too low The temperature of the The temperature of the fresh food compartment freezer compartment is is very low but that of the very low but that of the freezer compartment is fresh food compartment is sufficient. -
Page 54: Noise From The Evaporator Fan Motor
36’’ 3 DOORS WARDROBE TYPE REFRIGERATOR / REV NO: 00 The refrigerator operates tumultuously The operation sound There is a ticking Shake or changes when the noise from the noise sound is refrigerator is running. refrigerator. heard. The operation performance This noise comes from the characteristics of the Ground stabilization adjustment... -
Page 55: Noise From The Condenser Fan Motor
36’’ 3 DOORS WARDROBE TYPE REFRIGERATOR / REV NO: 00 Noise comes from evaporator fan motor Open the eva cover and check the fan, replace if it is Fan motor blade may skewed and there is a risk of be skewed. friction. -
Page 56: Noise From The Refrigerator
36’’ 3 DOORS WARDROBE TYPE REFRIGERATOR / REV NO: 00 Noise from the condenser fan motor. Open the compressor area rear cover and check the fan; replace if Fan motor blade may it is skewed and there is a risk of be skewed. -
Page 57: Condensation On The Inner Walls Of The Refrigerator
36’’ 3 DOORS WARDROBE TYPE REFRIGERATOR / REV NO: 00 Noise from the refrigerator Compressor pipes may be Check the pipes. contacting somewhere. As the capillary pipe is long, it may contact the eva cover or Check it. the body. This is normal. -
Page 58: Condensation On The Outer Side Of The Refrigerator
36’’ 3 DOORS WARDROBE TYPE REFRIGERATOR / REV NO: 00 Condensation on the inner walls of refrigerator. The doors are ajar. Hot and humid weather Make sure that the increases frosting and doors are fully closed. condensation. The doors might have been opened very frequently or they might have been left open for a long time. -
Page 59: The Doors Cannot Be Closed
36’’ 3 DOORS WARDROBE TYPE REFRIGERATOR / REV NO: 00 Water/condensatio n/ice on the outer side of the refrigerator. Stinky smell inside of Humidity occurs on the outer the refrigerator. side of the refrigerator or between the doors. Clean inside of the refrigerator. -
Page 60: Water Cannot Be Dispensed From The Water Dispenser
36’’ 3 DOORS WARDROBE TYPE REFRIGERATOR / REV NO: 00 The door(s) is (are) not closing. The refrigerator is probably not standing completely upright on the floor and it might be rocking when slightly moved. Door seals may Adjust the elevation be failed. -
Page 61: Condensation In The Form Of Drops On The Water Dispenser Area
36’’ 3 DOORS WARDROBE TYPE REFRIGERATOR / REV NO: 00 Water cannot be dispensed from the water dispenser Remove the water pipe from the water valve and discharge the System may have take water to a container for 1-2 air inside. minutes. -
Page 62: Mounting/Demounting Processes Of The Parts
36’’ 3 DOORS WARDROBE TYPE REFRIGERATOR / REV NO: 00 Condensation in the form of drops on the water dispenser area Set the display to ice supply and press and hold the trigger. After the flap opens and ice is obtained, release the Ice pouring mouth flap may trigger. -
Page 63: Beko Handle Group
36’’ 3 DOORS WARDROBE TYPE REFRIGERATOR / REV NO: 00 11.1.Beko handle group Inset handle is used on the product. The handles on the cooling doors are detached from bottom up direction. And from right to left on the freezing door. Tape can be placed in direction of detachment in order to prevent any scratches. -
Page 64: Rear Cover
36’’ 3 DOORS WARDROBE TYPE REFRIGERATOR / REV NO: 00 Inset handle is used on the product. The handles on the cooling doors are detached from bottom up direction. And from right to left on the freezing door. Tape can be placed in direction of detachment in order to prevent any scratches. 11.3.Rear cover... -
Page 65: Service Hatch
36’’ 3 DOORS WARDROBE TYPE REFRIGERATOR / REV NO: 00 As the waterspouts are on transition point, do not tighten a screw. Rear cover and rears are fixed by 5 screws and insertion at the bottom. Remove the screws to take the cover out. 11.4.Service hatch The service hatch used on the rear wall section of the product is fixed to the rear wall by insertion to plate and 1 screw. -
Page 66: Electronic Card
36’’ 3 DOORS WARDROBE TYPE REFRIGERATOR / REV NO: 00 The electronic card board used on the top plate is fixed by insertion and 1 screw. Screw is removed off and the board is detached according to the arrow direction. 11.6.Electronic Card Electronic card is fixed in the housing with bench stops. -
Page 67: Rear Leg Plate Group
36’’ 3 DOORS WARDROBE TYPE REFRIGERATOR / REV NO: 00 Front leg plate group is fixed by overlapping to the product and 1 screw. Remove the screws to take the group out. 11.8.Rear leg plate group It is fixed with 4 screws. Rear leg plate is detached by removing the screws. 11.9.Door shelf 70 mm... -
Page 68: Tpk Shelf
36’’ 3 DOORS WARDROBE TYPE REFRIGERATOR / REV NO: 00 70-Gallon Door Shelf is used on the upper section of cooling left and right doors. Detached by moving onto the arrow direction. *Optional 11.10.TPK shelf Gallon Door Shelf is used on the upper section of cooling left and right doors. Detached by moving onto the arrow direction. -
Page 69: Adjustable Glass Shelves
36’’ 3 DOORS WARDROBE TYPE REFRIGERATOR / REV NO: 00 Gallon Door Shelf is used on the upper section of cooling left and right doors. Can be moved up and down by arrow directed motions. The buttons located on the inner section of the shelf are pressed simultaneously in movement is required. -
Page 70: Fridge Crisper-Top Glass Shelf
36’’ 3 DOORS WARDROBE TYPE REFRIGERATOR / REV NO: 00 The aluminium profiles on which the adjustable glass shelf profiles are grouped are fixed by 2 screws. Profiles are detached by removing off the screws. 11.15.Fridge crisper-top glass shelf The glass shelf on the crisper is slightly lifted upwards and detached by pulling. 11.16.Crispers... -
Page 71: Chiller Compartment
36’’ 3 DOORS WARDROBE TYPE REFRIGERATOR / REV NO: 00 Crisper are pulled from their rails and removed. 11.17.Chiller compartment Chiller compartment is pulled, got free from the pins on the telescopic rail, slightly lifted upwards and detached. 11.18.Water dispenser trigger group... -
Page 72: Crisper Sheathing Group And Water Container Middle Rail Group
36’’ 3 DOORS WARDROBE TYPE REFRIGERATOR / REV NO: 00 socket Plastic Clamp Water dispenser trigger group is located on the inner left section. Remove by getting free from bench stops using a thin-edged apparatus. The led socket connection is detachable, plastic clamps are cut off and the water pipe is removed. -
Page 73: Waterspout Closer Lids
36’’ 3 DOORS WARDROBE TYPE REFRIGERATOR / REV NO: 00 The water container pipes through water valve and water dispenser are detached. Crisper cover group is fixed to the body by a screw on the rear wall. Screw is removed off, crisper cover and medium rail group are detached by pulling. -
Page 74: Middle Rail Group And Water Container
36’’ 3 DOORS WARDROBE TYPE REFRIGERATOR / REV NO: 00 They are comprised of two parts. Removed by removing 2 screws starting with the longer one. Then the other covering part is removed which is fixed to the rear wall by 3 screws. 11.21.Middle rail group and water container... -
Page 75: Water Valve And Waterspouts
36’’ 3 DOORS WARDROBE TYPE REFRIGERATOR / REV NO: 00 The rails on the right and the left of the middle rail group chassis are fixed by clamps. Rails are detached by removing the screws and getting loose from the clamps. 5 screws are removed off from the chassis holding water container. - Page 76 36’’ 3 DOORS WARDROBE TYPE REFRIGERATOR / REV NO: 00 The pipes towards water valve and trigger group Water reservoir IMAGE 1 IMAGE 2 IMAGE 4 IMAGE 5 IMAGE 3 IMAGE 6 IMAGE 7 IMAGE 8 The pipes towards water valve and trigger group are shown in image 1. The rear cover located on the rear part of the fridge is detached, the 1 screw fixing the water container is removed and water valve is detached.
-
Page 77: Water System Connection
36’’ 3 DOORS WARDROBE TYPE REFRIGERATOR / REV NO: 00 11.23.Water system connection From water reservoir to valve From filter to valve From ice machine to valve From filter to valve 1) The 1900 mm long black and white hoses are transmitted from inner body's upper left corner, pulled out from rear wall and grouped in valve and filter head in assembly. - Page 78 36’’ 3 DOORS WARDROBE TYPE REFRIGERATOR / REV NO: 00 Dragon filter Stream from valve to filter Stream from filter to valve Stream to water dispenser Stream from valve to water reservoir Double stream from valve to ice machine Mains input...
- Page 79 36’’ 3 DOORS WARDROBE TYPE REFRIGERATOR / REV NO: 00 Dragon filter Water dispenser group Stream to water dispenser from water container Icematic group socket...
-
Page 80: Crisper Rails
36’’ 3 DOORS WARDROBE TYPE REFRIGERATOR / REV NO: 00 Mains input To filter Stream from valve to ice machine Stream from filter to valve Stream from valve to water reservoir 11.24.Crisper rails Remove by getting free from bench stops using a thin-edged apparatus. 11.25.Telescopic rail and rail gripper... -
Page 81: Cooler Rear Illumination Glass Group
36’’ 3 DOORS WARDROBE TYPE REFRIGERATOR / REV NO: 00 Telescopic rails used in chiller, ice drawer and freezer upper drawer are fixed to rail gripper with 3 screws. Firstly, the telescopic ray is opened totally ajar for the screws to be completely seen and then they are removed off. -
Page 82: Cooler Ceiling Illumination Glass
36’’ 3 DOORS WARDROBE TYPE REFRIGERATOR / REV NO: 00 The cooling compartment is used in both right and left. This group is fixed on the body by means of clamps. Can be removed by using a thin-edged apparatus. Socket connection is removed from its housing by disassembling. 11.27.Cooler ceiling illumination glass Used on fridge compartment middle shelf. -
Page 83: Filter Cover Group
36’’ 3 DOORS WARDROBE TYPE REFRIGERATOR / REV NO: 00 Used in cooling chiller compartment's right and left sides. Illumination glass can be removed by using a thin-edged apparatus. The led card which is grouped in angled situation can be detached by needle nose pliers. When placing the mew led card, firstly the socket part is mounted and then the card is grouped in assembly by the clamps. -
Page 84: Filter Head
36’’ 3 DOORS WARDROBE TYPE REFRIGERATOR / REV NO: 00 Bypass cover grouped in assembly within the filter head is detached. Water filter is inserted instead upon preference. 11.31.Filter head It is fixed with 1 screw. Remove the screws and pipe connections to take the cover out. 11.32.Cooler evaporator cover screw plug... -
Page 85: Cooler Evaporator Cover
36’’ 3 DOORS WARDROBE TYPE REFRIGERATOR / REV NO: 00 Two units of eva cover screw plugs are used, one at the right and one at the left side. Remove the pipe holders by using a flat-tipped screwdriver. 11.33.Cooler evaporator cover The cooling eva cover is grouped in assembly with the clamps by 2 screws. -
Page 86: Ioniser Group
36’’ 3 DOORS WARDROBE TYPE REFRIGERATOR / REV NO: 00 Four tabs around the fan fixing frame are removed with a flat-tip screwdriver. After the fan and the protective silicon are removed, remove the fan. 11.35.Ioniser group Ioniser cooler is used behind the fridge eva cover. Can be detached by removing off 1 screw and socket connection. -
Page 87: Ioniser Illumination Cover (Ion Fresh)
36’’ 3 DOORS WARDROBE TYPE REFRIGERATOR / REV NO: 00 11.37. Ioniser illumination cover (Ion fresh) Ioniser illumination cover is fixed at the bottom and top by two clamps. Can be detached by slightly pulling with hands. 11.38.Sensor cover Sensor cover is mounted with tabs. Remove the pipe holders by using a flat-tipped screwdriver. -
Page 88: Hab Guide
36’’ 3 DOORS WARDROBE TYPE REFRIGERATOR / REV NO: 00 SOCKET CONNECTION UPPER HINGE LOWER HINGE GROUP SLIDING LOWER HINGE GROUP Movable middle section group ıt is used in the fridge’s left door. It is affixed by 2 screws each in lower hinge and the skid on the lower hinge. The skid is removed by slightly sliding on the direction of the arrow after the screws are removed off. -
Page 89: Hand Plate Display Group
36’’ 3 DOORS WARDROBE TYPE REFRIGERATOR / REV NO: 00 11.41.Hand plate display group The hand plate display group is grouped as to cover the hinges on the upper plate. 6 screws are removed off from the upper section and get loosened from the clamps on the hinge. -
Page 90: Display Group
36’’ 3 DOORS WARDROBE TYPE REFRIGERATOR / REV NO: 00 11.42.Display group It is fixed with 3 screws on the hinge cover. Remove the screws and socket connection to detach from housing. -
Page 91: Freezer Compartment Lower Drawer / Separator / Separator Wire
36’’ 3 DOORS WARDROBE TYPE REFRIGERATOR / REV NO: 00 11.43.Freezer compartment lower drawer / Separator / Separator wire The freezer compartment is removed by holding from rear handles. Separator is used on 2 wires. Separator wires are click-fit to right and left with silicones. 11.44.Freezer compartment upper drawer Freezer compartment upper drawer is grouped in assembly by means of telescopic rails in right and left sides. -
Page 92: Freezer Door
36’’ 3 DOORS WARDROBE TYPE REFRIGERATOR / REV NO: 00 Freezer compartment upper drawer is grouped in assembly by means of telescopic rails in right and left sides. Can be detached by lifting slightly up and pulling. 11.46.Freezer door The door is opened by pulling the freezer door, the lower drawer is removed and the reinforcement connecting the telescopic rails with the door comes forth. -
Page 93: Freezer Separator Wire
36’’ 3 DOORS WARDROBE TYPE REFRIGERATOR / REV NO: 00 Regularity of the silicone outputs must be assured. Attention must be paid to prevent heating cables to be placed in front of the silicone. Icematic group is used in the upper left corner in freezer compartment. Can be detached by slightly pulling with hands. -
Page 94: Freezer Middle Rail Group
36’’ 3 DOORS WARDROBE TYPE REFRIGERATOR / REV NO: 00 Wire is removed by pulling. 11.49.Freezer middle rail group The freezer compartment is in the chassis holding the telescopic rails supporting ice drawer and upper drawer as an assembly. Among the freezer middle rail group, the icebox group must be removed at first. Then 6 screws are removed off from the middle rail group and the front clamps are pushed backwards to detach. -
Page 95: Freezer Door Rail
36’’ 3 DOORS WARDROBE TYPE REFRIGERATOR / REV NO: 00 There are 4 rails used for freezer drawers. Can be detached by removing 2 screws placed on each. Rail grippers can be detached by bare hands as they are only inserted. 11.51.Freezer door rail... -
Page 96: Freezer Evaporator Sockets Service Cover
36’’ 3 DOORS WARDROBE TYPE REFRIGERATOR / REV NO: 00 Freezer door rails are used with synchronization wire in an assembly group. Rails are affixed with 7 screws on each side. The rails are pulled after the screws are removed off and rail group is detached after the screws at the bottom section are removed off. -
Page 97: Freezer Evaporator Cover
36’’ 3 DOORS WARDROBE TYPE REFRIGERATOR / REV NO: 00 Service hatch The freezer eva is affixed by 1 screw and clamps on the cover. The screws are removed off using a thin-edged apparatus and the sockets are reached. 11.53.Freezer evaporator cover... -
Page 98: Wired Fan Shield
36’’ 3 DOORS WARDROBE TYPE REFRIGERATOR / REV NO: 00 Fixed with the freezer evaporator cover using 1 screw. Remove the screws to take the cover out as shown in related images. 11.54.Wired fan shield Removed by turning left on the eva cover. 11.55.Freezer fan group... -
Page 99: Thermal Fuse
36’’ 3 DOORS WARDROBE TYPE REFRIGERATOR / REV NO: 00 Firstly, remove the Freezer eva cover. Remove the 2 screws off fixing the fan group. Socket connection is removed from its housing by disassembling. NOTE: Make sure that it is not possible that the cable touches the propeller and the evaporator. 11.56.Thermal fuse It is assembled on the return pipe. -
Page 100: Discharge Groups
36’’ 3 DOORS WARDROBE TYPE REFRIGERATOR / REV NO: 00 Once the service hatch is opened, 4 screws on the silicones are removed off and the heating pipe group is pulled as to detach. 11.58.Discharge groups Freezer draining group Fridge water drain group Freezer draining group is used in between compressor and coil condenser. -
Page 101: The Metal Door Puller Mechanism
36’’ 3 DOORS WARDROBE TYPE REFRIGERATOR / REV NO: 00 It is fixed with 3 screws. Remove the screws to take the cover out. Middle hinge pin is detached by pliers. 11.60.The metal door puller mechanism It is used under the lower covers of the fridge and freezer doors. It is fixed with two screws. Remove the screws off to take the cover out. -
Page 102: Sound Damper
36’’ 3 DOORS WARDROBE TYPE REFRIGERATOR / REV NO: 00 It is grouped onto the right side of the coil condenser in the compressor area. It is fixed to steam container with two screws. The screws and socket connection are removed, the fan group is dismantled from the housing. -
Page 103: Service Equipment
36’’ 3 DOORS WARDROBE TYPE REFRIGERATOR / REV NO: 00 12. Service equipment 1. Blade 2. Different bit set 3. Star bit 4. Torque bit 5. Chargeable gun 6. Flat-tipped screwdriver 7. Phillips screwdriver 8. Side cutter 9. Long nose pliers 10. - Page 104 36’’ 3 DOORS WARDROBE TYPE REFRIGERATOR / REV NO: 00 Service life of product extends and frequently experienced problems will be reduced if it is cleaned at regular intervals. WARNING: Before cleaning the unit, unplug it. • Never use gas, gasoline or similar substances for cleaning purposes. •...
Need help?
Do you have a question about the BEKO G91629NWU and is the answer not in the manual?
Questions and answers
shut off ice maker
To shut off the ice maker on the Arcelik BEKO G91629NWU, press the OFF button to stop the icematic motor. When the display shows "oF", the icematic is off.
This answer is automatically generated
I’m trying to replace Beko water filter The model number is g91629nw
Ice is built up behind the back wall of the lower half of my fridge.
When is it manufactured?