Table of Contents
Advertisement
Advertisement
Table of Contents

Subscribe to Our Youtube Channel
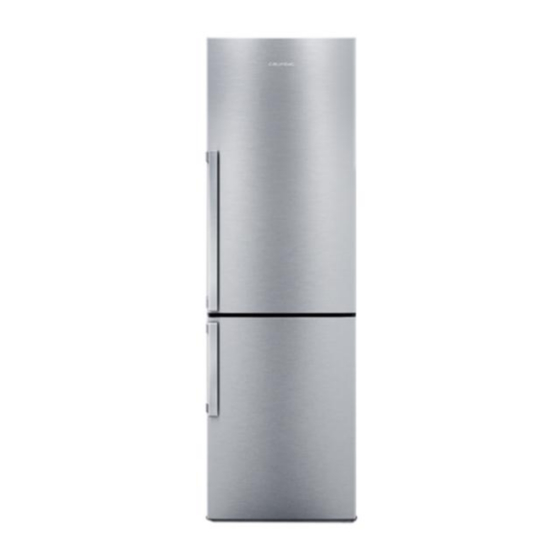
Related Manuals for arcelik K60365


Summary of Contents for arcelik K60365
- Page 1 60 CM COMBI SERVICE MANUAL FOR PRODUCTS K60365 / K60365NE / K60400NE PRODUCTION CODE-SALES CODE EXPLANATIONS Product codes mentioned in the Service Manual indicate the standard engineering model codes of Arçelik A.Ş. Accordingly, descriptions of model codes are as below:...
-
Page 2: Table Of Contents
K60365: It is a two-door, Static Combi sheet metal door refrigerator model with 60 cm width, 365 l gross volume and is controlled from the hand plates on the body. K60365NE: It is a two-door, No-Front Combi sheet metal door refrigerator model with 60 cm width, 365 l gross volume and a display on the door. - Page 3 Assembly / Disassembly Works for Upper Door Hinge Cover ..........14 Removing the Upper Door..................... 14 Removing Reed Switch Magnet Located in the Upper Section of the Door ......15 Removing Display Group ....................... 15 Removing Door Handles ......................16 Removing hinge cover of fridge compartment door .............
- Page 4 ASSEMBLY/DISASSEMBLY OF PARTS ON THE COMPRESSOR SECTION ......... 29 Removing the Evaporator Container ..................29 Removing the Terminal Box Cover ..................29 Disassembly of Run Capacitor ....................30 Removing the Filter Box ......................30 Removing the Thermal Relay Group ..................30 EXPLANATION OF ELECTRICAL SYSTEM ELEMENTS ..............
-
Page 5: Safety Warnings
11.5 FF heater ..........................42 11.6 Compressor ........................... 42 11.7 Ionizer ............................ 42 Operation Conditions ........................42 11.8 Quick Freeze .......................... 43 11.9 Quick Cool ..........................43 11.10 Eco-Extra ..........................43 11.11 Vacation Mode ........................44 11.12 Key Lock ..........................44 NF COMBI SERVICE and DEALER MODE .................. - Page 6 • Be careful not to pull by the cable when pulling the plug out. • DO NOT PLUG IN your appliance before removing all packaging materials and protective transport elements. • To prevent horizontal handling and in order to ensure complete distribution of the condenser oil, keep the appliance in upright position for 4 hours before operating.
-
Page 7: Technical Specifications
TECHNICAL SPECIFICATIONS K60365 Product Introduction 2.1.1 Product Definition: : ARÇELİK A.Ş. Manufacturer Model : K60365 Type : Static Combi Refrigerator 1- SNACK COMPARTMENT 8- FRIDGE DRAWERS 2- EGG TRAY 9- CRISPER COVER 3- DOOR SHELF 10- FRIDGE SHELF 4- BOTTLE HOLDER 11- WINE RACK 12- INDICATOR –... -
Page 8: K60365Ne Product Introduction
2.1.2 Dimensions: Height (mm) : 1850 Width (mm) : 595 Depth (mm) : 650 2.1.3 Package: Material : Corrugated Cardboard Dimensions: Height (mm) : 1930 Width (mm) : 665 Depth (mm : 730 2.1.4 Weight: Unpackaged (kg) : 83 Packaged (kg) : 89 2.1.5 Volume:... - Page 9 Refrigerator 1- SNACK COMPARTMENT 9- FRIDGE DRAWERS 2- FRIDGE COMPARTMENT DOOR 10- CRISPER COVER 3- EGG TRAY 11- FRIDGE SHELF 4- DOOR SHELF 12- WINE RACK 5- BOTTLE HOLDER 13- EVAPORATOR COVER 6- BOTTLE SHELF 14- FAN COVER 7- ADJUSTABLE LEGS 15- FRIDGE COMPARTMENT 8- FREEZER DRAWERS 16- FREEZER COMPARTMENT...
-
Page 10: K60400Ne Product Introduction
2.2.3 Package: Material : Corrugated Cardboard Dimensions Height (mm) : 1930 Width (mm) : 665 Depth (mm) : 730 2.2.4 Weight: Unpackaged (kg) : 83 Packaged (kg) : 89 2.2.5 Volume: Total volume (gross) (l) : 365 Total volume (net) (l) : 318 Fridge (net) (l) : 219... - Page 11 1- SNACK CONTAINER 9- FRIDGE DRAWERS 2- FRIDGE COMPARTMENT DOOR 10- CRISPER COVER 3- EGG TRAY 11- FRIDGE SHELF 4- DOOR SHELF 12-WINE RACK 5- BOTTLE HOLDER 13- EVAPORATOR COVER 6- BOTTLE SHELF 14- FAN COVER 7- ADJUSTABLE LEGS 15- FRIDGE COMPARTMENT 8- FREEZER DRAWERS 16- FREEZER COMPARTMENT 2.3.2 Dimensions:...
-
Page 12: Installation
2.3.3 Package: Material : Corrugated Cardboard Dimensions Height (mm) : 2100 Width (mm) : 705 Depth (mm) : 742 2.3.4 Weight: Unpackaged (kg) : 83 Packaged (kg) : 89 2.3.5 Volume: Total volume (gross) (l) : 400 Total volume (net) (l) : 356 Fridge (net) (l) : 257... -
Page 13: Installation Instructions
actions. You may injure yourself or damage the appliance. IMPORTANT! To prevent cutting or damaging the power cable, make sure that the cable is not pinched under the appliance during and after moving it. Installation Instructions Volume of the room where the product will be installed should not be less than 10 cubic meters. -
Page 14: Door Groups Assembly/Disassembly Instructions
You can balance your refrigerator by turning the front legs of it as illustrated in the figure. The corner where the leg exists is lowered when you turn in the direction of black arrow and raised when you turn in the opposite direction. Taking help from someone to slightly lift the refrigerator will facilitate this process. -
Page 15: Removing Reed Switch Magnet Located In The Upper Section Of The Door
Removing Reed Switch Magnet Located in the Upper Section of the Door There is a magnet cover on top of the upper door, and there are slots left to the side of cover where edge of flat-tipped screwdriver can enter. Magnet cover can be removed from its slot from these covers by means of screwdriver to access the magnet Removing Display Group While removing display, a PVC tape is applied to the side of display in order not to damage... -
Page 16: Removing Door Handles
Removing Door Handles Door handles are connected to the door with two screws; door handles can be removed by removing the screws with the help of torx tipped screwdriver. Removing hinge cover of fridge compartment door Whenever necessary (changing the direction of door, etc.), hinge cover on the door can be removed with a pointed tool. -
Page 17: Removing Lower Hinge Bearing Of Fridge Compartment Door
Removing Lower Hinge Bearing of Fridge Compartment Door Whenever necessary (changing the direction of door, etc.), hinge bearing on the fridge compartment door can be removed with a Phillips screwdriver. Removing Upper Hinge Plug of Freezer Compartment Door Whenever necessary (changing the direction of door, etc.), hinge plug on the door can be removed with a pointed tool. -
Page 18: Changing The Door Opening Direction
4.11 Changing The Door Opening Direction Necessary parts for changing the door direction (door left kit group) are placed in a plastic bag in the refrigerator. Contents of the Package: -Upper door stopper Name -Lower hinge bearing of fridge door Name -Middle section plug Name... - Page 19 Lower and upper door are removed by dismounting the middle hinge (See 4.2). Screws holding the upper hinge are removed by using a Torx pointed screwdriver (See 8.1). Then, hinge that is found in the left kit group of door is screwed to the other side. In the same manner, the lower hinge is removed (See 8.3) and screwed to the other side.
-
Page 20: Fridge Compartment Assembly/Disassembly Instructions
FRIDGE COMPARTMENT ASSEMBLY/DISASSEMBLY INSTRUCTIONS Replacing Fridge Compartment Illumination Glass and LED Card The illumination glass shown in the picture is fixed on the inner body plastic by snap-fit. Connection without a screw is used. To remove the illumination glass, it is opened from upper or bottom section of illumination glass respectively as shown in the picture with the help of a pointed tool, and then it is pulled by hand and removed from the interior body. -
Page 21: Access To Photocatalyst Filter (No-Frost (Gkn) Models)
Access to Photocatalyst Filter (No-Frost (GKN) Models) Odor filter prevents unpleasant odor build-up in the refrigerator. Pull the cover, into which the odor filter is installed, downwards and remove as illustrated. Leave the filter under sunlight for one day. Filter will be cleaned during this time. Install the filter back to its place. Odor filter must be cleaned once in a year. - Page 22 After removing screws, evaporator is pulled from the bottom by hand and disengaged from tabs. Afterwards, fan socket is dismounted and evaporator cover is removed Assembly / Disassembly of Fridge Compartment Fan Motor (No-Frost (GKN) Models) Fan motor for fridge compartment is mounted on the evaporator cover of fridge compartment. After removing evaporator cover (See 5.4), the frame around the fan group is demounted by loosening its tabs with the help of a pointed tool.
-
Page 23: Replacing Ionizer (No-Frost (Gkn) Models)
Replacing Ionizer (No-Frost (GKN) Models) After removing the evaporator cover in the fridge compartment, to dismantle the ionizer that is fixed on the body by means of a single screw, this screw is removed. Disassembling process is completed once the socket connection is removed. Assembly/Disassembly Crisper Covers of Fridge Compartment Crisper groups used in our fridge compartment are serviced in two different ways, namely;... -
Page 24: Removing Fridge Compartment Crisper Rails
To attach them, first the upper and side tabs are snapped to the drawer body, and then they can be mounted to the drawer body by snapping the tabs located at the bottom. Removing Fridge Compartment Crisper Rails Crisper rails located in the fridge compartment are attached by two screws and tabs passing to the interior body. -
Page 25: Removing The Socket Box Cover (No-Frost (Gkn) Models)
Removing the Socket Box Cover (No-Frost (GKN) Models) Socket box cover is attached with only one screw. The cover can be removed by hand after removing this screw. Assembly/Disassembly Works for Fan Group (No-Frost (GKN) Models) The Fan Group is attached on the inner body plastic by means of 2 screws. After removing the screw connections, the sockets related to the fan are removed from the socket box to complete the disassembly process of the fan group. -
Page 26: Removing The Thermal Fuse (No-Frost (Gkn) Models)
Removing the Thermal Fuse (No-Frost (GKN) Models) The thermal fuse is snapped on the pipe on the evaporator assembly by means of a tab structure. The part can be removed by holding as shown in the picture. Removing the Sensor (No-Frost (GKN) Models) The grey-colored Sensor is contained in the evaporator group. -
Page 27: Assembly/Disassembly Of The Drawer Groups
To dismantle the heater, first the plastic clamp connections are cut by using a side cutter. Finned evaporator group is taken from the inner body rear wall and leant against the side wall. After seeing the drain section clearly, the heater part will be taken out by holding from the sticky part of it. Assembly/Disassembly of the Drawer Groups The drawer groups used in our freezer compartment are serviced in two different ways, namely;... - Page 28 On the products with icematic, water valve group is reached after the co mpressor rear cover is removed. The water valve group is consisted of two main sections. While the first section is the area shown in red and which is located on the upper section of the product, the other and lower section is the cabin bottom area shown in orange.
- Page 29 Care must be taken that firstly the heater socket on the inner body must be removed in order to disassemble the connection on the upper part. After removing the socket connection, the group called heater pipe group which is connected with two screws is disassembled through unscrewing.
-
Page 30: Assembly/Disassembly Of Control Card
ASSEMBLY/DISASSEMBLY OF CONTROL CARD Removing Card Box Main board is on the upper wall of the refrigerator. Card cover is fixed to the card box with 4 tabs and one screw. Screw is loosened with the help of Phillips screwdriver. Afterwards, the cover is pulled from the tabs by sliding to the section where screw is connected, card box cover is removed. -
Page 31: Removing The Lower Hinge And Adjustable Feet
Removing the Lower Hinge and Adjustable Feet To remove the lower hinge, first the adjustable foot connected on the hinge must be removed. After removing the adjustable foot by turning, the screw that connects the lower hinge will be unscrewed and thus the lower hinge is disassembled. ASSEMBLY/DISASSEMBLY OF PARTS ON THE COMPRESSOR SECTION Removing the Evaporator Container... -
Page 32: Disassembly Of Run Capacitor
Disassembly of Run Capacitor It is snapped on the rear foot part by means of tabs. When it is disassembled, tabs of the relevant part is stretched from the bottom part, and the part is pulled to the above, and disengaged from tabs. -
Page 33: Explanation Of Electrical System Elements
EXPLANATION OF ELECTRICAL SYSTEM ELEMENTS 10.1 List of Critical Components 10.1.1 K60365 List of Components 4925440100 MAIN_CABLE_GR_K60365_KARD_Y_AYD_SKZ 4851490285 FF HEATER B957_KORE_230V_10W 5232100011 COMP.NTU120MT(220-240V)AMB_SIZ(R600a 4924840100 CMP.THERM.GR_NTU120_ePTC_K60360_FILT_SKZ 4822290200 NOISE FILTER (AERODEV_DNF06-Z_CGZK 4395550185 KARDELEN POT2-01 CARD NEW 5707440100 REED_SENSOR_CARD 5708840100 REED_SENSOR_MS108_3_1 4925910100 APPENDIX_3_CONTROL_CARD_GR... -
Page 34: Compressor
4822290200 NOISE FILTER (AERODEV_DNF06-Z_CGZK 5707440100 REED_SENSOR_CARD 5708840100 REED_SENSOR_MS108_3_1 4914280400 DOOR_UPPER_HANDPLATE_GR_DEPTH60CM_ARC714 4913170300 COMP_DISPLAY_GR_DOUBLE_DOOR_COMBI 4923321100 S1_CONTROL_CARD GR_K60XXXNE_GRNDG 4925910100 APPENDIX_3_CONTROL_CARD_GR 4913140100 LED2TO6HW-K_2012_DISPLAY CART GR 4923300100 CONTROL CARD S1 EQUIPMENT1 5714981100 S1_SOFWARE_K60XXXNE GRNDG 4925920100 APPENDIX_3_CONTROL_CARD_EQUIPMENT_1 5718680100 APPENDIX_3_CARD_SOFTWARE 10.1.3 K60400NE List of Components 4924090100 MAIN_CABLE_GR_K60400NE_S1_Y_AYD_SKZ 4851490285 FF HEATER B957_KORE_230V_10W 4305895000... -
Page 35: Freezer Fan Motor (Freezer Compartment Fan Motor)
10.3 Freezer fan motor (Freezer Compartment Fan Motor) It is mounted on the inner body of refrigerator behind the rear cover of evaporator. It ensures circulation of the freezer compartment air in the freezer compartment by passing it continuously over the evaporator. Freezer fan motor FDQC28AL3C PANASONIC Type... -
Page 36: Frz Sensor (Freezer Compartment Sensor)
0.6528 0.32 6.528 0.5325 0.47 5.325 0.4368 0.62 4.368 0.3602 0.77 3.602 0.2986 0.91 2.986 0.2488 1.05 2.488 0.2083 1.18 2.083 0.1752 1.31 1.752 0.1480 1.44 1.480 0.1256 1.57 1.256 0.1070 1.69 1.070 0.09154 1.81 0.9154 0.07861 1.93 0.7861 0.06775 2.04 0.6775 0.05860... -
Page 37: Ff Sensor (Fridge Compartment Sensor)
10.7 FF sensor (Fridge Compartment Sensor) It detects the temperature in the fridge compartment and transmits this to the microprocessor. Values taken from this sensor are compared with the cut-in and cut-out values of the temperature set for the freezer compartment to run or stop the compressor, the fridge compartment fan motor and the fridge compartment rear wall heater. -
Page 38: Frz Water Drain Heater
Defrost Heater 10.10 Frz Water Drain Heater It is parallel connected to the Frz Evaporator heater. It is the heater in the FRZ Drain pool. It melts the frost and ice accumulated on the drain and dropped from the evaporator during defrost. It is not controlled by algorithm from the control board. -
Page 39: Thermal
10.12 Thermal It is a component that opens the circuit when heated. It opens the circuit at a certain temperature and cuts the current to the compressor in order to protect the compressor coils against excessive heating. When the temperature of the compressor drops below a certain value, it re- completes the circuit to operate the compressor. -
Page 40: Electronic Control Board
10.17 Electronic Control Board The control board is placed in the plastic box towards the rear wall on the upper plate of the refrigerator. Connectors: KN1 : 1 : Phase KN1 : 2 :Neutral KN1 : 3 : Compressor KN1 : 4 : Defrost heater KN2 : 1 : FF heater KN2 : 2 : Frz Fan motor KN2 : 3 : FF Fan motor... -
Page 41: Display
10.19 Display 1. Quick Cool Button 2. Quick Cool Icon (illuminated when quick cool is activated) 3. Fast Freeze Button 4. Fast Freeze Icon (illuminated when fast freeze is activated) 5. Fridge Compartment Temperature Setting Button 6. Fridge Compartment Temperature Indicator 7. -
Page 42: Refrigerator Operation Principle
REFRIGERATOR OPERATION PRINCIPLE 11.1 FF Defrost FF Defrost Decision: Parameter 1. Depending on the number of compressor cycles 360min 2. Depending on the defined maximum operation time of compressor 3. If the compressor constantly operates for at least 120 minutes, FF Defrost will start when FF Eva sensor is colder than -27C. -
Page 43: Freezer Defrost
11.2 Freezer Defrost FRZ Defrost Decision Parameter Total operation time of FRZ FAN 11 hours Real time for defrost 26 hours Algorithmic Behavior: Parameter FF Fan Operates Compressor /FRZ FAN Does Frz heater operate Operates End of Function: Parameter 1. FRZ heater stops when Frz Eva sensor reaches +10C. -
Page 44: Ff Heater
Notes: 1. It starts to operate if Frz Eva sensor is colder than -5C or after maximum 5 minutes. 2. When freezer fan operates, it will not stop until the compressor stops. 3. It stops when FRZ Door opens. 11.5 FF heater Operation Conditions FF Heater turns ON when: - FF Air <= cut-in... -
Page 45: Quick Freeze
In cases where FF door is opened/closed, there must be minimum 2 hours between two consecutive ionizing periods. Note: When the compressor is operating, door is open and FF Fan is not operating, ionizer will not operate. 11.8 Quick Freeze When the Quick Freeze button is pressed, the snowflake next to Freezer segment illuminates. -
Page 46: Vacation Mode
11.11 Vacation Mode When vacation button is depressed, vacation icon is illuminated and '- -' appears in the FF display. The function can be terminated by pressing the same button again. Function is terminated by pressing the FF set button. 11.12 Key Lock When the key lock button is pressed and hold for 3 sec, the key lock is activated, and the key lock icon illuminates. - Page 47 The display board we use in the refrigerator has a six-key system. Set values are shown in the display. Within the first 30 seconds after the refrigerator is energized, it can be taken to the Service Mode by simultaneously pressing Quick Cool and Quick Freeze buttons for 2 seconds.
- Page 48 Step 2: When any button is pressed, Step 1 is terminated. Software version and revision info are shown on the display as follows. Note: Updated version revision should be checked from the technical drawing. Step 3: When any button is pressed, all sensors are shown on the display in a loop with 1 sec intervals.
- Page 49 Step 4: It will switch to component operation step when Display Off button is pressed. When the Eco-Fuzzy button is pressed, components can be selected in forward direction, and when Quick Cool button is pressed, components can be selected in reverse direction. The selected component can be activated/deactivated with Frz Set button.
-
Page 50: Switching To Nf Combi Dealer Mode
12.2 Switching to NF Combi Dealer Mode Step 1. Key lock is activated by pressing Display Off button for 3 seconds within 30 sec after energizing the refrigerator. If the following are pressed -(Fridge Set) -(Display Off) (Eco Fuzzy) -(Freezer Set) (Quick Freeze) respectively (Quick Fridge) buzzer will be active for a short period, and dealer mode is started. -
Page 51: Error Codes
13 ERROR CODES FRZ Air Sensor Error: Defrost Sensor Error: On the display, E and 0 illuminate alternately with set values and warning flashes; On the display, E and 1 illuminate alternately with set values and warning warning is given by the buzzer. The compressor is operated in ON mode for 35min, flashes;... - Page 52 Images (in the lit status) and meanings of all display icons of the K60320NE refrigerators are provided below. -24, -22, -20, -18, 2, 4, 6, 8 showing the refrigerator's temperature lights up continuously. The set temperature value is indicated by an arrow. Service Test Steps 1st Press SW1 and SW2 buttons concurrently for 3 seconds.
-
Page 53: Electrical Circuit Diagram
14 ELECTRICAL CIRCUIT DIAGRAM... -
Page 54: Troubleshooting And Failure Identification
TROUBLESHOOTING AND FAILURE IDENTIFICATION Please review this list before calling the service. To do so will save you time and money. This list includes frequent complaints that are not arising from defective workmanship or material usage. Some of the features described here may not exist in your product. Complaint Possible Reason Solution... - Page 55 Complaint Possible Reason Solution Adjust the refrigerator temperature to a The refrigerator is adjusted to a very warmer degree and wait until the low temperature. temperature is achieved. The fridge is running frequently or for a long time. Clean or replace the seal. Door seal of the fridge or freezer may Damaged/broken seal causes the be soiled, worn out, broken or not...
- Page 56 Complaint Possible Reason Solution Noise The operating performance The operation noise characteristics of the refrigerator may increases when the It is normal and not a fault. change according to the changes in the refrigerator is running. ambient temperature. The floor is not even or it is weak. Make sure that the floor is level, strong and The refrigerator rocks when moved capable to carry the refrigerator.
-
Page 57: Exploded Drawings
EXPLODED DRAWINGS 16.1 Polyurethane Door Package NOTES 1- Please read the service handbook before making assemble and disassemble of refrigerator parts 2- Screw, nut and some connecting elements are not served service number additionally. Stock numbers of screws which are needed be used must be checked from spare part list. -
Page 58: Door Accessories Package
16.2 Door Accessories Package NOTES 1- Please read the service handbook before making assemble and disassemble of refrigerator parts 2- Screw, nut and some connecting elements are not served service number additionally. Stock numbers of screws which are needed be used must be checked from spare part list. -
Page 59: General Package
16.3 General Package WIEW SIDE NOTES 1- Please read the service handbook before making assemble and disassemble of refrigerator parts 2- Screw, nut and some connecting elements are not served service number additionally. Stock numbers of screws which are needed be used must be checked from spare part list. -
Page 60: General Package
16.4 General Package WIEW SIDE NOTES 1- Please read the service handbook before making assemble and disassemble of refrigerator parts 2- Screw, nut and some connecting elements are not served service number additionally. Stock numbers of screws which are needed be used must be checked from spare part list. -
Page 61: External Heating Package
16.5 External Heating Package WIEW SIDE NOTES 1- Please read the service handbook before making assemble and disassemble of refrigerator parts 2- Screw, nut and some connecting elements are not served service number additionally. Stock numbers of screws which are needed be used must be checked from spare part list. -
Page 62: External Heating Control Package
16.6 External Heating Control Package NOTES 1- Please read the service handbook before making assemble and disassemble of refrigerator parts 2- Screw, nut and some connecting elements are not served service number additionally. Stock numbers of screws which are needed be used must be checked from spare part list.
Need help?
Do you have a question about the K60365 and is the answer not in the manual?
Questions and answers
When controlling the temperature of my fridge, what is colder 0 or 5? Also, when adjusting the temperature with the knob in my fridge, will that also adjust the temperature of the freezer? And if not, how can I make my freezer colder?
For an Arcelik fridge, a lower number like 0 is warmer, and a higher number like 5 is colder. Adjusting the fridge temperature knob affects only the fridge compartment, not the freezer. To make the freezer colder, adjust the freezer temperature setting to a lower temperature (colder setting).
This answer is automatically generated