Table of Contents
Advertisement
Advertisement
Table of Contents

Related Manuals for Sirona C2+


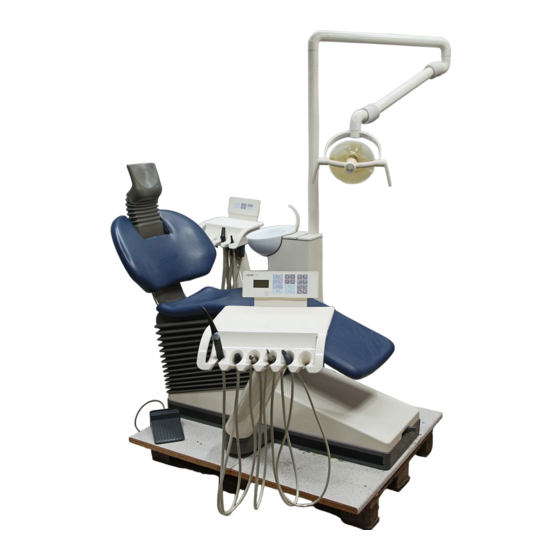
Summary of Contents for Sirona C2+
- Page 1 NMKOMMU kÉï=~ë=çÑW= fåëí~ää~íáçå=fåëíêìÅíáçåë båÖäáëÜ...
- Page 2 General information Sirona Dental Systems GmbH General information About this document For installing optional equipment, please refer to the follow- ing documents (among others): This document describes how to perform the installation of the C2 dental treatment center. • SIROLUX FANTASTIC Installation Instructions,...
-
Page 3: Table Of Contents
Sirona Dental Systems GmbH Table of contents Table of contents Safety ....................5 Checks and Prerequirements ..............6 Checking the Supply Lines ..............7 Installing the Narrow Backrest .............8 Installing the Wide Backrest ..............9 Installation with Motor-Driven Headrest..........10 Connection of Motor-driven Headrest..........11 Preparing the Chair for Installation ............12 Fastening the Chair Base to the Floor ..........13... - Page 4 Table of contents Sirona Dental Systems GmbH 29 Checking the Safety Switches ............39 30 For the Customer … ................40 31 Fastening the Chair to the Floor with the M1 Adapter Plate....42 32 Settings on Dentist and Assistant Elements........43 33 Changing Function on "C" Foot Switch ..........46 34 Demonstration Unit without Water Connection........47...
-
Page 5: Safety
For reasons of product safety, only original Sirona accesso- ries approved for this product, or accessories from third par- ties approved by Sirona, may be used. The user is respon- sible for dangers resulting from the use of non-approved accessories. -
Page 6: Checks And Prerequirements
2 Checks and Prerequirements Sirona Dental Systems GmbH Checks and Prerequirements Suction machine oil-free >80 µm Cold water (drinking water quality) Dilution hardness Water quality Air quality Lime deposits and corrosion residues in tap water can lead Oil-free, dry and hygienically perfect air is required for driv-... -
Page 7: Checking The Supply Lines
Sirona Dental Systems GmbH 3 Checking the Supply Lines Checking the Supply Lines Supply through the floor 3/8“ max. 60 mm 0 – 5 mm min. 500mm Solder fittings: 3/8" ext. thread Installation template Ventilation ca. 500mm Supply above the floor ca. -
Page 8: Installing The Narrow Backrest
4 Installing the Narrow Backrest Sirona Dental Systems GmbH Installing the Narrow Backrest Remove the six screws and four washers from the sword. Pull off backrest cover. Pull out the headrest to its stop position. Fit the backrest onto the sword from above. -
Page 9: Installing The Wide Backrest
Sirona Dental Systems GmbH 5 Installing the Wide Backrest Installing the Wide Backrest NOTE ATTENTION With the electrical headrest the padding flap P is fastened The order of installation must be complied with exactly to with the two middle screws. -
Page 10: Installation With Motor-Driven Headrest
6 Installation with Motor-Driven Headrest Sirona Dental Systems GmbH Installation with Motor-Driven Headrest Remove retaining ring S from driving pin F and pull the pin out. Place fork D on spindle nut E. NOTE Make sure spindle nut E is properly positioned! Flat end of spindle nut facing fork D! Insert fork D in the slide of headrest G. -
Page 11: Connection Of Motor-Driven Headrest
Sirona Dental Systems GmbH 7 Connection of Motor-driven Headrest Connection of Motor-driven Headrest 1. / 8. Unscrew cover M. Interconnect connectors X1 and X2 (floating connec- Undo two screws on the distributor housing and remove tion) and place them one after the other into the re- cover V. -
Page 12: Preparing The Chair For Installation
8 Preparing the Chair for Installation Sirona Dental Systems GmbH Preparing the Chair for Installation Remove the front faceplate of the base. NOTE It is fitted on the lateral faceplates (if necessary, careful- If the C2+ is being assembled as a replacement for an M1 ly prize the faceplates apart with a screwdriver). -
Page 13: Fastening The Chair Base To The Floor
Sirona Dental Systems GmbH 9 Fastening the Chair Base to the Floor Fastening the Chair Base to the Floor Ø 12mm Option min. B’ 20mm ATTENTION NOTE Floor heating! Determine the position of the heating coils For special requirements (e.g. demo operation at a fair), in- with the heating turned on. - Page 14 9 Fastening the Chair Base to the Floor Sirona Dental Systems GmbH 10x160 (5 ea.) 10x80 (5 ea.) Option B’ Screw the chair to positions A, B, B’, D, E and K. – 1 mm: Order No. 47 09 304 –...
-
Page 15: Connecting Air And Water
Sirona Dental Systems GmbH 10 Connecting Air and Water 10 Connecting Air and Water Water right wrong right wrong ATTENTION ATTENTION Use only properly fitting open-jawed wrenches for installa- Do not damage the sanitary hoses and cables. tion. Never use pipe wrenches. -
Page 16: Operating The Water Unit Without Disinfection System
11 Operating the water unit without disinfection system Sirona Dental Systems GmbH 11 Operating the water unit without disinfection system MV35 NOTE When it leaves the factors, the patient's chair has been pre- pared for operation of the water unit with the disinfection system. -
Page 17: Electrical Connection
Sirona Dental Systems GmbH 12 Electrical Connection 12 Electrical Connection ATTENTION ATTENTION The control voltages connected to X2, X3 and X4 may Switch OFF power from the main switch for the electrical in- amount to max. 230V, 6A. stallation. Fasten the control cables from X2, X3 and X4 together Connect power line: N, L, with a cable tie. -
Page 18: Fastening Of The Chair To The Floor
13 Fastening of the Chair to the Floor Sirona Dental Systems GmbH 13 Fastening of the Chair to the Floor 10x200 (2 ea.) 10x110 (2 ea.) Fastening Points C and H Switch on the main switch. Let the chair travel upwards with the foot control. (Ob-... -
Page 19: Adapting The Dentist Element
Sirona Dental Systems GmbH 14 Adapting the Dentist Element 14 Adapting the Dentist Element 3 kg 6,6 lbs Hinge up the flexible cover. Put on the tray support. Push the dentist element onto the guide bolts of the slide. NOTE... -
Page 20: Preparing Chair And Water Unit
15 Preparing Chair and Water Unit Sirona Dental Systems GmbH 15 Preparing Chair and Water Unit Grease SYNTHESO PRO AA2 Remove the transport protection tape. Undo two screws of fuse box cover and remove cover. Undo and remove three screws of the cable holder on the distributor box. -
Page 21: Adapting The Water Unit
Sirona Dental Systems GmbH 16 Adapting the Water Unit 16 Adapting the Water Unit M8 screw (2x) Only if video option is installed: Remove cover A and unscrew the sheet metal support for the video components (4 screws). Lay suction and drain hoses through. - Page 22 16 Adapting the Water Unit Sirona Dental Systems GmbH 10 x 160 (2 ea.) M8x20 (2 ea.) 10 x 80 (2 ea.) 2. / 3. / 6. Grease SYNTHESO PRO AA2 Loosen (do not remove) the nuts on screws F of the fix- NOTE ing bracket B.
-
Page 23: Water Unit: Making Connections
Sirona Dental Systems GmbH 17 Water Unit: Making Connections 17 Water Unit: Making Connections 2. / 6. Grease SYNTHESO PRO AA2 Connector X33: NOTE Insert cable sleeve of electrical lead into correspond- If the drain pipe is in an unfavorable position (such as termi- ingly marked recess of terminal box. -
Page 24: Adapting The Assistant Element
18 Adapting the Assistant Element Sirona Dental Systems GmbH 18 Adapting the Assistant Element Fold back the flexible cover. NOTE Push the assistant element onto the guide bolts of the The adjustment of the height and swivel stop settings of the slide. -
Page 25: Assistant Element: Making Hose Connections
Sirona Dental Systems GmbH 19 Assistant Element: Making Hose Connections 19 Assistant Element: Making Hose Connections Version with and without disinfection system NOTE Pull the nipple holder off from the four-way manifold and Step 4. also applies to MV33 in combination with a wet suc- plug in the water hose W38 from the assistant element. -
Page 26: Valve Set Additional Units: Making The Hose Connections
20 Valve set additional units: Making the hose connections Sirona Dental Systems GmbH 20 Valve set additional units: Making the hose connections 3 1 0 1./3. Version with disinfection system Version without disinfection system Version with disinfection system Version without disinfection system... -
Page 27: Distributor And Fuse Box
Sirona Dental Systems GmbH 21 Distributor and Fuse Box 21 Distributor and Fuse Box Screw on cover of fuse box tight. Screw cable holder to distributor box with three screws. Use ohmmeter to measure resistance between points B and C. The value must be ∞. -
Page 28: Attaching The Water Unit Housing Covers
22 Attaching the Water Unit Housing Covers Sirona Dental Systems GmbH 22 Attaching the Water Unit Housing Covers Remove the lower part of the amalgam separator or of the automatic separator (if installed). Loosen screws A. Slide both aluminum profiles approx. - Page 29 Sirona Dental Systems GmbH 22 Attaching the Water Unit Housing Covers Remount bottom part of amalgam separator. Sever the cable tie on the motor of the amalgam sepa- rator. 10. Slide transport brace with cable tie downward and re- move to the rear through opening in chassis.
- Page 30 22 Attaching the Water Unit Housing Covers Sirona Dental Systems GmbH Serial No. 12. Note Serial No. for Unit Passport. 13. Insert and engage folding cover. 14. Attach inner housing cover at an angle so that it snaps in place.
-
Page 31: Concluding Work
Sirona Dental Systems GmbH 23 Concluding Work 23 Concluding Work Foot switch C NOTE To make the installation easier, the patient chair can be moved up a little (see Operating Instructions). Install the bellows: Pull lower part of bellows over cast-metal frame and press it on with form-fit. - Page 32 23 Concluding Work Sirona Dental Systems GmbH Grease SYNTHESO PRO AA2 Fit the instrument hoses on the dentist element (ac- Fit the instrument hoses on the assistant element (ac- cording to order) from the left to the right: cording to order) from the left to the right: –...
-
Page 33: Final Assembly Of The Narrow Backrest
Sirona Dental Systems GmbH 24 Final Assembly of the Narrow Backrest 24 Final Assembly of the Narrow Backrest right wrong MultiMotion headrest (optional): With an electrical headrest: Attach and press the headrest upholstery on the snap Press the Velcro strap in area C uniformly onto catch D. -
Page 34: Final Assembly Of The Wide Backrest
25 Final Assembly of the Wide Backrest Sirona Dental Systems GmbH 25 Final Assembly of the Wide Backrest MultiMotion headrest (optional): Attach and press the headrest upholstery on the snap fasteners. Attach and snap on backrest cover. Unscrew backrest padding from cardboard backing. -
Page 35: Installing The Seat Padding
Sirona Dental Systems GmbH 26 Installing the Seat Padding 26 Installing the Seat Padding First press the padding snap fasteners E carefully until they snap into the clamp D. Then insert the seat padding at the foot area into the bracket. -
Page 36: Starting Up The Treatment Unit
27 Starting up the Treatment Unit Sirona Dental Systems GmbH 27 Starting up the Treatment Unit – Open the corner valves. Cuspidor rinsing adjustment: Fold open the cover flap on the base. Adjust control nozzle B by turning the Turn ON main switch I. Wait until the end of the self-test knurled wheel until the bottom of the cuspidor bowl is (see Operating Instructions). -
Page 37: Compare And Adjust Operating Air Pressures
Sirona Dental Systems GmbH 28 Compare and adjust operating air pressures 28 Compare and adjust operating air pressures EL 1, motor SL NOTE The cooling air pressure for the motor results from the driv- The operating pressures for the instruments are set before ing air setting of the turbine. - Page 38 28 Compare and adjust operating air pressures Sirona Dental Systems GmbH Setting the Air Pressures • Repeat setting for other holders. • Close the unit head: Propellant air – Take out the instruments and remove the instru- The setting is performed separately for each turbine on the ment tray.
-
Page 39: Checking The Safety Switches
Sirona Dental Systems GmbH 29 Checking the Safety Switches 29 Checking the Safety Switches Performance of safety tests • Swing in the swiveling cuspidor : The chair movement stops. Prior to handover of the treatment center, a number of safety tests must be performed. They are described in ATTENTION the Maintenance Manual. -
Page 40: For The Customer
Hand over the CUSTOMER'S COPY to the customer. The DEALER'S COPY is for the customer records kept by the dealer. Dealer: Please fax the DEALER'S COPY to Sirona directly af- ter the installation. 59 58 470 D 3370 D 3370.031.01.10.02... - Page 41 Sirona Dental Systems GmbH 30 For the Customer … Sanitization: Needs to be agreed with the customer. Prior to initial startup, the water paths must be sanitized with DENTOSEPT P as described in the instructions for Care and Maintenance by the Practice Team.
-
Page 42: Fastening The Chair To The Floor With The M1 Adapter Plate
31 Fastening the Chair to the Floor with the M1 Adapter Plate Sirona Dental Systems GmbH 31 Fastening the Chair to the Floor with the M1 Adapter Plate 10x160 10x80 Align the adapter plate with the M1 connection panel. Screw protective ground conductor S to the M1 adapter... -
Page 43: Settings On Dentist And Assistant Elements
Sirona Dental Systems GmbH 32 Settings on Dentist and Assistant Elements 32 Settings on Dentist and Assistant Elements 1./3. Readjusting the Height on the Dentist and Assistant Elements If the customer so wishes, the height setting on the dentist and assistant elements can be readjusted. - Page 44 32 Settings on Dentist and Assistant Elements Sirona Dental Systems GmbH Figure X 4./6. Torx 15 Torx 15 Torx 15 Braking effect at the head of the dentist element At the customer's request, the braking effect of the rotary joint at the head of the dentist element can be adjusted.
- Page 45 Sirona Dental Systems GmbH 32 Settings on Dentist and Assistant Elements 8./14. 10./ Swivel Stops on Dentist and Assistant Elements 10. Turn the support arm so that one screw of the end stop can be seen through hole C or D. Loosen screw.
-
Page 46: Changing Function On "C" Foot Switch
33 Changing Function on "C" Foot Switch Sirona Dental Systems GmbH 33 Changing Function on "C" Foot Switch Setting ex factory: All functions of the foot switch are triggered by operating the pedal at A (for example, starting of the dental instruments). -
Page 47: Demonstration Unit Without Water Connection
Sirona Dental Systems GmbH 34 Demonstration Unit without Water Connection 34 Demonstration Unit without Water Connection Ass. el. Dent. el. Unplug connector X5 of SPRAYVIT power supply leads from dentist element (board ADX). Unplug connector X5 of SPRAYVIT power supply leads from assistant element (board HP). -
Page 48: Packing Position
35 Packing Position Sirona Dental Systems GmbH 35 Packing Position 650 mm 300 mm To repack the chair (for example, for transportation to an exhibition), move it to the position shown. NOTE Should the chair be moved after the water unit and the as-... -
Page 49: Reversing The Direction Of The Travel Track
Sirona Dental Systems GmbH 36 Reversing the Direction of the Travel Track 36 Reversing the Direction of the Travel Track R6.2 R6.1 ATTENTION Unplug the unit! Pull off and swap the positions of the connectors for the white and brown leads at the travel track drive (white in place of brown and brown in place of white). - Page 50 tÉ=êÉëÉêîÉ=íÜÉ=êáÖÜí=íç=ã~âÉ=~åó=~äíÉê~íáçåë=ïÜáÅÜ=ã~ó=ÄÉ=êÉèìáêÉÇ=ÇìÉ=íç=íÉÅÜåáÅ~ä=áãéêçîÉãÉåíëK «=páêçå~=aÉåí~ä=póëíÉãë=dãÄe=OMMT péê~ÅÜÉW=ÉåÖäáëÅÜ= mêáåíÉÇ=áå=dÉêã~åó a=PPTMKMPNKMNKNMKMO===NMKOMMU ûKJkêKW= NNM=SQQ fãéêáã¨=Éå=^ääÉã~ÖåÉ páêçå~=aÉåí~ä=póëíÉãë=dãÄe áå=íÜÉ=rp^W RV=RU=QTM=a=PPTM c~Äêáâëíê~≈É=PN páêçå~=aÉåí~ä=póëíÉãë=ii` lêÇÉê=kç SQSOR=_ÉåëÜÉáã QUPR=páêçå~=aêáîÉI=pìáíÉ=NMM dÉêã~åó `Ü~êäçííÉI=k`=OUOTP ïïïKëáêçå~KÅçã...
Need help?
Do you have a question about the C2+ and is the answer not in the manual?
Questions and answers