Table of Contents
Advertisement
Advertisement
Table of Contents

Related Manuals for Sirona C3 Plus


Summary of Contents for Sirona C3 Plus
- Page 1 MVKOMNQ kÉï=~ë=çÑW léÉê~íáåÖ=fåëíêìÅíáçåë= båÖäáëÜ...
-
Page 3: Table Of Contents
Sirona Dental Systems GmbH Table of Contents Table of Contents General information ....................Dear Customer, ..........................Contact data ............................. Notes on these Operating Instructions ..................... Other valid documents........................Warranty and liability ........................Intended use ............................. Safety instructions ....................Identification of the danger levels ..................... 10 Information on the unit ........................ - Page 4 Table of Contents Sirona Dental Systems GmbH Positioning patients....................Articulated headrest ......................... 40 Flat headrest ............................ 40 Motor-driven headrest ........................41 MultiMotion headrest........................42 Chair movements adjustable by motor drive..................45 Programming patient positions ......................46 Dentist element and instrument functions .............
- Page 5 Sirona Dental Systems GmbH Table of Contents Assistant element...................... 12.1 Positioning the assistant element ..................... 74 12.2 Instrument tray for closed deposits....................74 12.3 Suction handpieces on the assistant element .................. 75 12.4 SPRAYVIT on the assistant element ....................76 12.5...
-
Page 6: General Information
Contact data Customer Service Center In the event of technical queries, please use our online contact form at www.sirona.com. In the navigation bar, select "CONTACT" then "Customer Service Center" and click on the "Contact form for technical questions" link. Manufacturer's address (worldwide) -
Page 7: Notes On These Operating Instructions
Online portal for technical documents We have set up an online portal for technical documen- tation at http://www.sirona.com/manuals. From here, you can download these Operating Instructions along with other documents. Please complete the online form if you would like a hard copy of a particular document. -
Page 8: Other Valid Documents
In the event that the system owner fails to fulfill its obli- gation to perform maintenance activities or ignores error messages, Sirona Dental Systems GmbH and its autho- rized dealers cannot assume any liability for any dam- age thus incurred. -
Page 9: Intended Use
Sirona Dental Systems GmbH 1 General information 1.6 Intended use Intended use This dental treatment center is designed to be used in the field of human dentistry and must only be operated by qualified dental personnel. Contraindications for the use of the treatment center, if any, are listed in the individual sections, e.g. -
Page 10: Safety Instructions
2 Safety instructions Sirona Dental Systems GmbH 2.1 Identification of the danger levels Safety instructions Identification of the danger levels To prevent personal injury and material damage, please observe the warning and safety information provided in the present Operating Instructions. Such information is... -
Page 11: On-Site Installation
To ensure compliance with the medical and national legal requirements for water from treatment centers, Sirona recommends equipping the treatment center with a disinfection system. If you decide to operate the treat- ment center without a disinfection system, you must make alternative arrangements to ensure good water quality. -
Page 12: Connection To The Public Drinking Water System
2 Safety instructions Sirona Dental Systems GmbH 2.6 Connection to the public drinking water system Connection to the public drinking water system Treatment center with separation of the public Connection to the public drinking water system Free discharge for option without disinfection system... -
Page 13: Trouble-Free Operation
No restrictions apply when using salt blasting devices in connection with Sirona treatment centers. However, in such cases, make sure that the system is subsequently flushed with an adequate amount of water. -
Page 14: Intermittent Operation
Therefore, use only care and cleaning agents and disin- fectants which have been approved by Sirona. For fur- ther information, see the document "Care, cleaning agents, and disinfectants", REF 59 70 905. -
Page 15: Electromagnetic Compatibility
Sirona Dental Systems GmbH 2 Safety instructions 2.15 Electromagnetic compatibility If a system is created during the installation process, the requirements of IEC 60601-1, 3rd edition, must be ful- filled. The system author assumes responsibility for con- formity of the system with 93/42/EEC Directive. -
Page 16: Dismantling / Installation
2 Safety instructions Sirona Dental Systems GmbH 2.17 Dismantling / Installation 2.17 Dismantling / Installation Dismantling / Installation Follow the installation instructions When dismantling and reinstalling the unit, proceed according to the installation instructions for new installa- tion in order to guarantee its proper functioning and sta- bility. -
Page 17: Technical Description
Sirona Dental Systems GmbH 3 Technical description 3.1 Standards / Approvals Technical description Standards / Approvals The C3 treatment center complies with the following standards, among others: • IEC 60601-1 (electrical, mechanical, and software safety) • IEC 60601-1-2 (electromagnetic compatibility) •... - Page 18 IC: 7654A-nanoLOCAVR The current approvals of the wireless foot switch are listed on the rating plate on the underside of the wireless foot switch. ® is a registered trademark of Sirona Dental Systems GmbH. 59 06 404 D 3390 D 3390.201.01.18.02...
-
Page 19: Technical Data
Sirona Dental Systems GmbH 3 Technical description 3.2 Technical data Technical data Dental treatment center Model designation: Power connection: 100 V / 115 V / 230 VAC 50 / 60 Hz Rated current: 11.5 A at 100 VAC 9.5 A at 115 VAC 4.5 A... - Page 20 3 Technical description Sirona Dental Systems GmbH 3.2 Technical data Foot switch wireless interface Model designation: nanoLOC AVR Frequency: 2,4 GHz – 2.4835 GHz (ISM band) Transmitting power: < 2 mW (short-range device) Modulation type: MDMA Range: approx. 10 m...
-
Page 21: Controls And Functional Elements
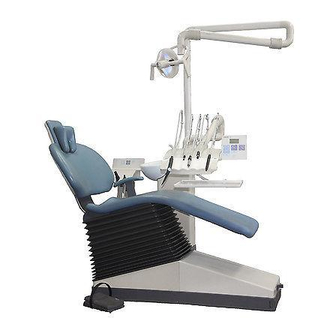
Sirona Dental Systems GmbH 4 Controls and functional elements 4.1 System overview of the C3 Controls and functional elements System overview of the C3 1 2 3 4 5 6 10 11 12 13 Assistant element Holder 4: 3. Electric motor / highspeed handpiece... -
Page 22: Control Panel On The Dentist Element
4 Controls and functional elements Sirona Dental Systems GmbH 4.2 Control panel on the dentist element Control panel on the dentist element Control panel System status indication display and Mode AMALG DESINF AMALG appears when the amalgam rotor needs to be replaced. - Page 23 Sirona Dental Systems GmbH 4 Controls and functional elements 4.2 Control panel on the dentist element Main functions – dark blue keys Quick adjustment keys for speed and instrument intensity For electric motors and the SIROSONIC L scaler Spray ON/OFF...
- Page 24 4 Controls and functional elements Sirona Dental Systems GmbH 4.2 Control panel on the dentist element Additional functions – light blue keys Preselection of user A or B All instruments must be in place. You cannot switch between the two users after picking...
- Page 25 Sirona Dental Systems GmbH 4 Controls and functional elements 4.2 Control panel on the dentist element Chair functions – gray keys For manual chair settings: Tilt backrest backward or forward Vertical adjustment down / up Additional functions of the control...
-
Page 26: Control Panel On The Assistant Element
4 Controls and functional elements Sirona Dental Systems GmbH 4.3 Control panel on the assistant element Control panel on the assistant element Control panel Main functions – dark blue keys Mouth rinsing position chair program With last position memory function (freely program-... - Page 27 Sirona Dental Systems GmbH 4 Controls and functional elements 4.3 Control panel on the assistant element Additional functions – light blue keys Tumbler filling ON / OFF Flushing of the cuspidor ON / OFF X-ray image viewer ON / OFF...
-
Page 28: Putting The System Into Operation
5 Putting the system into operation Sirona Dental Systems GmbH 4.3 Control panel on the assistant element Putting the system into operation Initial startup The disinfection system adds a disinfectant to the water (1:100) to significantly reduce the formation of microor- ganisms in the water system. - Page 29 Sirona Dental Systems GmbH 5 Putting the system into operation 4.3 Control panel on the assistant element Display of the next maintenance due date As soon as the next maintenance date is fewer than 30 days away, the maintenance prompt appears each...
-
Page 30: Foot Control
6 Foot control Sirona Dental Systems GmbH 6.1 Wireless foot switch C+ Foot control Wireless foot switch C The treatment center can be operated with a wireless foot switch C IMPORTANT The service engineer already registered the wireless foot switch during the installation. - Page 31 Sirona Dental Systems GmbH 6 Foot control 6.1 Wireless foot switch C+ Press the 0 and S keys of the wireless foot switch simultaneously for at least 3 seconds. The signal lamp A on the wireless foot switch flashes once per second (for 30 seconds) and the beeper on the NSB board periodically beeps.
- Page 32 6 Foot control Sirona Dental Systems GmbH 6.1 Wireless foot switch C+ Battery voltage message The wireless foot switch is powered by a battery. The system will detect a low battery status and emit an acoustic signal. In this case, the battery should be replaced within a week to prevent system failure.
- Page 33 Sirona Dental Systems GmbH 6 Foot control 6.1 Wireless foot switch C+ Remove the screws (A) from the bottom of the foot switch. Remove the switch part (C) from the foot switch. Pull the battery out of the battery compartment by pulling the cloth strap (B) and replace it with a new one.
- Page 34 6 Foot control Sirona Dental Systems GmbH 6.1 Wireless foot switch C+ Removing and changing the battery from the wireless foot control (with battery compartment) Prior to changing the battery, switch the treatment center off at the main switch. This prevents the inadvertent trig- gering of unwanted functions.
-
Page 35: C Foot Switch
Sirona Dental Systems GmbH 6 Foot control 6.2 C foot switch foot switch This foot switch allows you to work with both hands free using the cursor control and also manually by key operation. The foot switch has a 4-way foot switch plate for cursor... - Page 36 6 Foot control Sirona Dental Systems GmbH 6.2 C foot switch Automatic cursor control with C foot switch A yellow diode on the dentist element indicates the posi- tion of the cursor. The cursor path is marked by lines. 1. / 3.
-
Page 37: Program Selection
Sirona Dental Systems GmbH 7 Program selection 7.1 Safety Program selection Safety Patient positioning WARNING The patient’s arms and legs must be resting on the chair upholstery during the program run! WARNING Make sure that no obstacles (e.g. windows, drawers, devices, etc.) extend into the movement range. -
Page 38: Movement Stop
7 Program selection Sirona Dental Systems GmbH 7.2 MOVEMENT STOP! CAUTION When moving the chair (via program or manually), make sure that the patient does not under any circumstances come into contact with the support arm or the dentist element. -
Page 39: Program Selection
Sirona Dental Systems GmbH 7 Program selection 7.3 Program selection Program selection Keys for selecting the programmed patient positions. For a swiveling cuspidor: Before the chair moves to the selected program position, the swiveled-in cuspidor automatically returns to its starting position. -
Page 40: Positioning Patients
8 Positioning patients Sirona Dental Systems GmbH 8.1 Articulated headrest Positioning patients Articulated headrest The headrest must be adjusted manually. To do this, take the load off the backrest and pull out or push in the headrest using the handle (1). -
Page 41: Motor-Driven Headrest
Sirona Dental Systems GmbH 8 Positioning patients 8.3 Motor-driven headrest Motor-driven headrest Moving the headrest in / out Move the headrest out / in by pushing the upper 4-way switch at the back of the headrest up / down. Tilting the headrest... -
Page 42: Multimotion Headrest
8 Positioning patients Sirona Dental Systems GmbH 8.4 MultiMotion headrest MultiMotion headrest Adjustment to patient's height The headrest can be adjusted to the patient's height by pulling out or pushing in the headrest extension. This adjustment is usually required at the beginning of treat-... - Page 43 Sirona Dental Systems GmbH 8 Positioning patients 8.4 MultiMotion headrest Maxillary position Take the load off the headrest by lifting it slightly. Press release A on the handle. Let the headrest slide down slowly. Let go of the release when the headrest reaches the desired position.
- Page 44 8 Positioning patients Sirona Dental Systems GmbH 8.4 MultiMotion headrest Removing the MultiMotion For certain treatments (e.g. involving children) it may be appropriate to remove the MultiMotion completely in order to obtain better access to the patient. The patient's head will then be supported on the contact surface of the headrest extension F.
-
Page 45: Chair Movements Adjustable By Motor Drive
Sirona Dental Systems GmbH 8 Positioning patients 8.5 Chair movements adjustable by motor drive Chair movements adjustable by motor drive You can start the motorized chair movements manually with the keys in the right block on the dentist element control panel. -
Page 46: Programming Patient Positions
8 Positioning patients Sirona Dental Systems GmbH 8.6 Programming patient positions Programming patient positions The four factory-set programs can be changed indi- vidually by user A and user B. • Programs 1 and 2 • Entry / exit program 0 •... -
Page 47: Dentist Element And Instrument Functions
Sirona Dental Systems GmbH 9 Dentist element and instrument functions 9.1 Dentist element Dentist element and instrument functions Dentist element Maximum load capacity The maximum load of the tray on the dentist element amounts to 1kg (2.2 lbs). max. max. -
Page 48: Positioning The Dentist Element
9 Dentist element and instrument functions Sirona Dental Systems GmbH 9.2 Positioning the dentist element Positioning the dentist element After the dental chair has reached the patient position, move the dentist element to the desired treatment posi- tion after releasing the brake by pressing one of the but- tons (1). -
Page 49: General Instrument Functions
Sirona Dental Systems GmbH 9 Dentist element and instrument functions 9.3 General instrument functions General instrument functions Spray You can switch the spray cooling ON / OFF by pressing the spray key on the dentist element control panel. If spray is preselected, the green LED in the key is lit. - Page 50 9 Dentist element and instrument functions Sirona Dental Systems GmbH 9.3 General instrument functions Instrument light ON / OFF With this key on the dentist element control panel, you preset the instrument light for the picked-up instru- ment. If light ON is preset, the green LED in the key is lit.
-
Page 51: Electric Motor
Sirona Dental Systems GmbH 9 Dentist element and instrument functions 9.4 Electric motor Electric motor Speed setting When you pick up an electric motor, the programmed speed of the motor in RPM (revolutions per minute) appears on the display. You can set the speed with the quick adjustment keys on the left side of the dentist element control panel. -
Page 52: Highspeed Handpiece
9 Dentist element and instrument functions Sirona Dental Systems GmbH 9.5 Highspeed handpiece You can activate counterclockwise rotation of the elec- tric motor also with the foot switch: • 4-way foot switch plate to the left – counterclockwise rotation •... -
Page 53: Sirosonic L Scaler
Sirona Dental Systems GmbH 9 Dentist element and instrument functions 9.6 SIROSONIC L scaler SIROSONIC L scaler Tip protector The tip protector is used as a tool for screwing in instru- ment tips. WARNING While the handpiece is in its holder, the tip protector must remain fitted to prevent injuries. - Page 54 9 Dentist element and instrument functions Sirona Dental Systems GmbH 9.6 SIROSONIC L scaler If intermediate values are set, the green key LED does not light up. The cooling water flow is always switched on automati- cally. Endodontics setting An intensity range of 1 – 4 is provided for endodontics mode.
-
Page 55: Sprayvit L Multifunctional Syringe
Sirona Dental Systems GmbH 9 Dentist element and instrument functions 9.7 SPRAYVIT L multifunctional syringe SPRAYVIT L multifunctional syringe The multifunctional syringe is used to clean the treat- ment areas and blow them dry. It supplies preheated air and water media. The heating cartridges are located in the handpiece. -
Page 56: Saving The Instrument Programs
9 Dentist element and instrument functions Sirona Dental Systems GmbH 9.8 Saving the instrument programs Saving the instrument programs The factory-set instrument programs can be changed individually by user A and user B. Select the corresponding user, i.e. A or B, pick up an instrument and set it according to your wishes. -
Page 57: Surgery With Saline Solution (Nacl)
Sirona Dental Systems GmbH 9 Dentist element and instrument functions 9.9 Surgery with saline solution (NaCl) Surgery with saline solution (NaCl) Preparations on the unit • Hook the NaCl bottle (1) in place. • Attach the peristaltic pump hose set (2). - Page 58 9 Dentist element and instrument functions Sirona Dental Systems GmbH 9.9 Surgery with saline solution (NaCl) Switching the NaCl pump on / off With the handpiece removed, the NaCl pump can be switched ON/OFF by activating the Spray key (or with the left button on the foot switch).
-
Page 59: Operating Light, Tumbler Filling, Flushing Of The Cuspidor, Purge
Sirona Dental Systems GmbH 10 Operating light, tumbler filling, flushing of the cuspidor, purge 10.1 Operating light Operating light, tumbler filling, flushing of the cuspidor, purge 10.1 Operating light Operating light – dentist element control panel Briefly pressing the light key switches the operating light ON or OFF. -
Page 60: Tumbler Filling
10 Operating light, tumbler filling, flushing of the cuspidor, purge Sirona Dental Systems GmbH 10.2 Tumbler filling 10.2 Tumbler filling When you press this key briefly, the tumbler is filled with a preset amount of water. When you press the key again during water flow, the tumbler filling function is switched off. -
Page 61: Flushing Of The Cuspidor
Sirona Dental Systems GmbH 10 Operating light, tumbler filling, flushing of the cuspidor, purge 10.3 Flushing of the cuspidor 10.3 Flushing of the cuspidor When you press this key briefly, the flushing function is switched ON and the cuspidor is flushed for a preset period of time. - Page 62 10 Operating light, tumbler filling, flushing of the cuspidor, purge Sirona Dental Systems GmbH 10.4 Purge / Auto Purge function (purging the water paths) Pick up the instruments you want to purge and hold them above the cuspidor. The maximum water flow must be set on the instru- ments.
- Page 63 Sirona Dental Systems GmbH 10 Operating light, tumbler filling, flushing of the cuspidor, purge 10.4 Purge / Auto Purge function (purging the water paths) Setting the APURGE function Activate the selection dialog box by pressing quick adjustment key 1 (> 3 s) when all of the instruments are deposited in their holders.
- Page 64 10 Operating light, tumbler filling, flushing of the cuspidor, purge Sirona Dental Systems GmbH 10.4 Purge / Auto Purge function (purging the water paths) Remove the instruments to be purged from the dentist and assistant elements and insert them into the adapters of the sanitation bowl as far as they will go.
-
Page 65: Basic Treatment Center Settings In The Mode Dialog
Sirona Dental Systems GmbH 11 Basic treatment center settings in the Mode dialog 11.1 Mode key Basic treatment center settings in the Mode dialog 11.1 Mode key When you press the Mode key, you can access and change various basic settings in a certain order. -
Page 66: Mode: Nacl Pump Off Or On For Instrument Holder
11 Basic treatment center settings in the Mode dialog Sirona Dental Systems GmbH 11.2 Mode: NACL PUMP OFF or ON for instrument holder .. 11.2 Mode: NACL PUMP OFF or ON for instrument holder .. Saline solution for the desired burr instrument –... -
Page 67: Mode: Fc Control Mode On/Off - Variable
Sirona Dental Systems GmbH 11 Basic treatment center settings in the Mode dialog 11.5 Mode: FC CONTROL MODE ON/OFF - VARIABLE Mode: FC CONTROL MODE ON/OFF − VARIABLE 11.5 Direct starter or speed controller foot switch – Mode Preselection of the foot switch control mode for instru- ment start. -
Page 68: Mode: Bowl Flush. On S Yes - No
11 Basic treatment center settings in the Mode dialog Sirona Dental Systems GmbH 11.9 Mode: BOWL FLUSH. ON S YES - NO Mode: BOWL FLUSH. ON S YES − NO 11.9 Cuspidor flushing with chair program S In program S of the treatment chair, cuspidor flushing switches on. - Page 69 Sirona Dental Systems GmbH 11 Basic treatment center settings in the Mode dialog 11.11 Mode: WHITE BALANCE The selected item flashes. – / + Select USER with the keys. USER starts flashing. Set the slide switch (2) of the camera to its middle posi- tion (overview exposure).
-
Page 70: Instrument Settings Via The Mode Dialog
3.9 V WARNING Observe the voltage specifications provided by the instrument manufacturer! IMPORTANT For Sirona instruments, the voltage (3.6 V) is already preset. Setting the torque of the electric motors This Mode dialog is used to set the automatic controller action of the SL or SL ISO electric motors. -
Page 71: Mode: # Function Toggle - Momentary
Sirona Dental Systems GmbH 11 Basic treatment center settings in the Mode dialog 11.13 Mode: # FUNCTION TOGGLE - MOMENTARY Mode: # FUNCTION TOGGLE − MOMENTARY 11.13 Free function key # as button or switch – Mode In this mode you can preset whether you want to use the... -
Page 72: Mode: Sirolux U - Pos. On - Off
11 Basic treatment center settings in the Mode dialog Sirona Dental Systems GmbH 11.17 Mode: SIROLUX U - POS. ON – OFF 11.17 Mode: SIROLUX U - POS. ON – OFF The SIROLUX U - POS mode presetting does not have a function in this unit. -
Page 73: Mode: A/B Video Mode On - Off
ON or OFF. The selected item flashes. IMPORTANT This function is switched OFF in the factory setting. IMPORTANT Sirona recommends activating this function especially for the C3 treatment center. 59 06 404 D 3390 D 3390.201.01.18.02... -
Page 74: Assistant Element
12 Assistant element Sirona Dental Systems GmbH 12.1 Positioning the assistant element Assistant element 12.1 Positioning the assistant element The assistant element can be swiveled to the side and to the front. To do this grasp the assistant element laterally at the handpiece rack (1). -
Page 75: Suction Handpieces On The Assistant Element
Sirona Dental Systems GmbH 12 Assistant element 12.3 Suction handpieces on the assistant element 12.3 Suction handpieces on the assistant element The vacuum system switches on when you pick up a suction hose from the holder. NOTICE Please observe the safety information regarding the suction system on page 13. -
Page 76: Sprayvit On The Assistant Element
12 Assistant element Sirona Dental Systems GmbH 12.4 SPRAYVIT on the assistant element WARNING Make sure to hold the suction cannula in such a way that the cannula opening cannot attach itself to the oral mucous membranes by accident. IMPORTANT The factory-set suction power can be adjusted in the water unit by a service engineer. -
Page 77: Satelec Mini Led Curing Light
Sirona Dental Systems GmbH 12 Assistant element 12.5 Satelec Mini LED curing light 12.5 Satelec Mini LED curing light Safety instructions The curing light contains powerful LEDs. In accordance with IEC 62471, they are classified in risk group 2 with the light bar removed. - Page 78 12 Assistant element Sirona Dental Systems GmbH 12.5 Satelec Mini LED curing light WARNING • Any condensation occurring in the handpiece of the Mini LED may cause impairments (e.g. fogging of the LED). If the handpiece is taken from a cool environment into a warm room then it may only be operated once it has reached room temperature.
- Page 79 Sirona Dental Systems GmbH 12 Assistant element 12.5 Satelec Mini LED curing light Installation • in the assistant element, holder 1 Handpiece and accessories Handpiece Light guide Supply cable Status LEDs Glare shield ON / OFF switch Function button 134°C 274°F Operating modes The Mini LED has three different modes.
- Page 80 12 Assistant element Sirona Dental Systems GmbH 12.5 Satelec Mini LED curing light 4.3 Pulsed curing mode This mode is selected by pressing the function button. The light operates at full power in "pulsed" mode; it emits radiation in 10 consecutive light pulses of 1s each.
- Page 81 Sirona Dental Systems GmbH 12 Assistant element 12.5 Satelec Mini LED curing light Technical data Table 1: General technical data Model: Mini LED Weight of handpiece without 105 g hose: Dimensions: dia. 23 x 240 mm Current draw of handpiece: 5 VDC / 0.65 A...
-
Page 82: Water Unit
13 Water unit Sirona Dental Systems GmbH 13.1 Swiveling cuspidor (alternative equipment) Water unit 13.1 Swiveling cuspidor (alternative equipment) The cuspidor on the water unit can be swiveled manually by approx. 110mm toward the patient chair. Collision protection If the cuspidor is swiveled toward the patient chair cer- tain chair movements are locked. -
Page 83: Amalgam Rotor
Sirona Dental Systems GmbH 13 Water unit 13.3 Amalgam rotor 13.3 Amalgam rotor The message AMALGappears on the display when the amalgam rotor needs to be replaced, i.e., once it has reached a filling level of 95 % (see the document "Care and Cleaning by the Practice Team"). -
Page 84: Sivision 3 / Sirocam 3 / Sirocam C
14 SIVISION 3 / SIROCAM 3 / SIROCAM C Sirona Dental Systems GmbH 14.1 SIVISION monitor SIVISION 3 / SIROCAM 3 / SIROCAM C 14.1 SIVISION monitor Monitor versions The monitors are fitted with a glass pane for easy clean- ing. -
Page 85: Camera Versions
Sirona Dental Systems GmbH 14 SIVISION 3 / SIROCAM 3 / SIROCAM C 14.2 Camera versions 14.2 Camera versions The camera can be integrated into the dentist element or the assistant element. SIROCAM 3 • Integrated 4-view image memory • 3-fold adjustable focus range •... -
Page 86: Sirocam 3 Intraoral Camera (Extra Equipment)
14 SIVISION 3 / SIROCAM 3 / SIROCAM C Sirona Dental Systems GmbH 14.3 SIROCAM 3 intraoral camera (extra equipment) 14.3 SIROCAM 3 intraoral camera (extra equipment) The SIROCAM 3 intraoral camera combined with SIVISION 3 is a perfect system for effective communi- cation with the patient. - Page 87 Sirona Dental Systems GmbH 14 SIVISION 3 / SIROCAM 3 / SIROCAM C 14.3 SIROCAM 3 intraoral camera (extra equipment) Hygienic protective sleeves for SIROCAM 3 Hygienic protective sleeves are available for the camera. They can be ordered under REF 59 38 654. Package size: 500 pcs.
-
Page 88: Sirocam C Intraoral Camera (Extra Equipment)
14 SIVISION 3 / SIROCAM 3 / SIROCAM C Sirona Dental Systems GmbH 14.4 SIROCAM C intraoral camera (extra equipment) 14.4 SIROCAM C intraoral camera (extra equipment) The SIROCAM C intraoral camera combined with SIVISION 3 is a perfect system for effective communi- cation with the patient. - Page 89 Sirona Dental Systems GmbH 14 SIVISION 3 / SIROCAM 3 / SIROCAM C 14.4 SIROCAM C intraoral camera (extra equipment) Hygienic protective sleeves for SIROCAM C Hygienic protective sleeves are available for the camera. They can be ordered under REF 59 14 705. Package size: 500 pcs.
-
Page 90: Operating Modes Of Sivision 3
14 SIVISION 3 / SIROCAM 3 / SIROCAM C Sirona Dental Systems GmbH 14.5 Operating modes of SIVISION 3 14.5 Operating modes of SIVISION 3 SIVISION 3 with SIROCAM 3 or SIROCAM C can be used basically in two different operating modes: •... - Page 91 Sirona Dental Systems GmbH 14 SIVISION 3 / SIROCAM 3 / SIROCAM C 14.5 Operating modes of SIVISION 3 SWITCHING TO VIDEO MODE A/B key on the control panel Only for: VIDEOCAM PC MODE • camera picked up and activated, •...
-
Page 92: Sirocam 3 / Sirocam C Integrated In The Dentist Element (Video)
14 SIVISION 3 / SIROCAM 3 / SIROCAM C Sirona Dental Systems GmbH 14.6 SIROCAM 3 / SIROCAM C integrated in the dentist element (video) 14.6 SIROCAM 3 / SIROCAM C integrated in the dentist element (video) Operation in video mode... - Page 93 Sirona Dental Systems GmbH 14 SIVISION 3 / SIROCAM 3 / SIROCAM C 14.6 SIROCAM 3 / SIROCAM C integrated in the dentist element (video) Picking up the camera If a STILL IMAGE or QUAD IMAGE was displayed while the camera was in place, this view is retained.
- Page 94 14 SIVISION 3 / SIROCAM 3 / SIROCAM C Sirona Dental Systems GmbH 14.6 SIROCAM 3 / SIROCAM C integrated in the dentist element (video) IMAGE SWITCHING Spray ON / OFF key on the control panel Manually or by cursor (using the foot switch) with instru- ments in place or camera picked up.
- Page 95 Sirona Dental Systems GmbH 14 SIVISION 3 / SIROCAM 3 / SIROCAM C 14.6 SIROCAM 3 / SIROCAM C integrated in the dentist element (video) TOGGLING BETWEEN QUAD IMAGE AND SINGLE IMAGE Chip blower key on the control panel Manually or by cursor (using the foot switch) with instru- ments in place or camera picked up.
- Page 96 14 SIVISION 3 / SIROCAM 3 / SIROCAM C Sirona Dental Systems GmbH 14.6 SIROCAM 3 / SIROCAM C integrated in the dentist element (video) Putting the camera back • If a LIVE IMAGE was displayed, a BLACK SCREEN appears.
- Page 97 Sirona Dental Systems GmbH 14 SIVISION 3 / SIROCAM 3 / SIROCAM C 14.6 SIROCAM 3 / SIROCAM C integrated in the dentist element (video) WHITE SCREEN X-ray image viewer ON / OFF key on the control panel • Switch X-ray image viewer or WHITE SCREEN on the SIVISION monitor ON / OFF.
-
Page 98: Sirocam 3 / Sirocam C Integrated In The Dentist Element (Pc)
14 SIVISION 3 / SIROCAM 3 / SIROCAM C Sirona Dental Systems GmbH 14.7 SIROCAM 3 / SIROCAM C integrated in the dentist element (PC) 14.7 SIROCAM 3 / SIROCAM C integrated in the dentist element (PC) Operation in PC mode using a PC connection and SIDEXIS/VIDEXIS The monitor is controlled by the PC in this case. - Page 99 Sirona Dental Systems GmbH 14 SIVISION 3 / SIROCAM 3 / SIROCAM C 14.7 SIROCAM 3 / SIROCAM C integrated in the dentist element (PC) USING THE FUNCTION KEYS Other functions, e.g. the SIDEXIS / VIDEXIS functions Tile, Next Image, Full Frame, Zoom In, Zoom Out,...
- Page 100 14 SIVISION 3 / SIROCAM 3 / SIROCAM C Sirona Dental Systems GmbH 14.7 SIROCAM 3 / SIROCAM C integrated in the dentist element (PC) Putting the camera back • The LIVE IMAGE window closes. The displayed STILL IMAGE or any saved images remain open.
- Page 101 Sirona Dental Systems GmbH 14 SIVISION 3 / SIROCAM 3 / SIROCAM C 14.7 SIROCAM 3 / SIROCAM C integrated in the dentist element (PC) BLACK SCREEN "100" quick adjustment key Manually or by cursor (using the foot switch) with instru- ments in place or camera picked up.
-
Page 102: Sirocam 3 / Sirocam C Integrated In The Assistant Element (Video)
14 SIVISION 3 / SIROCAM 3 / SIROCAM C Sirona Dental Systems GmbH 14.8 SIROCAM 3 / SIROCAM C integrated in the assistant element (video) 14.8 SIROCAM 3 / SIROCAM C integrated in the assistant element (video) Operation in video mode If a PC is connected, PC mode must be switched OFF! See section "Switching between VIDEO mode and PC... - Page 103 Sirona Dental Systems GmbH 14 SIVISION 3 / SIROCAM 3 / SIROCAM C 14.8 SIROCAM 3 / SIROCAM C integrated in the assistant element (video) GENERATING STILL IMAGES • Briefly touch the foot button when the camera has been picked up. The image number I appears in the upper right corner of the image.
- Page 104 14 SIVISION 3 / SIROCAM 3 / SIROCAM C Sirona Dental Systems GmbH 14.8 SIROCAM 3 / SIROCAM C integrated in the assistant element (video) SELECTING / OVERWRITING IMAGES • When a QUAD IMAGE is displayed with the camera picked up, you can select a specific image from the QUAD IMAGE by briefly touching the foot button.
- Page 105 Sirona Dental Systems GmbH 14 SIVISION 3 / SIROCAM 3 / SIROCAM C 14.8 SIROCAM 3 / SIROCAM C integrated in the assistant element (video) DELETING ALL IMAGES (from the camera memory) With a QUAD IMAGE displayed and the camera picked •...
- Page 106 14 SIVISION 3 / SIROCAM 3 / SIROCAM C Sirona Dental Systems GmbH 14.8 SIROCAM 3 / SIROCAM C integrated in the assistant element (video) Putting the camera back • If a LIVE IMAGE was displayed, a BLACK SCREEN appears.
-
Page 107: Sirocam 3 / Sirocam C Integrated In The Assistant Element (Pc)
Sirona Dental Systems GmbH 14 SIVISION 3 / SIROCAM 3 / SIROCAM C 14.9 SIROCAM 3 / SIROCAM C integrated in the assistant element (PC) 14.9 SIROCAM 3 / SIROCAM C integrated in the assistant element (PC) Operation in PC mode using a PC connection and SIDEXIS/VIDEXIS To use the PC mode, SIDEXIS / VIDEXIS must be open. - Page 108 14 SIVISION 3 / SIROCAM 3 / SIROCAM C Sirona Dental Systems GmbH 14.9 SIROCAM 3 / SIROCAM C integrated in the assistant element (PC) SAVING A STILL IMAGE IN SIDEXIS / VIDEXIS • Save the displayed STILL IMAGE by pressing the foot button for a while (>...
- Page 109 Sirona Dental Systems GmbH 14 SIVISION 3 / SIROCAM 3 / SIROCAM C 14.9 SIROCAM 3 / SIROCAM C integrated in the assistant element (PC) USING THE CAMERA BUTTON AND THE FOOT BUTTON AS FUNCTION KEYS The camera must be placed in its holder.
-
Page 110: Switching Between Video Mode And Pc Mode
14 SIVISION 3 / SIROCAM 3 / SIROCAM C Sirona Dental Systems GmbH 14.10 Switching between VIDEO mode and PC mode 14.10 Switching between VIDEO mode and PC mode Only with SIROCAM 3 / SIROCAM C in the assistant element and a connected PC... - Page 111 Sirona Dental Systems GmbH 14 SIVISION 3 / SIROCAM 3 / SIROCAM C 14.10 Switching between VIDEO mode and PC mode Switching to PC mode Right-click the Siucom icon in the Systray (usually in the lower right corner of the screen).
-
Page 112: Sivision 3- Second Monitor Function Without Sirocam3 / Sirocam C
14 SIVISION 3 / SIROCAM 3 / SIROCAM C Sirona Dental Systems GmbH 14.11 SIVISION 3– second monitor function without SIROCAM3 / SIROCAM C 14.11 SIVISION 3– second monitor function without SIROCAM3 / SIROCAM C The monitor integrated in the treatment center serves as primary or secondary monitor for the externally con- nected PC. -
Page 113: Extra Equipment And Accessories
Sirona Dental Systems GmbH 15 Extra equipment and accessories 15.1 Media block on the patient chair Extra equipment and accessories 15.1 Media block on the patient chair Extra equipment External medical accessories can be connected to the external device connection. They must comply with the requirements of Medical Device Directive 93/42/EEC. -
Page 114: Hygienic Motorized Headrest Protection
15 Extra equipment and accessories Sirona Dental Systems GmbH 15.2 Hygienic motorized headrest protection 15.2 Hygienic motorized headrest protection Accessories Two different hygienic covers are available for the head- rest of the patient chair: • Washable textile headrest cover with Velcro closure and neck pad REF: 59 05 588 (5 pcs.) -
Page 115: Folding Armrest
Sirona Dental Systems GmbH 15 Extra equipment and accessories 15.4 Folding armrest 15.4 Folding armrest Extra equipment If a folding armrest is attached to the patient chair, it can be folded up or down by pressing the two buttons on the lower end of the armrest at the same time. -
Page 116: X-Ray Image Viewer On The Lamp Support Tube
15 Extra equipment and accessories Sirona Dental Systems GmbH 15.6 X-ray image viewer on the lamp support tube 15.6 X-ray image viewer on the lamp support tube Extra equipment This X-ray image viewer is switched ON or OFF using the illustrated key on the dentist or assistant element control panel. -
Page 117: Maintenance
Sirona Dental Systems GmbH 16 Maintenance 16.1 Care and cleaning instructions for the practice team Maintenance Despite the outstanding quality of your treatment center, it is necessary to perform inspections and preventive maintenance as well as safety tests at scheduled inter- vals in order to ensure its operational safety. -
Page 118: Safety Checks
16 Maintenance Sirona Dental Systems GmbH 16.3 Safety checks 16.3 Safety checks Medical equipment is designed in such a way that the first occurrence of a fault does not create a hazard to the safety of patients, users or other persons. Hence it is important to detect such faults before a second fault occurs, which might then lead to safety hazards. -
Page 119: Disposal
Sirona Dental Systems GmbH 17 Disposal 17.1 Returning electrical devices Disposal 17.1 Returning electrical devices Your product is marked with the adjacent symbol. Within Environmentally sound disposal the European Economic Area, this product is subject to Directive 2002/96/EC as well as the corresponding national laws. -
Page 120: Battery Disposal
17 Disposal Sirona Dental Systems GmbH 17.2 Battery disposal Worldwide (outside Germany): Please contact your local dental equipment specialist for country-specific information on disposal. 17.2 Battery disposal Note for disposal company: Battery disposal Prior to disposal, remove the following batteries from the treatment center: •... - Page 122 tÉ=êÉëÉêîÉ=íÜÉ=êáÖÜí=íç=ã~âÉ=~åó=~äíÉê~íáçåë=ïÜáÅÜ=ã~ó=ÄÉ=êÉèìáêÉÇ=ÇìÉ=íç=íÉÅÜåáÅ~ä=áãéêçîÉãÉåíëK «=páêçå~=aÉåí~ä=póëíÉãë=dãÄe=OMNP péê~ÅÜÉW=ÉåÖäáëÅÜ= mêáåíÉÇ=áå=dÉêã~åó a=PPVMKOMNKMNKNUKMO===MVKOMNQ ûKJkêKW=NNV=MTQ fãéêáã¨=Éå=^ääÉã~ÖåÉ páêçå~=aÉåí~ä=póëíÉãë=dãÄe áå=íÜÉ=rp^W SO=PQ=MSN=a=PRRQ c~Äêáâëíê~≈É=PN páêçå~=aÉåí~ä=póëíÉãë=ii` lêÇÉê=kç SQSOR=_ÉåëÜÉáã QUPR=páêçå~=aêáîÉI=pìáíÉ=NMM dÉêã~åó `Ü~êäçííÉI=k`=OUOTP ïïïKëáêçå~KÅçã...
Need help?
Do you have a question about the C3 Plus and is the answer not in the manual?
Questions and answers