Table of Contents
Advertisement
Advertisement
Table of Contents

Related Manuals for AURES YUNO II


Summary of Contents for AURES YUNO II
- Page 1 YUNO-II user manual v1.1...
-
Page 2: Liability Disclaimer
YUNO-II user manual v1.1 Copyrights this equipment does cause harmful interference to radio or television reception, which can be determined ©2021 All rights reserved. The information in this by turning the equipment off and on, the user is document is subject to change without prior notice in encouraged to try to correct the interference by one or order to improve reliability, design and function and more of the following measures:... -
Page 3: Weee Notice
YUNO-II user manual v1.1 WEEE Notice Safety IMPORTANT SAFETY INSTRUCTIONS To disconnect the machine from the electrical Power Supply, turn off the power switch and remove the power cable plug from the wall socket. The wall socket must The WEEE mark applies only to countries within the be easily accessible and in close proximity to the European Union (EU) and Norway. -
Page 4: Table Of Contents
Table of Contents Copyrights ......................i Liability Disclaimer ....................i Regulatory Information ..................i FCC Notice ........................... i CE Notice ..........................i UL Notice ..........................i WEEE Notice ........................ii Safety ........................... ii Table of Contents ....................iii 1. Item Checklist ....................1 1.1 Standard Items ...................... -
Page 5: Item Checklist
YUNO-II user manual v1.1 1. Item Checklist 1.1 Standard Items a. System : YUNO-II 151 & YUNO-II 156 b. Power Adapter (65W) c. Power Cable d. RJ50-COM Cable 100cm (x1) e. System Cover f. Peripheral Adapter g. QuickStart guide... -
Page 6: Optional Items
YUNO-II user manual v1.1 1.2 Optional Items YUNO-II supports full range of peripherals as listed below. Model # Description USB interface YUNO-II-2NDLCD10.1 Attachment-type (integrated) Second Display (non-Touch and Touch models) YUNO-II-LCM 2x20 LCM 3-Track USB Keyboard HID YUNO-MSRLONG Attachment-type (integrated) Magnetic Stripe Reader USB interface YUNO-SCANNER2D Attachment-type (integrated) 2D Scanner... -
Page 7: System View
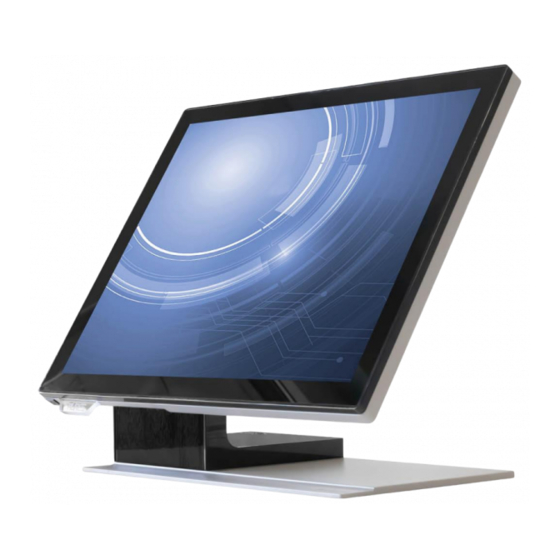
YUNO-II user manual v1.1 2. System View 2.1 Front View Number Description Bezel Free Panel PC Logo LED Plate Power Button L-Stand Base Plate... -
Page 8: Rear View
YUNO-II user manual v1.1 2.2 Rear View Number Description Attachment-type Customer Display (YUNO-II LCM & 10") service door System Cover Service door for peripherals Rear Side Cable service door L-Stand Cover... -
Page 9: Side View
YUNO-II user manual v1.1 2.3 Side View Number Description USB 3.0 (Type A) -
Page 10: Dimension
YUNO-II user manual v1.1 2.4 Dimension For YUNO-II151,... - Page 11 YUNO-II user manual v1.1 For YUNO-II156...
-
Page 12: I/O View
YUNO-II user manual v1.1 2.5 I/O View Full Feature Mode Inside View Number Description DC-IN Jack Ethernet 1Gb COM1 COM2 USB 3.0 x 4 USB-C with Video Support USB-C to Processor Cash Drawer port Ethernet 1Gb... - Page 13 YUNO-II user manual v1.1 Right-side View Number Description 1 x USB 3.0 (Type A) 1 x USB 3.0 (Type A)
-
Page 14: Specification
YUNO-II user manual v1.1 3. Specification Model Name YUNO-II YUNO-II 156-50KH (ART-05200) Model Number YUNO-II 151-50KH (ART-05199) CPU support X85 motherboard (Tiger Lake platform) : Intel® Core™ J6412 Processor (1,5M Cache, up to 2.6 GHz) Intel® Core™ i3-1115G4E Processor (6M Cache, up to 3.9 GHz) Intel®... - Page 15 YUNO-II user manual v1.1 Inside I/O DC-IN jack 1 x jack connector for 19V DC input 1 x RJ45 port for Gigabit Ethernet, support Wake on LAN Serial / COM 2x RJ50 connector with RJ50 to DB9 cable for RS-232 port 4 x USB 3.0 USB-C USB-C with Video Support...
- Page 16 YUNO-II user manual v1.1 Certifications CE / FCC Class B / RCM / UKCA Safety Environment Operating temperature 0℃ ~ 35℃ (32℉ ~ 95℉) Storage temperature -20℃ ~ 60℃ (-4℉ ~ 140℉) Humidity 5% ~ 80%, non-condensing Dimension YUNO-II151: YUNO-II156: (W x D x H) LCD 90˚...
-
Page 17: Configuration
YUNO-II user manual v1.1 4. Configuration 4.1 Processor Module Tiger Lake Platform ART-05205 ART-05206 TGL-MB-I3-1115G4E TGL-MB-I5-1145G7E Intel® Core™ Intel® Core™ i3-1115G4E Processor i5-1145G7E Processor (6M Cache, up to 3.90 GHz) (8M Cache, up to 4.10 GHz) DIMM1 SO-DIMM DDR4 x 1 CN1_IN USB-C Connector (Power Deliver In) to I/O Module ART-05201 I/O-MODULE-III... -
Page 18: I/O Module
YUNO-II user manual v1.1 4.2 I/O Module 4.2.1 Layout, Connectors & Functions ART-05201 I/O-MODULE-III DC-IN1 DC-IN jack LAN_CON1 LAN (RJ45 Connector) COM1 & COM2 COM1~2 (from right to left) (RJ50 Connector) USB1~6 4 x USB 3.0 (Type A) USB-C (Power Deliver Out) to Processor Module USB-C (only 2 channel DisplayPort, but supports FHD) with Video and Power in/out... -
Page 19: Pos System Assembly & Disassembly
YUNO-II user manual v1.1 5. POS System Assembly & Disassembly Diagrams of YUNO-II are used as a representative of all YUNO-II POS System series for elaboration in the rest of this manual. 5.1 Open the System Cover Open the System Cover by holding the bottom side of the System Cover and drag up. -
Page 20: Install The Processor Module
YUNO-II user manual v1.1 5.2 Install the Processor Module ⚫ Install the memory and SSD Install the Install the Memory Storage Disk Drive 1. Notice correct (1) Locate the memory slot inside the dump-proof Processor Module key and enclosure. install the (2) Flip the ejector clips SSD. - Page 21 YUNO-II user manual v1.1 ⚫ Install the CPU Module to dock with AD board (1) Connect USB-C cable (2) Place the Processor Module from the start position on the surface of rear base. (3) Slide the Processor Module to dock with AD board (Note: Be cautious the bottom of the Processor...
-
Page 22: Install The Power Adapter
YUNO-II user manual v1.1 (4) Rotate the lever to secure the Processor Module 5.3 Install the Power Adapter The system is equipped with a 65W power adapter. Please follow below procedures to get it plugged into the system. 1. To open the System Cover, please refer to the procedures described in Chapter 5- 1, and remove it. - Page 23 YUNO-II user manual v1.1 2. Locate the power connector on the I/O panel (please refer to Chapter 2-5) and connect the plug of power adapter directly to the DC-IN jack. Route the DC cord connection securely. All Feature Mode Processor & AD Board Only Mode 3.
- Page 24 YUNO-II user manual v1.1 5.5 Install the VESA mount 1. Open the System Cover, please refer to the procedures described in Chapter 5-1, and remove it. 1. Remove the 11 screws of the L-stand and separate them.
- Page 25 YUNO-II user manual v1.1 2. Install the VESA bracket Fix VESA bracket by six M3*6 screws [shown as below]...
-
Page 26: Peripherals Installation
YUNO-II user manual v1.1 6. Peripherals Installation 6.1 Install the Cash Drawer You can install a cash drawer through the cash drawer port. Please verify the pin assignment before installation. Cash Drawer Pin Assignment Signal Drawer 1 kick out Drawer open/close status PUH/PUH3 12V/24V CDA 24V Drawer 2 kick out... - Page 27 YUNO-II user manual v1.1 Read FW Command You can send below command sequence to get MCU FW version Read FW Version 0x1D 0x41 0x30 You can read FW version after “Read FW” command. The FW version is a ASCII string. Open Command You can send below command sequence to COM port to open drawer.
- Page 28 YUNO-II user manual v1.1...
- Page 29 YUNO-II user manual v1.1 Status Command You can send below command sequence to COM to read drawer status. Read Drawer Status Read Status 0x1D 0x72 0x02 You can read drawer status after “Read Drawer Status” command. Drawer Status 0x01 Drawer Opened 0x00 Drawer Closed ASB Command (Automatic Status Back)
- Page 30 YUNO-II user manual v1.1 How to access Cash Drawer in Windows You can use COMMTest to access cash drawer. The application can download at here http://www.cppfans.com/software/communication/serailassistant.asp Start COMMTest Right click on COMMTest.exe and select “Run as Administrator” to start COMMTest. Setup COM port The MCU is commutation through Prolific virtual COM port.
- Page 31 YUNO-II user manual v1.1 Open Drawer Input “Open Drawer” command “1B 70 00 7F 7F” than enter, this command will open drawer. Read Drawer Status Input “Read Drawer Status” command “1D 72 02” to read status. The status will return and display after read command. Enable ASB Input “Enable ASB“...
- Page 32 YUNO-II user manual v1.1...
- Page 33 YUNO-II user manual v1.1 Disable ASB Input “Disable ASB” command “1D 61 00”. The drawer will not report drawer status. You need to use read status to read drawer status.
- Page 34 YUNO-II user manual v1.1 How to access Cash Drawer in Ubuntu You can access Cash Drawer port through USB-to-Serial port. You can use cutecom to access it. Find PUH CD port You can list all “/dev/ttyUSB*” by ls command. There are total 5 COM ports for PUH.
- Page 35 YUNO-II user manual v1.1 Setup COM port The MCU is commutation through virtual COM port. Please find out the PUH/CDA port name first than setup the COM port baud rate to “115200, N, 8, 1”. Click “Setting” to display COM port setting. Open COM port Select which device for access “/dev/ttyACM0”.
- Page 36 YUNO-II user manual v1.1 Read FW Version Input “Read FW” command “1D 41 30” than enter, this command will return MCU FW version. Open Drawer Input “Open Drawer” command “1B 70 00 7F 7F” than enter, this command will open drawer. Read Drawer Status Input “Read Drawer Status”...
- Page 37 YUNO-II user manual v1.1 Enable ASB Input “Enable ASB“ command “1D 61 01”. The drawer will automatic report drawer status when drawer open/close status changed. Disable ASB Input “Disable ASB” command “1D 61 00”. The drawer will not report drawer status.
-
Page 38: Install The Attachment-Type Customer Display (Yuno-Ii-Lcm) And Second Display (Yuno-Ii-2Ndlcd10.1)
YUNO-II user manual v1.1 6.2 Install the Attachment-type Customer Display (YUNO-II-LCM) and Second Display (YUNO-II-2NDLCD10.1) The Attachment-type Customer Display (YUNO-II-LCM) and Second Display (YUNO-II-2NDLCD10.1) can be installed from the rear top side of the system. Make sure the unit is powered off before starting. Please follow the below steps to finish the installation: 1. -
Page 39: Install Other Attachment-Type Peripherals
YUNO-II user manual v1.1 6.3 Install other Attachment-type Peripherals Attachment-type peripherals, including YUNO-MSRLONG, YUNO-SCANNER2D, YUNO-DALLAS and YUNO-ADDIMAT Reader, may be easily installed at either side of the system. YUNO-MSRLONG is used as an installation representative for elaboration. See the peripheral adapter control table for side peripherals: Screw in accessory’s box Name Peripheral... - Page 40 YUNO-II user manual v1.1 3. Insert the peripheral in place and fasten the two pcs of screws to make it secure.
-
Page 41: Appendix A: Driver Installation
YUNO-II user manual v1.1 Appendix A: Driver Installation To download the most recent drivers and utilities, and obtain advice regarding the installation of your equipment, please visit the AURES Technical Support Website: www.aures-support.com...
Need help?
Do you have a question about the YUNO II and is the answer not in the manual?
Questions and answers