Table of Contents
Advertisement
Quick Links
Copyright Notice
This document is copyrighted, 2001, by Advantech Co., Ltd. All rights
are reserved. Advantech Co., Ltd., reserves the right to make improve-
ments to the products described in this manual at any time without
notice.
No part of this manual may be reproduced, copied, translated or
transmitted in any form or by any means without the prior written
permission of Advantech Co., Ltd. Information provided in this manual
is intended to be accurate and reliable. However, Advantech Co., Ltd.
assumes no responsibility for its use, nor for any infringements upon
the rights of third parties which may result from its use.
CE Notification
The EDG-4508/4516 has passed the CE test for environmental
specifications. Test conditions for passing included the equipment
being operated within an industrial enclosure. In order to protect the
EDG-4508/4516 system from being damaged by ESD (Electrostatic
Discharge) and EMI leakage, we strongly recommend the use of
CE-compliant industrial enclosure products.
Printed in Taiwan
Feb. 2001
Preface and Table of Contents
Advertisement
Table of Contents
Troubleshooting

Related Manuals for Advantech EDG-4508


Summary of Contents for Advantech EDG-4508
- Page 1 Copyright Notice This document is copyrighted, 2001, by Advantech Co., Ltd. All rights are reserved. Advantech Co., Ltd., reserves the right to make improve- ments to the products described in this manual at any time without notice. No part of this manual may be reproduced, copied, translated or transmitted in any form or by any means without the prior written permission of Advantech Co., Ltd.
- Page 2 A Message to the Customer... Advantech Customer Services Each and every Advantech product is built to the most exacting specifications to ensure reliable performance in the unusual and demanding conditions typical of industrial environments. Whether your new Advantech equipment is destined for the laboratory or the...
- Page 3 Because of Advantech’s high quality-control standards and rigorous testing, most of our customers never need to use our repair service. If an Advantech product ever does prove defective, it will be repaired or replaced at no charge during the warranty period. For out-of-warranty repairs, you will be billed according to the cost of replacement materi- als, service time and freight.
- Page 4 5. Write the RMA number visibly on the outside of the package and ship it prepaid to your dealer. EDG-4508/4516 User's Manual...
-
Page 5: Table Of Contents
Driver and Software Installation ............. 27 Using EDG-4508/4516 Manager ............. 30 Saving Your Configuration ................31 Adding an EDG-4508/4516 -Add Server Wizard ......... 31 Deleting a Server ................... 35 Modifying COM Name Mappings .............. 36 Un-Mapping a Port ..................37 Configuring Server Properties ............... - Page 6 Driver and Software Installation ............. 45 Using EDG-4508/4516 Manager ............. 48 Saving Your Configuration ................49 Adding an EDG-4508/4516 -Add Server Wizard ......... 49 Deleting a Server ................... 53 Modifying COM Name Mappings .............. 53 Un-Mapping a Port ..................54 Upgrading NPort Server Pro Firmware ............
- Page 7 7. Utility Programs ..............97 Firmware Utility ..................99 Toolbar Functions ..................100 EDG-4508/4516 Monitor ............... 103 Toolbar Functions ..................103 EDG-4508/4516 Diagnostic ..............111 Toolbar Functions ..................111 Uninstalling the Software ..............117 8. Changing Your Installation Type ........119 A.
- Page 8 Application with one host and two EDG-4508/4516 ....27 Figure 4-2 EDG-4508/4516 Manager menus and toolbar functions..31 Figure 5-1 Application with three hosts and two EDG-4508/4516 s..45 Figure 5-2 EDG-4508/4516 Manager and the menus......49 Figure 6-1 A remote control link diagram ..........
-
Page 9: Overview
Overview... - Page 10 Welcome to Advantech EDG-4508/4516 , an Industrial Serial Device Server that greatly enhances the ability of a Windows NT/95/98 host to control multiple serial port devices over a TCP/IP based Ethernet network. This chapter is an overview of EDG-4508/4516 and includes the follow- ing: Features...
-
Page 11: Features
Features Provides a stand-alone multi-port serial solution, over a TCP/IP net- work, for connecting 8 or 16 COM ports for each EDG-4508/4516 Long range connection and distributed serial device control over an Ethernet network Easy expansion to provide up to 256 serial ports for one Windows NT... -
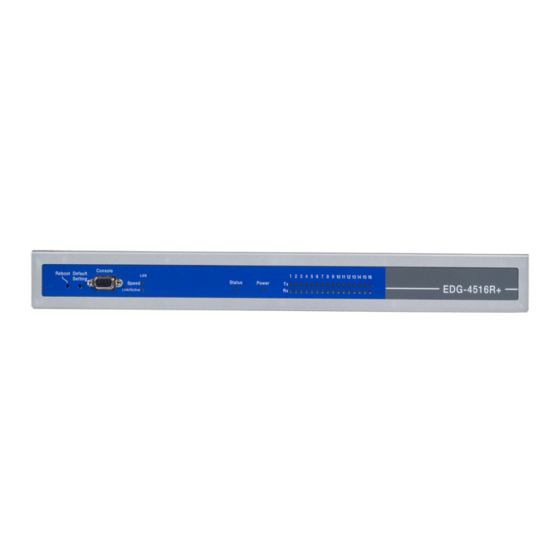
Page 12: Front Panel View
Front Panel View Figure 1-1. 8-Port EDG-4508 Front Panel Figure 1-2. 16-Port EDG-4516 Front Panel EDG-4508/4516 User's Manual... -
Page 13: Figure 1-3 16-Port Edg-4508/4516 Rear Panel
Rear Panel View Power Connector AC Power 10/100 M Serial Ports Switch Ethernet Figure 1-3. 16-Port EDG-4516 Rear Panel Power Connector AC Power 10/100 M Serial Ports Switch Ethernet Figure 1-4. 8-Port EDG-4508 Rear Panel Chapter 1 Overview... - Page 14 EDG-4508/4516 User's Manual...
-
Page 15: Getting Started
Getting Started... - Page 16 Now that you are familiar with EDG-4508/4516 ’s features and specifica- tions, it’s time to install the hardware and get your system up and run- ning. We begin this chapter with a brief explanation of the operation modes available when using EDG-4508/4516 , and then discuss the basics of setting it up.
-
Page 17: Knowing Your Application
LAN, or even over the Internet. Since EDG-4508/4516 is connected through a TCP/IP network, you will need to know some basic facts about networking in order to get the server hooked up correctly. -
Page 18: Multi-Host Mode
5 serial ports to communicate with five serial devices. All you need to do is install one 16 port EDG-4508/4516 , and connect 5 ports to each of the three hosts. In some types of applica-... -
Page 19: Figure 2-3 Three-Hosts Sharing Two Edg-4508/4516 S
Figure 2-3. Three-Hosts sharing two EDG-4508/4516 s If you decide to configure your EDG-4508/4516 as Multi-Host, you will need to know something about the networking concept of assigning IP addresses. There are two basic roles at play with this application mode- the administrator, and general users. -
Page 20: Custom Mode
You could be the administrator setting up EDG-4508/4516 for other Windows NT/95/ 98 hosts, or you could be a general user with access to EDG-4508/4516 from a remote site. -
Page 21: Connecting The Hardware
Connecting the Hardware In the previous section we illustrated the general operation modes of EDG-4508/4516 . In this section we begin by describing how to find a proper location for your server, and then explain how to connect to the network, hook up the power cable, and connect to the server’s serial... -
Page 22: Connecting To The Network
There are two ways to use the 10/100BaseT Ethernet jack located on EDG-4508/4516 ’s back panel (see Figs. 1-3 and 1-4): 1. For many of the applications using EDG-4508/4516 , you will simply plug one end of your Ethernet cable into the 10/100BaseT jack, and the other end into the hub connected to your network. -
Page 23: Connecting Asynchronous Serial Devices
Connecting Asynchronous Serial Devices You may use the RJ-45 to female DB-25 cable included with EDG-4508/ 4516 to connect serial devices to the server. Plug the RJ-45 connector into one of the serial port jacks on the server’s rear panel, and then connect the DB25 connector to the serial device. - Page 24 EDG-4508/4516 User's Manual...
-
Page 25: Ip Address Configuration
IP Address Configuration... -
Page 26: Telnet Console
In this chapter we explain how to configure EDG-4508/4516 ’s IP address, using: Telnet Console DHCP Server The first method uses the Telnet program to access the server over the network. The second method applies if you have a Dynamic Host Con- figuration Protocol (DHCP) server. - Page 27 Run. 2. Typetelnet [IP_address] in the Open text input box, where [IP_address] is the IP address of the EDG-4508/4516 you intend to configure. Click OK to continue. 3. When the Telnet window opens up, type 1 to select ansi/vt100 for Console terminal type, and then press Enter on the computer key- board.
- Page 28 8. Use the keyboard arrow keys to position the cursor over the first digit of the IP address. 9. Type in the correct IP address and then press Enter to accept this value. 10.Press ESC to return to the main menu, and then select Restart to activate the change. EDG-4508/4516 User's Manual...
-
Page 29: Dhcp Server
This section applies if you are using your Windows NT host as a DHCP server. This type of server is set up to provide IP addresses for new devices as they log onto a network. As the operation of EDG-4508/4516 requires a fixed IP address, we strongly recommend that you establish an IP reservation list in DHCP in order to maintain fixed IP assignments based on the server’s MAC address. - Page 30 IP address, and then locate and enter your EDG- 4508/4516 ’s MAC address in the Unique Identifier field. (The MAC address is located on EDG-4508/4516 ’s back panel.) Be sure to enter the same Client Name that was entered in the Name field of the Create Scope - (Local) window (see step 8 above).
- Page 31 the MAC address and IP address, and then click OK to accept the values. 12.To check that the numbers just entered are correct, return to the DHCP Manager main window, click on Scope, and then choose Active Leas- es from the pull down menu. The IP address reserved for your EDG- 4508/4516 will be displayed in the window that opens up.
- Page 32 EDG-4508/4516 User's Manual...
-
Page 33: Setting Up Single-Host
Setting Up Single-Host... - Page 34 In this chapter we explain how to set up EDG-4508/4516 for Single-Host Mode. This type of application uses one Windows NT/95/98 server to control several serial devices in a manner similar to the way you would use a traditional multi-port serial board.
-
Page 35: Driver And Software Installation
Driver and Software Installation 1. Insert the EDG-4508/4516 disk into either the floppy disk drive or CD ROM drive, depending on the type of disk that was provided. From the Windows NT/95/98 desktop, click on Start and then choose Run. - Page 36 3. The Welcome to EDG-4508/4516 window opens, giving you the op- tion to continue with the installation process. Click on Next to contin- 4. When the Setup Wizard window opens, choose Single-Host, and then click on Next to continue. EDG-4508/4516 User's Manual...
- Page 37 5. The Select Destination Directory window gives you the option to change the directory which program files will be copied to. Click on Next to copy EDG-4508/4516 files to the given default directory. To choose a different directory, click on Browse, navigate to the desired directory, and then click on Next.
-
Page 38: Using Edg-4508/4516 Manager
When you run the Setup program to install EDG-4508/4516 software, you are given the option to run the Add Server Wizard. However, you may run EDG-4508/4516 Manager at a later time if you decide to add more servers, change server names, remove servers, or change COM names. -
Page 39: Saving Your Configuration
The Add Server Wizard is activated automatically during the driver and sofware installation procedure. If you need to add another EDG-4508/ 4516 to your system at a later time, run EDG-4508/4516 Manager, and then choose Add Server Wizard from the Server menu, or click on the toolbar Add Server button. - Page 40 1. Select Yes and then click on Next to start the Add Server Wizard. 2. If the EDG-4508/4516 you wish to add is listed in the Add Server Wizard window, use the mouse to highlight the server Model and then click on Next to continue.
- Page 41 3. Select the COM port name that you would like the first port on the server to map to. This will add all of EDG-4508/4516 ’s ports (8 or 16, depending on the server model number) to your NT/95/98 system, using consecutively numbered COM names.
- Page 42 5. Check the Add Server Wizard Complete! window to verify that all of the information is correct. Click on Finish if everything is correct, or click on Back to return to the previous window. 6. The EDG-4508/4516 Manager window opens, with the newly installed server listed. EDG-4508/4516 User's Manual...
-
Page 43: Deleting A Server
Add Server icon, and then repeat the above steps. 9. Before exiting EDG-4508/4516 Manger you should save the new con- figuration. Choose Save Configuration from the Server menu, or click on the toolbar Save all Servers icon to carry this out. -
Page 44: Modifying Com Name Mappings
Modifying COM Name Mappings You may use EDG-4508/4516 Manager to change previously as- signed COM names. Choose Map Port from the Port menu, or click on the toolbar Map Port icon. You will be asked to choose from two options. -
Page 45: Un-Mapping A Port
Changing the COM Name of One Port 1. Click on the server name whose port you would like to modify. 2. Click on the port, in the right info box, whose COM name you would like to modify. 3. Choose Map Port from the Port menu, or click on the toolbar Map Port icon to activate the function. -
Page 46: Configuring Server Properties
DHCP server. Server Properties-Password To add more security to your EDG-4508/4516 , it is highly recommended that you set a password as soon as you complete the installation. If you did not set the password while running Add Server Wizard, or you would like to change the current password, you may use the toolbar Properties function to do so. - Page 47 Server Properties. Server Properties-Transmission The Transmission page allows the user to set the Transmission Mode and Tx FIFO options for each of EDG-4508/4516 ’s ports. Transmission Mode Select Hi-Performance to use buffering technology to accelerate data...
-
Page 48: Upgrading Edg-4508/4516 Firmware
Advantech continually upgrades its driver software and server firm- ware to keep pace with the ever-expanding world of computing. You can use EDG-4508/4516 Manager’s Upgrade function to carry out the up- grade procedure. Access Advantech’s Web site at www.Advantech.com to download the required computer file (contact our sales department if you need assistance with this), and then follow these instructions. -
Page 49: Replacing A Server
NT/95/98 host’s hard drive, and then in- stall the new one. Replacing a Server In the unlikely event that your EDG-4508/4516 needs to be replaced, you can use EDG-4508/4516 Manager’s Replace Server... function. This pro- cedure uses EDG-4508/4516 ’s “hot-swap” feature, and gives you an easy way to locate the replacement server. - Page 50 Replace Server procedure. However, the server password will be set to the one you entered during the replacement procedure, so you will need to start using the new password to access the server. EDG-4508/4516 User's Manual...
-
Page 51: Setting Up Multi-Host
Setting Up Multi-Host... - Page 52 In this chapter we explain how to set up EDG-4508/4516 for Multi-Host Mode. This type of application uses more than one host on a local net- work to control several serial port devices. We cover the following topics: Driver and Software Installation Using EDG-4508/4516 Manager •...
-
Page 53: Driver And Software Installation
Driver and Software Installation 1. Insert the EDG-4508/4516 disk into either the floppy disk drive or CD ROM drive, depending on the type of disk that was provided. From the Windows NT/95/98 desktop, click on Start and then choose Run. - Page 54 3. The Welcome to EDG-4508/4516 window opens, giving you the op- tion to continue with the installation process. Click on Next to contin- 4. When the Setup Wizard window opens, choose Multi-Host, and then click on Next to continue. 5. The Select Destination Directory window gives you the option to change the directory which program files will be copied to.
- Page 55 8. Clicking on Next in the previous window activates the Add Server Wizard. Refer to the subsection Adding an EDG-4508/4516 -Add Server Wiz- ard in the next section for instructions on how to add an EDG-4508/ 4516 . Chapter 5 Setting Up Multi-Host...
-
Page 56: Using Edg-4508/4516 Manager
When you run the Setup program to install EDG-4508/4516 software, you are given the option to run the Add Server Wizard. However, you may run EDG-4508/4516 Manager at a later time if you decide to add more servers, change server names, remove servers, or change COM names. -
Page 57: Saving Your Configuration
The Add Server Wizard is activated automatically during the driv- er and software installation procedure. If you need to add another EDG-4508/4516 to your system at a later time, run EDG-4508/4516 Man- ager, and then choose Add Server Wizard from the Servers menu, or click on the toolbar Add Server button. - Page 58 1. Select Yes and then click on Next to continue the installation process. 2. If the EDG-4508/4516 you wish to add is listed in the Add Server Wizard window, use the mouse to highlight the server Model and then click on Next to continue.
- Page 59 5. Select the COM port name that you would like the first port on the server to map to. This will add all of EDG-4508/4516 ’s ports (8 or 16, depending on the server model number) to your NT/95/98 system, using consecutively numbered COM names.
- Page 60 7. This evokes the EDG-4508/4516 Manager program, with the newly installed server listed. 8. Click on the server name to highlight it. Basic information about the server’s COM ports will be listed in the right info box. Note: If you see ports with status ‘Non-authorized’, and you are...
-
Page 61: Deleting A Server
10.Before exiting EDG-4508/4516 Manger you should save the new con- figuration. Choose Save Configuration from the Server menu, or click on the toolbar Save all Servers icon to carry this out. 11.Exit EDG-4508/4516 Manager when you finish. Deleting a Server... -
Page 62: Un-Mapping A Port
Port function to remove it from your Windows NT/95/98 operating system. 1. Click on the port (in the right info box) that you want to remove. 2. Choose UnMap Port from the Port menu, or click on the toolbar Un- map Port icon EDG-4508/4516 User's Manual... -
Page 63: Upgrading Nport Server Pro Firmware
Advantech continually upgrades its driver software and server firmware to keep pace with the ever-expanding world of comput- ing. You can use the Upgrade function located on EDG-4508/4516 Man- ager’s toolbar to carry out the upgrade procedure. Access Advantech’s Web site at www.Advantech.com to download the required computer file (contact our sales department if you need assistance with this), and then follow these instructions. -
Page 64: Configuring Server Properties
The server will restart automatically. Note: When using this procedure, only the selected server’s firm- ware is upgraded. If you know that new EDG-4508/4516 Manager software has been released, it is recommended that you uninstall the old EDG-4508/4516 Manager pro- gram from your NT/95/98 host’s hard drive, and then in-... - Page 65 Server Properties-Password To add more security to your EDG-4508/4516 , it is highly recommended that you set a password as soon as you complete the installation. If you did not set the password while running Add Server Wizard, or you would like to change the current password, you may use the toolbar Properties function to do so.
- Page 66 Server Properties-Transmission The Transmission page allows the user to set the Transmission Mode and Tx FIFO options for each of EDG-4508/4516 ’s ports. Transmission Mode Select Hi-Performance to use buffering technology to accelerate data writing. This allows your communication software to reach maximum data throughput when transmitting large amounts of data.
-
Page 67: Access Control
Access Control It is possible to assign access permission to hosts to allow them access to the ports on a shared EDG-4508/4516 . For security reasons, the ac- cess control list can only be defined by the server’s administrator. If you have not been granted access to a port, you will see a screen with the message ‘Non-authorized’... -
Page 68: Configuring Through View By Ip
To add access for a group of computers, select a group of computer, and then enter the IP address and netmask. (E.g., for network class C computers, you might enter 192.168.1.0 for IP address and then 255.255.255.0 for netmask.) EDG-4508/4516 User's Manual... - Page 69 5. Click OK. 6. When the Add Port window opens up, highlight the port(s) that the host will be granted access to. Note: You can select blocks of ports by holding down the left mouse button while scrolling through the list of ports. 7.
- Page 70 2. Click on the Port that you would like to remove from the list. 3. Click on Remove, and then click OK to exit. As you can see from the window shown below, Port 3 has been removed from the host’s ac- cess control. EDG-4508/4516 User's Manual...
-
Page 71: Configuring Through View By Port
Removing a Granted Host If you do not allow a particular host to use any of the ports, simply remove the host from the list. Note: If you empty the access control list, then by default, only the connecting host’s IP address is granted. 1. - Page 72 To add access for a group of computers, select a group of computers, and then enter the IP address and netmask. (E.g., for network class C computers, you might enter 192.168.1.0 for IP address, and then 255.255.255.0 for netmask.) EDG-4508/4516 User's Manual...
- Page 73 4. Click OK to finish. 5. When the Server Properties window opens up, you can look at the Access Control page to verify that the host was added to the port. 6. Click OK to finish. Modifying a Granted Host 1.
- Page 74 3. Click OK to finish. EDG-4508/4516 User's Manual...
-
Page 75: Setting Up Custom
Setting Up Custom... - Page 76 In this chapter we explain how to set up EDG-4508/4516 for Custom Mode. Custom Mode users can apply EDG-4508/4516 for multi-port serial applications with remote control or monitoring, and as stand-alone machines connected to serial devices at a remote site.
-
Page 77: Figure 6-1 A Remote Control Link Diagram
- Adding a Host IP Address to a Specific Port - Modifying a Granted Host - Removing a Granted Host Adding Routes to EDG-4508/4516 • Adding Routes Through Server Properties • Modifying Routes • Removing Routes • Examples of Internet/Intranet Routing Configurations... -
Page 78: Driver And Software Installation
Driver and Software Installation 1. Insert the EDG-4508/4516 disk into either the floppy disk drive or CD ROM drive, depending on the type of disk that was provided. From the Windows NT/95/98 desktop, click on Start and then choose Run. - Page 79 3. The Welcome to EDG-4508/4516 window opens, giving you the op- tion to continue with the installation process. Click on Next to contin- 4. When the Setup Wizard window opens, choose Custom, and then click on Next to continue. Chapter 6 Setting Up Custom...
- Page 80 8. Clicking on Next in the previous window activates the Add Server Wizard. Refer to the subsection Adding an EDG-4508/4516 -Add Server Wiz- ard in the next section for instructions on how to add an EDG-4508/ 4516 . EDG-4508/4516 User's Manual...
-
Page 81: Using Edg-4508/4516 Manager
When you run the Setup program to install EDG-4508/4516 software, you are given the option to run the Add Server Wizard. However, you may run EDG-4508/4516 Manager at a later time if you decide to add more servers, change server names, remove servers, or change COM names. -
Page 82: Saving Your Configuration
The Add Server Wizard is activated automatically during the driver and software installation procedure. If you need to add another EDG-4508/4516 to your system at a later time, run EDG-4508/4516 Man- ager, and then choose Add Server Wizard from the menu, or click on the toolbar Add Server button. - Page 83 2. If the EDG-4508/4516 you wish to add is listed in the Add Server Wizard window, use the mouse to highlight the server Model and then click on Next to continue. Note: If the server you want to add is not listed in the above window, you will receive the warning window shown below.
- Page 84 5. Select the COM port name that you would like the first port on the server to map to. This will add all of EDG-4508/4516 ’s ports (8 or 16, depending on the server model number) to your NT/95/98 system, using consecutively numbered COM names.
- Page 85 6. When the Complete! window opens, check the information to make sure that everything is correct, and then click on Finish to continue. 7. This evokes the EDG-4508/4516 Manager program, with the newly installed server listed. 8. Click on the server name to highlight it. Basic information about the server’s COM ports will be listed in the right info box.
-
Page 86: Deleting A Server
Add Server icon, and then repeat the above steps. 10.Before exiting EDG-4508/4516 Pro Manger you should save the new configuration. Choose Save Configuration from the Server menu, or click on the toolbar Save all Servers icon to carry this out. - Page 87 2. Click on port 1 in the right info box. 3. Choose Map Port from the Port menu, or click on the toolbar Map Port icon to activate the function. 4. Select the COM name that the first port will be mapped to. 5.
-
Page 88: Un-Mapping A Port
Advantech continually upgrades its driver software and server firm- ware to keep pace with the ever-expanding world of computing. You can use the Upgrade function located on EDG-4508/4516 Manager’s toolbar to carry out the upgrade procedure. Access Advantech’s Web site at www.Advantech.com to download the required computer file (con- tact our sales department if you need assistance with this), and then follow these instructions. -
Page 89: Configuring Server Properties
The server will restart automatically. Note: When using this procedure, only the selected server’s firm- ware is upgraded. If you know that new EDG-4508/4516 Manager software has been released, it is recommended that you uninstall the old EDG-4508/4516 Manager pro- gram from your NT/95/98 host’s hard drive, and then in-... -
Page 90: Server Properties-Password
DHCP server. Server Properties-Password To add more security to your EDG-4508/4516 , it is highly recommended that you set a password as soon as you complete the installation. If you did not set the password while running Add Server Wizard, or you would like to change the current password, you may use the toolbar Properties function to do so. -
Page 91: Server Properties-Transmission
Server Properties. Server Properties-Transmission The Transmission page allows the user to set the Transmission Mode and Tx FIFO options for each of EDG-4508/4516 ’s ports. Transmission Mode Select Hi-Performance to use buffering technology to accelerate data writing. -
Page 92: Access Control
Access Control It is possible to assign access permission to hosts to allow them access to the ports on a shared EDG-4508/4516 . For security reasons, the ac- cess control list can only be defined by the server’s administrator. If you have not been granted access to a port, you will see a screen with the message ‘Non-authorized’... -
Page 93: Configuring Through View By Ip
Note: When adding access permission, you may either view the access control list by Port, or by IP address. These two approaches also apply to the procedure for adding new hosts. The next two sections describe how to add hosts using both approaches. - Page 94 IP address and netmask. (E.g., for network class C computers, you might enter 192.168.1.0 for IP address and then 255.255.255.0 for netmask.) 5. Click OK. 6. When the Add Port window opens up, highlight the port(s) that the host will be granted access to. EDG-4508/4516 User's Manual...
- Page 95 Note: You can select blocks of ports by holding down the left mouse button while scolling through the list of ports. 7. Click OK to finish, and return to the Access Control page. 8. The ports granted access to will be listed under the host’s IP address. Click OK to finish, and the choose Save Configuration to activate the settings.
- Page 96 2. Click on the Port you would like to remove from the list. 3. Click on Remove, and then click OK to exit. As you can see from the window shown below, Port 3 has been removed from the host’s ac- cess control. EDG-4508/4516 User's Manual...
-
Page 97: Configuring Through View By Port
Removing a Granted Host If you do not allow a particular host to use any of the ports, simply remove the host from the list. Note: If you empty the access control list, then by default, only the connecting host’s IP address is granted. 1. - Page 98 To add access for a group of computers, select a group of computer, and then enter the IP address and netmask. (E.g., for network class C computers, you might enter 192.168.1.0 for IP address, and then 255.255.255.0 for netmask.) EDG-4508/4516 User's Manual...
- Page 99 4. Click OK to finish. 5. When the Server Properties window opens up, you can look at the Access Control page to verify that the host was added to the port. 6. Click OK to finish. Modifying a Granted Host 1.
-
Page 100: Adding Routes To Edg-4508/4516
To enable access from an Internet/Intranet host, first make sure your EDG-4508/4516 can be connected through the Internet. You may add routes into EDG-4508/4516 if your Windows NT/95/98 host is at a remote site. This section lists the steps you should follow to add new routes, including examples you can refer to. -
Page 101: Modifying Routes
2. Enter the Destination, Gateway, Netmask and Metric as needed. 3. Click OK to exit Gateway Settings. Modifying Routes 1. Select the Advanced tab in the Server Properties window. 2. Click on the route setting you would like to modify to highlight it. 3. -
Page 102: Removing Routes
Some routers have the capability to learn routes automatically. To ensure that your Internet connection will work properly, you can consider add- ing the routes without RIP protocol. Figure 5-1 shows an example of connecting to the Internet through a Router. EDG-4508/4516 User's Manual... -
Page 103: Figure 6-3 Scheme For Lan With Edg-4508/4516 Connecting To The Internet
Netmask, and Metric as shown below: Configuring Router for One Internet and One Intranet Connection In the more complex case in which EDG-4508/4516 connects to both the Internet and Intranet, you will need to add two routes to the server. -
Page 104: Figure 6-4 Scheme For Edg-4508/4516 Connecting To The Intranet And Internet
If you are under the same environment as shown above but your EDG- 4508/4516 only needs to be accessed by the private network as opposed to the global Internet, then just add the first route to the server. In this case the routing setup is as follows: EDG-4508/4516 User's Manual... -
Page 105: Utility Programs
Utility Programs... - Page 106 In this chapter we cover the following topics: Firmware Utility • Toolbar Functions - EDG-4508/4516 Server General Info - Search All EDG-4508/4516 Servers - Connect to an EDG-4508/4516 - Upgrade Firmware EDG-4508/4516 Monitor • Toolbar Functions - Configuring EDG-4508/4516 Monitor...
-
Page 107: Firmware Utility
Start —> Programs —> EDG-4508/4516 —> Firmware Utility. 2. The Search all EDG-4508/4516 Servers window opens, indicating that the program is searching the network for all active EDG-4508/4516 s. 3. After completing the search, the EDG-4508/4516 Server firmware up- grade utility window opens, listing all EDG-4508/4516 s that were found. -
Page 108: Toolbar Functions
EDG-4508/4516 Server General Info The General Info function can be used to display basic information about a specific EDG-4508/4516 . To apply the function, do the following: 1. Click on the server you would like to obtain information about to highlight it. - Page 109 EDG-4508/4516 Server icon. 2. The Connect an EDG-4508/4516 Server window opens up. Enter the IP address of the server you would like to connect to in the EDG-4508/ 4516 Server IP text input box. Chapter 7 Utility Programs...
- Page 110 3. Click OK. Upgrade Firmware The Upgrade EDG-4508/4516 Server function can be used to up- grade the server firmware. 1. Access Advantech’s Web site at www.Advantech.com to download the required computer file (contact our sales department if you need assistance with this).
-
Page 111: Edg-4508/4516 Monitor
EDG-4508/4516 Monitor The first time you run EDG-4508/4516 Monitor you will need to set up the configuration by selecting target servers, target ports, and monitoring items. You will be able to save the configuration for the next time you use it, or go back to EDG-4508/4516 Monitor to check the monitoring infor- mation. - Page 112 The Select Port page will be opened by default, and the program will find all EDG-4508/4516 s currently connected to the network. 2. Select the server that you want to monitor from the Server IP Address pull down menu.
- Page 113 Check or uncheck the boxes as needed. 6. Click on the General tab to set up the Sampling interval. This is the time interval the program waits before updating EDG-4508/4516 ’s cur- rent data. Select a number from the pull-down list, and then click OK.
- Page 114 The configuration file will be saved in .mnt format. Load Configuration This function is provided so that you can load a configuration file that was previously saved. When initating EDG-4508/4516 Moni- tor, you will be give the option to load a previously save file. EDG-4508/4516 User's Manual...
- Page 115 (Check the Help menu to find additional information about using this program.) EDG-4508/4516 Monitor will use different colors to indicate the status of the ports. • Black means that the port is currently hooked up to your LAN and is active.
- Page 116 • Pink means that two or more EDG-4508/4516 s have been assigned the same IP address. You must use EDG-4508/4516 Manager to rectify the situation. Port Status This function is used to display a status graph for each port being monitored.
- Page 117 3. Enter the correct password and then click OK. Reset Server This function is provided to allow you to reset EDG-4508/4516 when- ever the NT server was not shut down properly or the network was disconnected. Normally, EDG-4508/4516 will automatically launch five minutes after the NT server is reconnected.
- Page 118 3. Enter the correct password, and then click OK. Exiting EDG-4508/4516 Monitor When you have finished using EDG-4508/4516 Monitor, choose Exit from the File menu, or click on the close window box in the upper right hand corner of the EDG-4508/4516 Monitor window.
-
Page 119: Edg-4508/4516 Diagnostic
EDG-4508/4516 Diagnostic EDG-4508/4516 Diagnostic is used to test the operation of EDG-4508/ 4516 . In this section we explain how to configure and use EDG-4508/4516 Diagnostic. To start EDG-4508/4516 Server Diagnostic, click on: 1. Start —> Programs —> EDG-4508/4516 —> EDG-4508/4516 Diagnostic. - Page 120 EDG-4508/4516 s, and then choose the desired server. 4. If the EDG-4508/4516 you chose is password protected, the following window will open. Type in the correct password and then click OK. 5. The server information will now appear in the Selected EDG-4508/4516 Server information window.
- Page 121 7. If you do not need to change any Test Items or Communication Pa- rameters, click OK to return to the EDG-4508/4516 Server Diagnostics window. Otherwise continue the configuration process described in the next sub sections.
- Page 122 2. Set Baud rate, Data bits, Parity, and Stop bits, to the appropriate val- ues. Exiting Config Click OK in the bottom right corner of the Diagnostic Config window to return to the EDG-4508/4516 Server Diagnostics window. EDG-4508/4516 User's Manual...
- Page 123 COM name (COM3 in the example below), serial port interface, and current port status. 2. Click OK to return to the EDG-4508/4516 Server Diagnostics window. Test Initiation You can begin testing once all modifications have been made to the test procedure.
- Page 124 The printing function is included to provide a convenient way to print out test reports. 1. Click on the EDG-4508/4516 shown in the To be tested... info box to determine which testing report to print. 2. Choose Print... from the File menu, or click on the toolbar Printer icon to print out the report.
-
Page 125: Uninstalling The Software
Uninstalling the Software If your Windows NT/95/98 host no longer needs access to any EDG- 4508/4516 s, you may use the Uninstall EDG-4508/4516 Server utility to uninstall the driver and software. To activate Uninstall EDG-4508/4516 , click on 1. Start —> Programs —> EDG-4508/4516 —> Uninstall EDG-4508/4516 2. - Page 126 3. Click on Finish to complete the uninstall procedure. EDG-4508/4516 User's Manual...
-
Page 127: Changing Your Installation Type
Changing Your Installation Type... - Page 128 See chapter 2 of this manual for details. Note: To change to a different application mode, you will need to rerun the Setup program. See chapter 4 to install Single- Host, chapter 5 to install Multi-Host, and chapter 6 to in- stall Custom. EDG-4508/4516 User's Manual...
-
Page 129: Troubleshooting
Troubleshooting... -
Page 130: Installation And Configuration Troubleshooting
4508/4516 Manager to access EDG-4508/4516 . For security reasons, and to simplify operations, the Single-Host Mode allows only one host to connect to EDG-4508/4516 at a time. Thus, if while using the single-host type of installation you discover that the... - Page 131 Under Single-Host Mode, users are only allowed to modify the server’s name and password. This is because Single-Host users are not sharing their EDG-4508/4516 with other hosts. If you do need to modify other properties, run the setup program and change to another mode of operation (see Chapter 8 for details).
- Page 132 If the host and server are in the same location: 1. Make sure EDG-4508/4516 ’s power cable is plugged in, and the server is receiving power. 2. Check that the server’s network connector is plugged in properly.
- Page 133 And then double click on the server icon that has the question mark '?' on top. This will evoke EDG-4508/4516 Man- ager to reconnect with the server.
-
Page 134: Led Description
Power Ready 100 M 10 M Traffic COLOR Description Indicates that EDG-4508/4516 is turned on and power is being Power supplied to the server Steady on indicates that EDG-4508/4516 is running without problem. Ready Green Flashing indicates the server is being located by the EDG-4508/4516 Manager Locate Server function. -
Page 135: Cable Pinouts
Cable Pinouts... -
Page 136: 10/100Baset Port Pinouts
This appendix lists the cables that you may use with EDG-4508/4516 , and includes information needed to make your own cable. We cover the following topics: 10/100BaseT Port Pinouts Asynchronous Port Pinouts RJ45 to Male DB25 RS-232 Cable Pinouts 10/100BaseT Port Pinouts Listed below are the pinouts for the 10BaseT port on EDG-4508/4516 . -
Page 137: Opt 1B - Rj45 To Male Db25 Rs-232 Cable Pinouts
Opt 1B - RJ45 to Male DB25 RS-232 Cable Pinouts N P ort O pt 1B M ode m S erver or an y P ro D C E D e vice R J45 P lug P in 1 R J4 5 Ja ck D C E D e vice C o nne cto r D b 25 Fe m a ie... - Page 138 EDG-4508/4516 User's Manual...
-
Page 139: Setting Up A Windows Nt/95/98 Network
Setting Up a Windows NT/95/ 98 Network... - Page 140 In order use a PC via an Ethernet network to control serial devices con- nected to EDG-4508/4516 , you must first have a host running Windows NT/95/98 This type of application also requires the host to have an Ethernet card and TCP/IP protocol installed. If your computer does not...
Need help?
Do you have a question about the EDG-4508 and is the answer not in the manual?
Questions and answers